When I set a rear paddock stand with a J-trip L-fixture on my YZF-R125 (5D7W), I noticed the following.
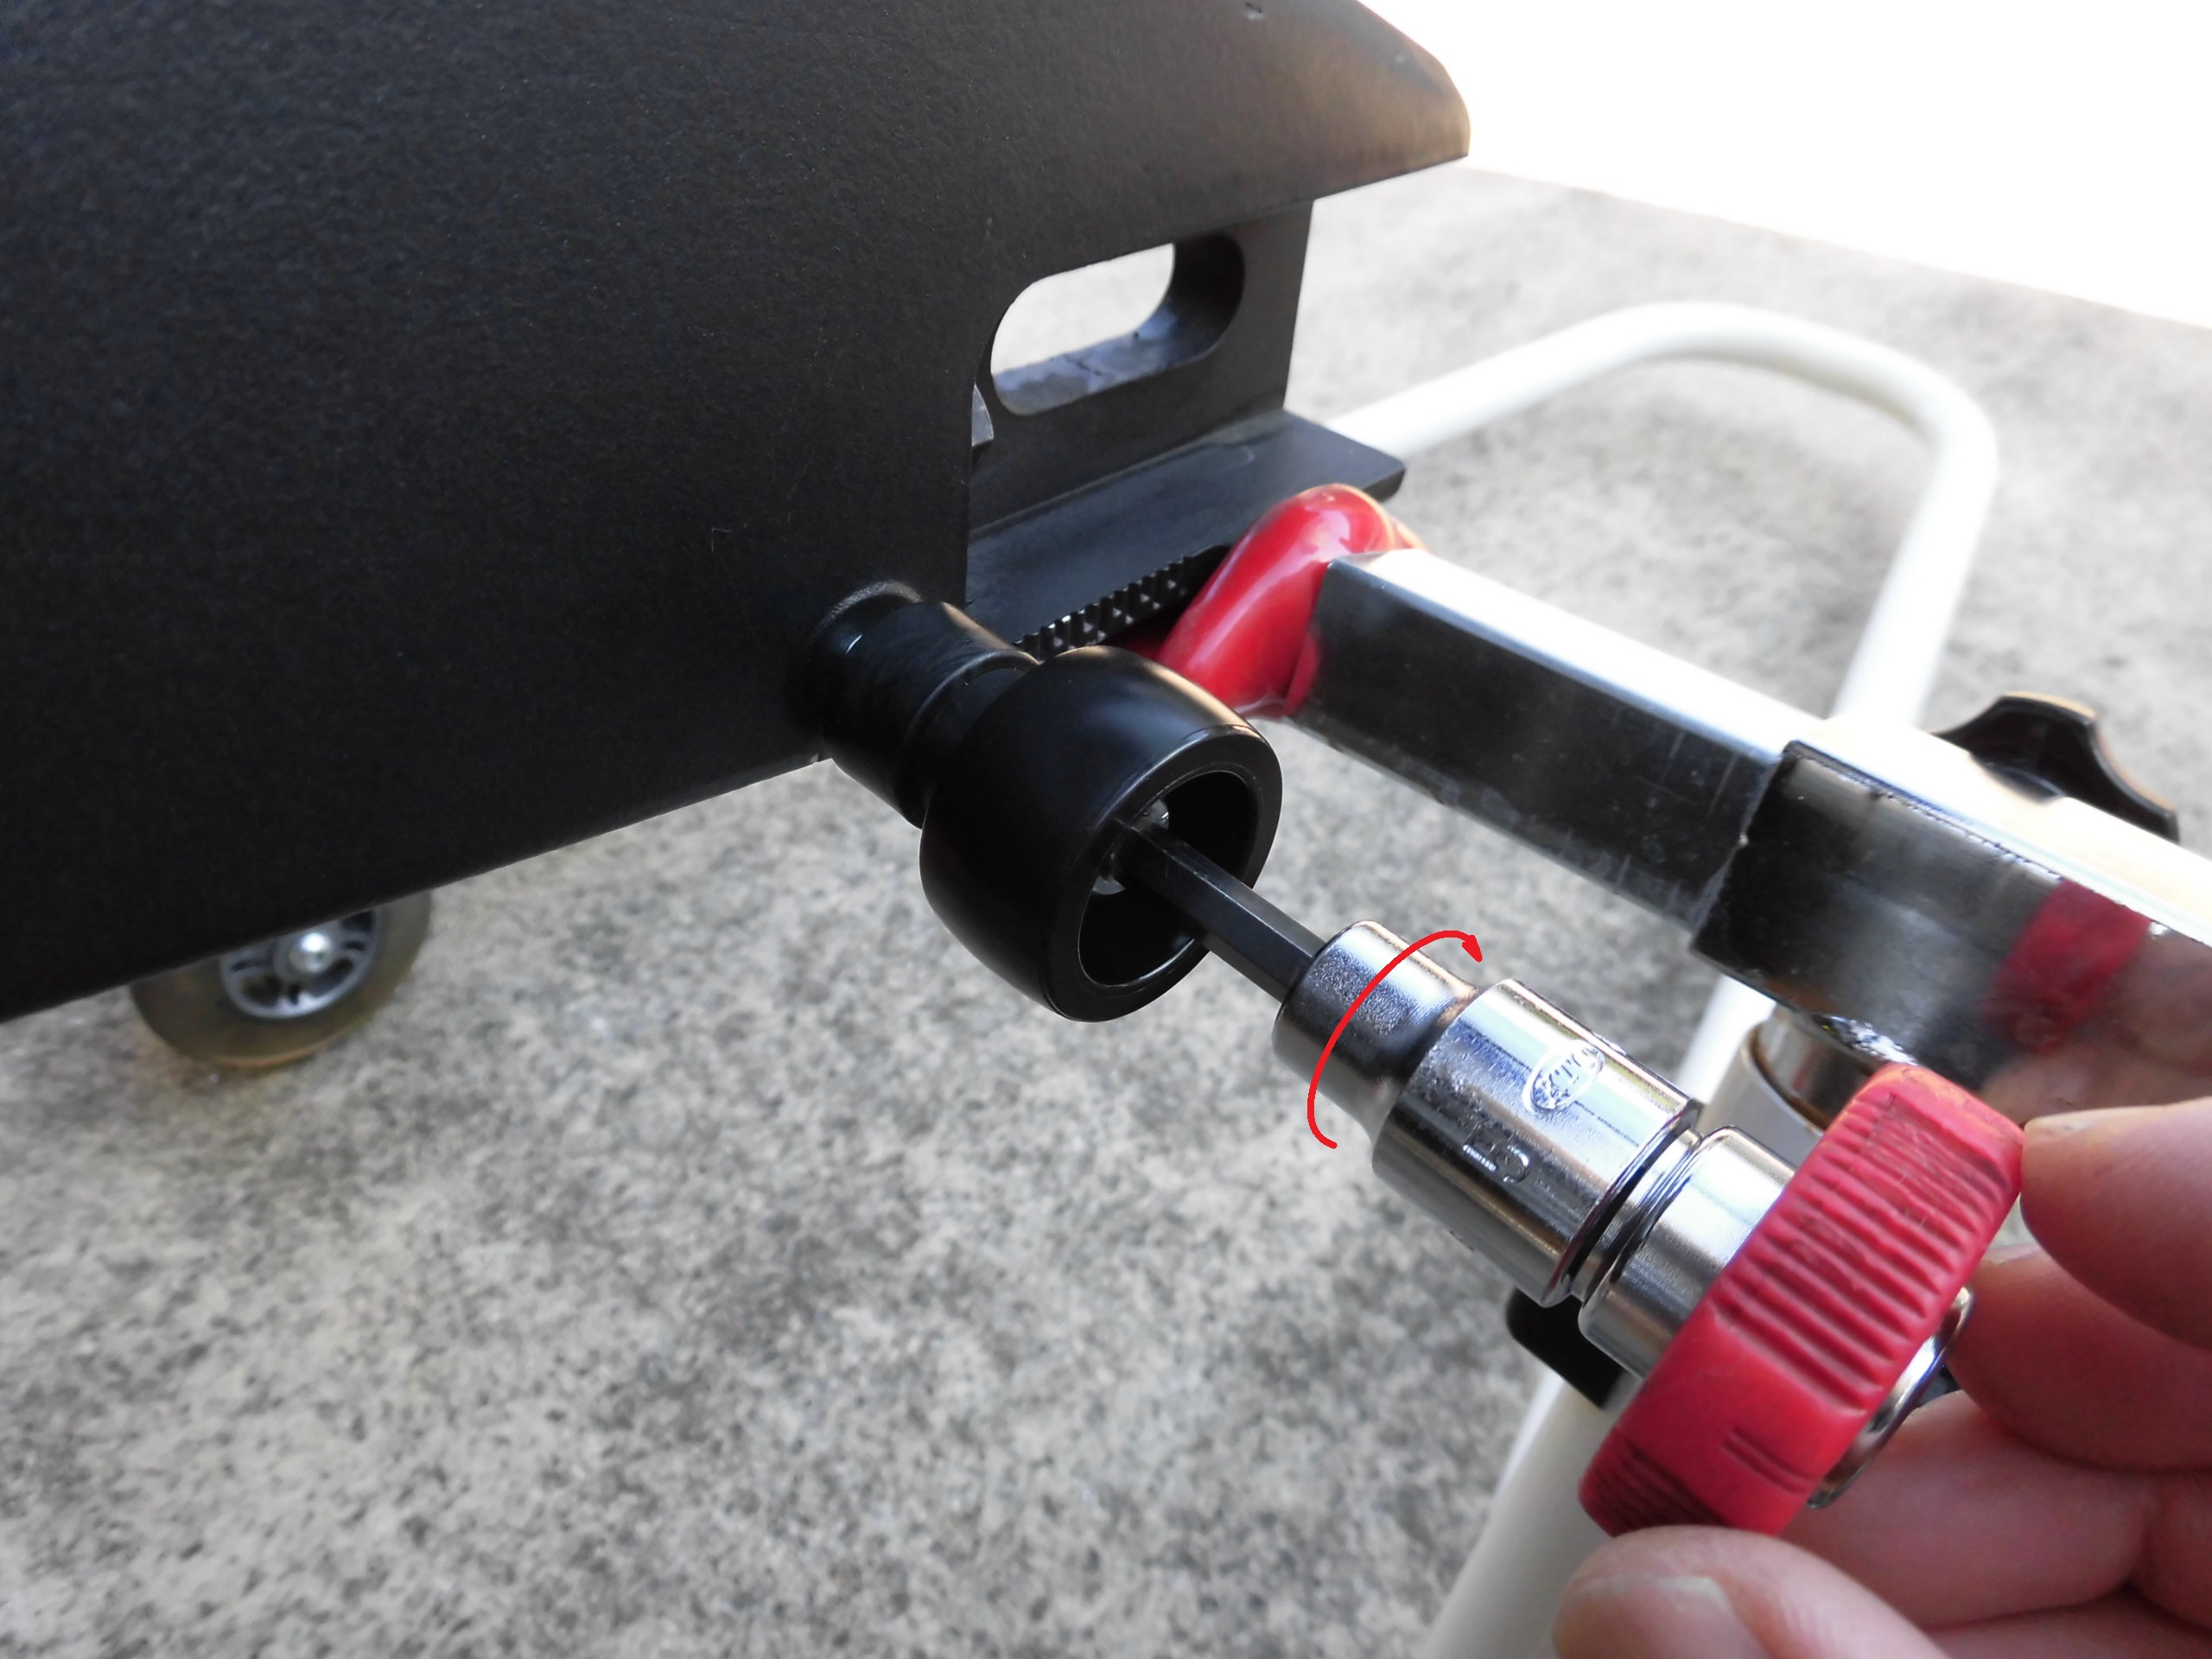
- When loosening/tightening the axle shaft, the socket hits the L-fixture, and it is difficult to loosen/tighten the nut.
- The vehicle leans slightly to the right.
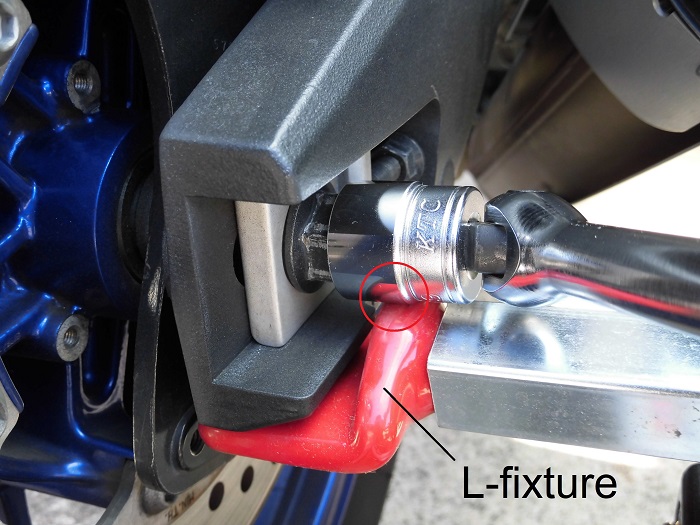
<Socket Interference>
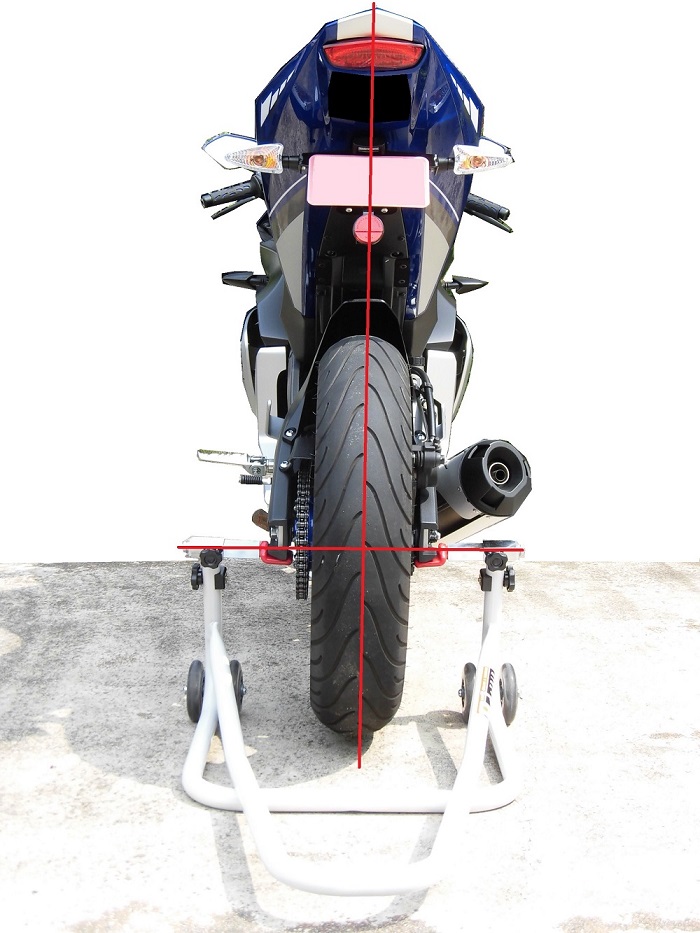
<lean slightly>
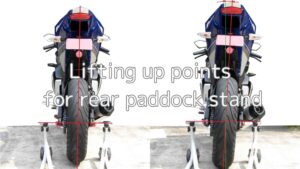
(For more information, see maintenance record “Lifting up points for rear paddock stand”.)
To solve these problems, install rear paddock stand bobbins (hereafter described as the bobbins).
From this article you can find out the following.
- How to install the bobbins
- How the bobbins are installed
| Date | 17th June 2023 |
| Subjects | Tuning, Customizing |
| Shop or DIY | DIY |
| Difficulty | |
| Working hours | 0.5 |
| Costs [Yen] | 3,068 |
1. Goods to use

| No. | Name | Manufacturer | Parts number | Quantity | Amounts [Yen] | Purchasing this time |
| ST3 | Swingarm hook bolts 06 | J-Trip | JT-107G-SBK | 1 | 2,640 | ○ |
| ST3 | Cap screw head cover M6 black | MonotaRO | 42178105 | 2 | (428) | ○ |
| 1 | Loctite 243 | LOCTITE | – | 1 | 879 | |
| 2 | Hexagon socket (5 mm) (+Quick spinner) | KTC | BT3-05S | 1 | 920 | |
| 3 | Torque wrench (Small) | KTC | CMP0252 | 1 | (40,900) | |
| 45,767 | 3,068 |
2. Mount bobbins (STEP 1-11)
Threading on swingarm
First, machine the threaded holes in the swingarm.
The screw size for the bobbins used by Yamaha is M6 with a pitch of 1.0.
For details, please refer to the maintenance record “Threading for paddock stand bobbins”.

<Threaded hole>
Around threaded hole on swingarm
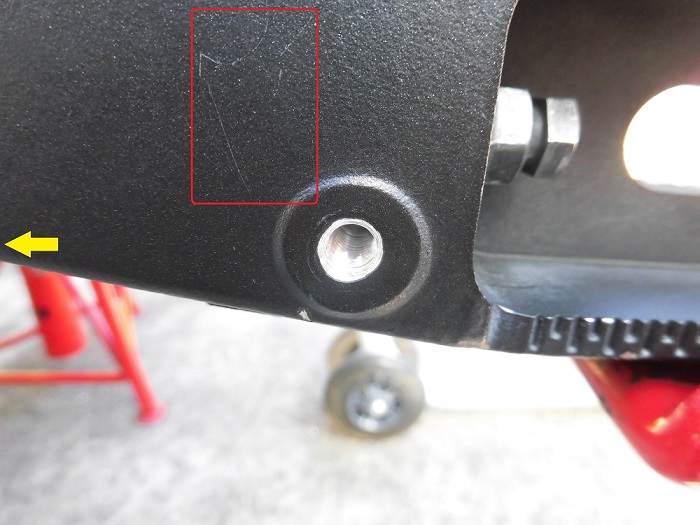
<Around threaded hole on swingarm>
I think there is a scratch on the top left…
Did the guide bar that was applied when machining the threaded hole rub against it?
Was the guide bar not sufficiently cured?
Prepared bobbins
I was suddenly demotivated, but I got myself back on track and mounted the bobbins.
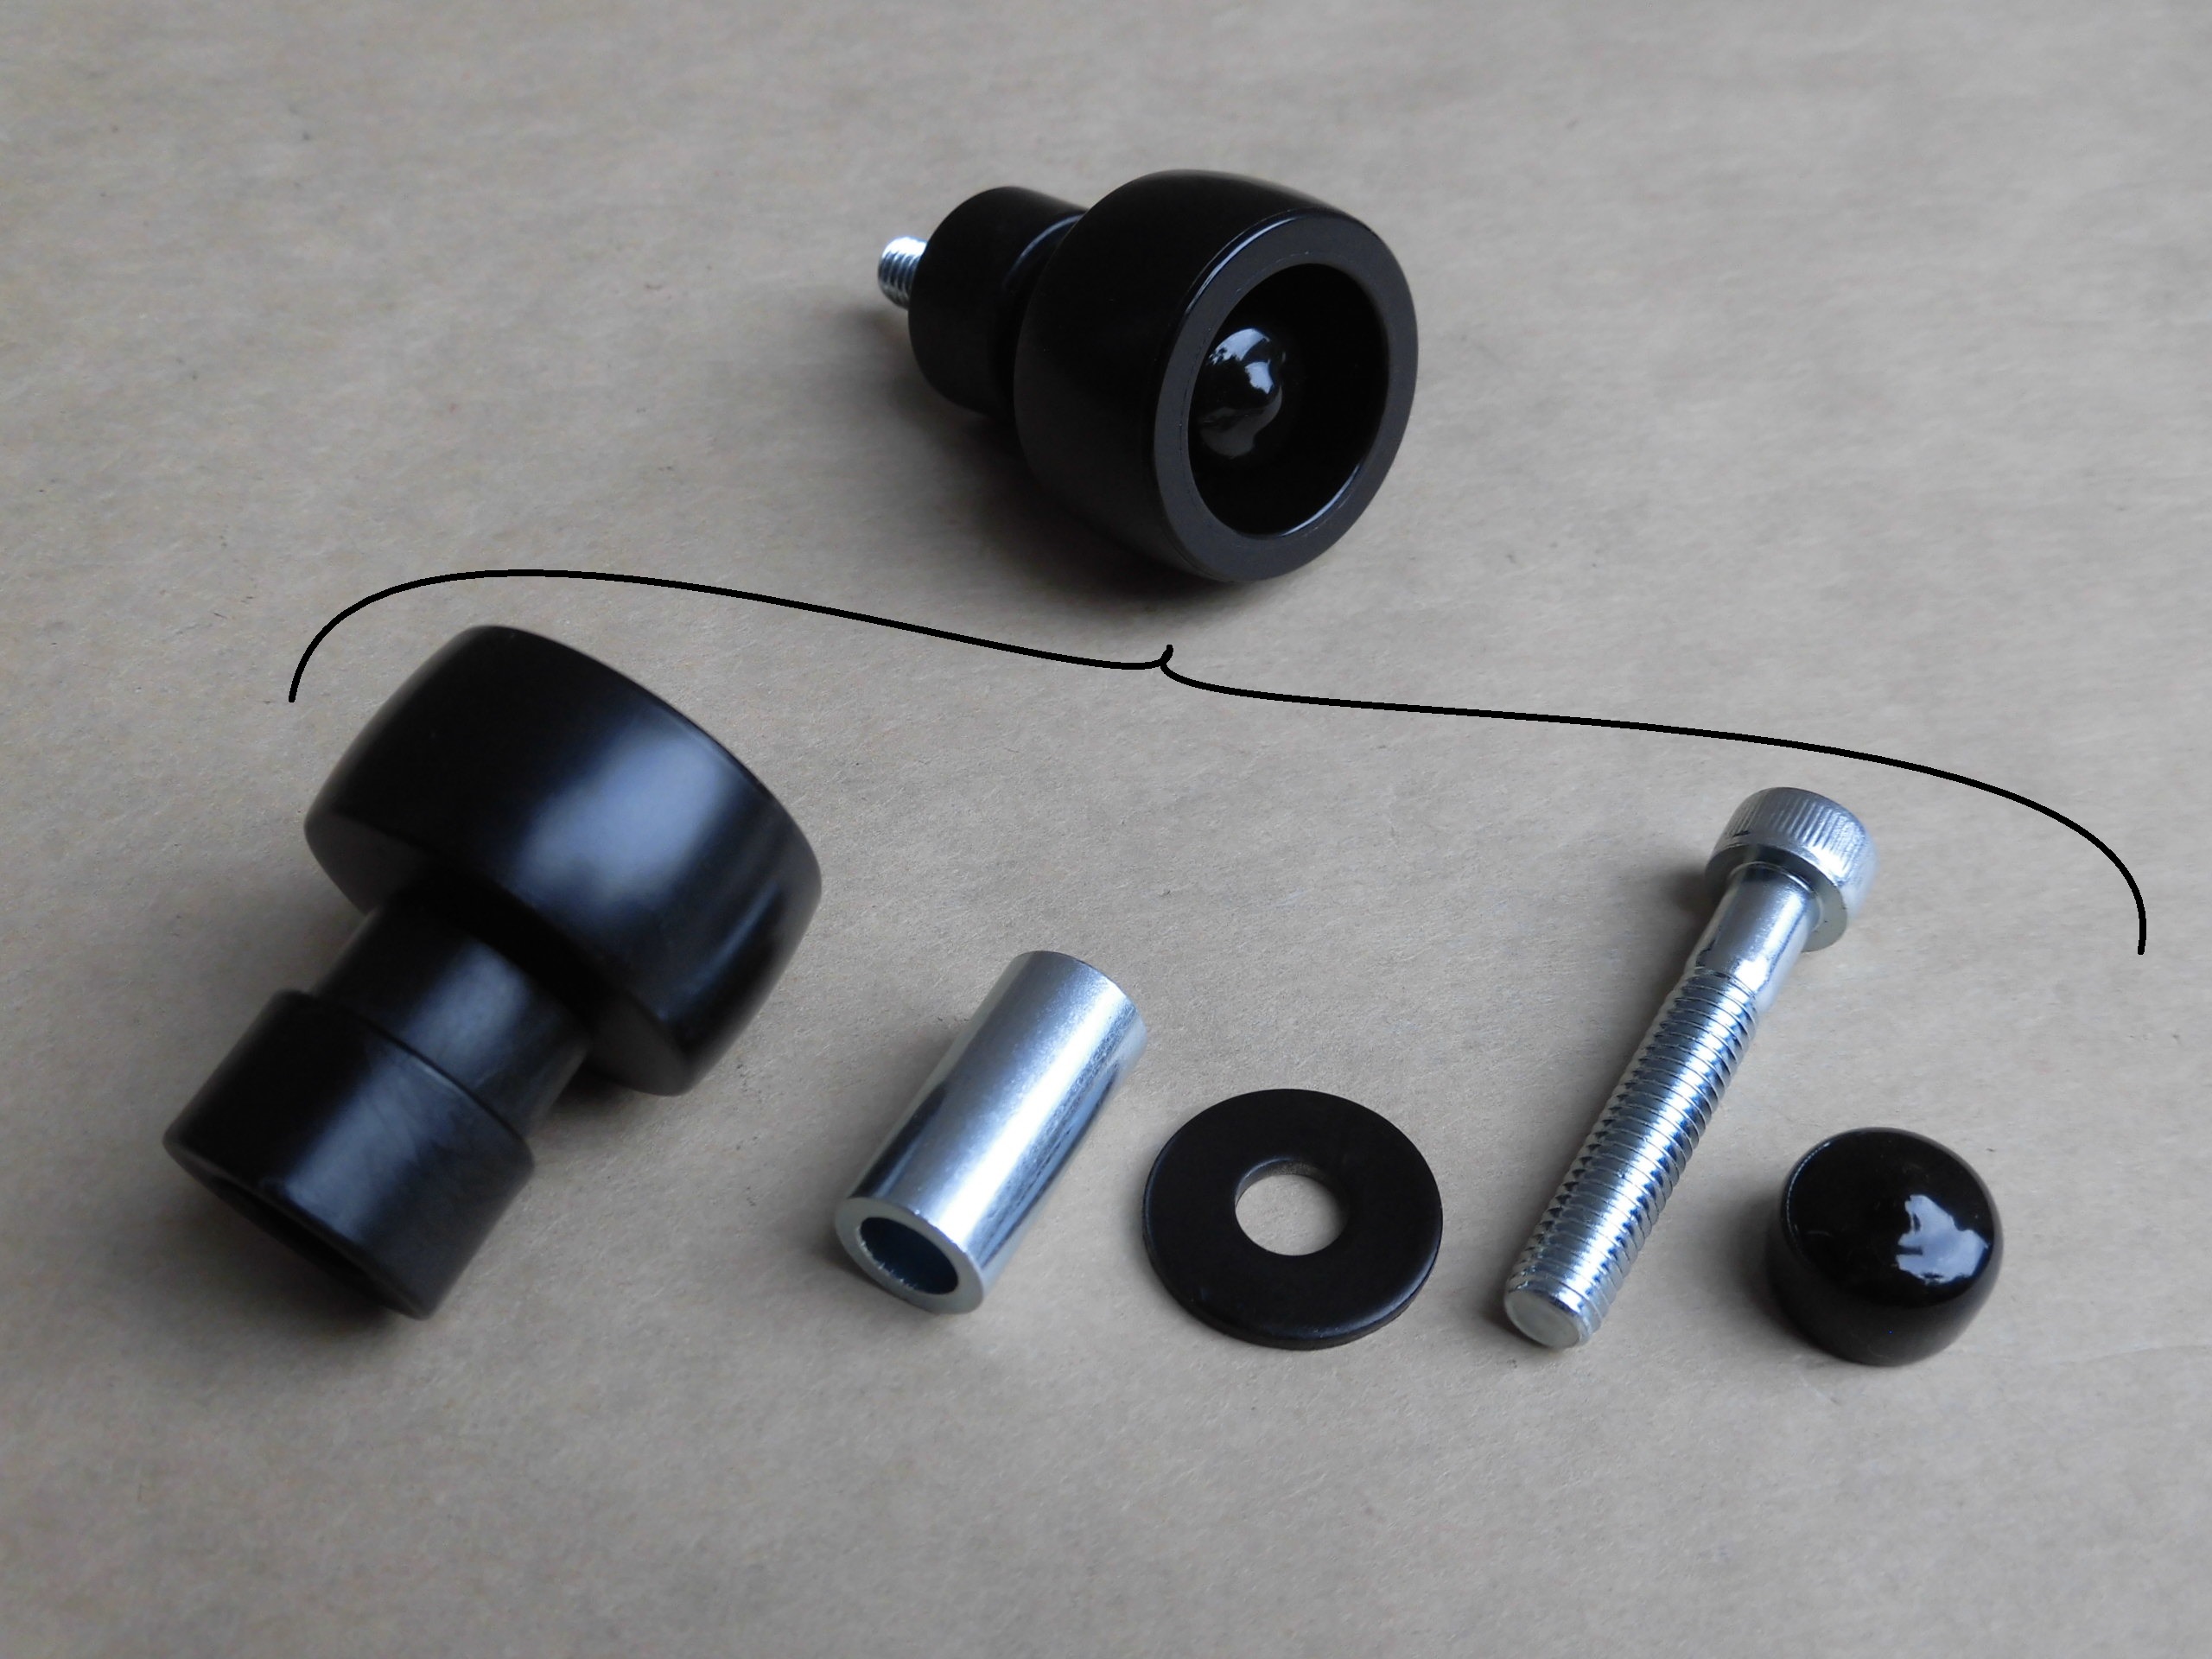
<Prepared bobbins>
I was prepared J-Trip’s Durakon bobbins.
For the appearance after installation,
- I painted the washers black… to unify the color black.
- I bought caps to put on the end of the bolt… to prevent tampering.
Mount bobbins 1
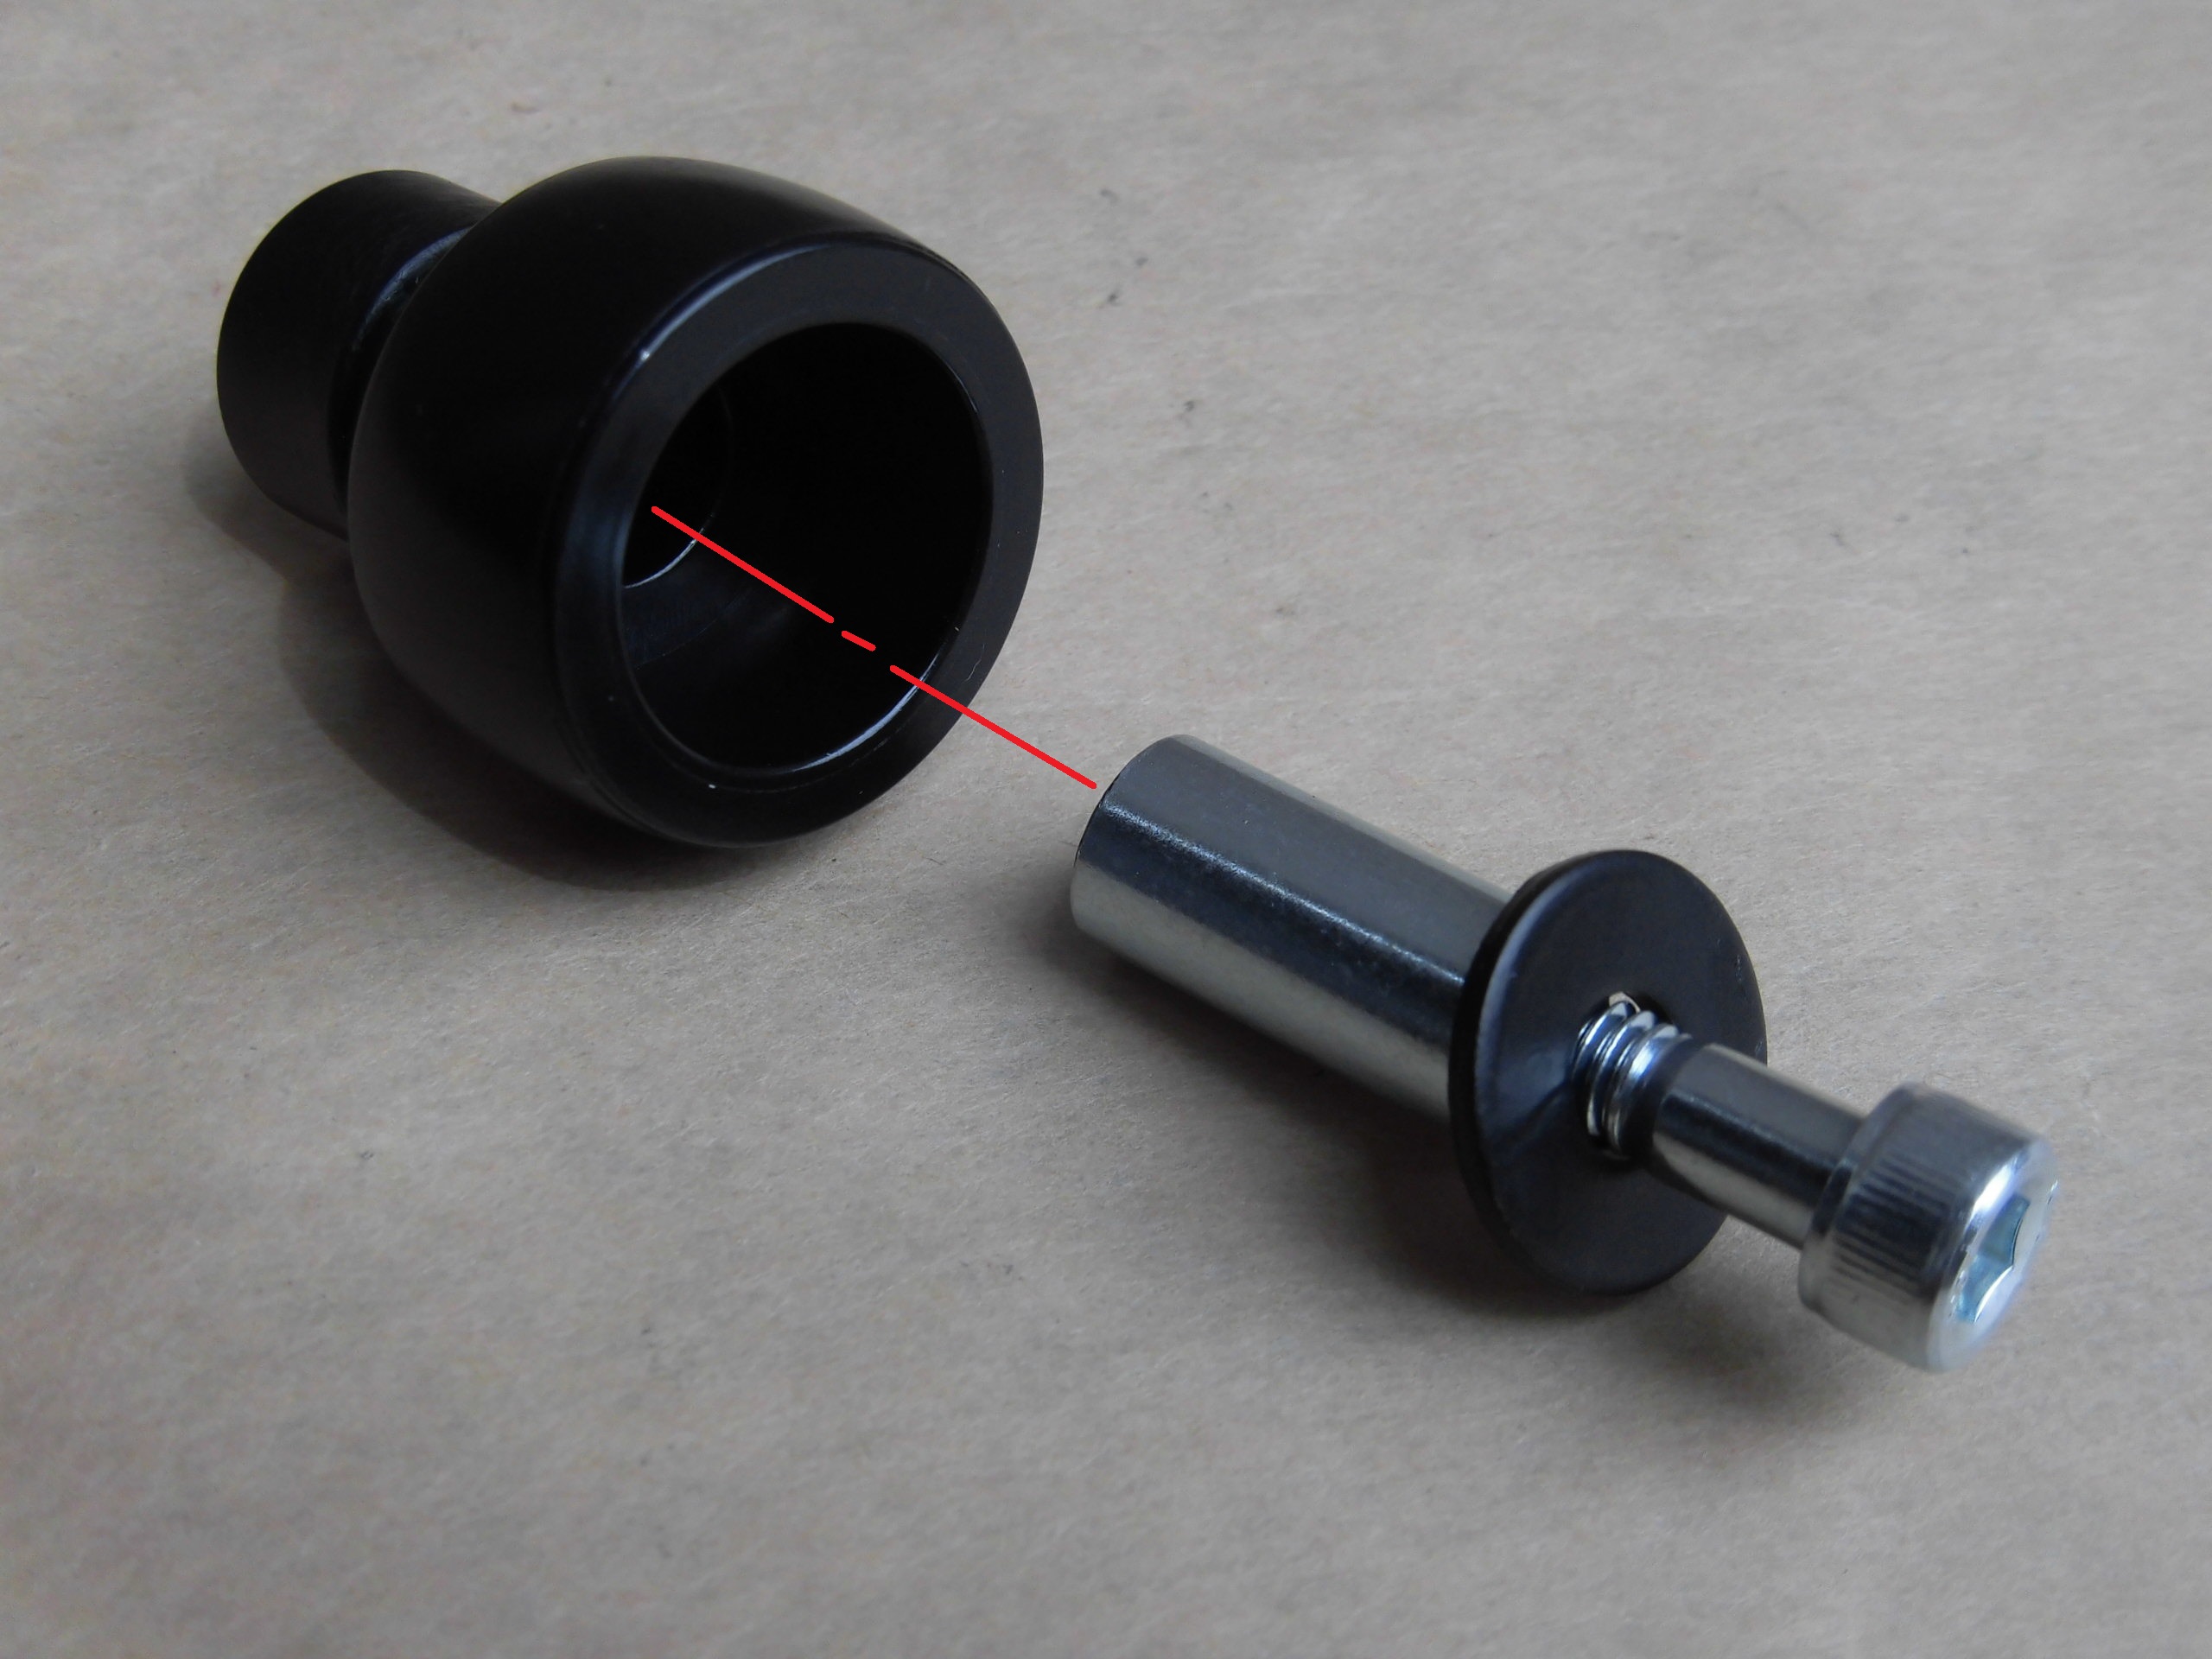
<Mount bobbins 1>
Insert the bolt through the sleeve/washer and into the bobbin.
Thread-locking agent application
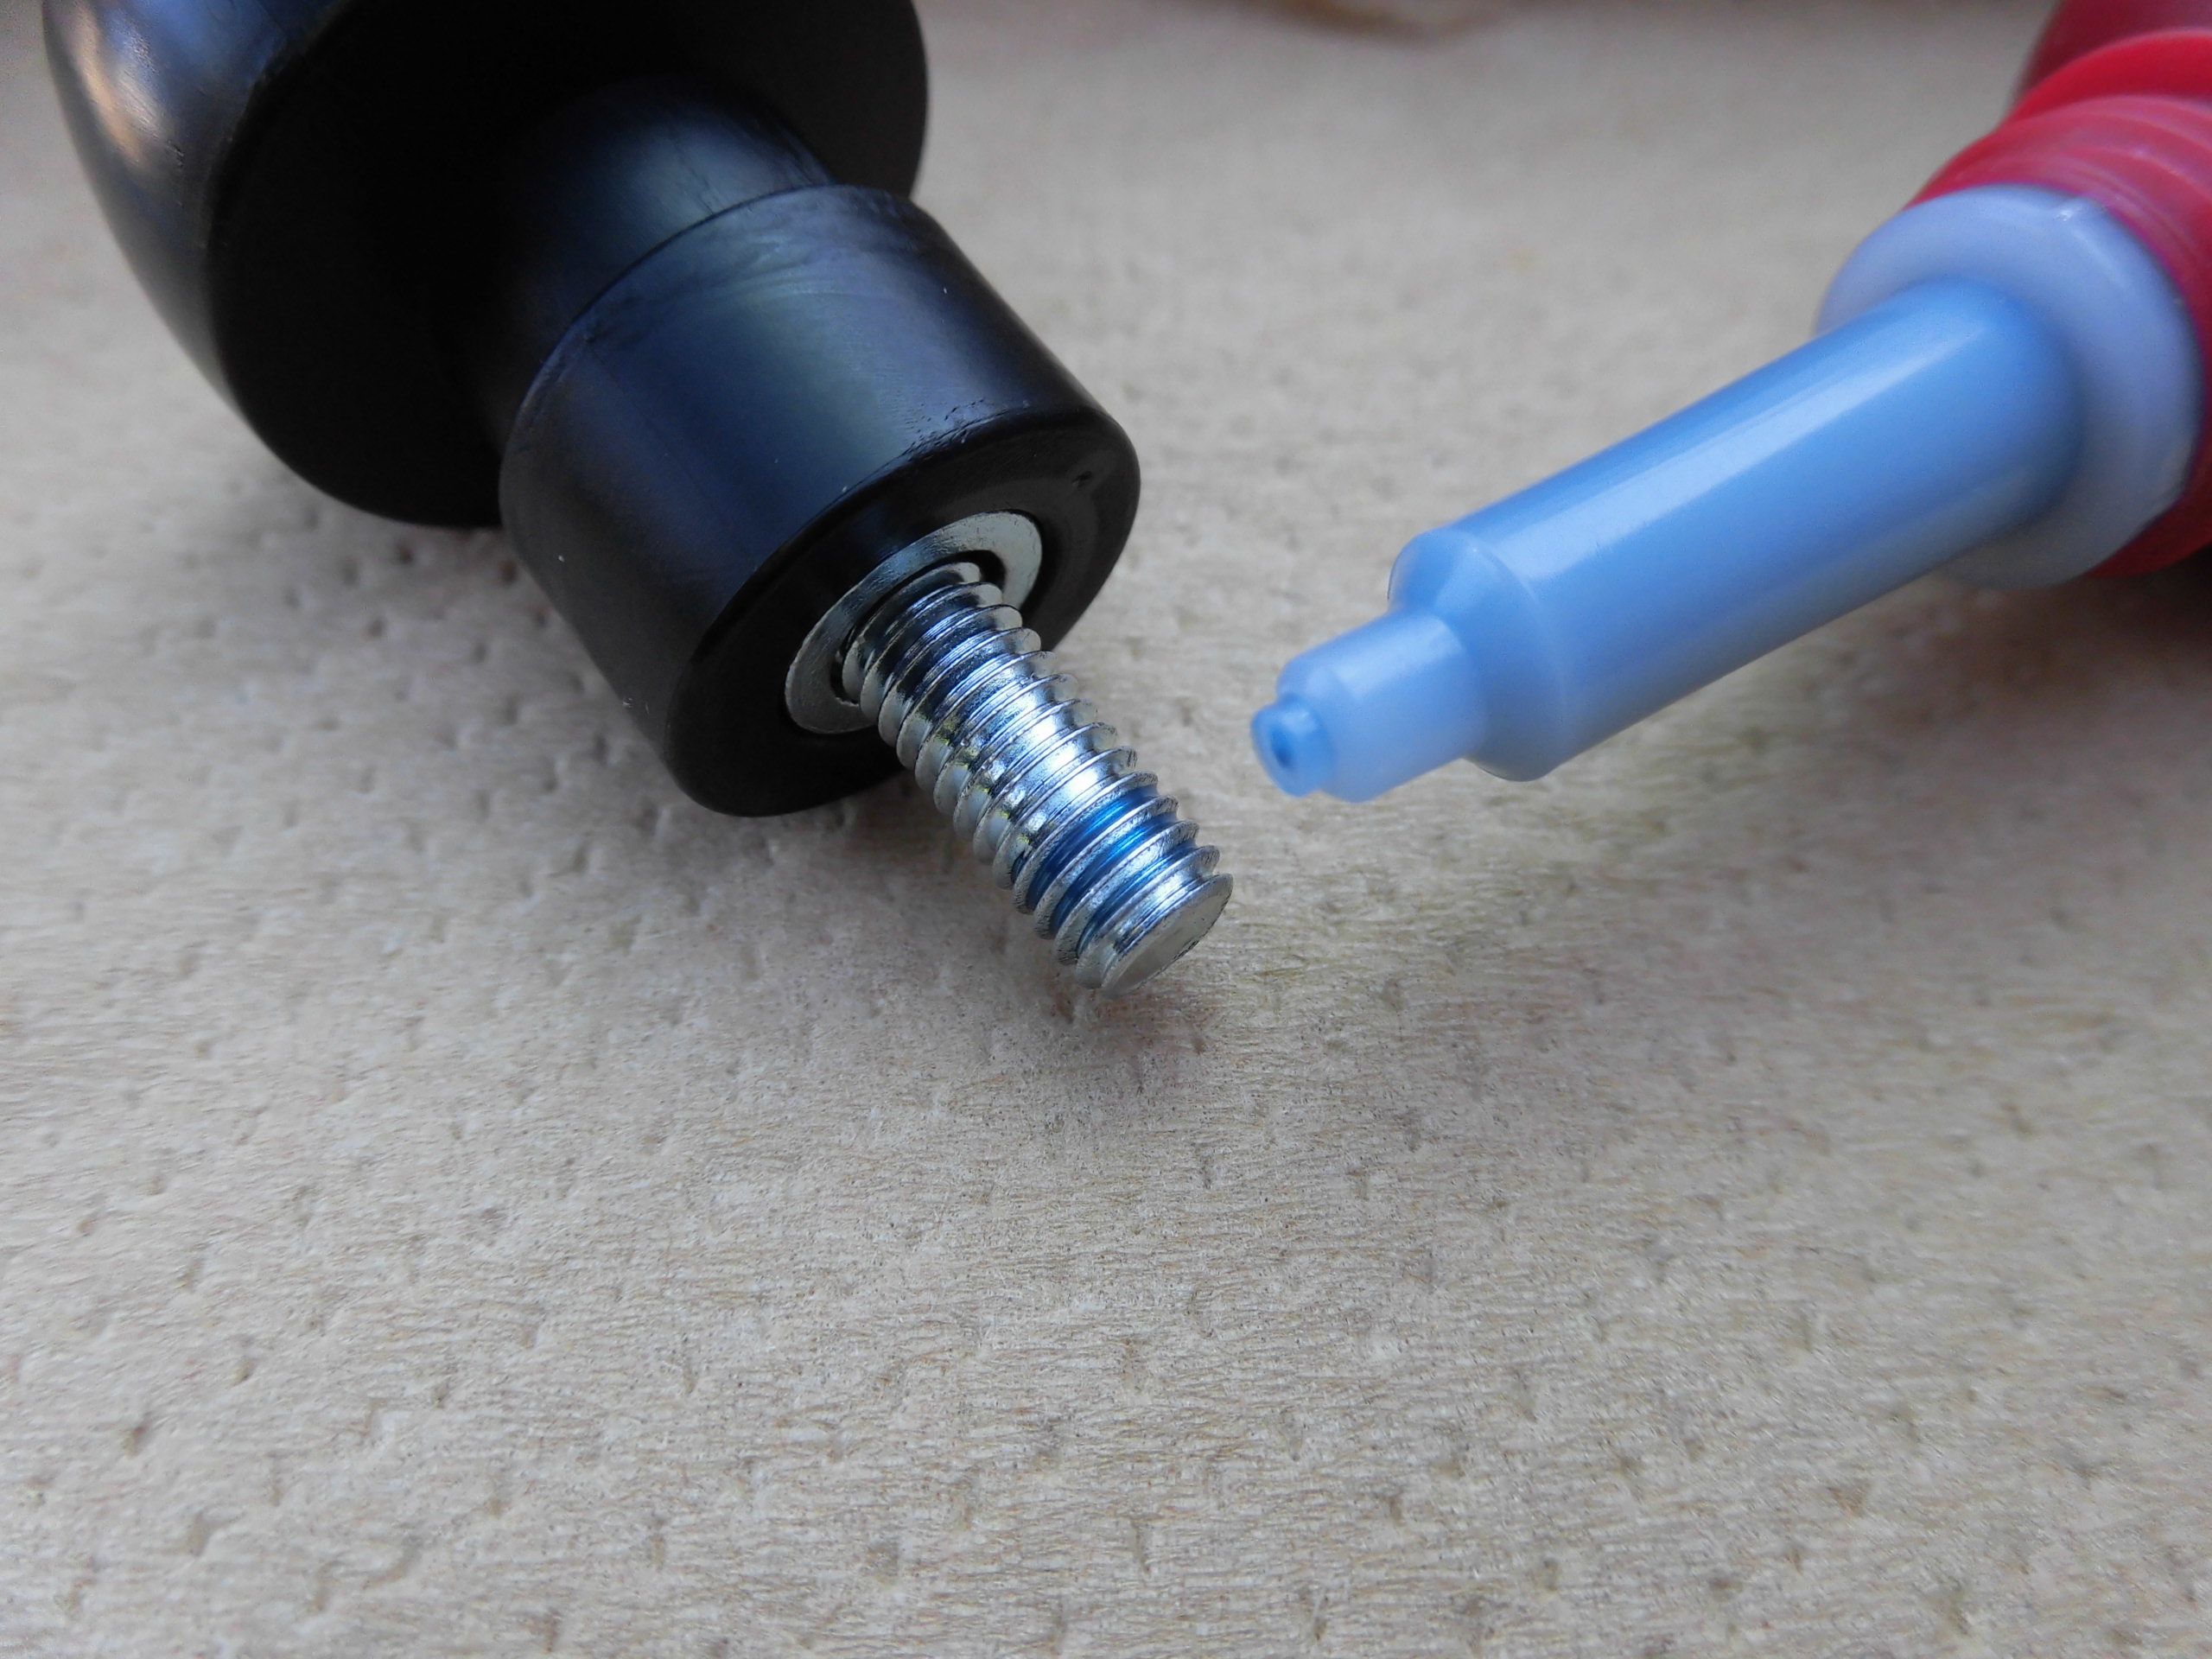
<Thread-locking agent application>
The YZF-R125 has a small engine and uses a lot of high revolutions, so it vibrates a lot.
Therefore, thread-locking agent is applied to prevent loosening.
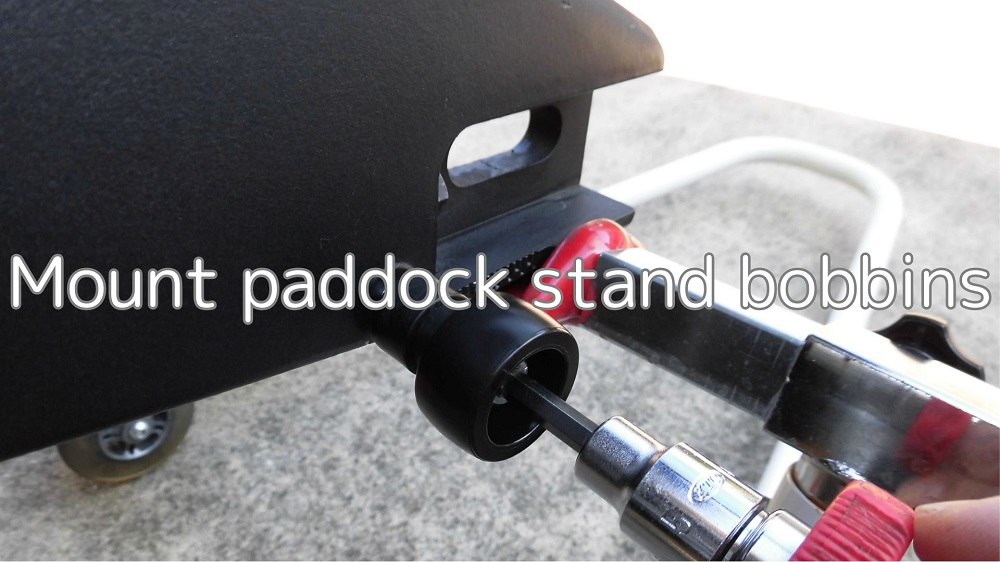
Mount bobbins 2
<Mount bobbins 2>
Tighten the bobbin to the swingarm using a quick spinner with a hexagon socket (5 mm).
Mount bobbins 3
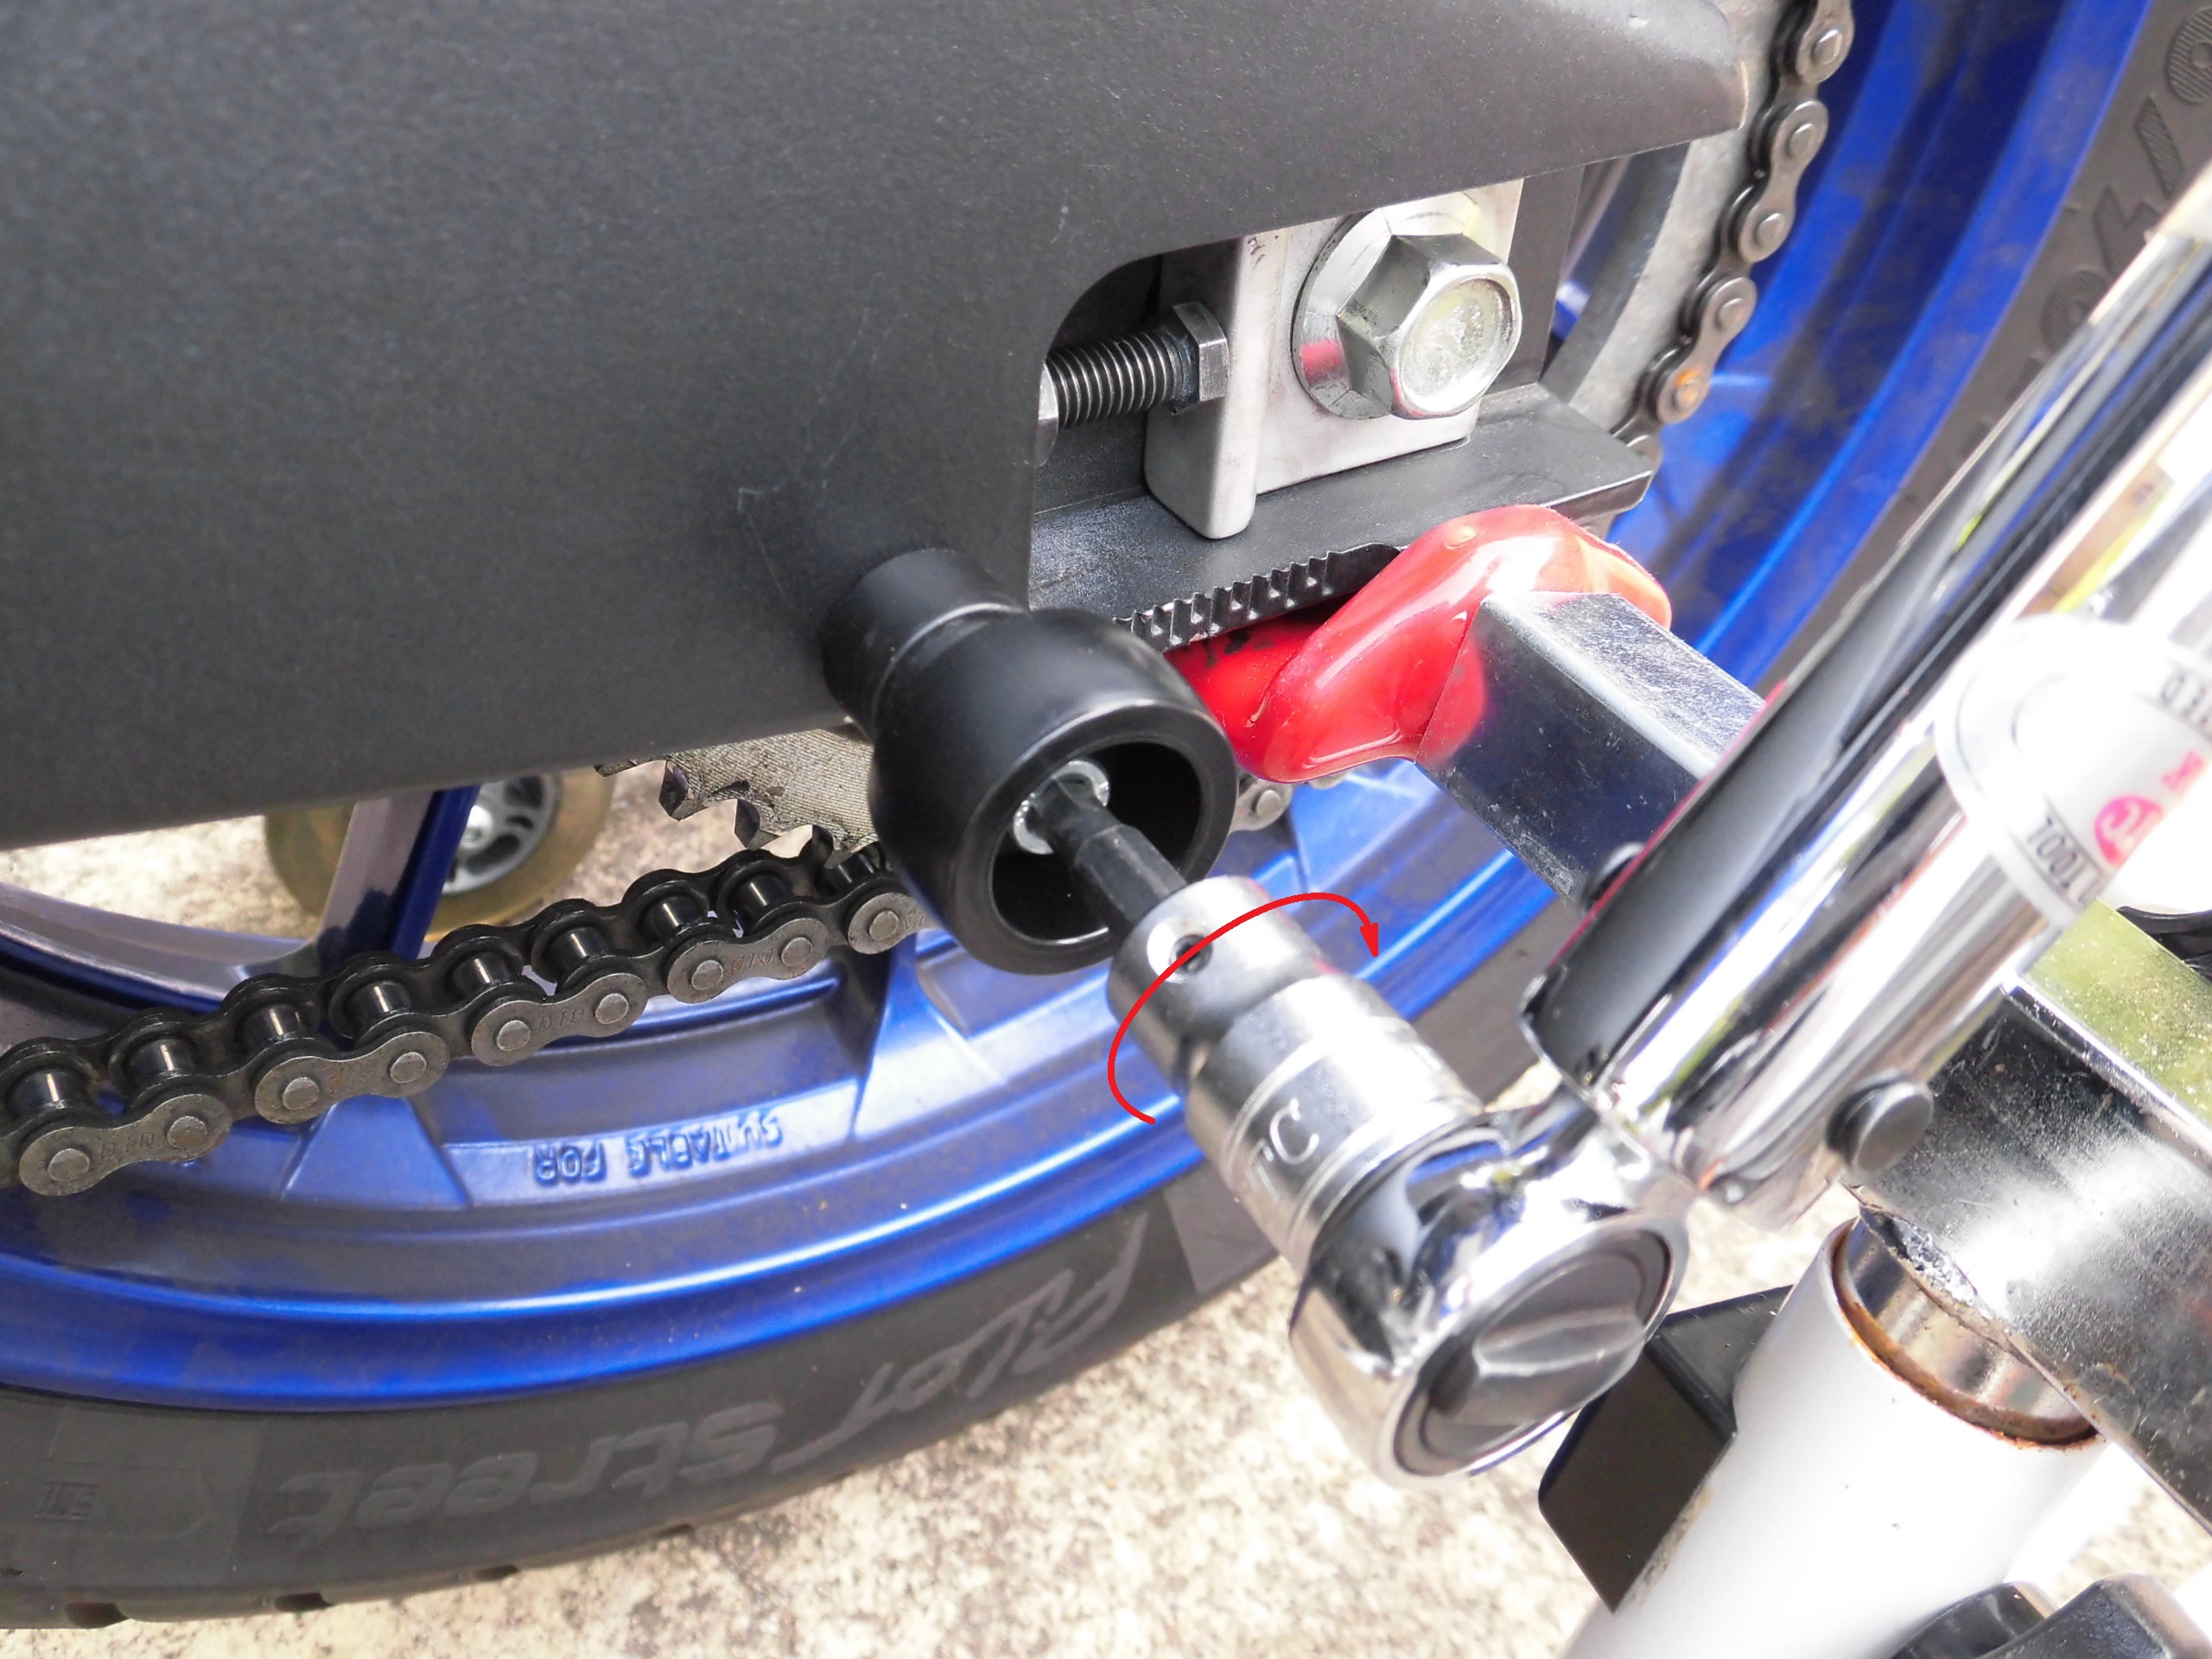
<Mount bobbins 3>
Then tighten the bolts with a torque wrench to 7 Nm.
The tightening torque was described in the instructions for the J-Trip V-fixture.
For 6 mm bolts: 5-8 Nm.
*
I forgot to take a photo when I was working on it, so I took this photo after the wheel was assembled.
(Please forgive the out of focus).
Mount cap
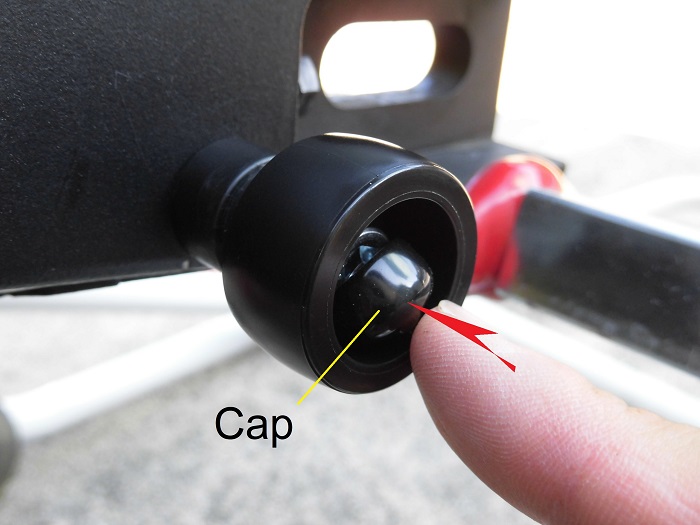
<Mount cap>
Finally, put the cap on.
Then, the rear wheels can be fitted to complete the process.
Condition with bobbin mounted
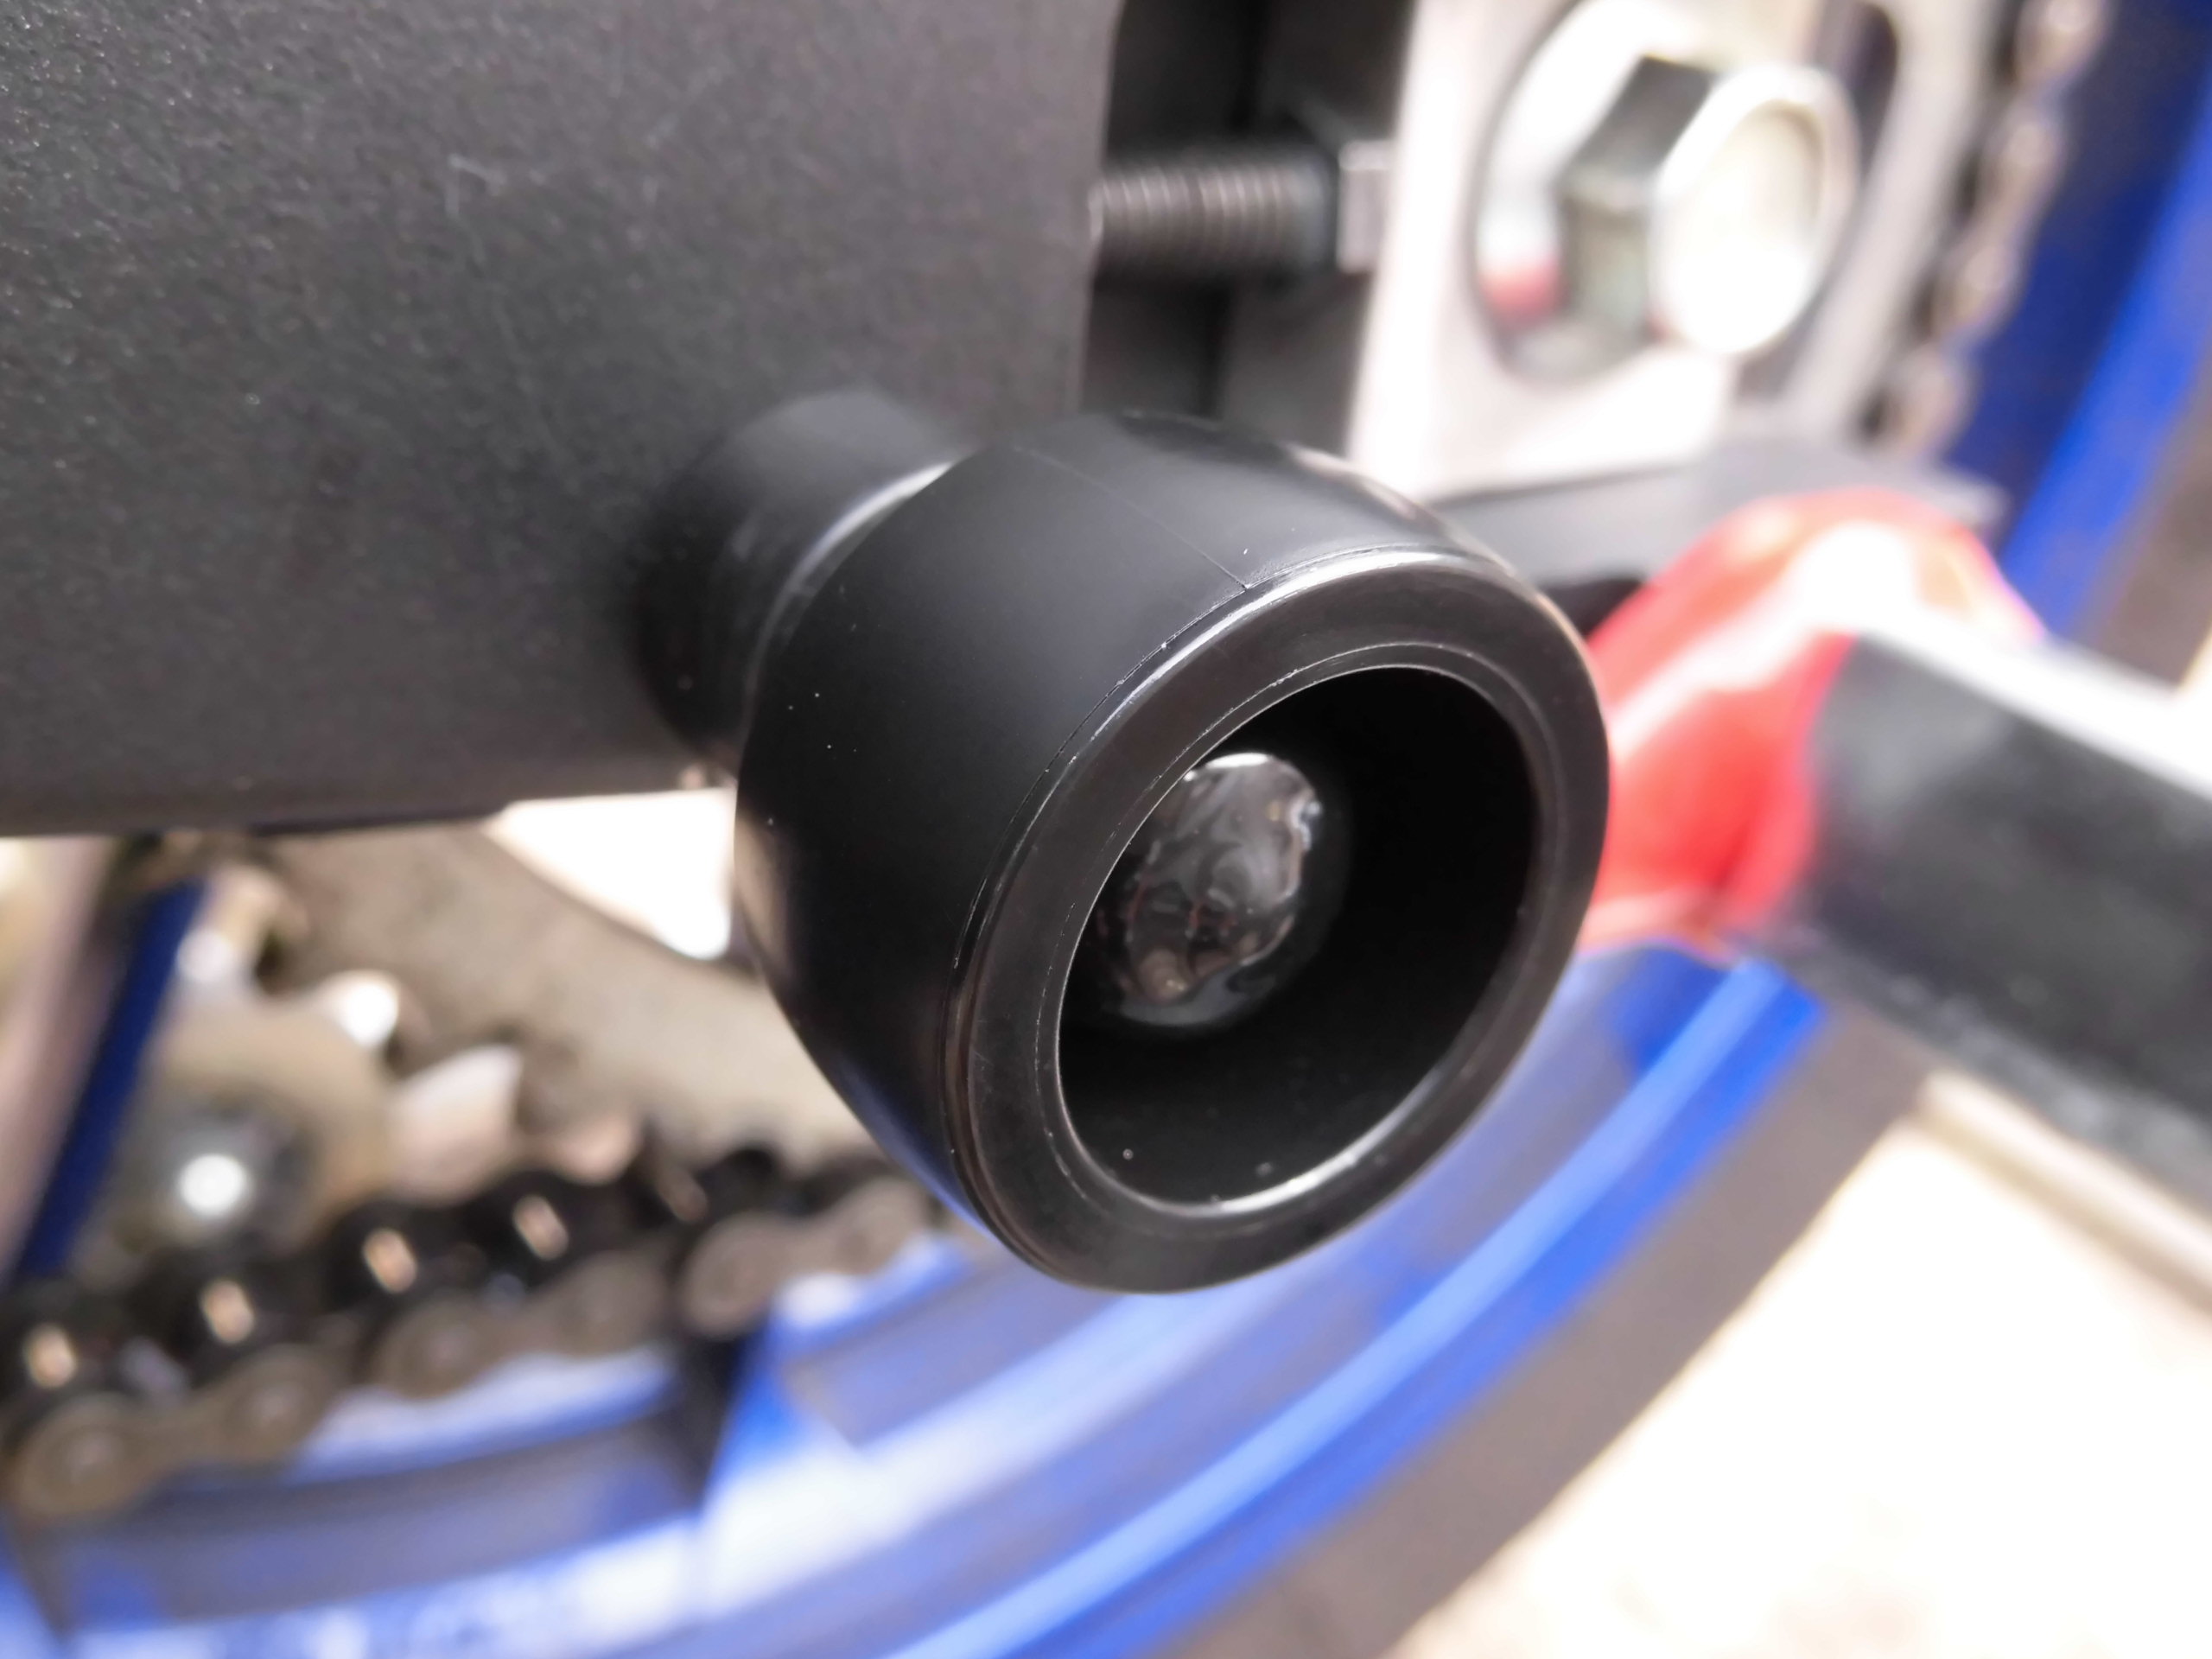
<Condition with bobbin mounted>
It looks like this.
I think the color of the cast skin of the swingarm matches the gloss of the Durakon.
But I guess it’s not gorgeous…
Comparison before and after bobbins mounted
Now for a before-and-after comparison.
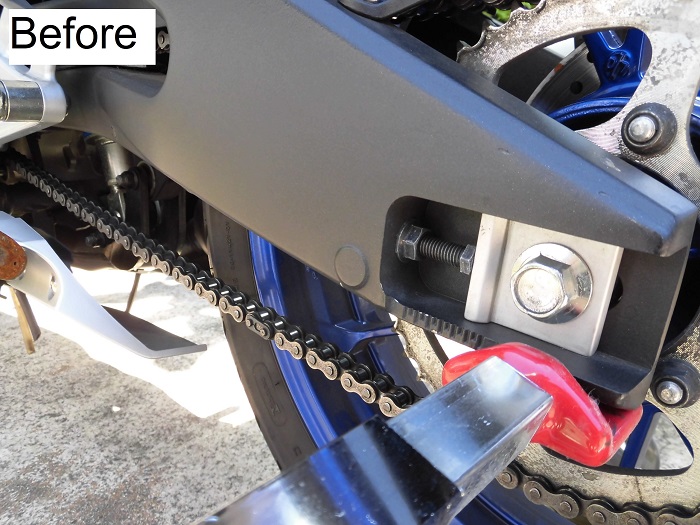
<Before bobbin mounted>
Setting the stand at the rear end caused inconvenience in removing the axle shaft.
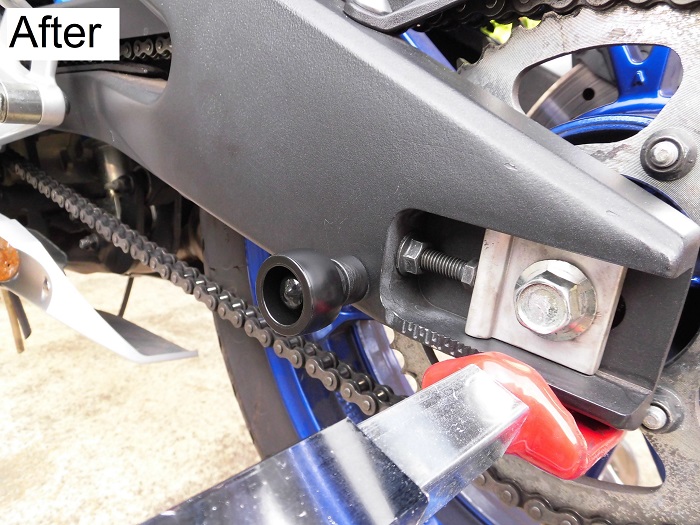
<After bobbin mounted>
Yeah, just what I was aiming for.
Now I can set the rear paddock stand reliably on the V-fixture 2 and work better around the rear axle.
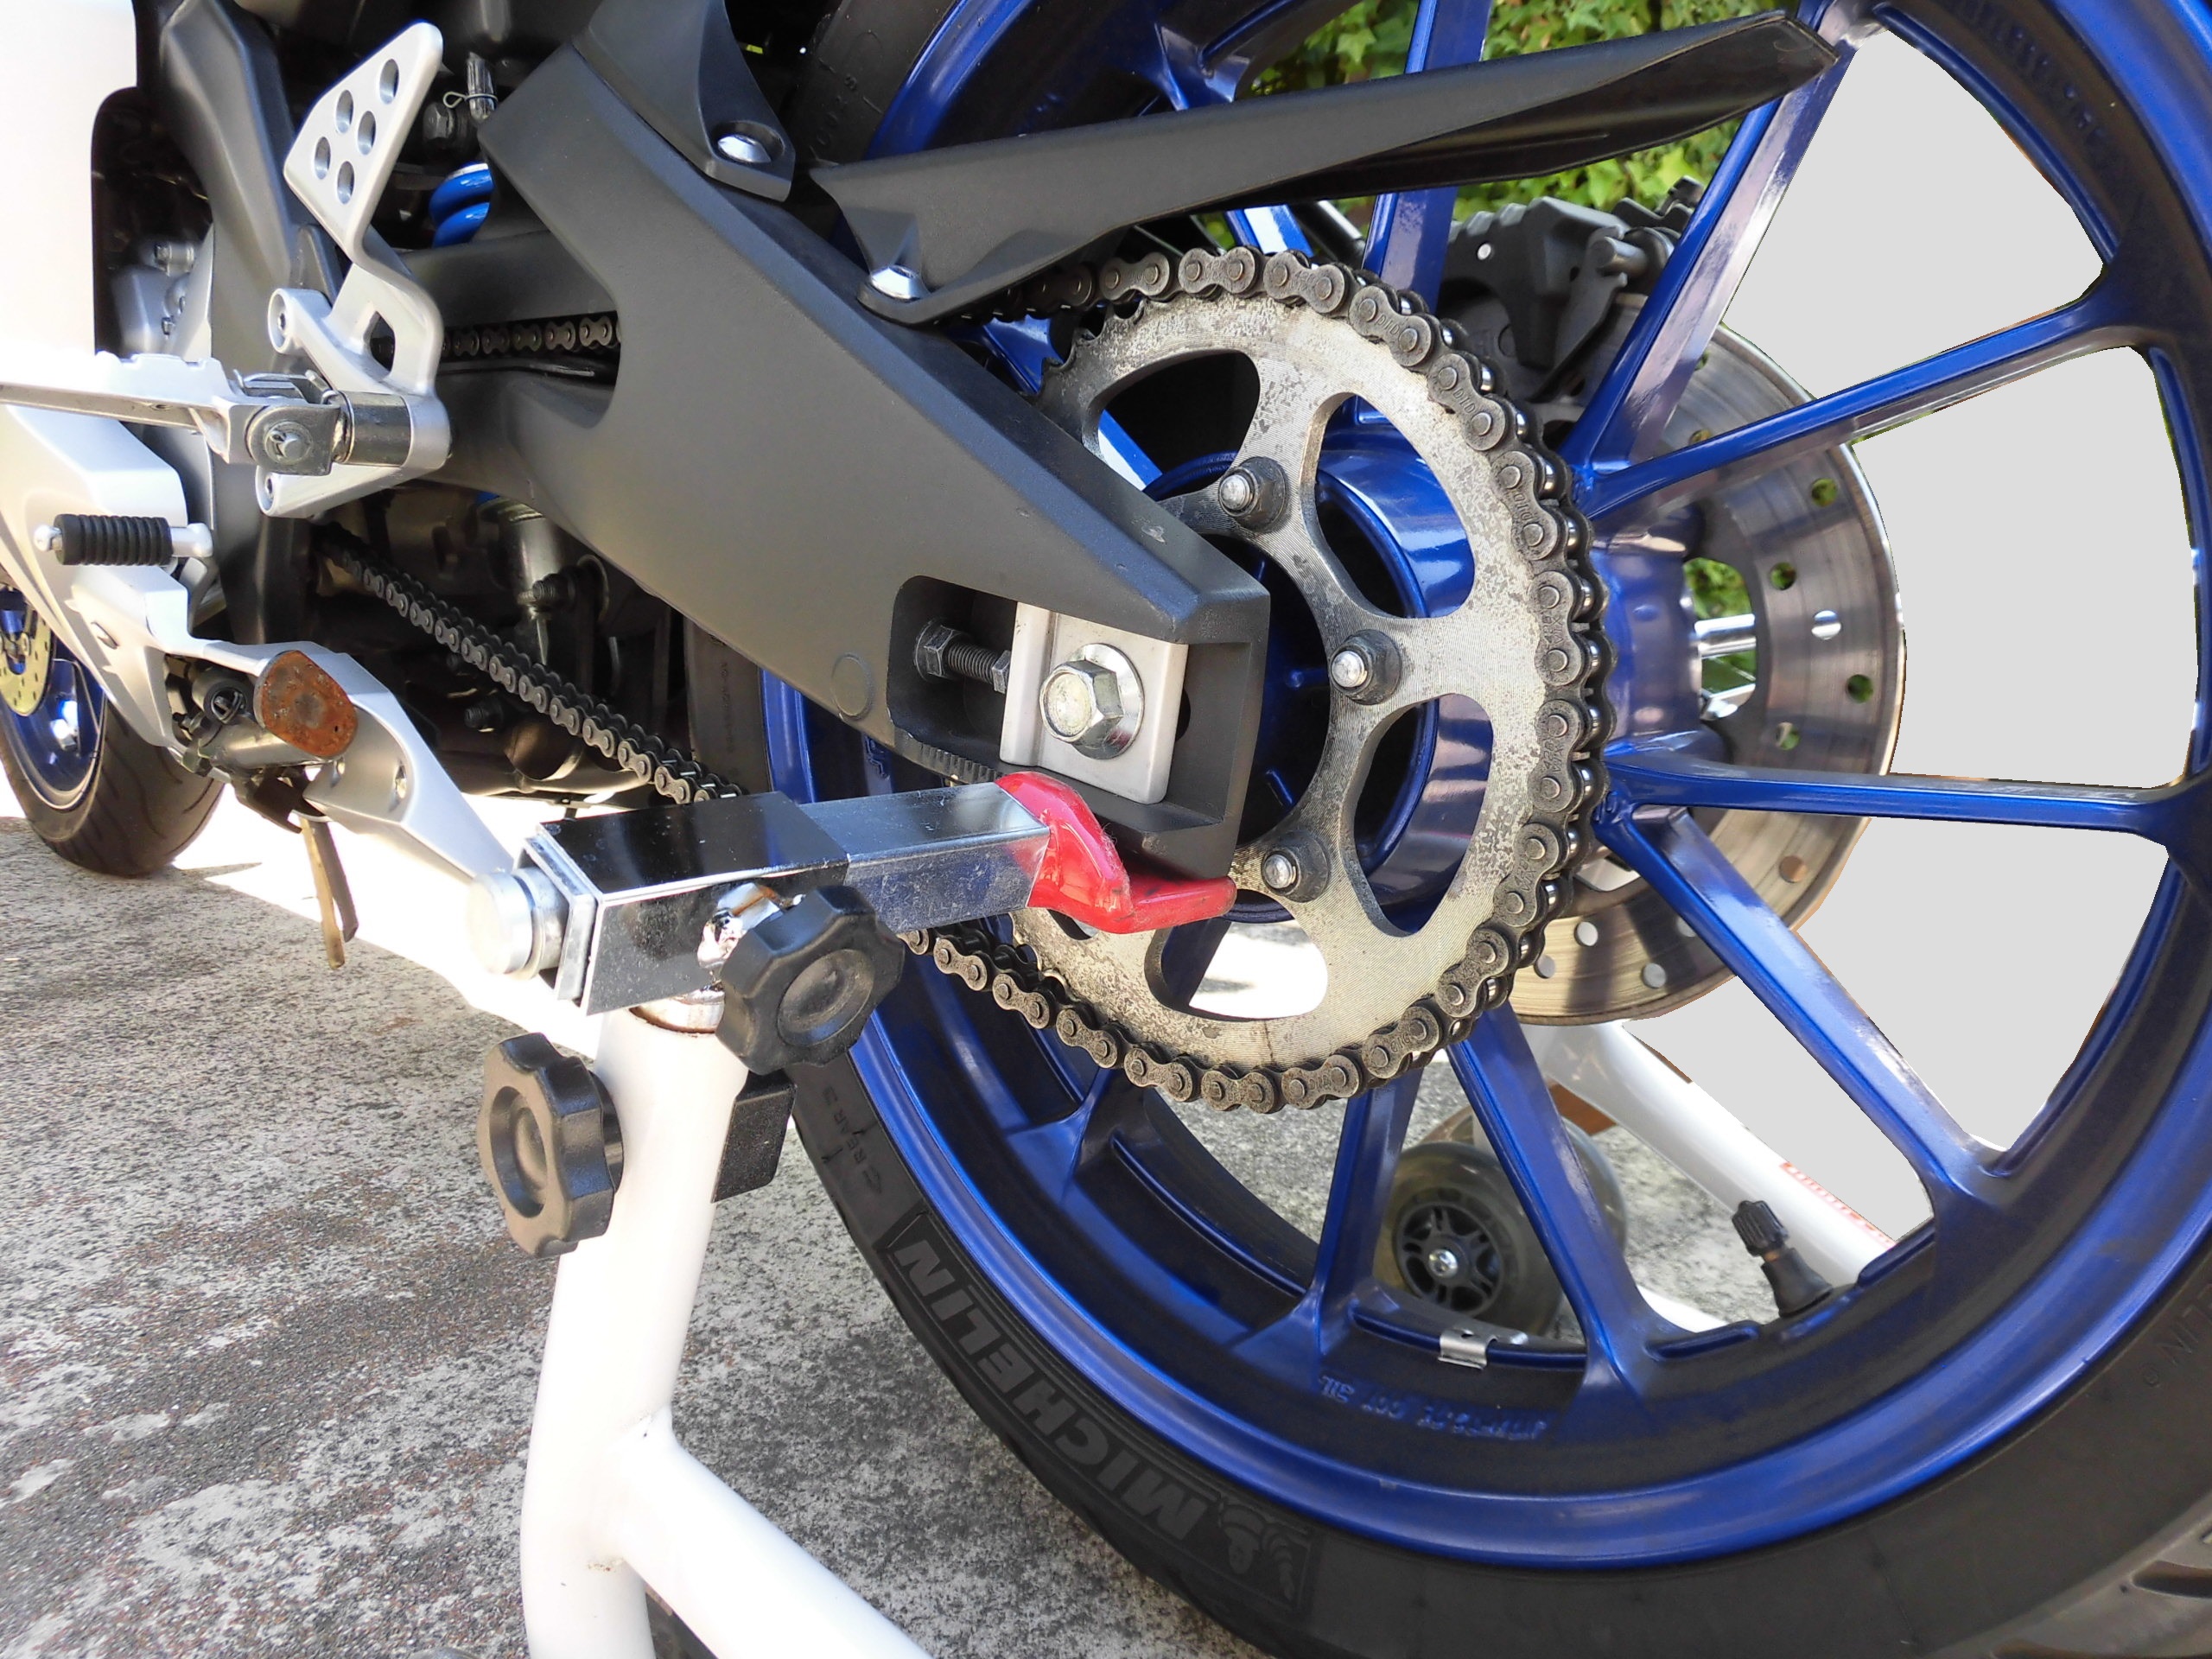
Comparison of different types of fixtures
<Condition with stand in L-fixture>
It has never come off, but I have resisted setting it on the edge.

<Condition with stand in V-fixture2>
There are fewer missed lifting-ups and, most importantly, the left-right tilt has almost completely disappeared.
The next problem is…
And although I have written positive comments on V-fixture 2 so far, it was not so easy.
I’ll have all sorts of problems when I actually try it…
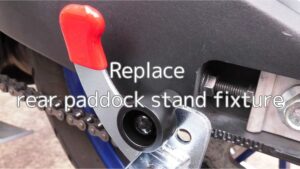
(For more details, please see the next maintenance record “Replace rear paddock stand fixture”.)
3. Summary
Now, I finished mounting the bobbins.
This time I used J-Trip bobbins, but other bobbins should be able to be mounted in the same way.
- Screw size for bobbins: M6 pitch 1.0
- Tightening torque for J-Trip bobbins: 5-8 Nm.
- Application of thread-locking agent is recommended


