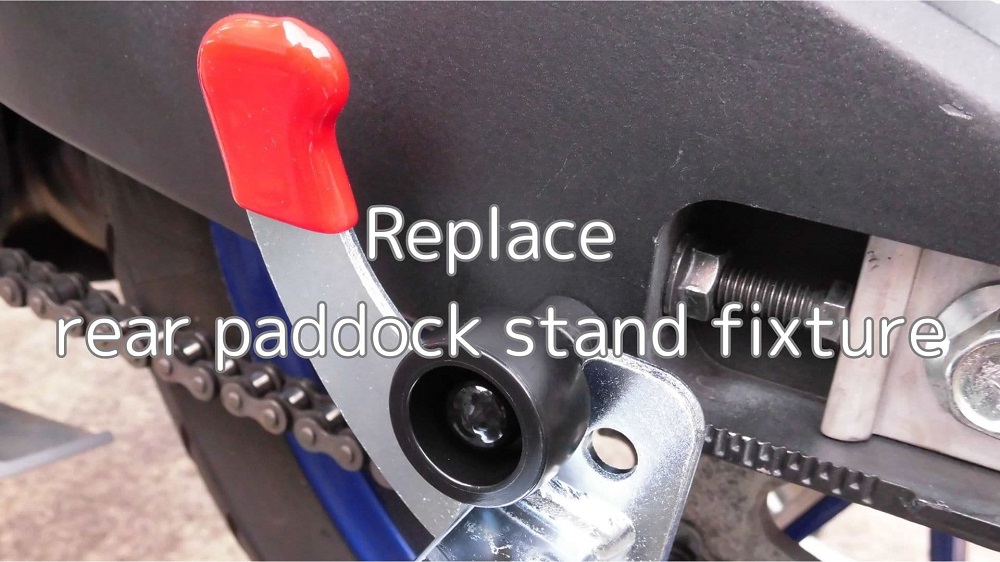
A J-trip paddock stand bobbins have been fitted to the YZF-R125 (5D7W) and the rear paddock stand fixtures will be replaced accordingly.
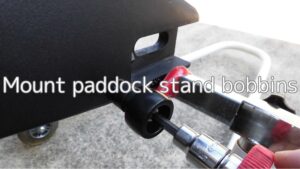
For details, see maintenance record ‘Mount paddock stand bobbins’.
From this article you can find out the following.
- Setting up the rear paddock stand
- How to use the rear paddock stand by bobbins
| Date | 18th June 2023 |
| Subjects | Tuning, Customizing |
| Shop or DIY | DIY |
| Difficulty | |
| Working hours | 0.5 |
| Costs [Yen] | 3,080 |
1. Goods to use
| No. | Name | Manufacturer | Part number | Quantity | Amounts[Yen] | Purchasing this time |
| 1 | Long roller stand (L-fixture type) | J-Trip | JT-121LWT | 1 | 22,481 | |
| 2 | Stand hooks V-fixture2 | J-Trip | JT-107V2 | 1 | 3,080 | ○ |
| 25,561 | 3,080 |
2. Replace rear paddock stand fixture (STEP 1-20)
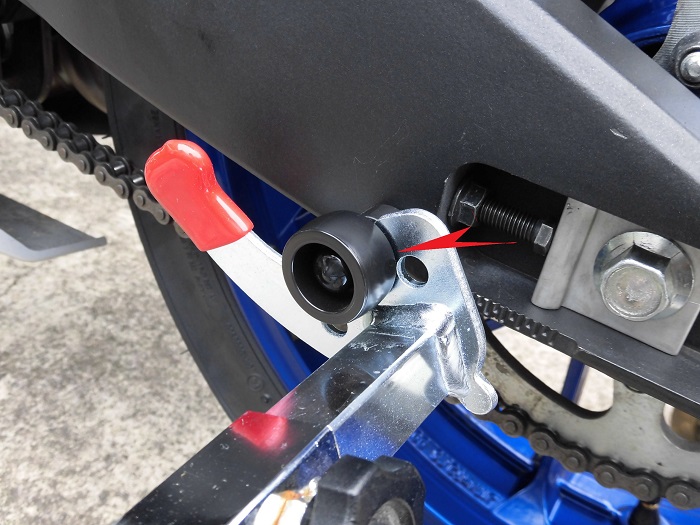
Bobbins fitted
<Bobbins fitted>
As J-Trip, black Durakon fixtures have been fitted, I will replace fixtures to match.
Purchased fixtures

<Purchased fixtures>
This time, I prepared the V-fixture 2 from J-Trip.
This will hopefully make much easier to service around the rear axle area.
Remove L-fixtures
Now replace the fixtures for the rear stand.
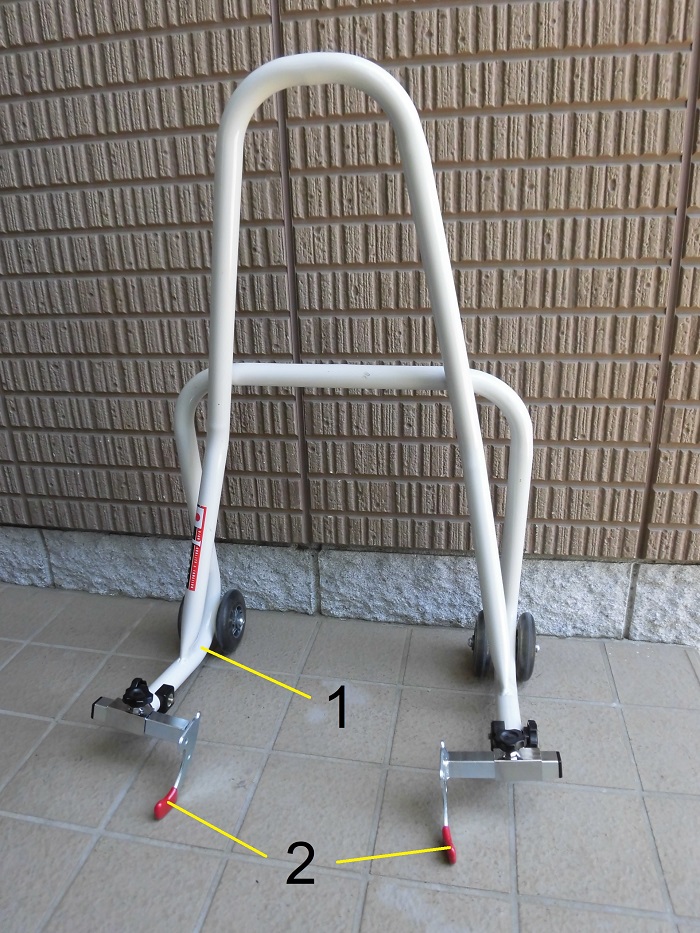
The rear stand used is a long roller stand.
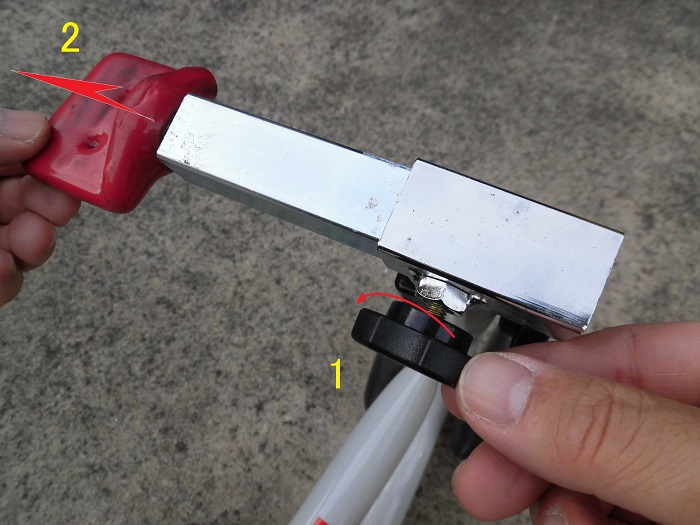
<Remove L-fixtures>
First, remove the L-fixtures from the stand.
- Loosen the knob bolt securing the L-fixture.
- Pull the L-fixture inwards to remove it.
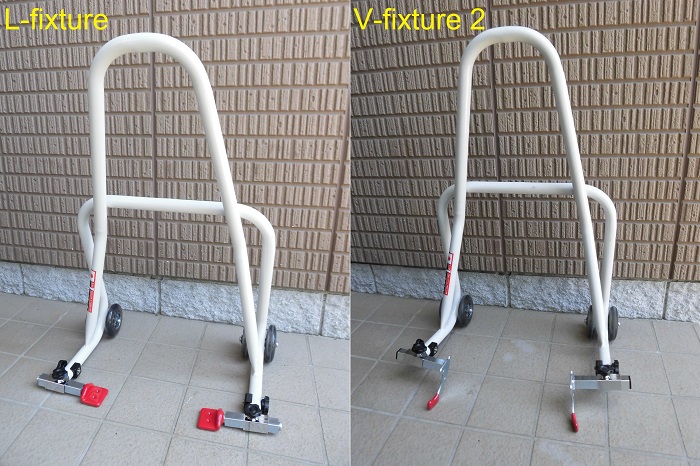
Comparison of old and new fixtures
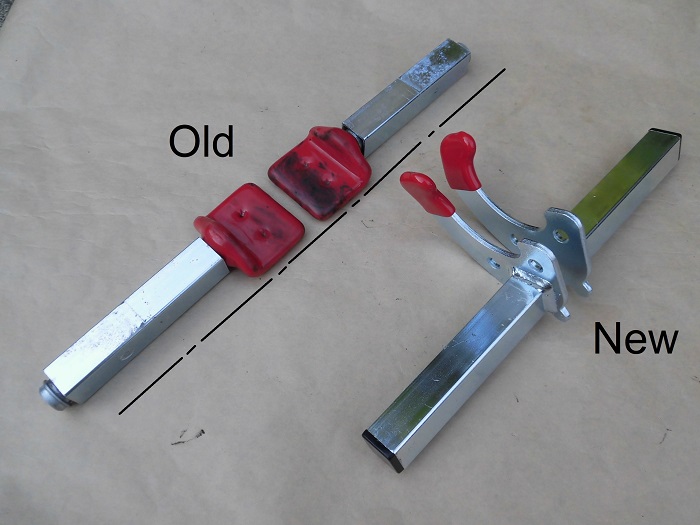
<Comparison of old and new fixtures>
Left: L-fixture
Right: V-fixtures 2
I used the L-fixture for about two years and the rubber part did not break.
The V-fixture 2 has no moving parts and is simple in construction.
Mount V-fixture 2
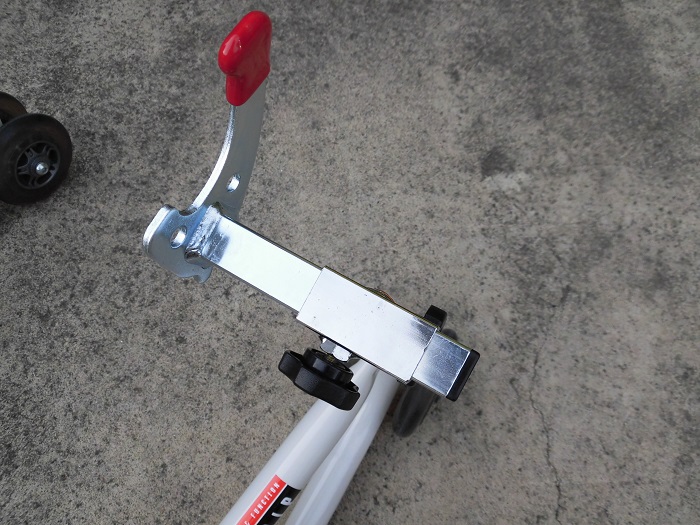
<Mount V-fixture 2>
Install V-fixture 2 in the reverse order of STEP 3.
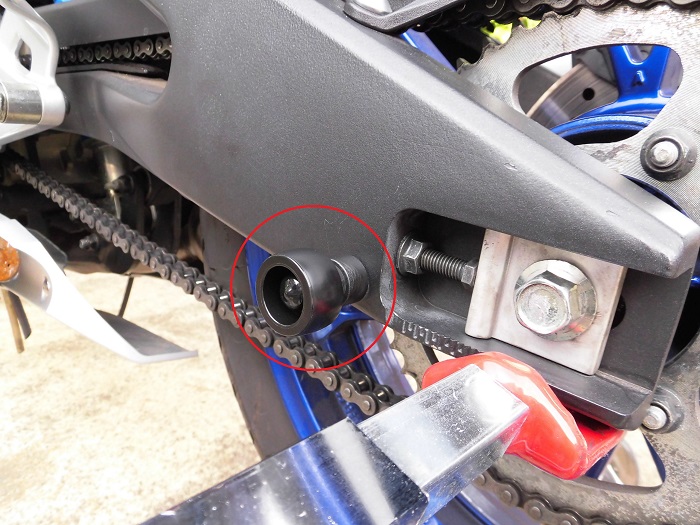
Check bobbin position
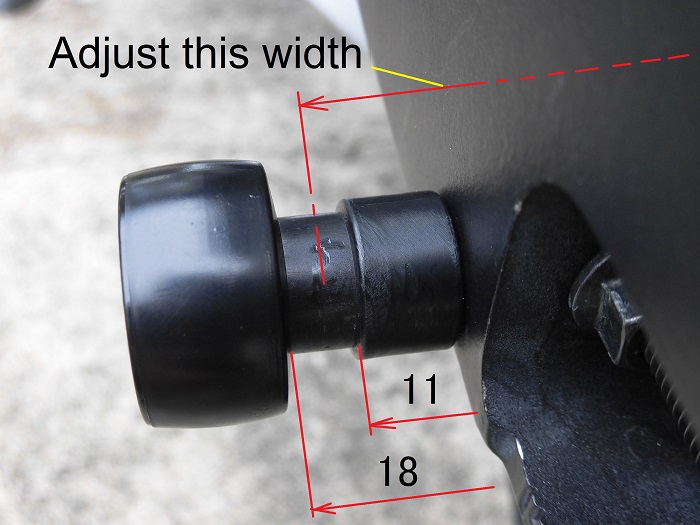
<Check bobbin position>
Adjust the width of the V-fixture 2 to match the width of the left and right bobbins.
Adjusted rear stand
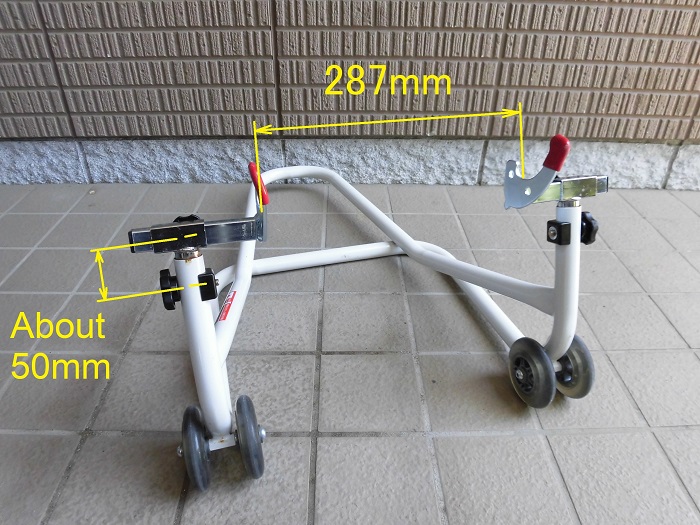
<Adjusted rear stand>
Width of V-fixture 2: 287 mm
Height of stand: lowest point
The height of the stand was not changed.
Lift up by rear stand 1
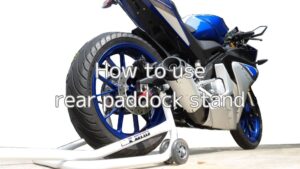
Now let’s lift up by rear stand.
The method of lifting up and removing the rear stand is basically the same as for the L-fixture.
For details, see STEP 3 to 13 in the Maintenance Records ‘How to use rear paddock stand’.
<Lift up by rear stand 1>
Straighten the moto and then align the bobbins with the groove of the V-fixture 2.
Lift up by rear stand 2
<Lift up by rear stand 2>
All that remains is to push down the rear stand.
The V-fixture 2 is extremely stable.
There is no sign of failure or disengagement.
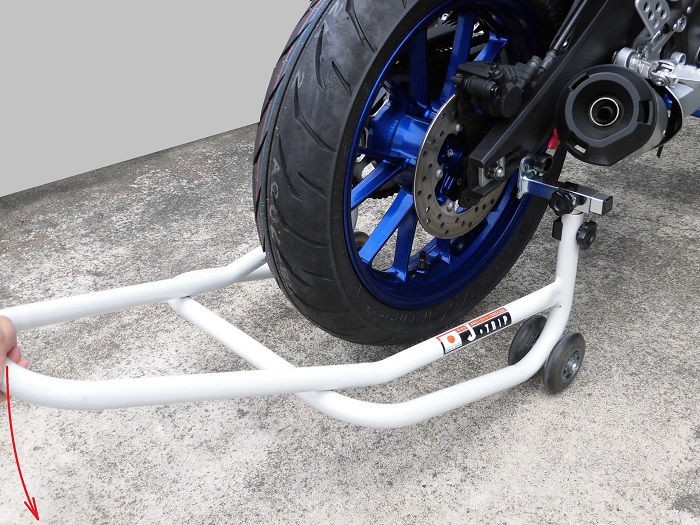
Condition lifted by rear stand 1
<Condition lifted by rear stand 1>
It was lifted up like this.
Condition lifted by rear stand 2
<Condition lifted by rear stand 2>
On the other hand, the right side looks like this.
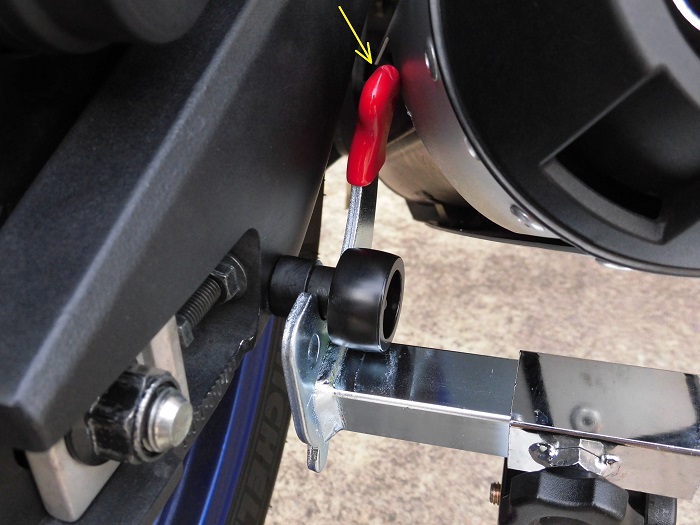
‘Hey, the rubber on the tip has been cut off!’
Broken rubber 1
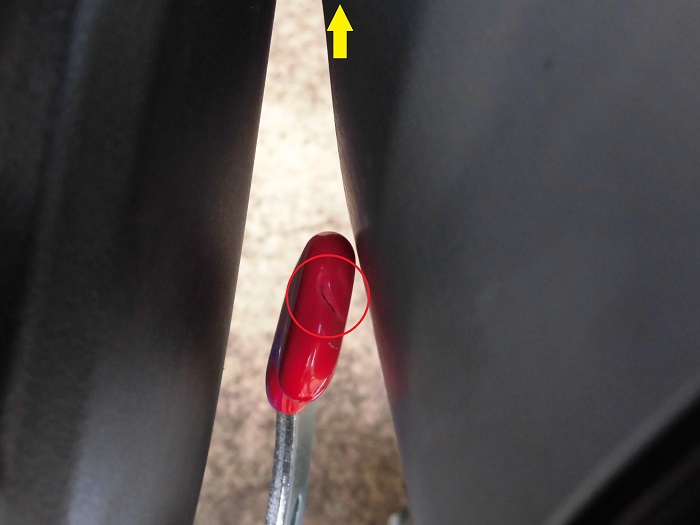
<Broken rubber 1>
‘I didn’t have this damage at the beginning, what happened?’
Broken rubber 2
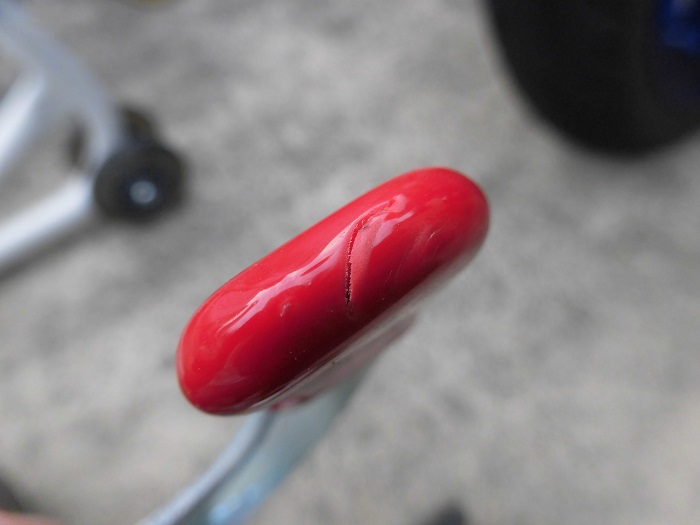
<Broken rubber 2>
I took the stand off to check and this is what it looked like…
I can’t hide my upset because I used it for the first time and suddenly it was scratched.
Lower side of muffler
When I lifted up again, the cause was immediately apparent.
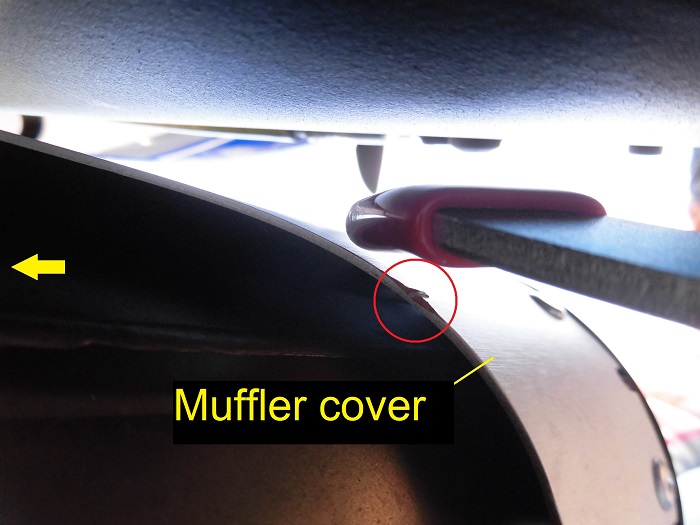
<Lower side of muffler>
When lifting up by the rear stand, the tip of the V-fixture 2 seems to have hit the edge of the muffler cover.
The muffler cover was also scratched.
Fortunately, I found that it did not hit it if I used the stand while twisting the handle to the right.
It’s usable, but it’s such a hassle to have to be aware of it every time I use it…
Interference prevention study
I thought about how to prevent the V-fixture 2 and the muffler cover (muffler) from hitting each other.
-How to move the V-fixture 2 away from the muffler cover-
- Move the bobbins position closer to the swingarm…①
- Shave off the part of the V-fixture 2 where it hits the swingarm
- Change the bobbins to a shorter one…②
-How to release the muffler cover-
- Shave off the part of the muffler cover where it hits the swingarm
- Move the muffler mounting position to the outside
- Change to a shorter muffler
In the end, we used the above-mentioned method ① to deal with the problem.
Bobbin comparison
For ② of STEP 15, the dimensions of the various bobbins were examined.
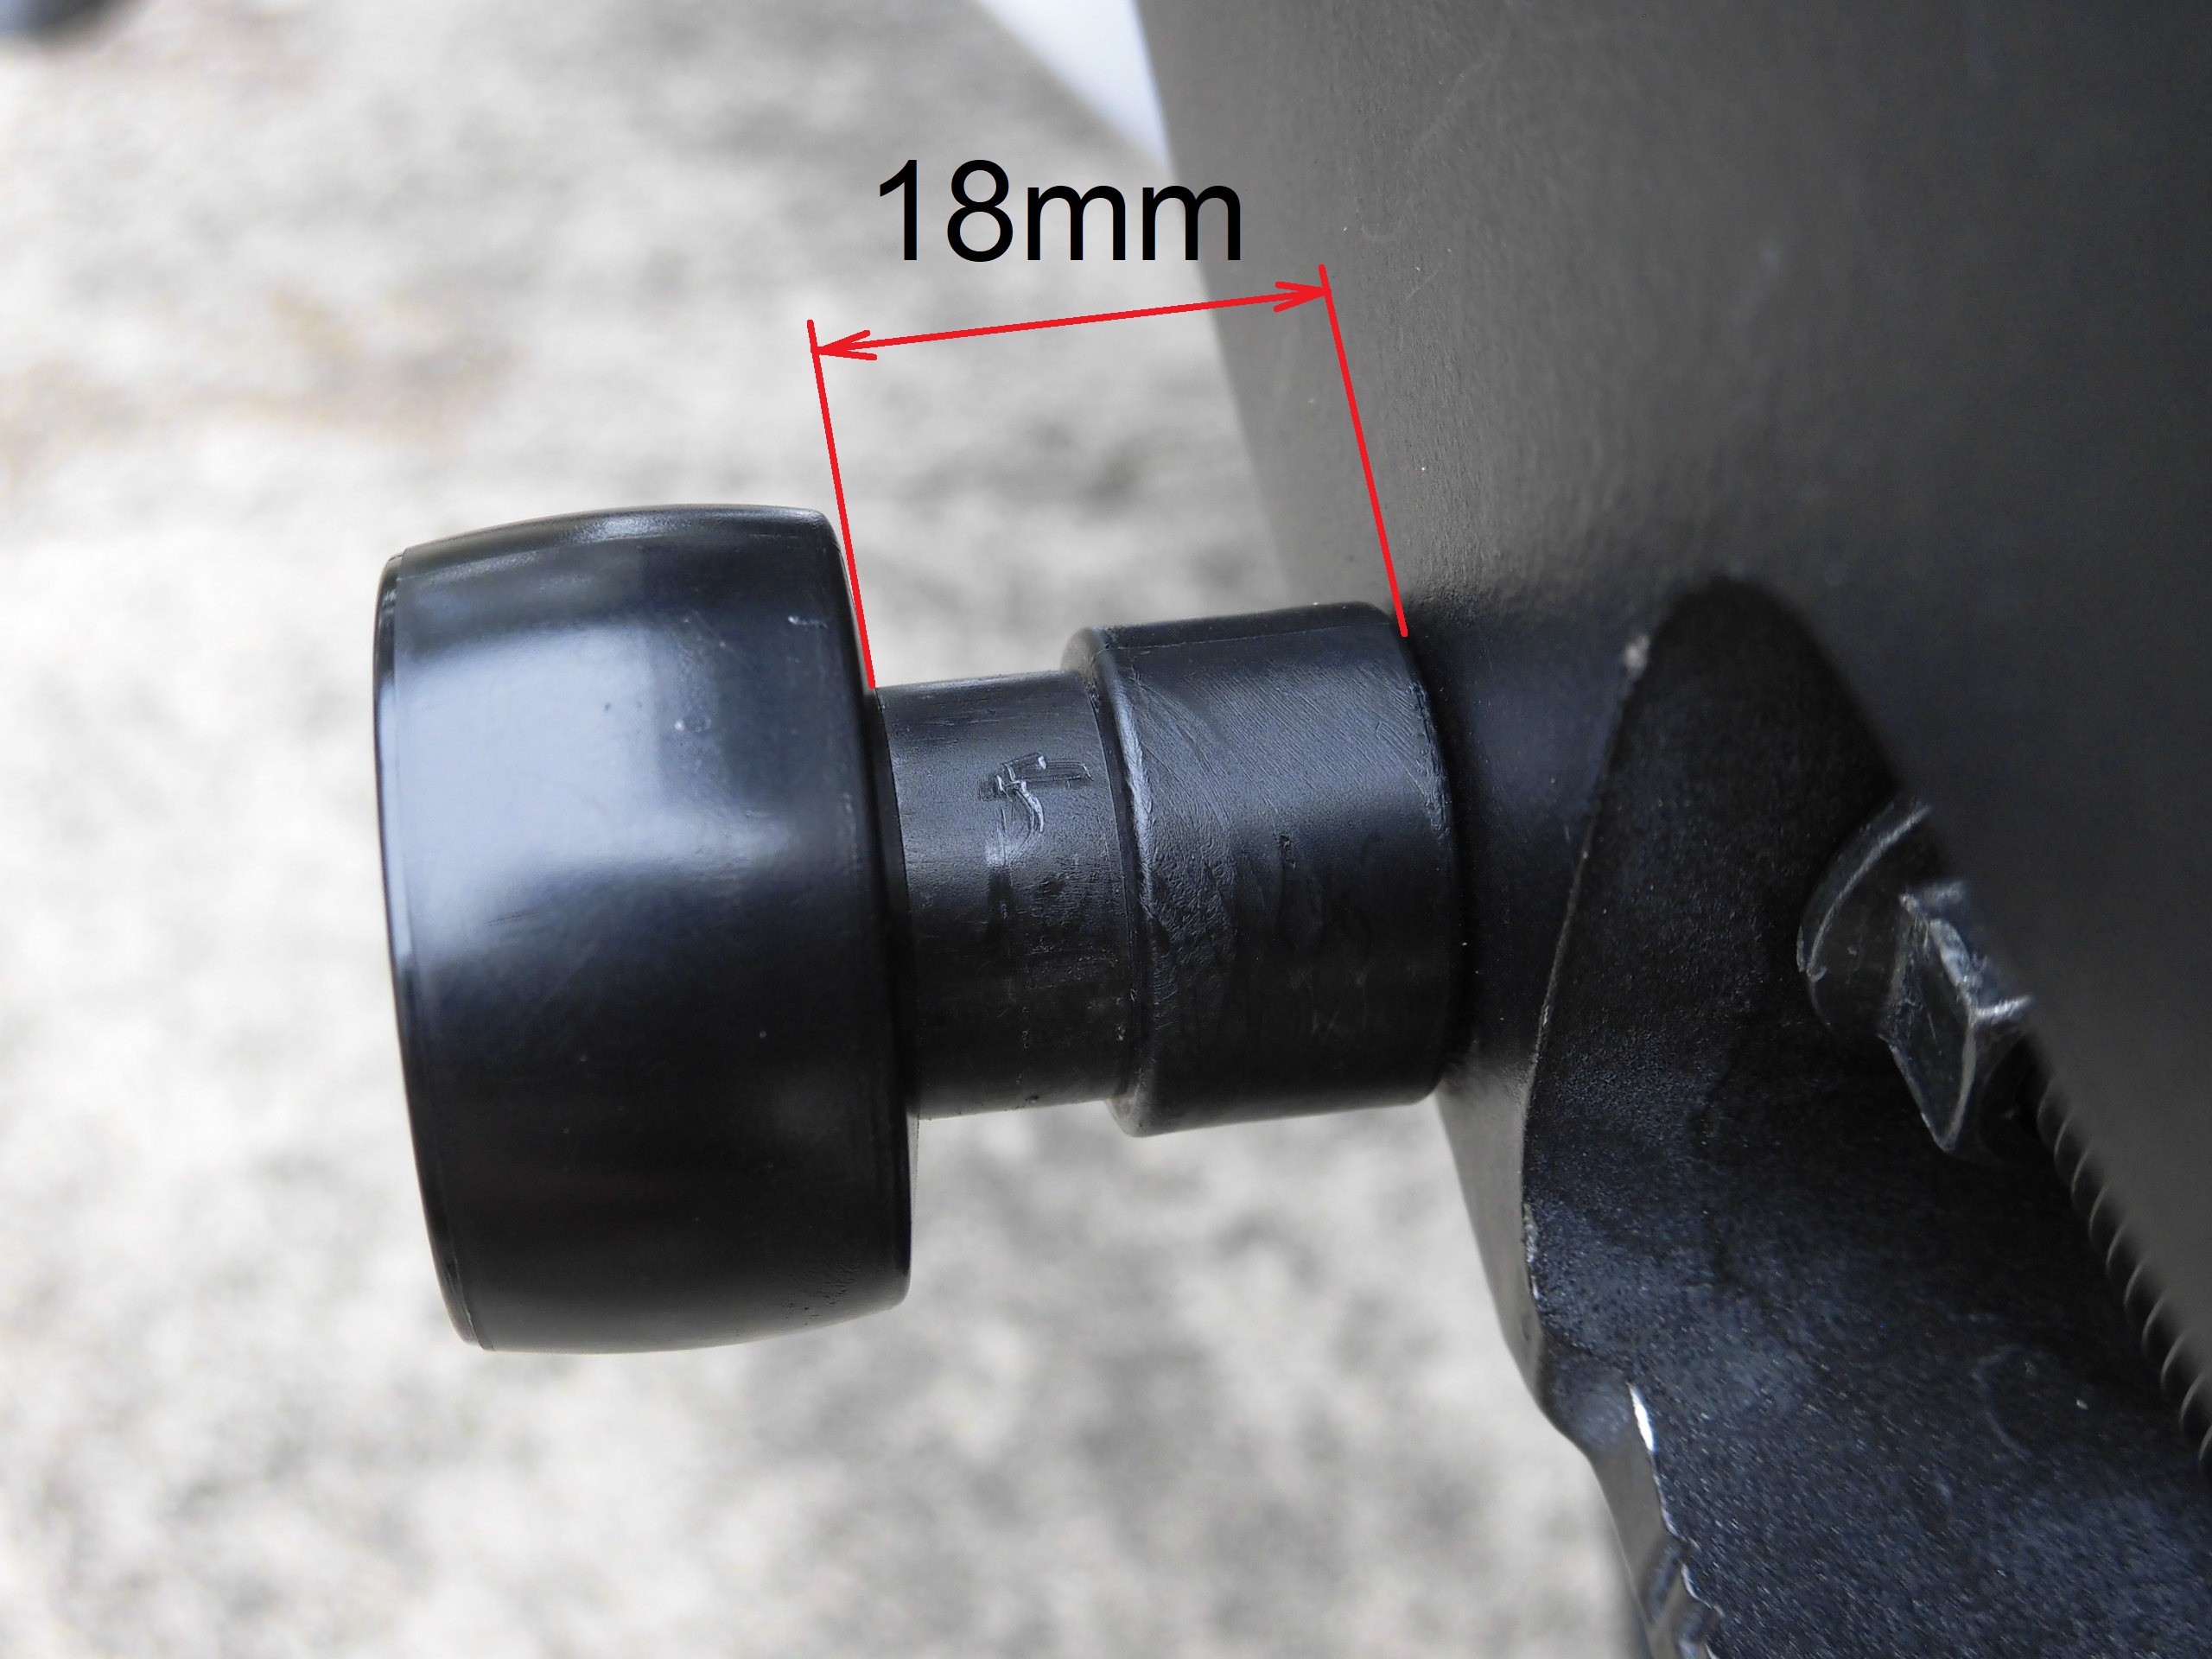
<Positioning of bobbin>
If the length from the base of the bobbin to where the stand is hooked is short, it will be harder to hit.
- J-Trip bobbin: 18 mm (see photo)
- Aluminum bobbin from online auction: 15 mm
- Aluminum bobbin from net store: 20mm
So, if you have a genuine muffler, using the aluminum bobbin from online auction seems to be the way to go.
Condition lifted by rear stand 3
I was a little disturbed, but I got myself together and made sure the condition lifted by rear stand.
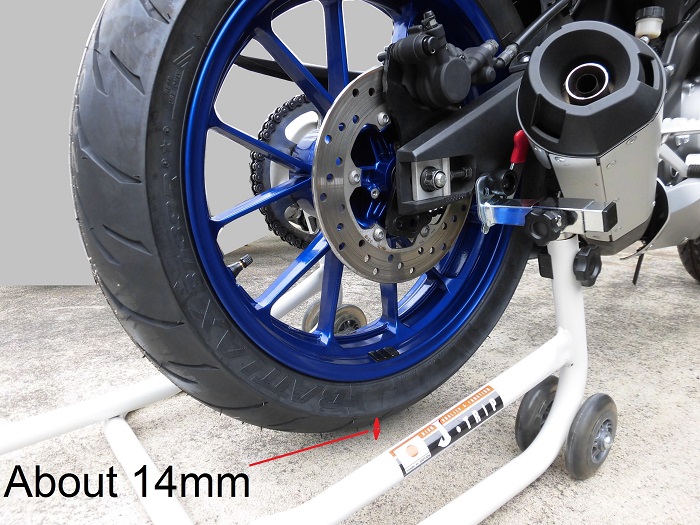
<Condition lifted by rear stand 3>
If you lifted up in STEP 7, the tire will lift off the ground by about 14 mm.
This is a difference of a few millimeters from the L-fixture.
Comparison before and after change fixture 1
And I couldn’t help but be curious about the leaning of the vehicle.
How did it turn out?
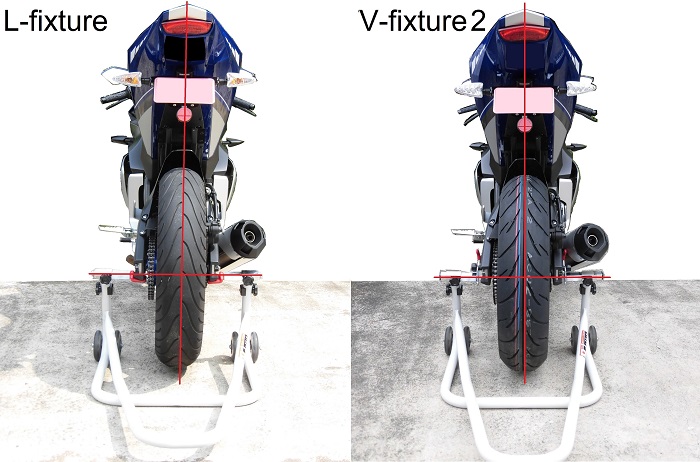
<Comparison before and after 1>
Left: Before (L-fixture)
Right: After (V-fixture 2)
The tilt has been eliminated.
Comparison before and after change fixture 2
I will also tell you about the differences when the rear stand is set up.
<Comparison before and after 2>
Left: Before (L-fixture)
Right: After (V-fixture 2)
On the L-fixture, the knob bolt for adjusting the height could come loose when it touches the ground.
On the other hand, with the V-fixture, the knob bolt does not hit the ground because the rubber part at the end touches the ground.
However, when taking the rear stand out of storage, it is irritating to catch something on the hook part.
This is a problem with my handling, though…
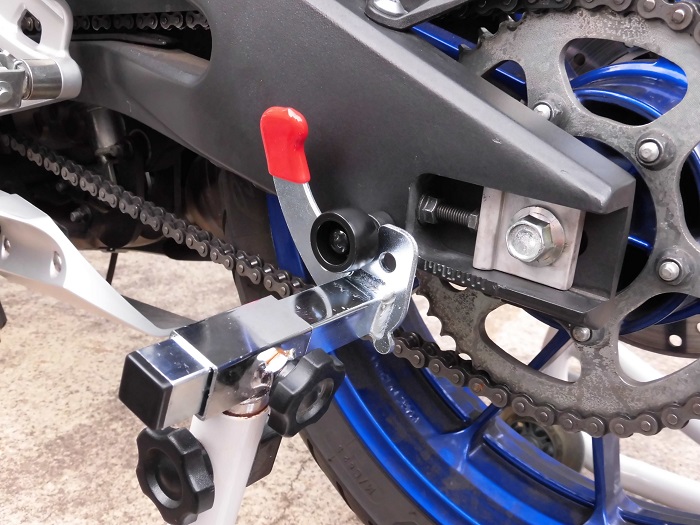
Chain adjustment part
Furthermore, the pending maintainability is…
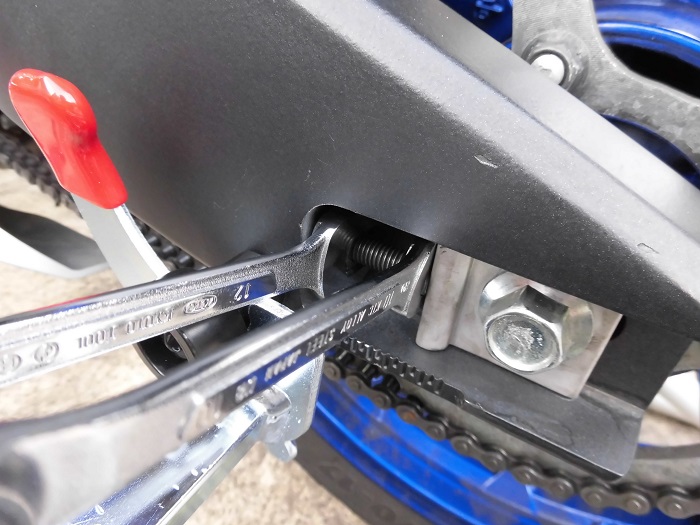
<Chain adjustment part>
It is now easier to install and remove the axle shaft, as well as adjust the chain.
The locknut on the left side of the photo is a little hard to turn, but I can retighten it after removing the rear stand.
3. Summary
After some twists and turns, I was able to use the V-fixture 2.
It eliminates the leaning of the moto when lifting up and makes maintenance very easy.
Now I have no more excuses for myself not to maintain the rear axle area…
- Lifting with the V-fixture 2 gives the moto a great sense of stability.
- Switching to the V-fixture 2 eliminates the leaning of the moto caused by the L-fixture.
- When using the J-trip Durakon bobbins on the YZF-R125 (5D7W), the V-fixture 2 and the muffler cover hit each other.


