1. Check drive sprocket wear
In the maintenance record ‘Inspection of delivered moto’ I checked the driven sprocket, but I have not yet checked the drive sprocket.
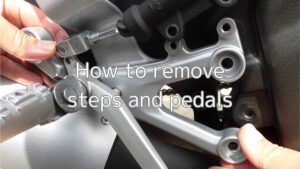
So, this time, at the same time as the maintenance record ‘How to remove steps and pedals’, I removed the sprocket cover to check it.
The mileage at the time of purchase was around 5,000 km, and the chain and driven sprocket have not been replaced, so the drive sprocket has probably not been replaced either.
From this article you can find out the following.
- How to check the drive sprocket
- How to fix the wiring around the left crankcase
| Date | 29th May 2021 |
| Subjects | Maintenance, Failure, Repair |
| Shop or DIY | DIY |
| Difficulty | |
| Working hours | 3 |
| Costs [Yen] | 0 (Use what I have) |
Goods to use:
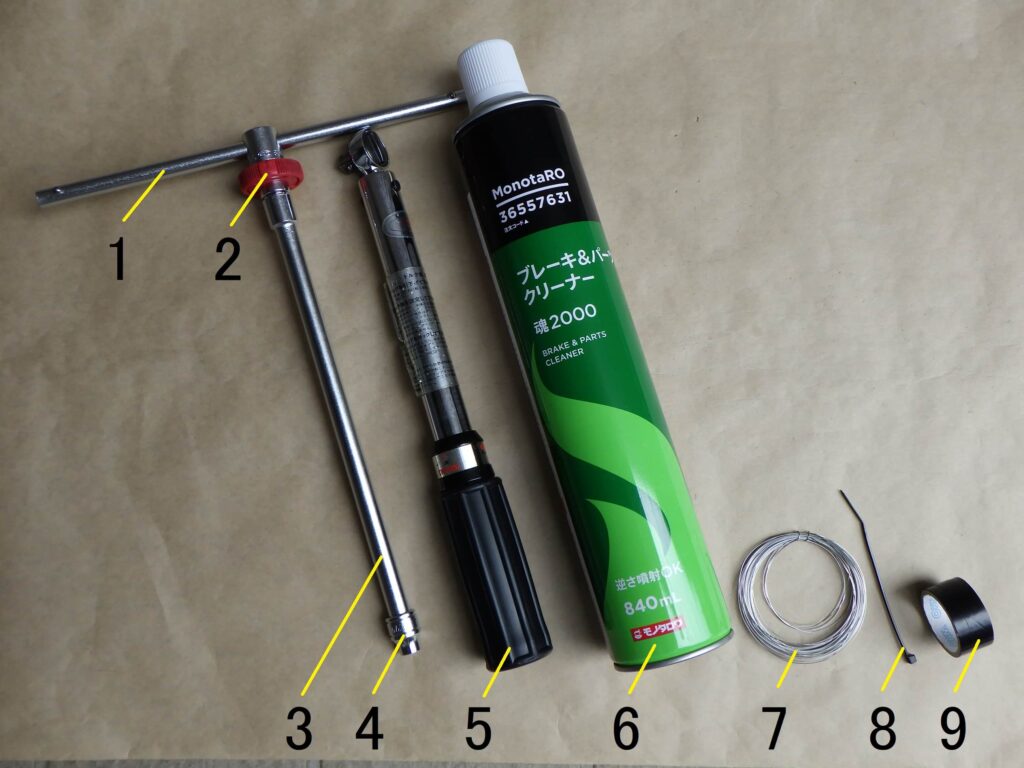
| No. | Name | Manufacturer | Part number | Quantity | Amounts [Yen] |
| 1 | Slide head handle | KTC | BHM3 | 1 | 2,970 |
| 2 | Quick spinner | KTC | BE3-Q | 1 | 2,046 |
| 3 | Extension bar | KTC | BE20-250 | 1 | (2,783) |
| 4 | Socket wrench (8mm) | KTC | B3-08 | 1 | 1,529 |
| 5 | Torque wrench (Small) | KTC | CMP0252 | 1 | (44,990) |
| 6 | Parts cleaner | – | – | 1 | (500) |
| 7 | Wire (0.35mm) | – | – | 1 | (200) |
| 8 | Cable ties (2.5mm) | – | – | 1 | (200) |
| 9 | Insulating tape (19mm) | – | – | 1 | (200) |
| 55,418 |
2. Check and Clean drive sprocket (STEP 1-13)
Remove sprocket cover 1
The work is done from STEP 7 in the maintenance record ‘How to remove the steps and pedals’.
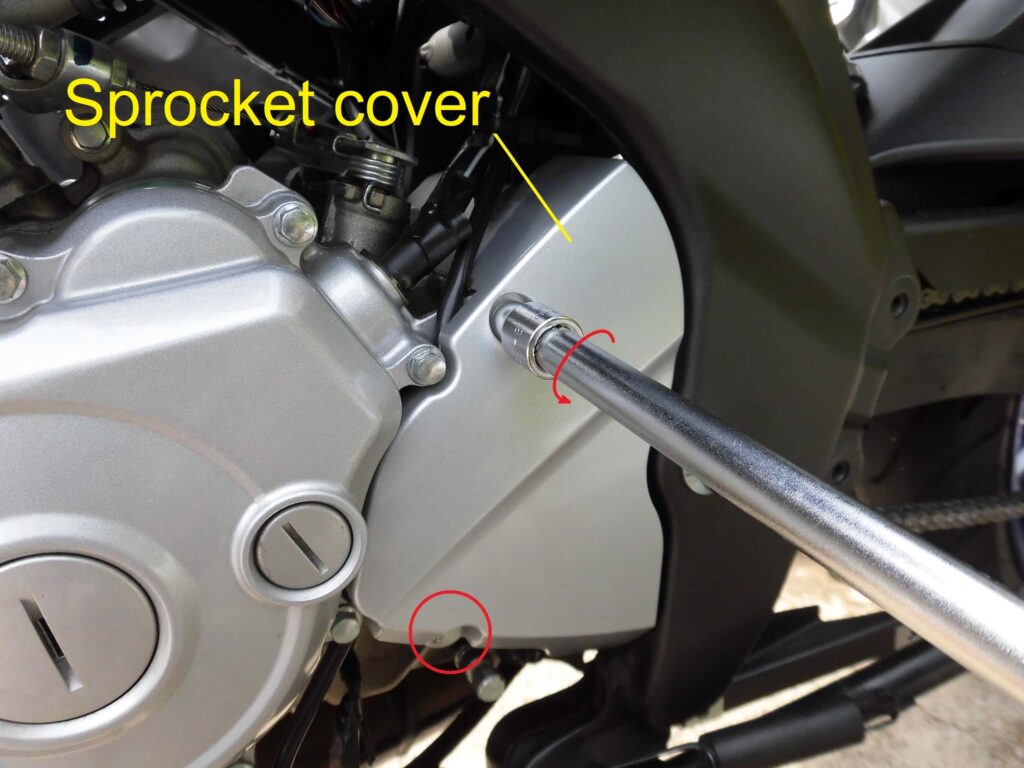
<Remove sprocket cover 1>
Loosen the two bolts securing the sprocket cover with a T-bar spanner fitted with a socket (8 mm).
Remove sprocket cover 2
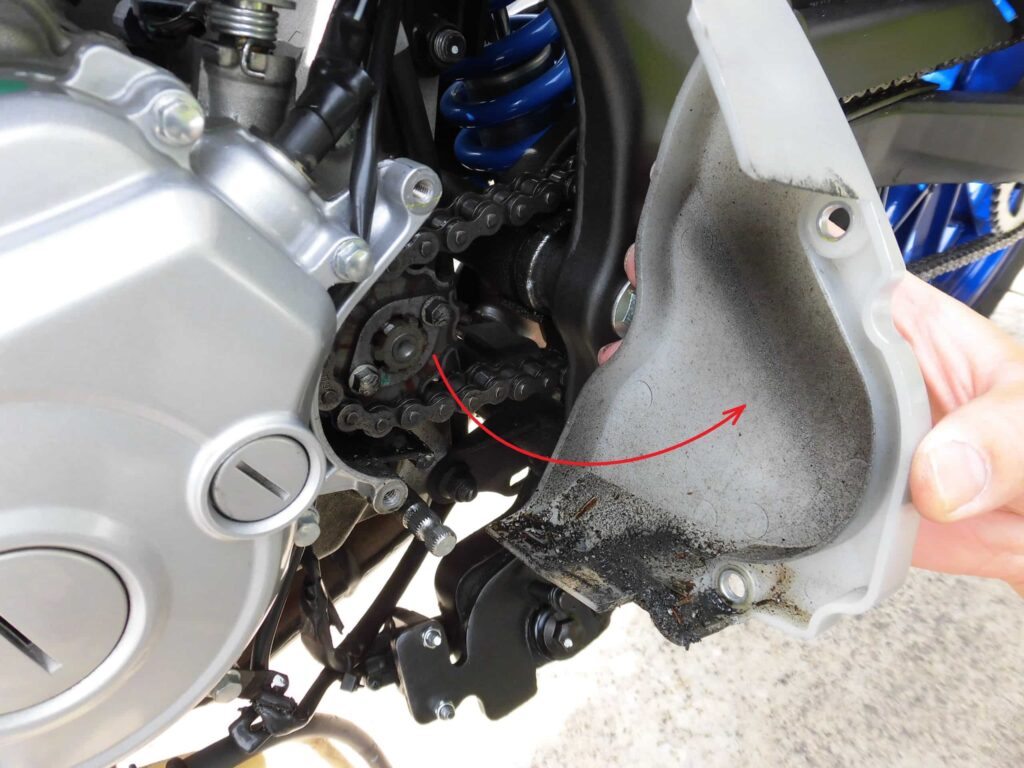
<Remove sprocket cover 2>
When the cover was removed by hand, the inside was still quite dirty.
The cover will be cleaned later.
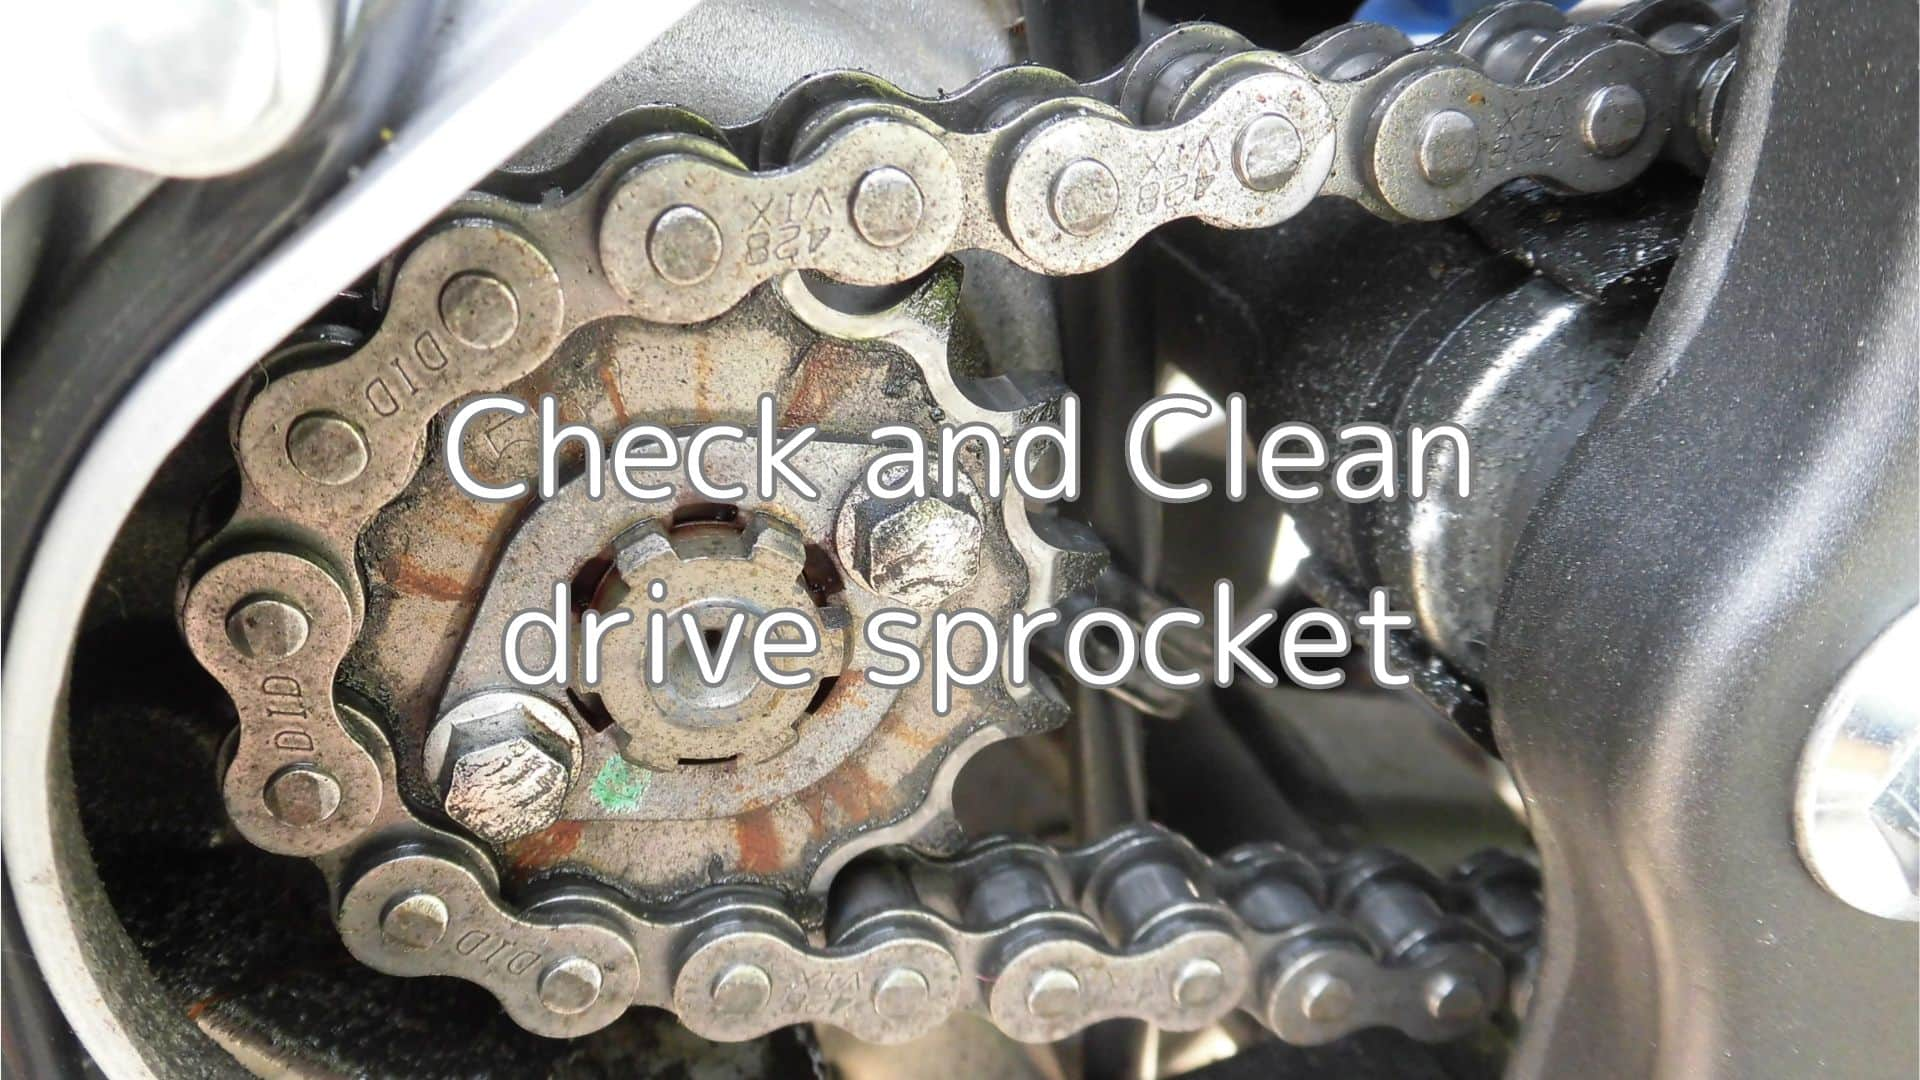
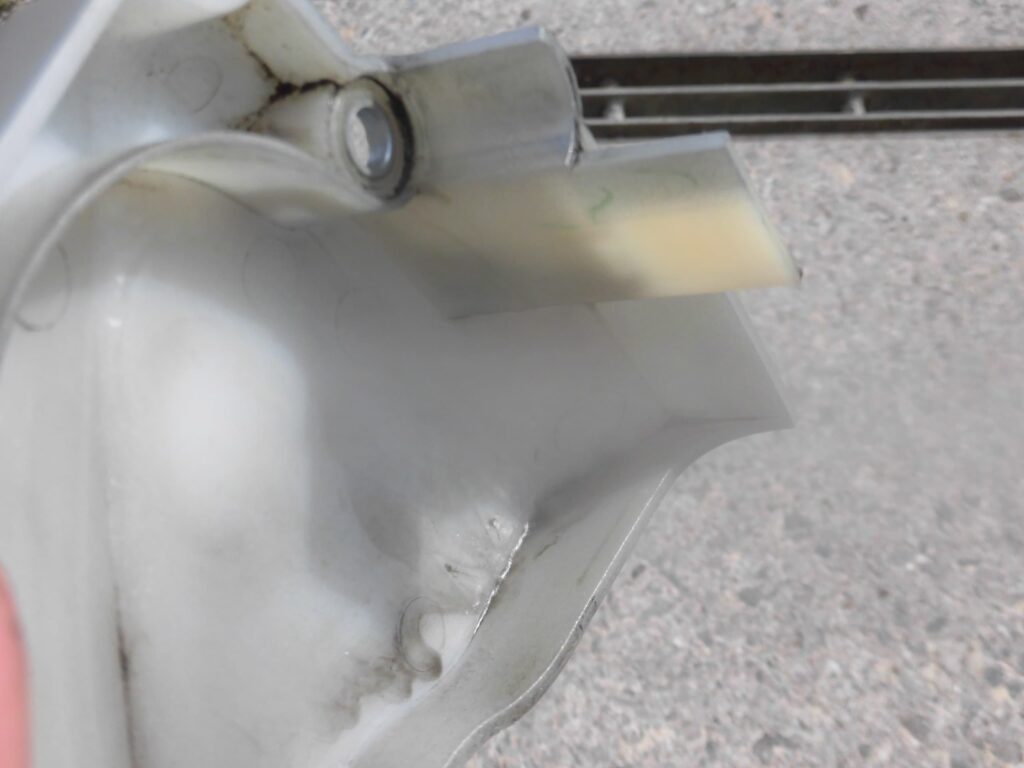
Condition of drive sprocket
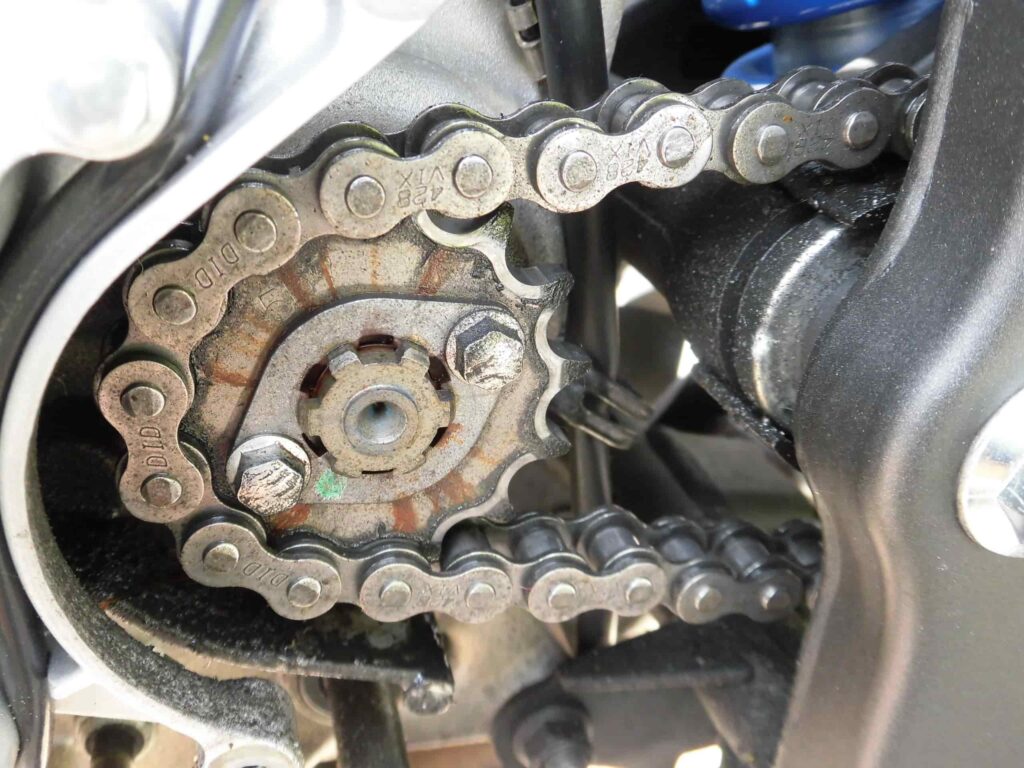
<Condition of drive sprocket>
The drive sprocket has not been replaced, as I can see the 5D7 imprint.
The tooth wear has not reached the limit of 1/4 at all and it appears that it can still be used.
However, I am concerned about the red rust (?) radiating out from the drive axle.
I don’t want to touch it, because when I remove this part, I want to clean it including the chain…
After cleaning drive sprocket
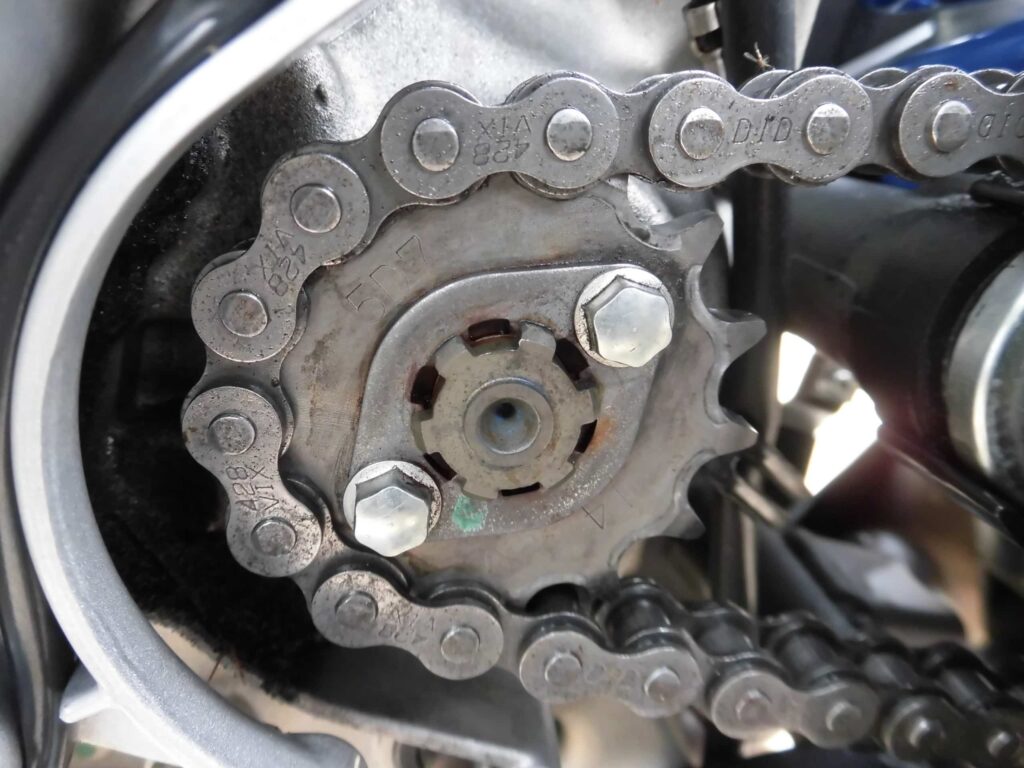
<After cleaning drive sprocket>
So、 I wiped the red rust flowing out of the drive axle with a rag and pretended I didn’t see it.
Now that it has been cleaned up to some extent, the ’14’ imprint indicating the number of teeth is now visible.
Clean around shift shaft

<Clean around shift shaft>
The area around the shift shaft was also dirty with chain grease and should be cleaned with parts cleaner.
Clean shift shaft
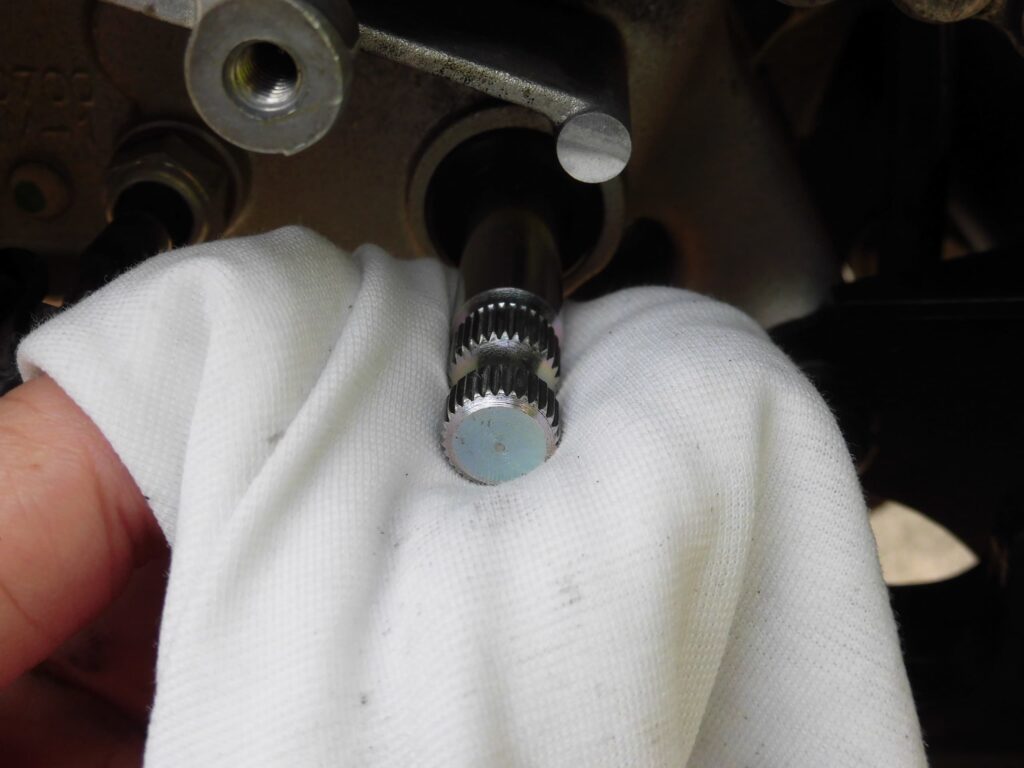
<Clean shift shaft>
Wipe dirt from the shift shaft area with a rag.
Carefully remove any dirt trapped between the serrations.
Clean sprocket cover 1
<Clean sprocket cover 1>
Clean with parts cleaner to remove chain grease.
Clean sprocket cover 2
<Clean sprocket cover 2>
After some dirt has been removed, wash in water with car shampoo.
(Washed with bracket others).
Comparison of cleaning sprocket cover
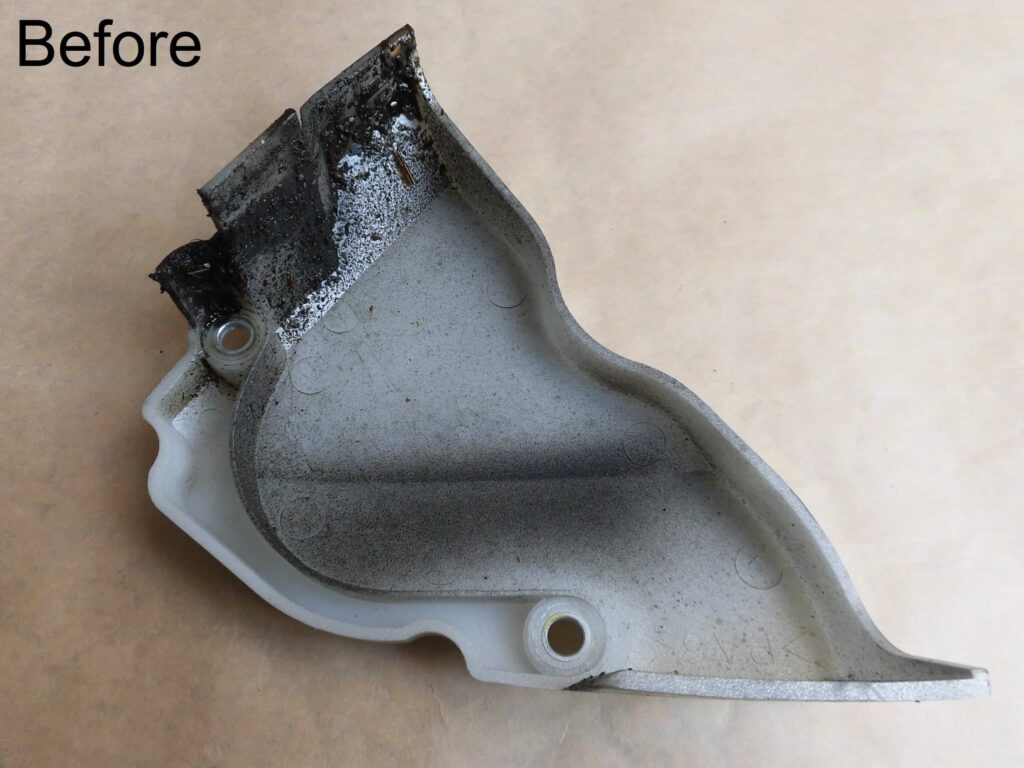
<Before>
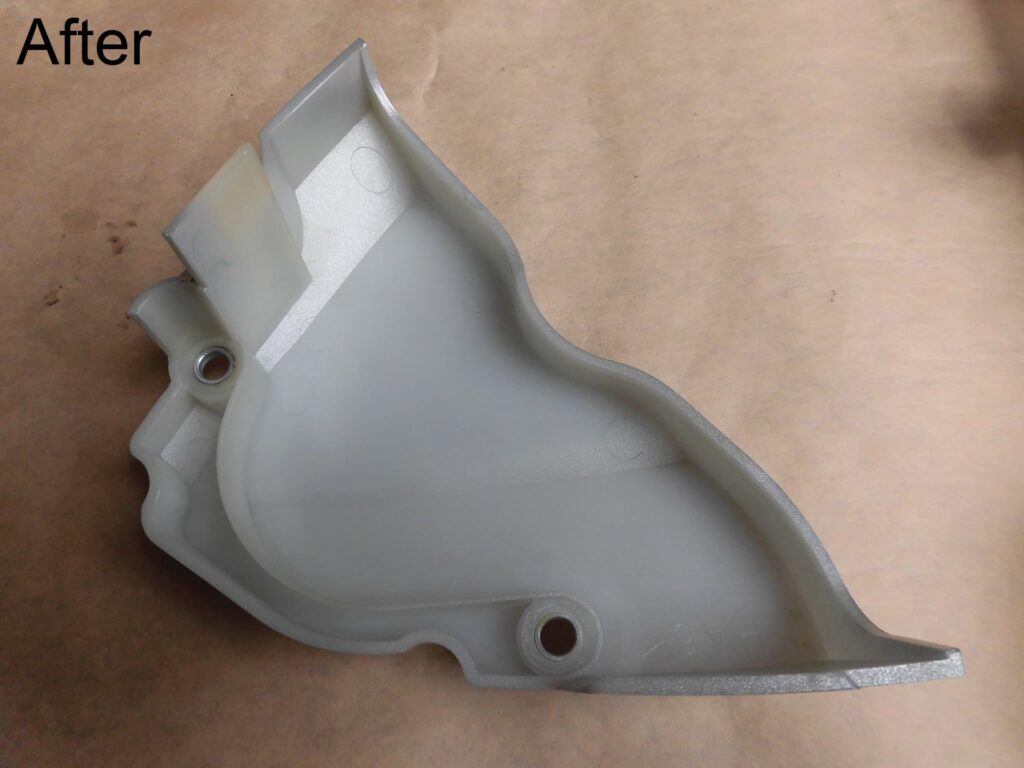
<After>
It looks different and clean.
But it will probably get dirty as soon as it runs…
Check position of wiring
Now install the sprocket cover.
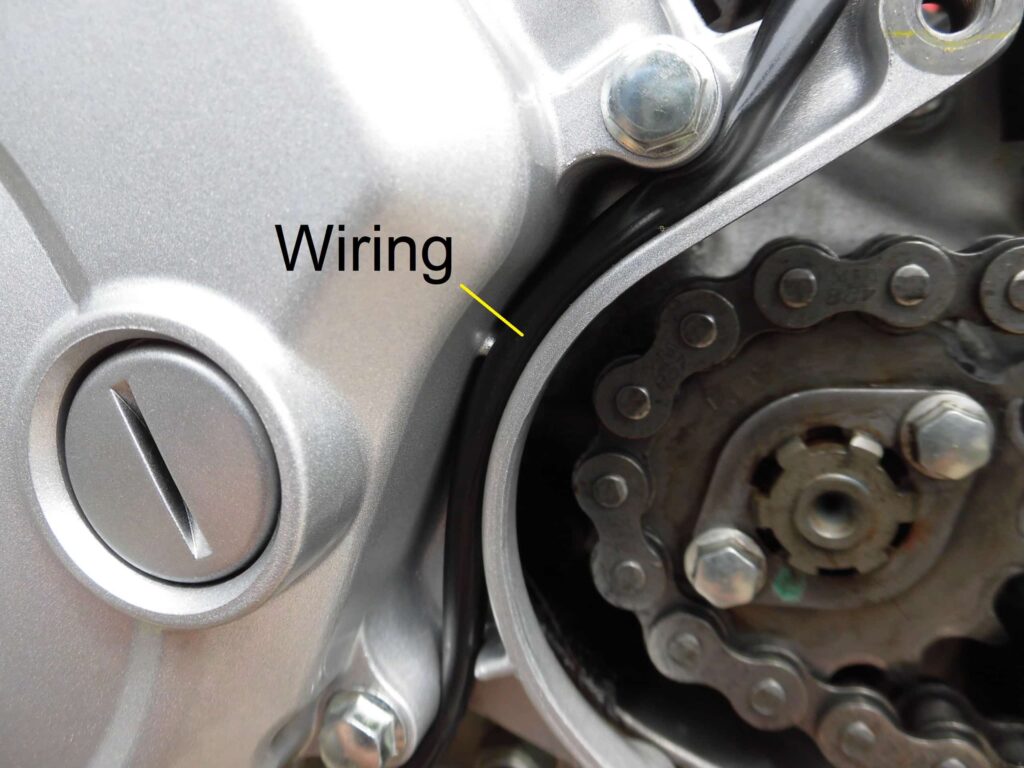
<Check position of wiring>
Ensure that the wiring for the side stand switch sits in the groove at the end of the sprocket cover.
If the wiring protrudes from this groove, it may be pinched when the cover is fitted.
Install sprocket cover

<Install sprocket cover>
Install the cover and, using a torque wrench with a socket (8 mm), tighten the two bolts securing the cover to 10 Nm.
Clean and modify wiring near shift shaft
As this was a good opportunity, the area securing the wiring near the shift shaft was cleaned and modified.
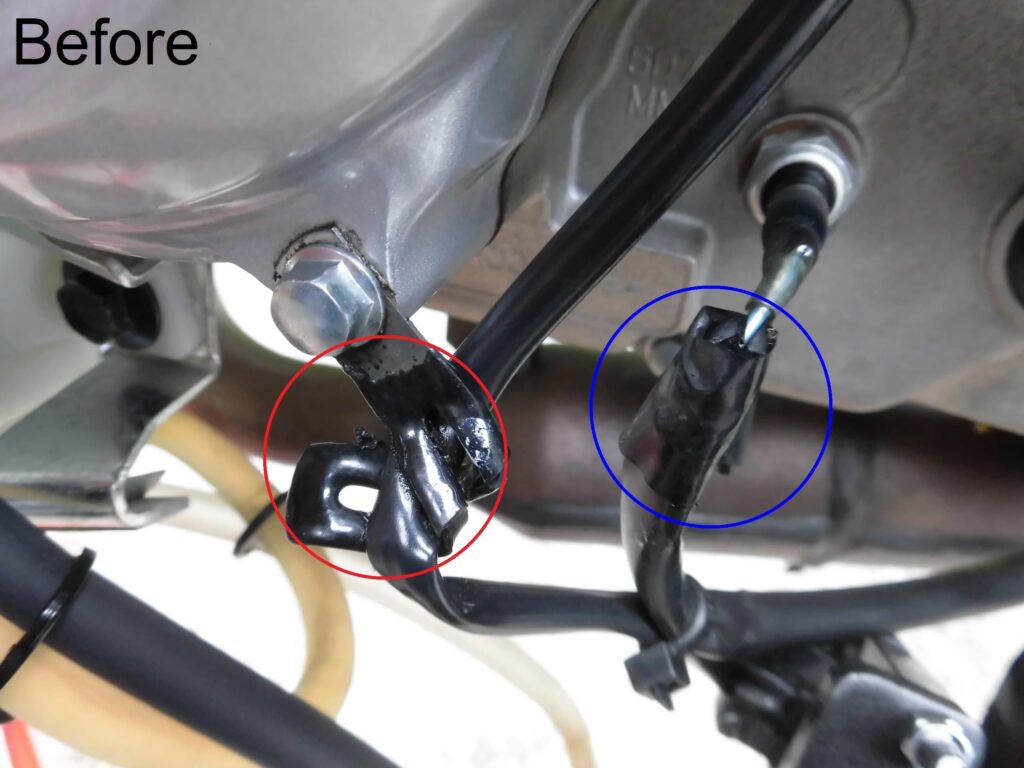
<Before>
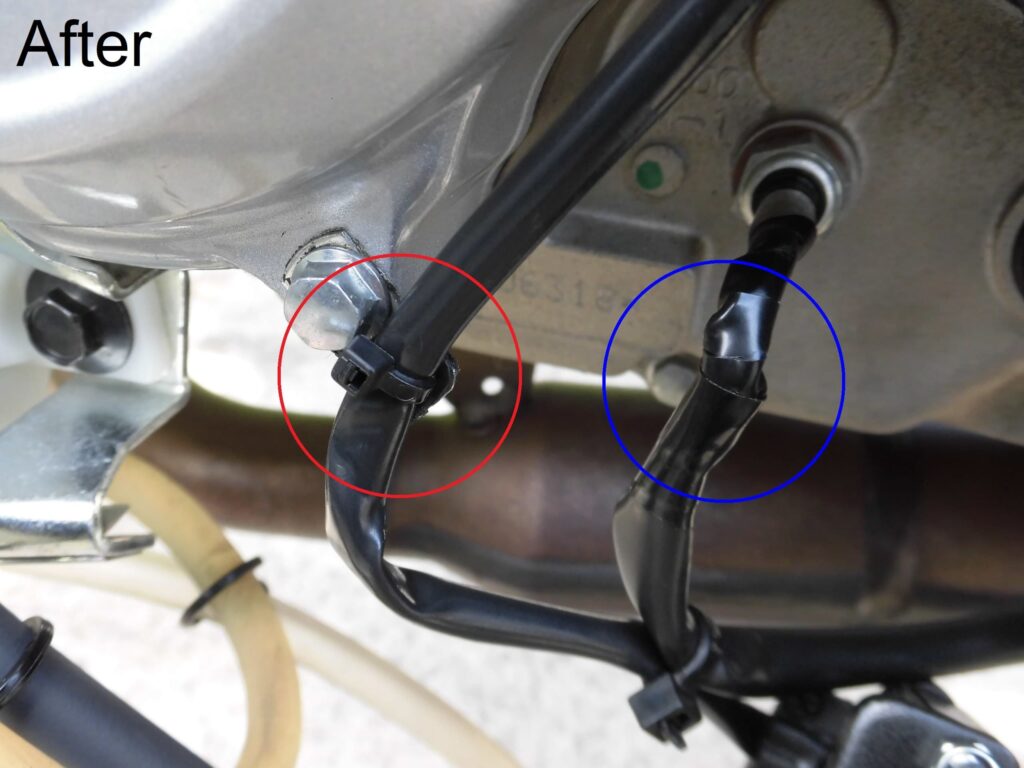
<After>
○:The clips securing the side stand switch wires were deformed, so they were re-fixed with wire and cable ties.
○:The tape at the end of the neutral switch tube was nearly peeled off, so the insulation tape was rewrapped.
Perhaps the joy of working on your own is that I can spend time on these areas.
After installing sprocket cover
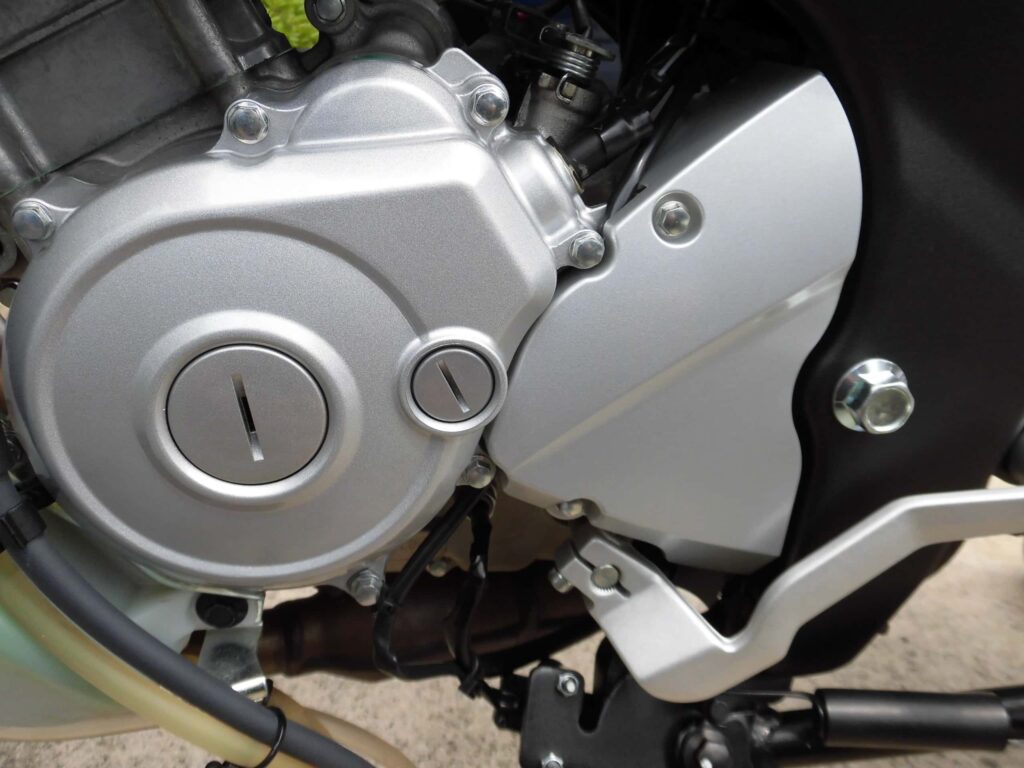
<After installing sprocket cover>
It was cleaned as well as checked, so it is clean.
It does not improve performance, but it is cleaner.
3. Summary
I found that the driveline sprocket was not worn out and could still be used.
The drive/driven sprocket will be replaced when the chain is changed for the second time, which will be in the foreseeable future.
- Wear limit of sprockets is less than 1/4 of the tooth thickness
- Ensure that the side stand switch wiring fits into the groove
- Change the method of securing the wiring to a cable tie


