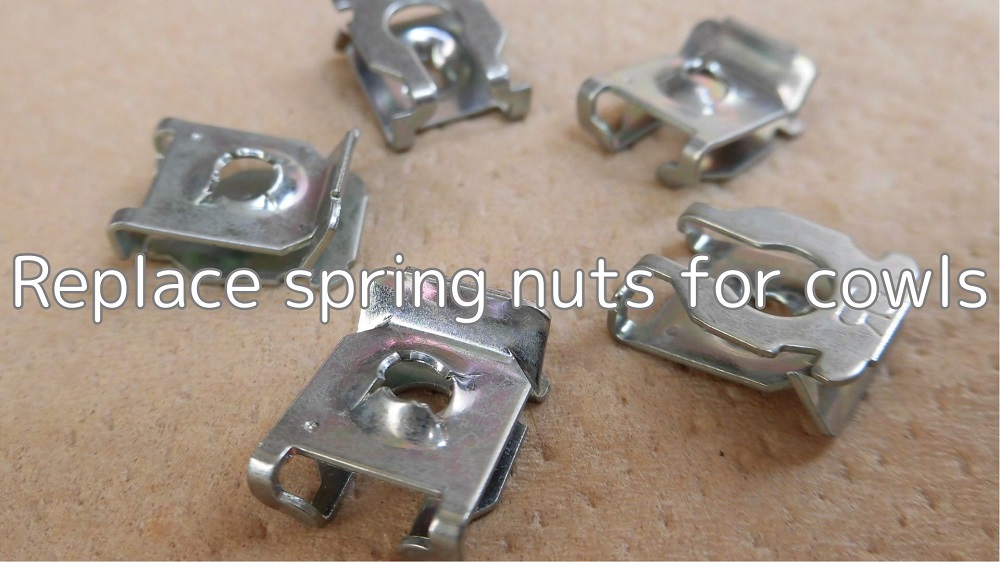
Tapping screws used to fix the cowl, panels, etc. on the R125.
This part is sometimes broken…
When tightening, if it starts spinning and cannot be tightened firmly, it is an indication that the spring nut / 90183-05X03 on the female thread side is broken.
Once this happens, the spring nut must be replaced to fix the problem.
So, in this article, I will consider the causes of a broken spring nut and further summarizes the replacement of a broken spring nut and cowl repair.
From this article you will know as follow.
- How spring nuts are constructed and tightened
- How to replace spring nuts
- How to repair cowls
| Date | 9th April 2022 |
| Subjects | Maintenance, Failure, Repair |
| Shop or DIY | DIY |
| Difficulty | |
| Working hours | 3 |
| Costs [Yen] | 3,245 |
1. Goods to use
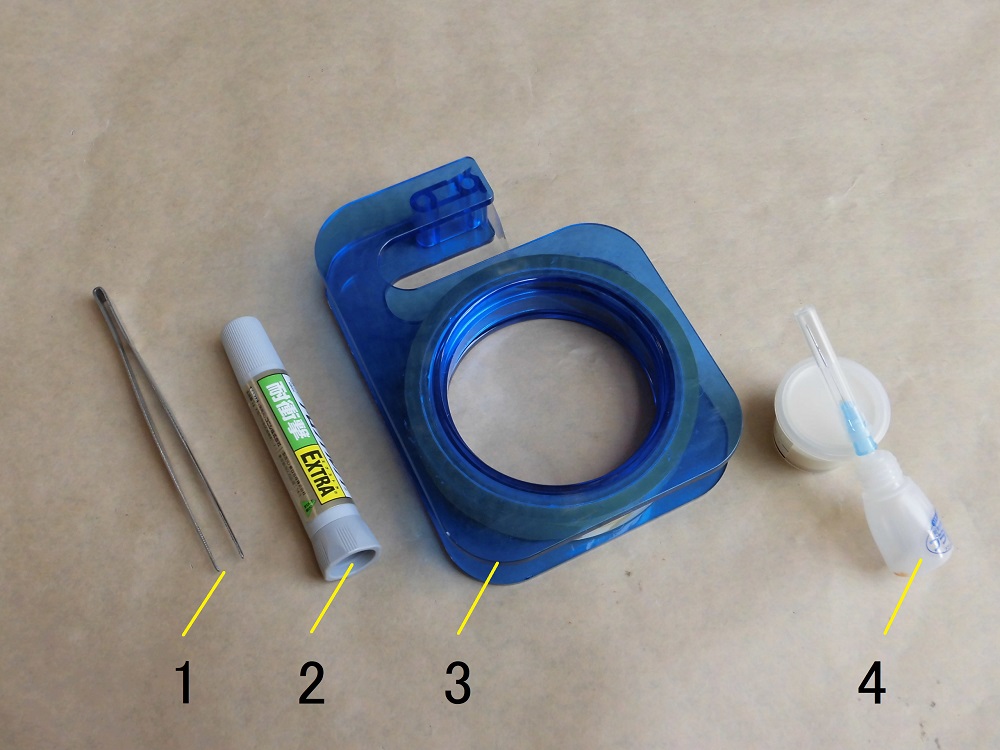
| No. | Products name | Manufacturer | Products number | Quantity | Amounts[Yen] | Purchased this time |
| 1 | Tweezers | – | – | 1 | (142) | |
| 2 | Aron Alpha EXTRA shockproof | Konishi | – | 1 | 659 | |
| ST9 | NUT, SPRING | Genuine parts | 90183-05X03 | 5 | 3,245 | ○ |
| 3 | Scotch tape | – | – | 1 | (110) | |
| 4 | Plastic repair (Clear) | Muto trading | PL-16 | 1 | 1,758 | |
| 5,914 | 3,245 |
2. Replace spring nuts for cowls (STEP 1-17)
Tightening of tapping screws
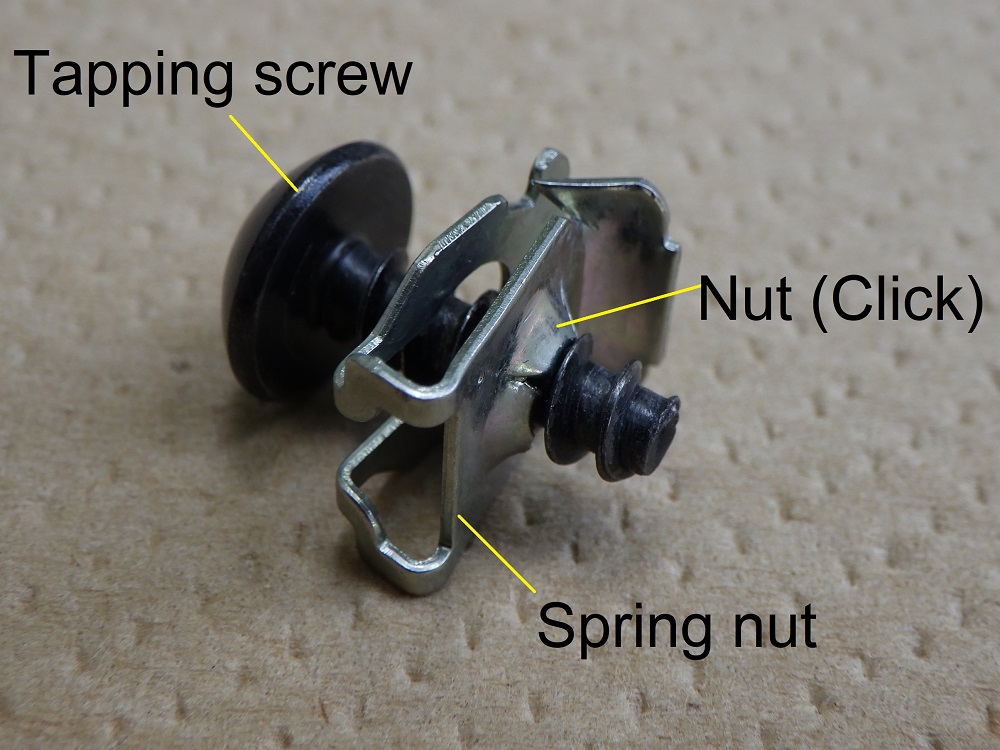
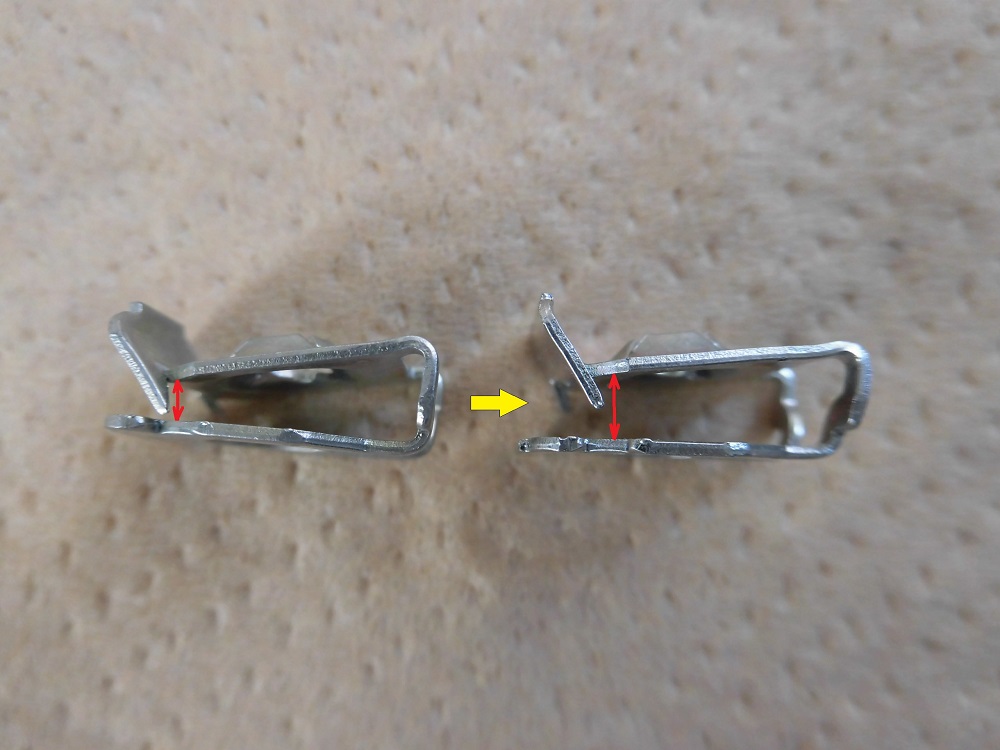
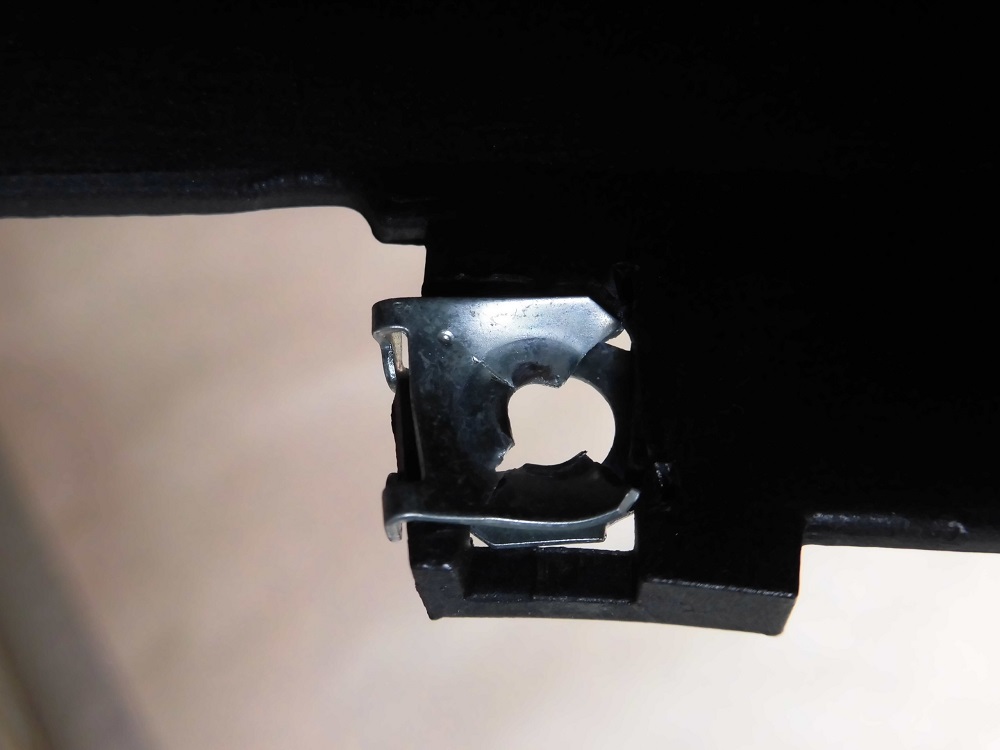
<Tapping screw and spring nut>
The spring nut is made of a thin metal plate and seems to act as a spring when the nut (click) part bends.
Therefore, the tapping screw should be tightened only to the extent that the click part is just slightly flexed.
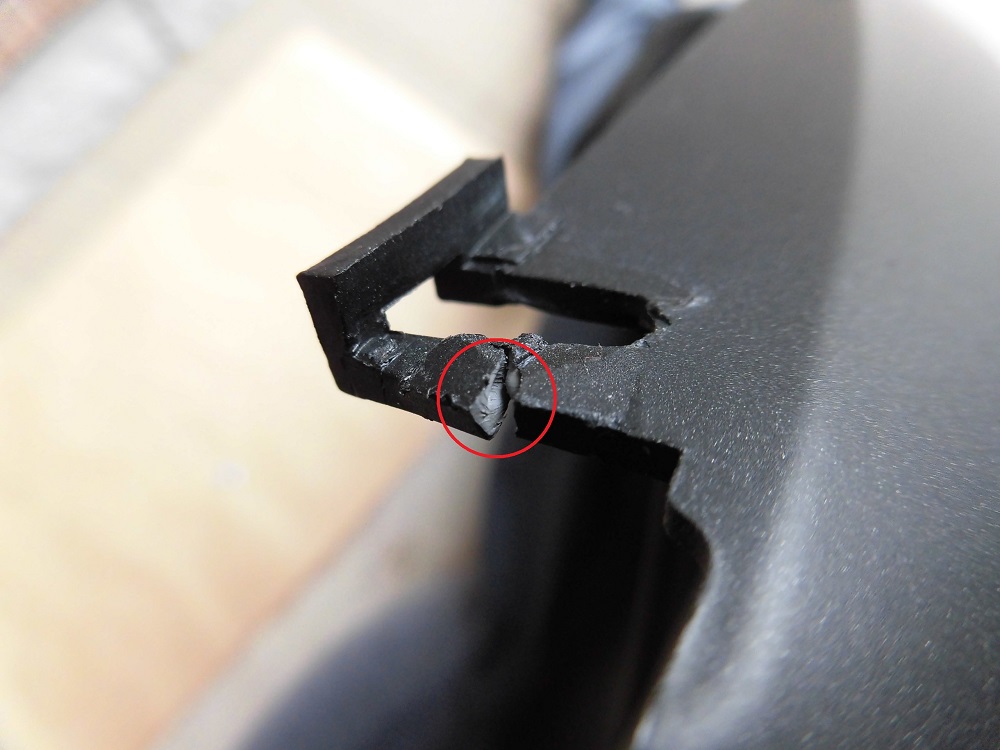
New and broken spring nuts
Previously, without being aware of it, the tapping screws were tightened with the feel of M6 bolts (approx. 7 Nm), which are also used to fix cowls, panels, etc.
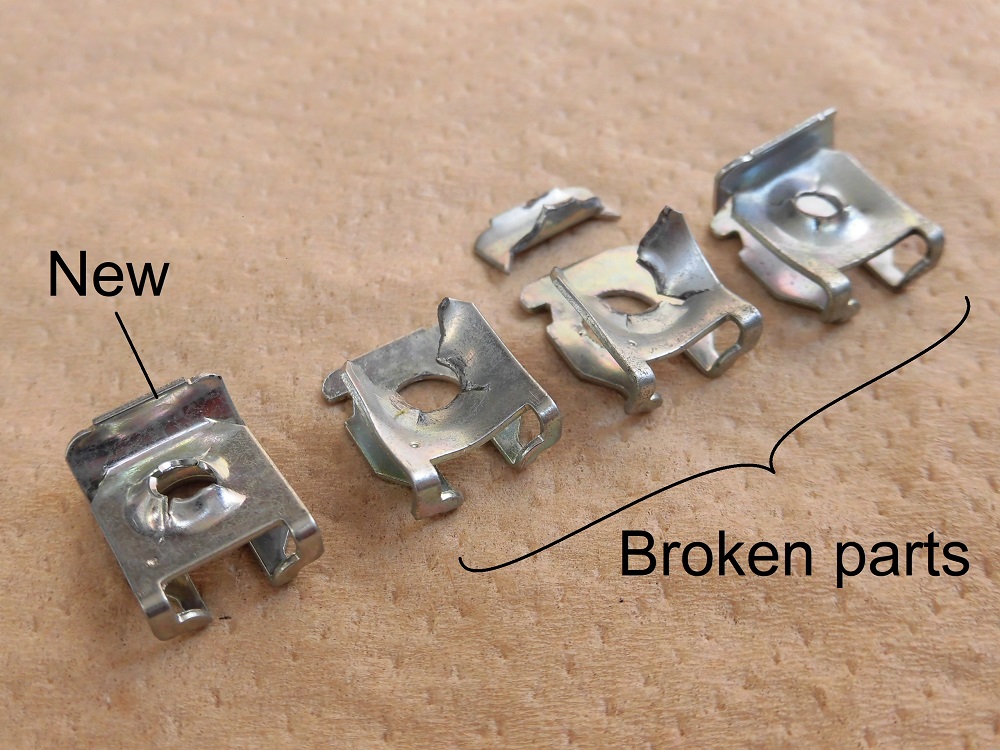
<New and broken spring nuts>
Perhaps 7 Nm is too tight, and the click is bent.
Furthermore, repeated removal and installation will finally break the click as shown in the picture.
- If the first-place breaks, the click detaches from the screw and spin out when a certain torque is reached.
- If the second-place breaks, it seems to become unusable.
Therefore, I recognized that tapping screws are OK if they are tightened moderately and should not be tightened too hard!
Spring nuts
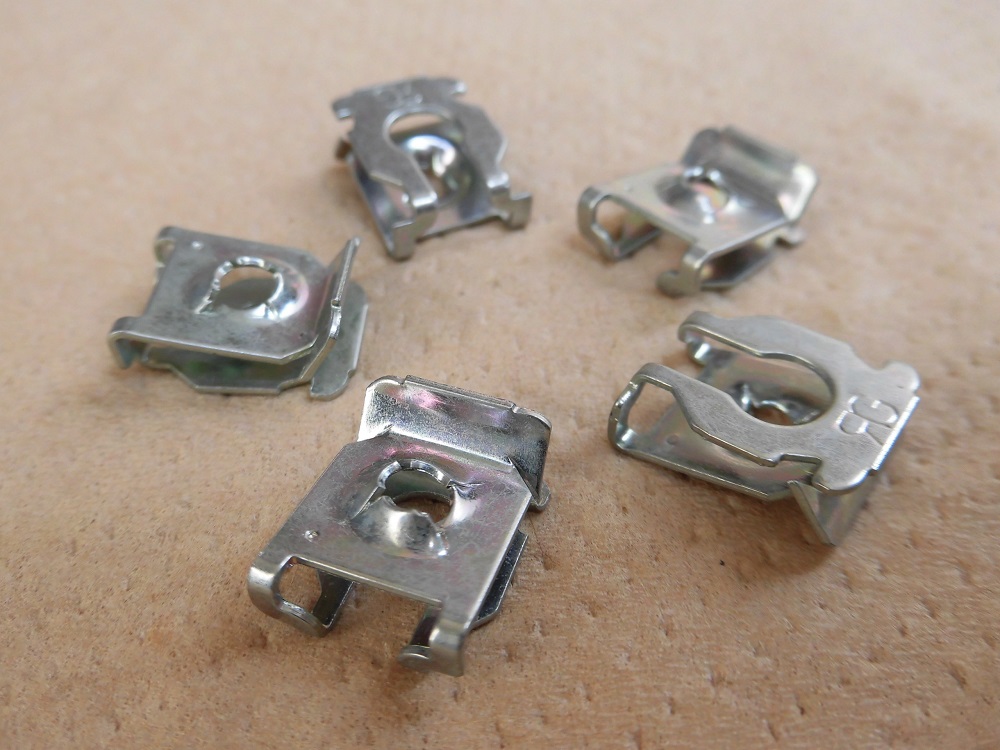
<Spring nuts>
Moreover, this spring nut is not the flat plate one used in other parts, but an elaborate, walled-out construction.
Why was a flat plate one not used?
- Due to cowl design constraints?
- The cowl panel side needed to have a wobble structure to avoid bending or breaking?
The price, as of February 2022, was 649 yen per unit, which is probably a detriment of setting up an exclusive product!
This time, due to budget constraints, I could only buy five.
I have to use them carefully.
Remove cowls
Before replacing the broken spring nuts, remove each cowl from the moto body.
1st location: Front cowl
2nd location: right upper side cowl
3rd location: Left lower side cowl
See below for instructions on removing each cowl.
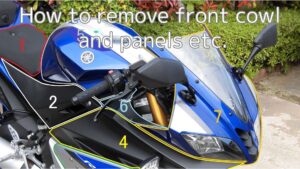
1st location: How to remove the front cowl and panels etc.
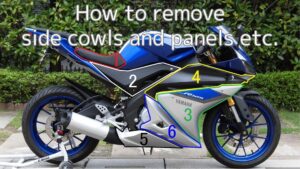
2nd, 3rd locations: How to remove side cowls and panels etc.
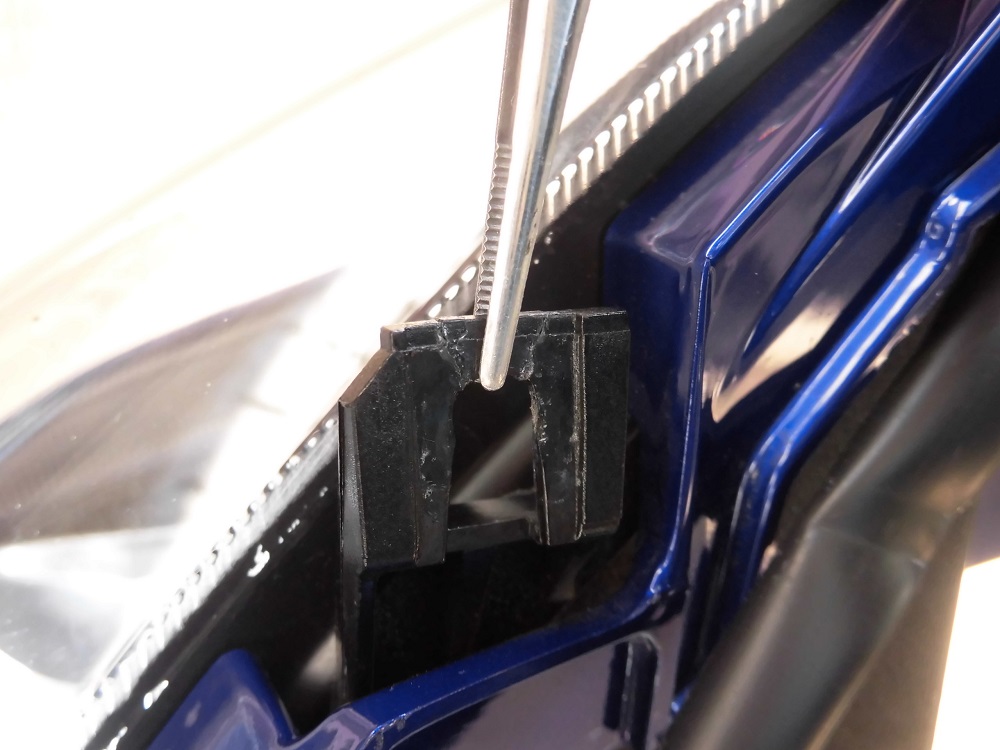
Tightening section at the bottom right of the front cowl
Now let’s start repairing the first location.

<Tightening section at the bottom right of the front cowl>
This is the tapping screw that holds the front cowl and upper side cowl together.
I broke it when I replaced the low side headlight with an LED.
I thought it was strange because the screw was tightened in a tilted position, but the spring nut was broken.
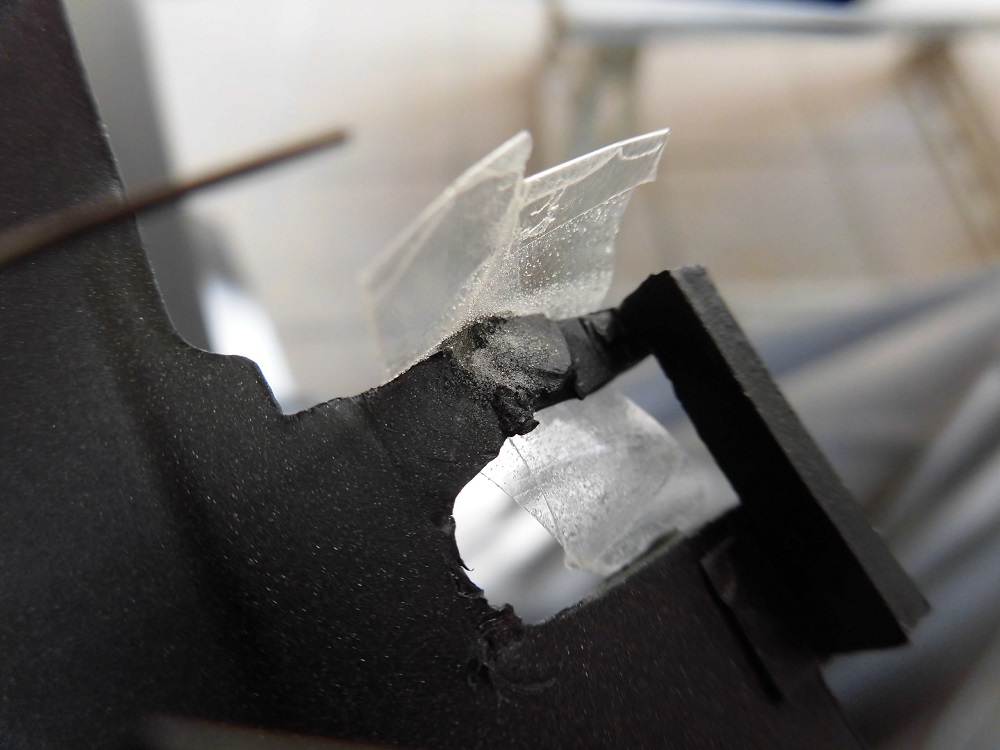
Repair front cowl 1
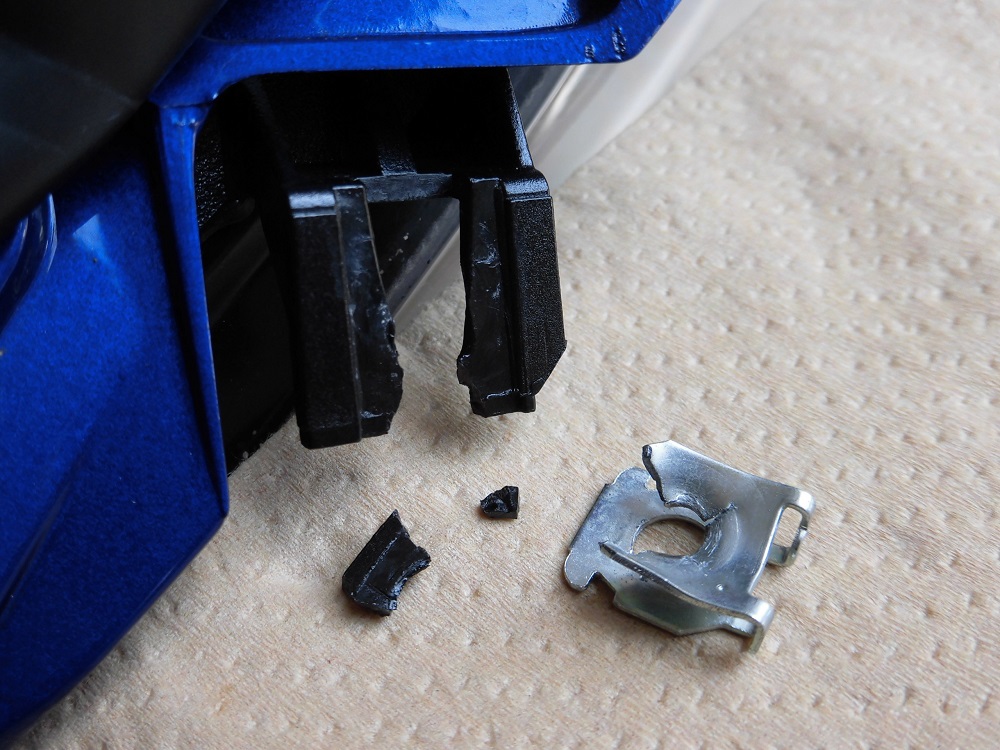
<Repair front cowl 1>
When the spring nut was removed, the front cowl plastic was also broken.
Luckily, I was able to recover the pieces.
Repair front cowl 2
<Repair front cowl 2>
I glued the pieces together with glue.
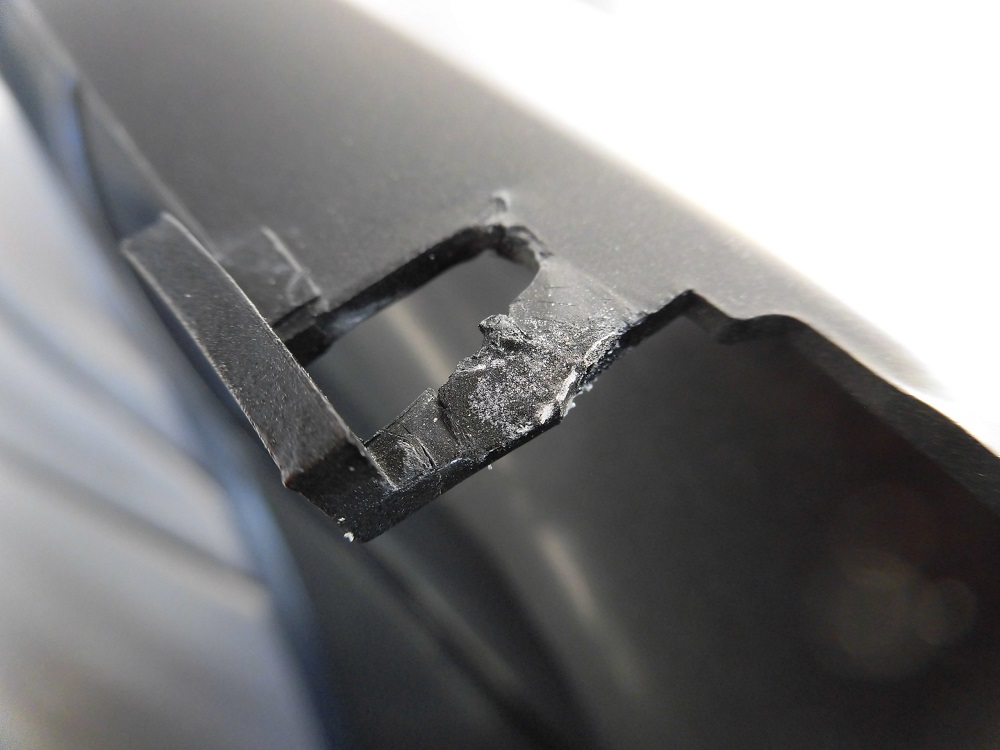
After front cowl repair

<After front cowl repair>
It stuck together like this.
The pieces can be restored to some shape if they are still there.
It doesn’t look great, but it’s not visible, so that’s good enough.
Preparation for installing spring nut
If the spring nut is installed as it is, the repaired part is likely to break immediately.
<Preparation for installing spring nut>
So, I widened the area where the plate is sandwiched a little.
With the cowl removed, the spring nut may snap into place, but this will not be a problem once the tapping screw is tightened.
After installing spring nut
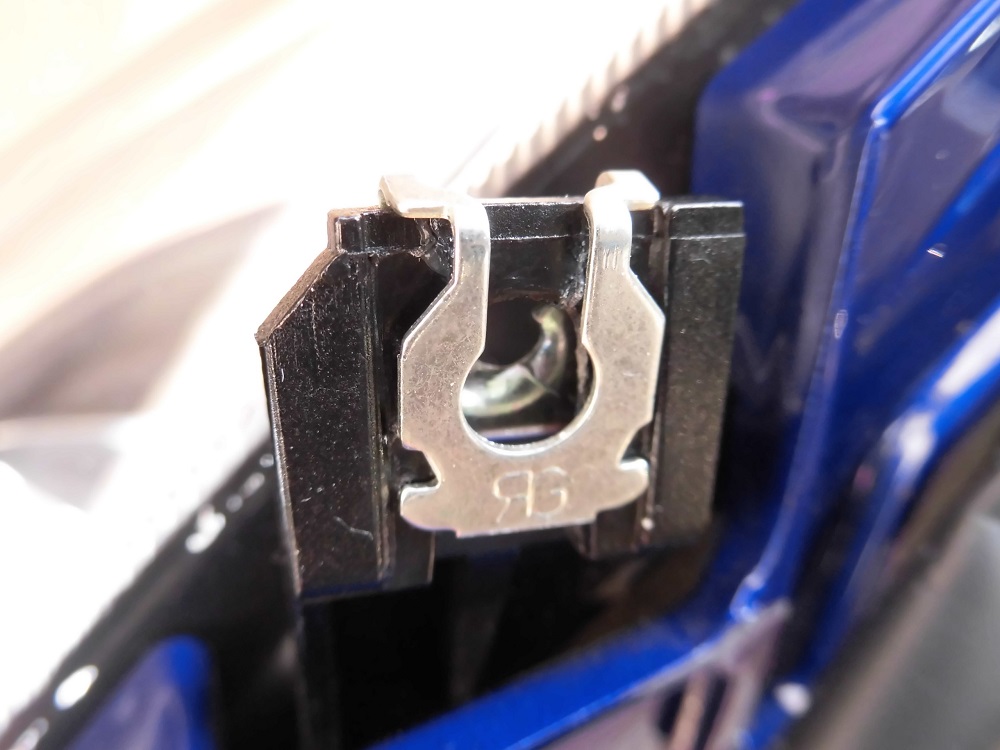
<After installing spring nut>
Repaired like this.
The tapping screw can now be tightened.
Tightening section at the top of the right upper side cowl
The second location is then repaired.
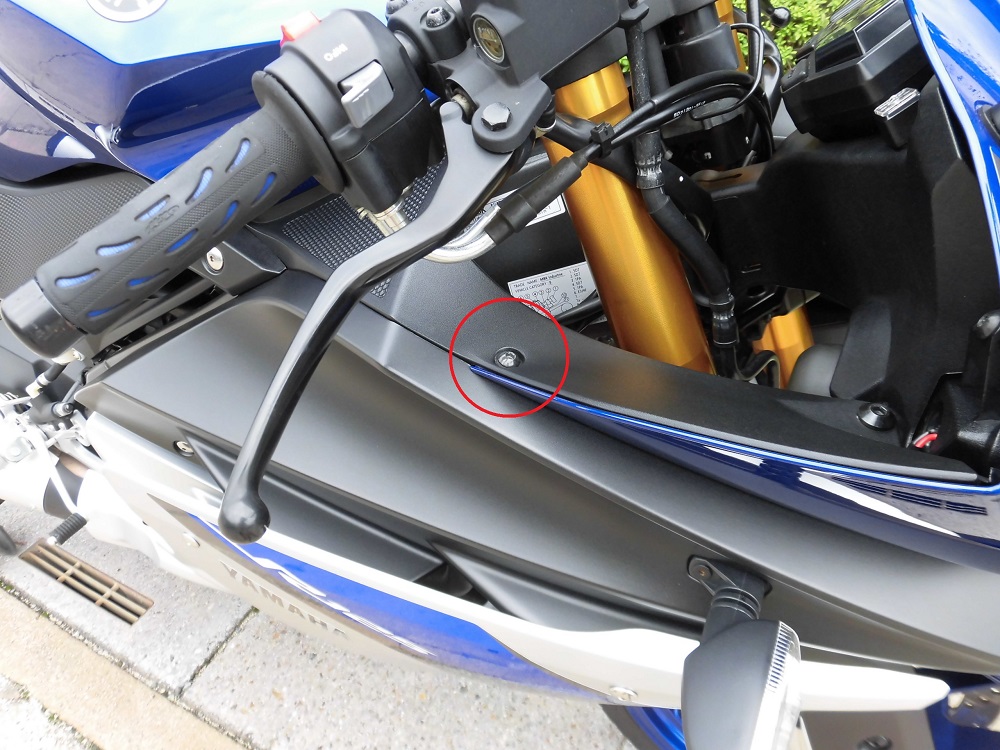
<Tightening section at the top of the right upper side cowl>
This is the tapping screw that holds the front panel to the upper side cowl.
This area has been broken since I bought moto and when I tightened it for the first time, I noticed that when the screw reached a certain torque, it would spin out.
I left it alone because it was fixed, but I will take this opportunity to repair it.
Spring nut condition
<Spring nut condition>
One click is broken and dented all over.
Condition of upper side cowl
<Condition of upper side cowl>
This one has a lack of pieces and some gaps.
Upper side cowl repairs
<Upper side cowl repairs>
So, I used plastic repair to fill the gap.
To prevent the powder from falling out, I covered the area to be repaired with Scotch tape.
After repairing upper side cowl
<After repairing upper side cowl>
I repaired it like this.
It is a plastic repair, so I can trust the strength.
Comparison before and after spring nut repair
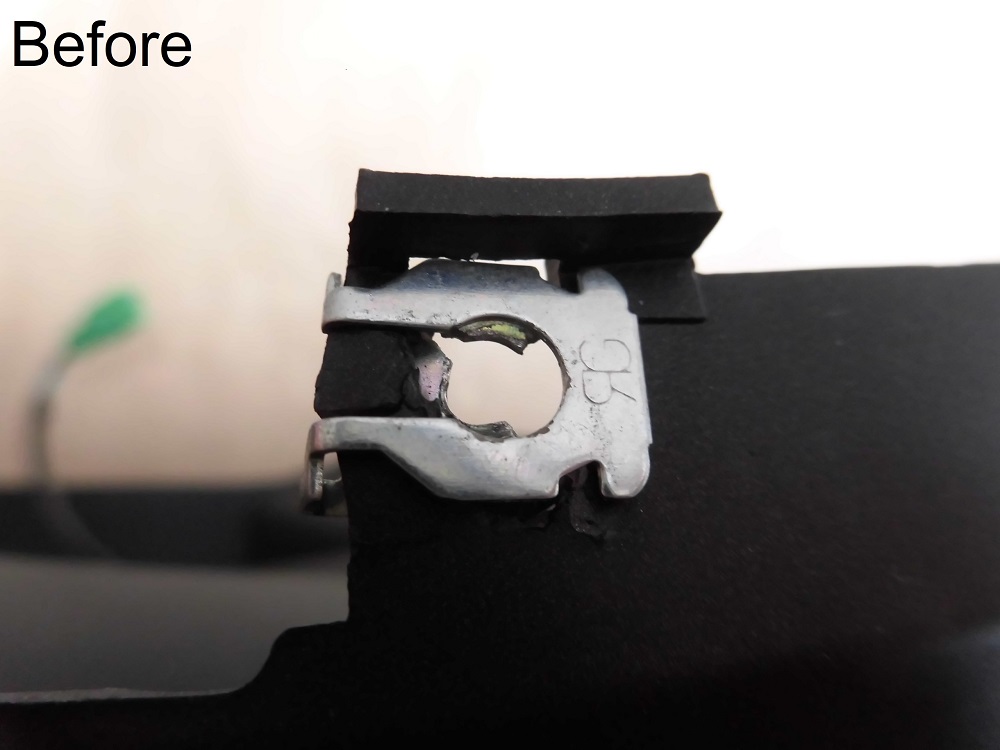
<Before repair>
The click can be seen cracked from the top side.
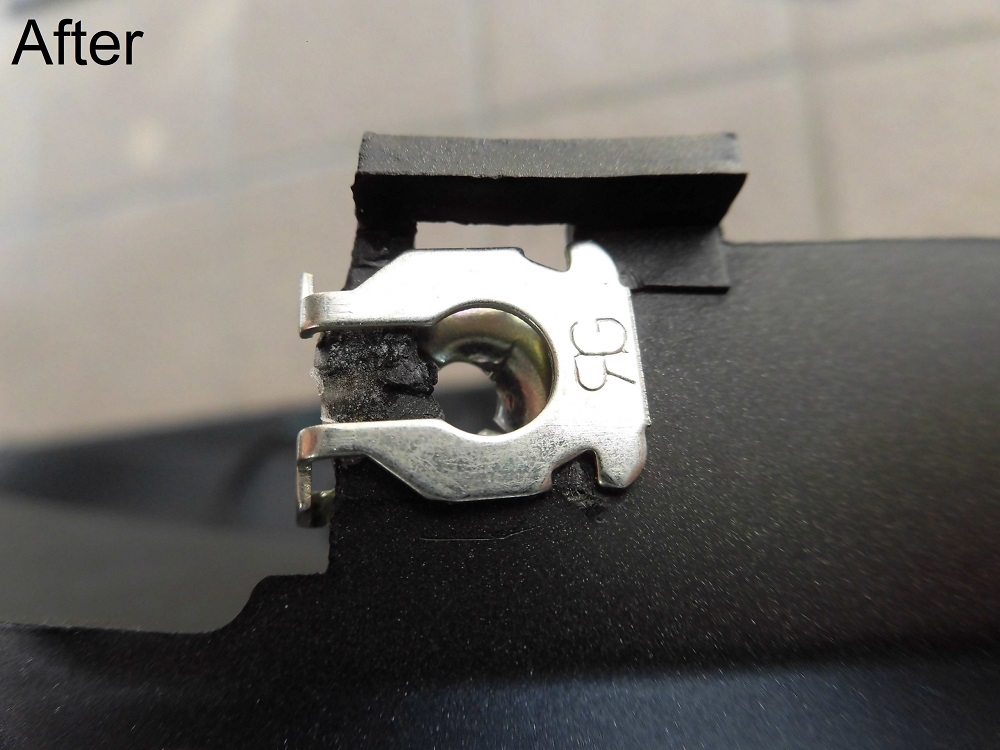
<After repair>
It has been repaired to a reasonable standard.
Tightening section on the side of the left lower side cowl
In addition, a third location is repaired.
<Tightening section on the side of the left lower side cowl>
Finally, the side tightening on the lower side cowl.
Fortunately, the spring nut was not broken here, just dented, but it felt uncomfortable to tighten, so it was replaced.
3. Summary
This section considers the causes of the broken spring nut and summarizes the replacement of the spring nut and repair of the cowl that broke further.
I used to tighten the tapping screw without thinking about it, as the service manual did not specify the tightening torque.
I have learnt this time that if I work carelessly, I run the risk of breaking them myself.
- Spring nuts are made of thin metal plates, and the nut (click) part acts as a spring by flexing.
- Tapping screws are OK if they are tightened moderately, but not too hard.
- Spring nuts / 90183-05X03 are expensive, so be careful not to break them.


