Following the instructions for removing and installing the front turn signals, I will now summarize how to remove and install the rear turn signals.
The turn signals on my moto are mounted to R&G’s tail tidy / LP0162BK. It is not a genuine flap guard, but the workflow is roughly the same.
By the way, the purposes of removing a turn signal may include the following
- Replacing broken turn signals
- Replace with LED turn signals, etc.
- Replace upper side cowl
- Change the location of turn signals
Note that it is not necessary to remove the turn signals in the following cases.
- Replacing the bulb
- Replace the lens
From this article, you can learn the following.
- How to remove and install rear turn signals
- How to remove and install connector
- Difference between left and right turn signals
- Difference between front and rear turn signals
| Date | 16th January 2022 |
| Subjects | Maintenance, Failure, Repair |
| Shop or DIY | DIY |
| Difficulty | |
| Working hours | 1 |
| Costs [Yen] | 0 (Use what I have) |
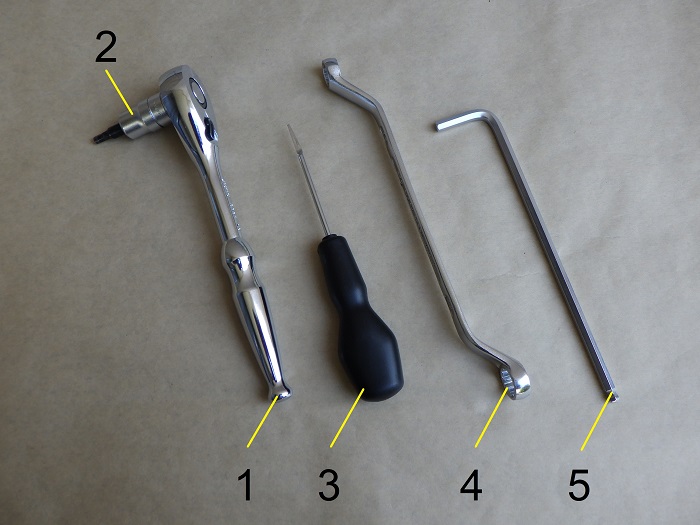
1. Goods to use
| No. | Products name | Manufacturer | Products number | Quantity | Amounts[Yen] |
| 1 | Rachet wrench | KTC | BR3E | 1 | (6,545 ) |
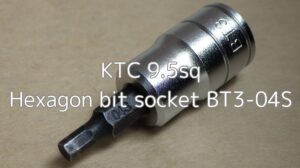
| 2 | Hexagon bit socket (4mm) | KTC | BT3-04S | 1 | 1,012 |
| 3 | Connector tools | STRAIGHT | 19-456 | 1 | (2,770) |
| 4 | Box wrench (10×12mm) | KTC | M25-10X12 | 1 | 1,936 |
| 5 | Long hex key (5mm) | KTC | HLD250-5 | 1 | 1,375 |
| 13,638 |
2. How to remove and install rear turn signals (STEP1-13)
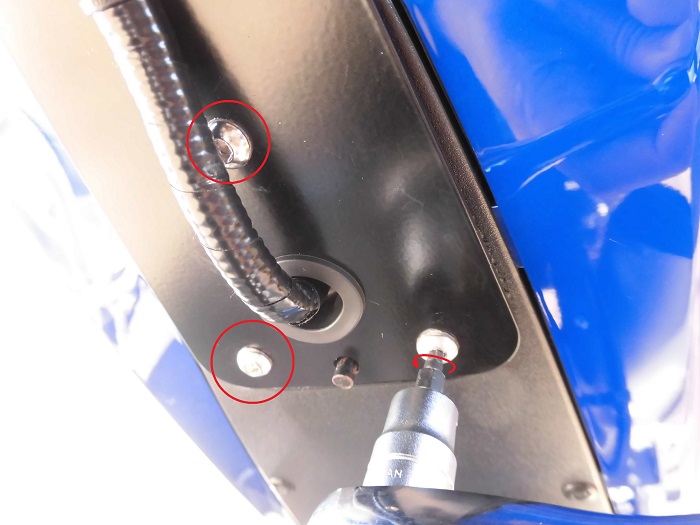
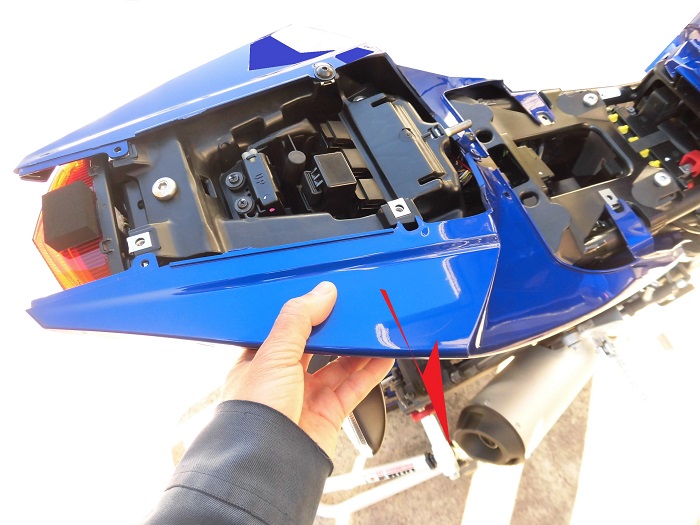
Remove tail tidy 1
First, remove the tail tidy.
<Remove tail tidy 1>
Using a ratchet wrench with a hexagon socket (4 mm), loosen the three bolts that secure the tail tidy.
At this point,
- Remove the rear one bolt.
- Do not remove the front two bolts.
Remove rear cowls and panel etc.
<Remove rear cowls and panel etc.>
Remove the rear cowl and panel, box in order to disconnect the wiring connectors.
(For details, see STEP 1-21 in the maintenance record “How to remove rear cowls and panel etc.”)

Disconnect connectors
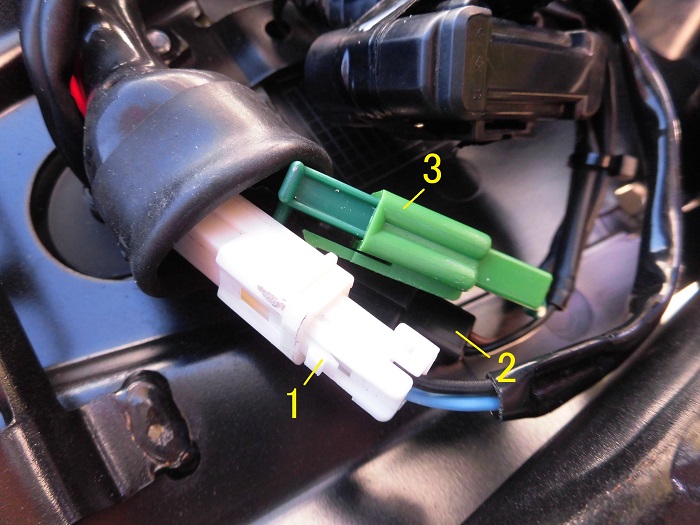
<Disconnect connectors>
The following three wires are fixed to the tail tidy.
- License plate light (2 poles)
- Left turn signal (2 poles)
- Right turn signal (2 poles)
Each of these connectors can be disconnected by pushing down on the projection and pulling.
Remove tail tidy 2
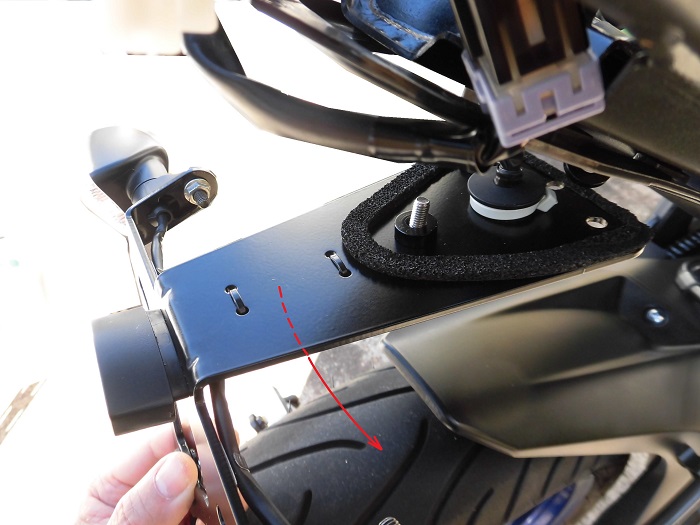
<Remove tail tidy 2>
Remove the bolts that I loosened in STEP 1.
Then, I can lower the tail tidy by passing the wires through the holes in the seat rail bracket.
Now, I can remove it from the vehicle body.
Remove terminals
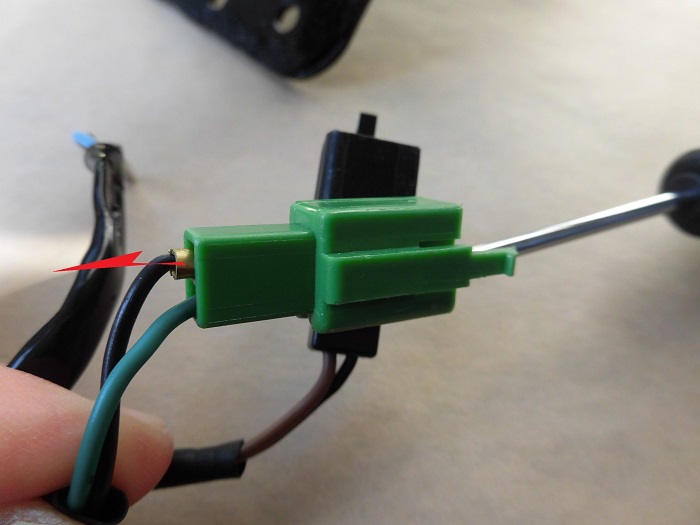
<Remove terminals>
Next, use the connector tool to disconnect the terminals from the turn signal connectors.
Image of terminal removal
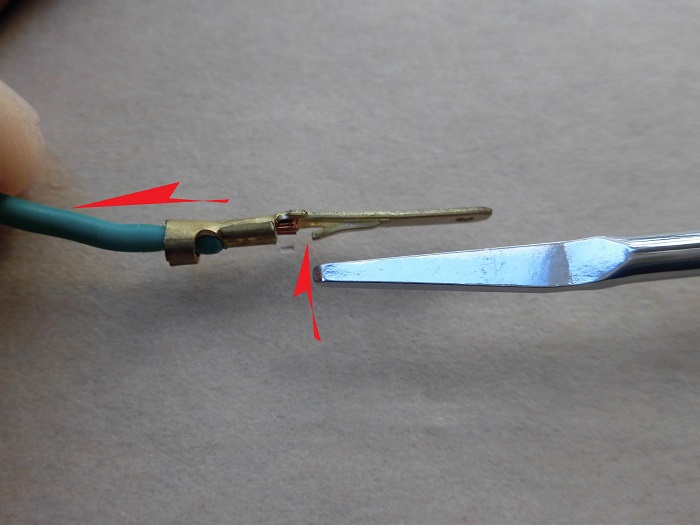
<Image of terminal removal>
The terminals are type 110 male.
The terminal is released by pushing down on the protrusion shown in the photo.
Remove wirings
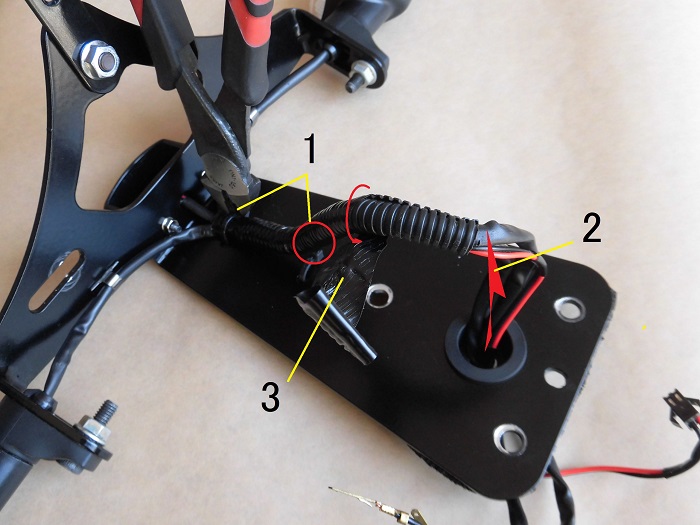
<Remove wirings>
- Cut the two ties that hold the wires in place.
- Remove the corrugated tube and wiring from the grommet.
- Remove the insulation tape from the corrugated tube.
Remove turn signals 1
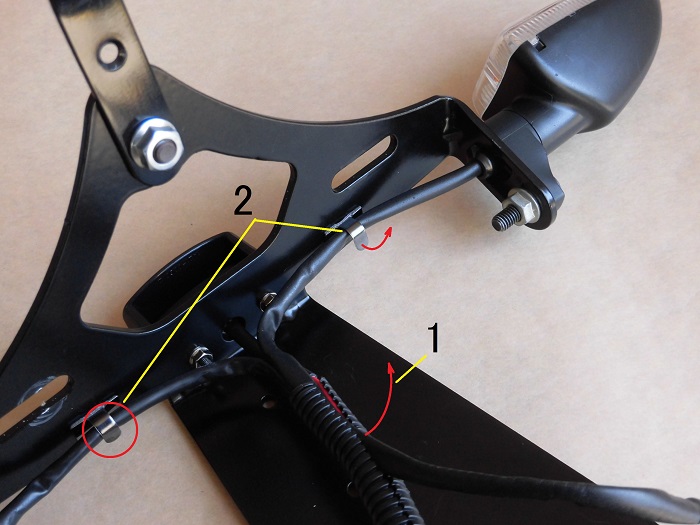
<Remove turn signals 1>
- Remove the wirings from the corrugated tube.
- Raise the two bands of the wiring clamps that hold the wirings in place.
Remove turn signals 2
<Remove turn signals 2>
Secure the flange nut with a box wrench (10 mm) and remove the bolt with a long hex key (5 mm).
I used a hex key because a hexagon socket would hit the turn signal body.
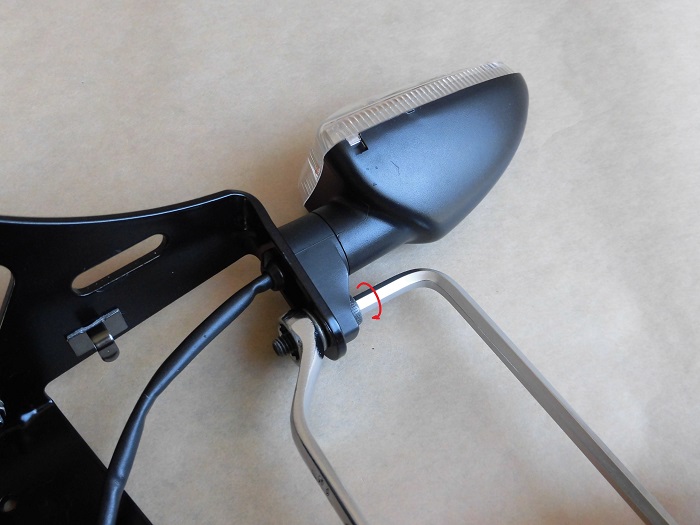
Remove turn signals 3
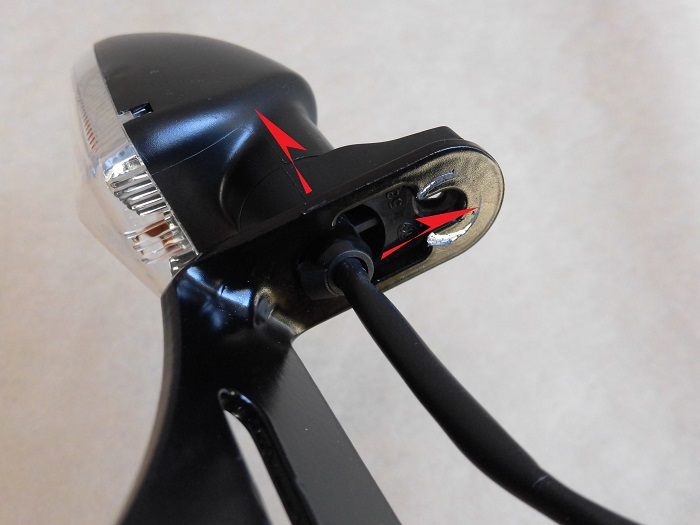
<Remove turn signals 3>
Move the claw part of the turn signal body forward and then outward to remove it.
Removed turn signals
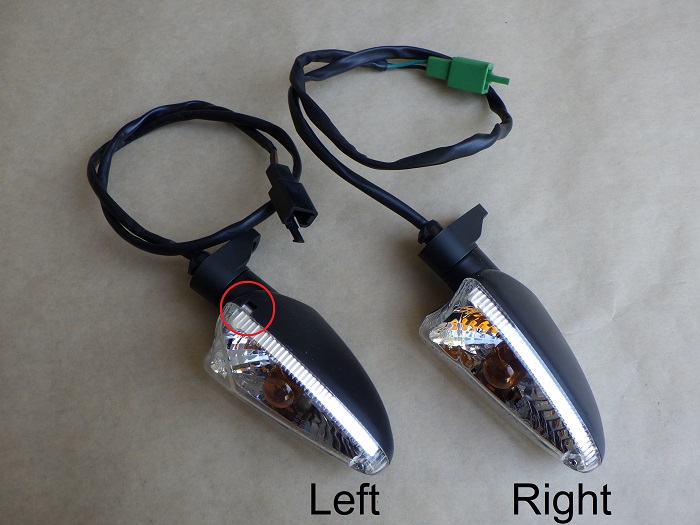
<Removed turn signals>
For left side: Connector color… Black
For right side: Connector color … Green
Not only the color of the connectors, but also the turn signals themselves have a left and right side, and the one with the drain hole (○) is on the bottom.
Removed turn signals front and rear (Left)
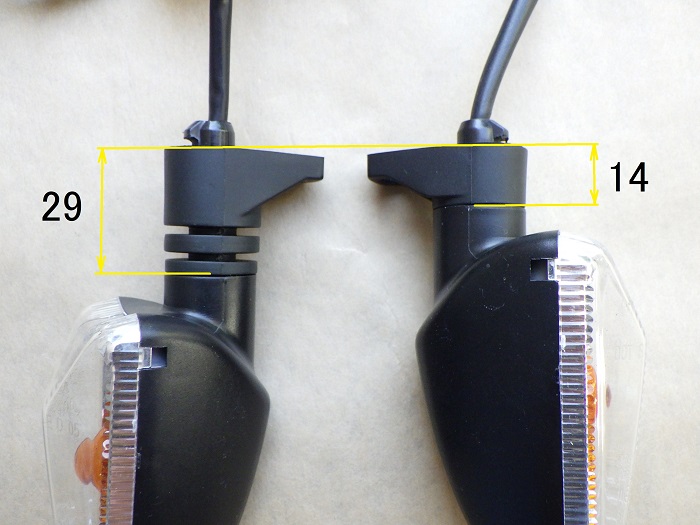
<Removed turn signals front and rear (Left)>
For front: 29mm
For rear : 14mm
You may not notice it, but the length of the mounting part is different for the front and rear.
When replacing a turn signal on one side only, be careful not to mistake the part number.
Install turn signals
To install, simply follow the reverse procedure of removing the unit.
(For details, please refer to the following maintenance records.)
Replace tail tidy 3 【Assembly】:
Replace tail tidy 4 【Installation】:
3. Summary
Here is a summary of how to remove and install the rear turn signals.
The front turn signals were the same, but it takes longer to remove the cowl, etc. than to remove the turn signal itself.
- Connectors are black on the left and green on the right.
- Install so that the drain hole is on the lower side.
- The length of the mounting portion is 15 mm shorter for the rear side.


