This is a continuation of the maintenance record “Check and clean rear brake1【Removal and clean】”
Now that the parts have been cleaned, put them back together.
Properly lubricate the brake pistons and grease brake calipers during installation to ensure smooth movement.
Doing these things will make a difference in brake feel, so feel it.
From this article, you can learn as follows.
- Lubricating brake piston
- Grease application to brake caliper
- How to install brake pads
- How to install brake caliper
| Date | 12th August 2023 |
| Subjects | Maintenance, Failure, Repair |
| Shop or DIY | DIY |
| Difficulty | |
| Working hours | 1 |
| Costs [Yen] | 2,461 |
1. Goods to use
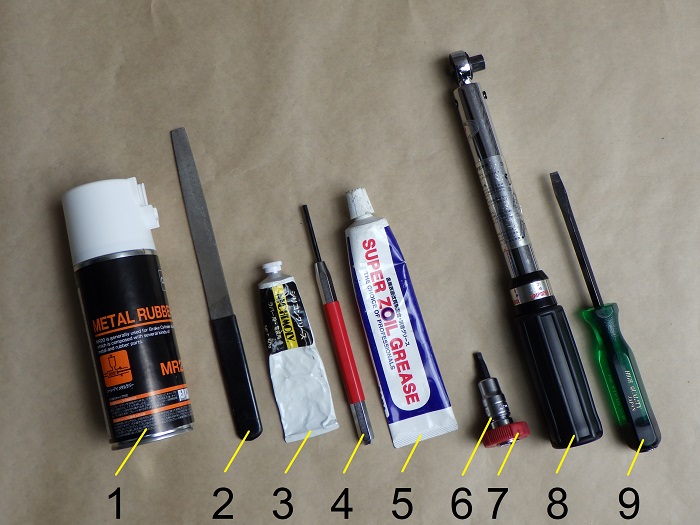
| No. | Products name | Manufacturer | Products number | Quantity | Amounts[Yen] | Purchase this time |
| 1 | Metal rubber | CCI | MR20 | 1 | 1,152 | ○ |
| 2 | Iron file | – | – | 1 | 417 | |
| 3 | Silicone grease | NICHIMOLY | N920 | 1 | 1,428 | |
| 4 | Dowel pin punch (4mm) | KTC | PK-4185 | 1 | 2,167 | |
| 5 | Super Zoil Grease | Super Zoil | ZG100 | 1 | 2,418 | |
| 6 | Hexagon bit socket (5mm) | KTC | BT3-05S | 1 | 1,045 | |
| 7 | Quick spinner | KTC | BE3-Q | 1 | 2,112 | |
| 8 | Torque wrench (Small) | KTC | CMP0252 | 1 | (44,990) | |
| ST19 | Cap | Genuine parts | 5D7-F5825-00 | 1 | 1,309 | ○ |
| 9 | Flat-head screwdriver (Width 6 mm) | KTC | MDM-100 | 1 | (1,584) | |
| 58,622 | 2,461 |
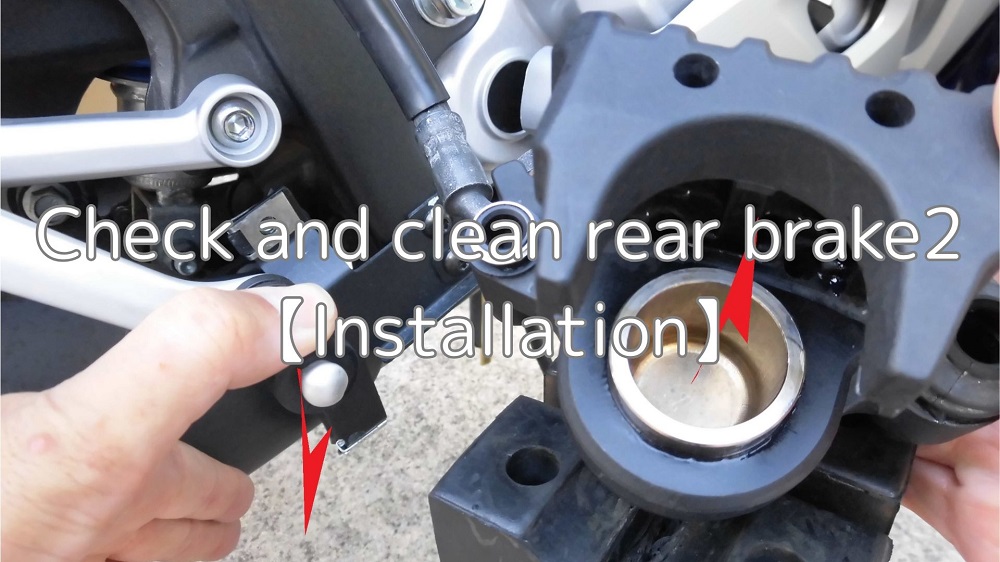
2. Check and clean rear brake2【Installation】(STEP1-23)
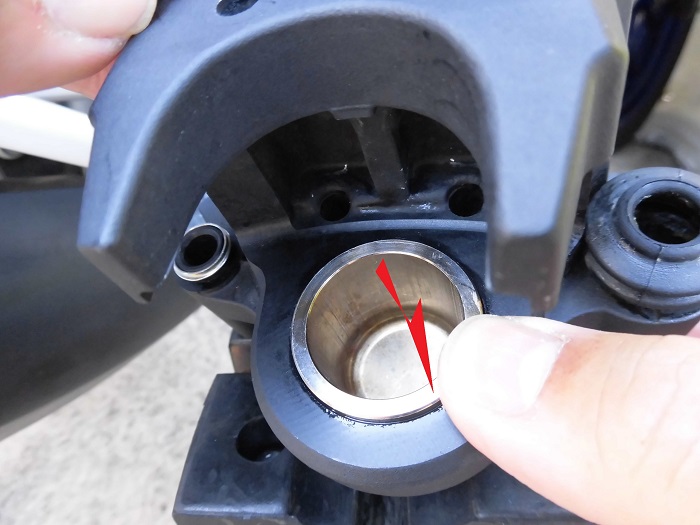
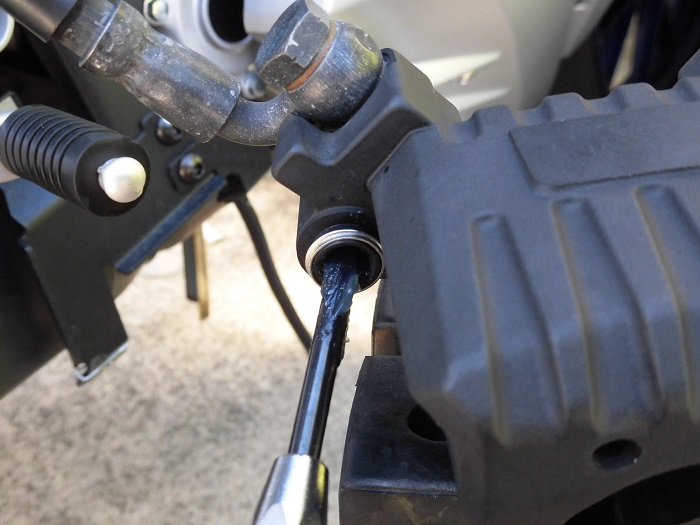
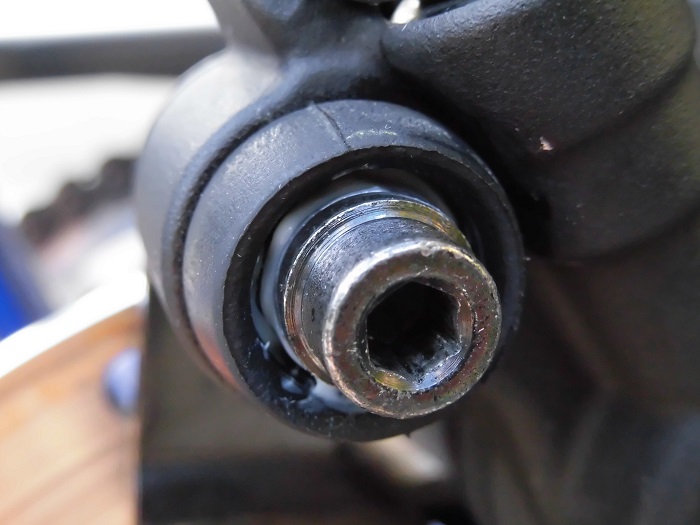
Lubrication
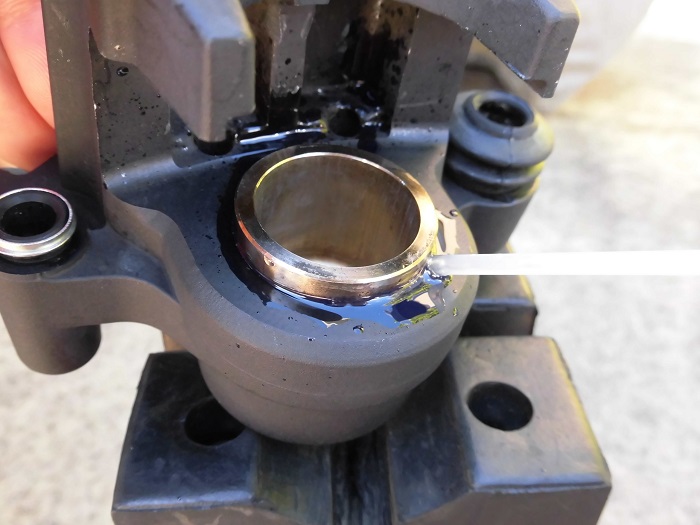
<Lubrication>
Spray lubricant all around the cleaned brake piston.
It stuck to the caliper after cleaning it…or rather, I put too much on it.
Next time, it might be better to change the application method, such as applying it to the piston.
Lubricant acclimation 1
<Lubricant acclimation 1>
Push the brake piston in with your fingers.
I was able to push the brake piston in with my fingers without using the brake piston tool.
Lubricant acclimation 2
<Lubricant acclimation 2>
Push the brake pedal to release the piston.
Repeat STEP 2 and 3 several times.
Wipe off any lubricant that has been spilled.
In the past, I used to apply brake rubber grease and then do the same operation.
The Internet seems to show that there are pros and cons to this process (rubbing out), but in my experience, it is very effective.
I wonder if it smoothes out the piston movement, or if it makes the brakes feel so much better. (especially the front)
I imagine, it may penetrate the dust seal (outer seal) and reduce the sliding resistance of the piston.
Chamfering brake pads
Now, let’s get ready for installation.
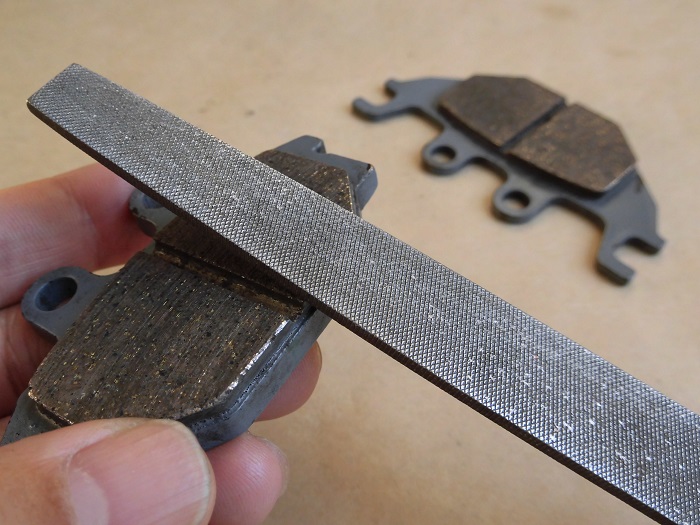
<Chamfering brake pads>
Using an iron file, lightly chamfer the edges of the brake pads.
This is to ensure that the brake pads will hit correctly and immediately after reassembly.
Greasing 1
<Greasing 1>
Apply a thin layer of silicon grease to the rear slide pin and pad pin.
Greasing 2
<Greasing 2>
Apply lithium grease to the pin punch and apply it inside the forward slide pin hole.
As I was writing this, I realized that I thought the steel slide pin on the brake caliper bracket and the metal part inside the brake caliper were touching, but in fact, the plastic part on the front seems to be touching.
I will consider whether or not to replace it with silicon grease at the next service.
Greasing 3
<Greasing 3>
Apply silicone grease to the pin punch and apply it inside the rear slide pin hole.
This one touches the inside diameter of the steel slide pin and rubber boot.
Install pads spring
Now, let’s start the installation.
<Install pads spring>
Install the pad spring in the orientation shown in the photo.
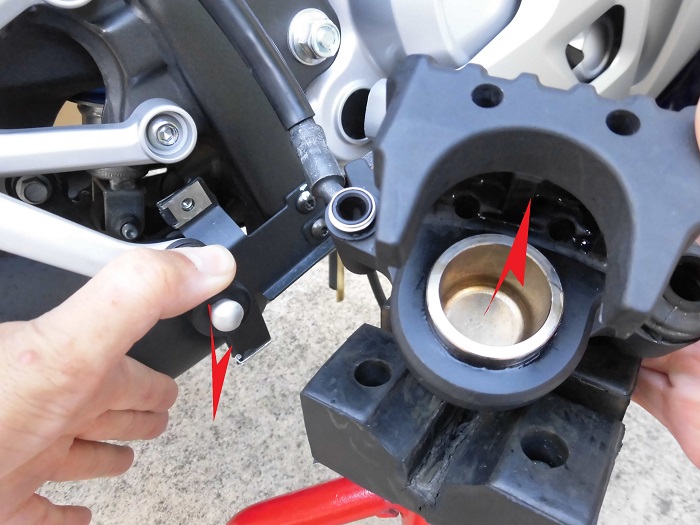
Install brake caliper
<Install brake caliper>
- Hang the boot over the groove.
- Apply lithium grease to the slide pins of the brake caliper bracket.
- Install the brake caliper.
Install brake pads 1
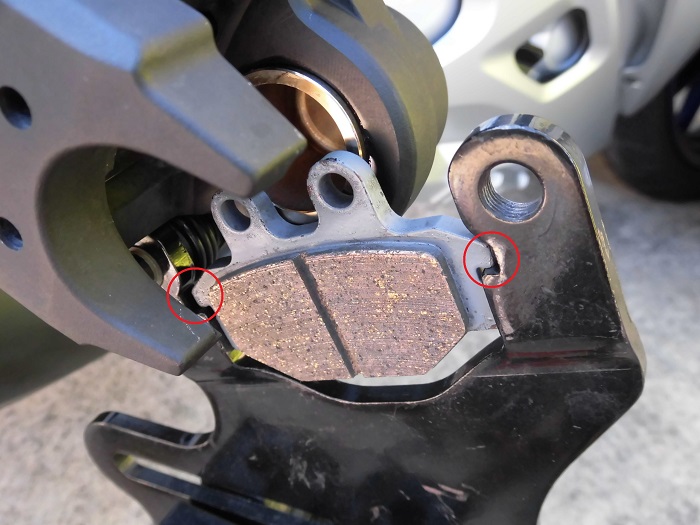
<Install brake pads 1>
Place the outer brake pad on the grooves of the brake caliper bracket.
Install brake pads 2
<Install brake pads 2>
- Put the washer between bracket and boots.
- Insert the rear slide pin halfway.
*Be careful not to forget to insert washer.
Install brake pads 3
<Install brake pads 3>
- Hook the inner brake pad groove to the guide
- While supporting it upward with your fingers
- Push down on the brake caliper with light force (pushing the pad against the pad spring)
Install brake pads 4
<Install brake pads 4>
In this state, push in the rear slide pin and insert it into the groove of the brake pad.
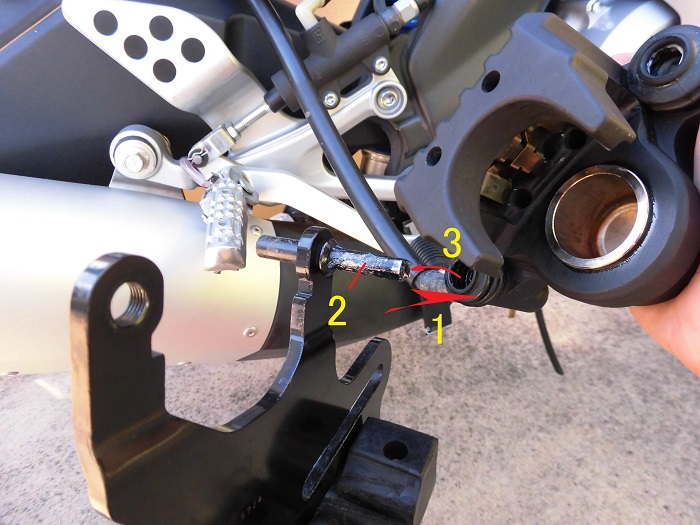
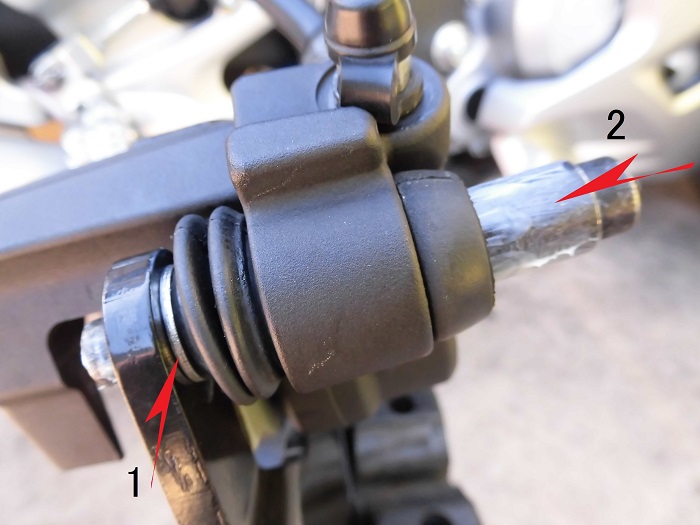
Install rear slide pin 1
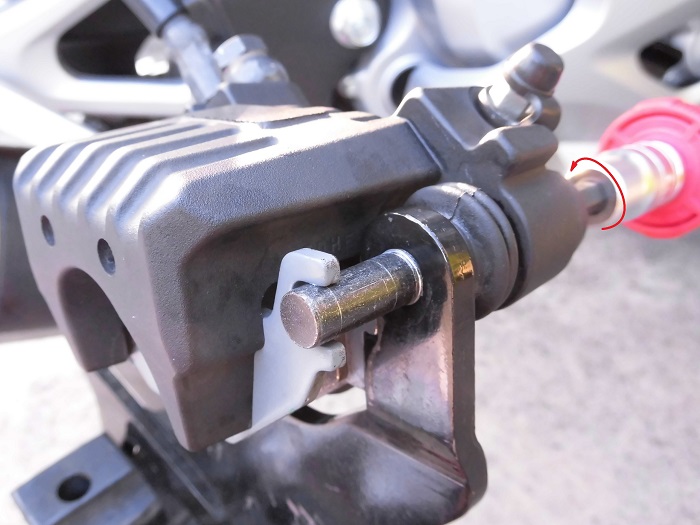
<Install rear slide pin 1>
Tighten the slide pin at the rear with a hexagon socket (5 mm) fitted with a quick spinner.
Wipe off any grease on the guide portion of the slide pin.
Install pad pins 1
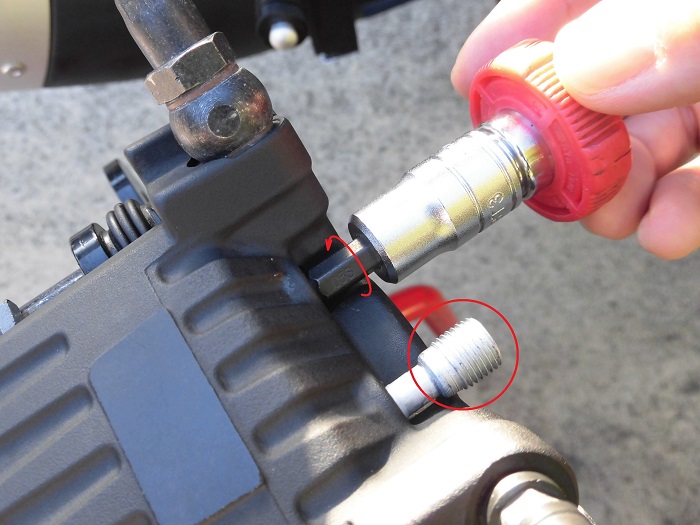
<Install pad pins 1>
Tighten the two pad pins with a hexagon socket (5 mm) with a quick spinner.
Then, install the brake caliper bracket to the rear arm and install the wheel.
Install rear slide pin 2
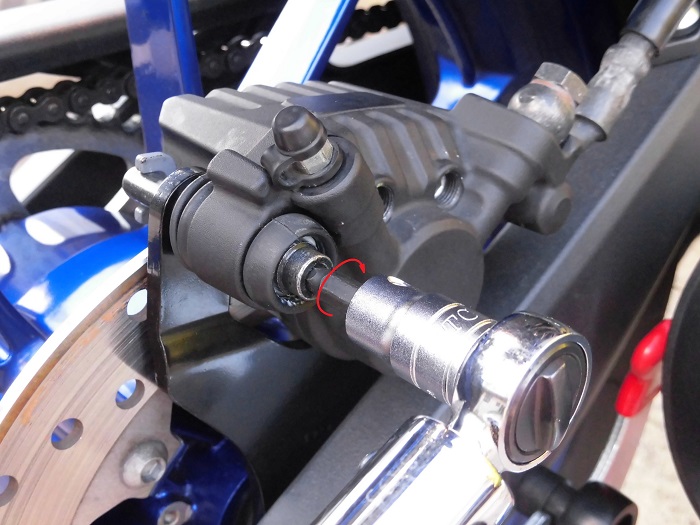
<Install rear slide pin 2>
Tighten the rear slide pin with a torque wrench. (18N-m)
Install pad pins 2
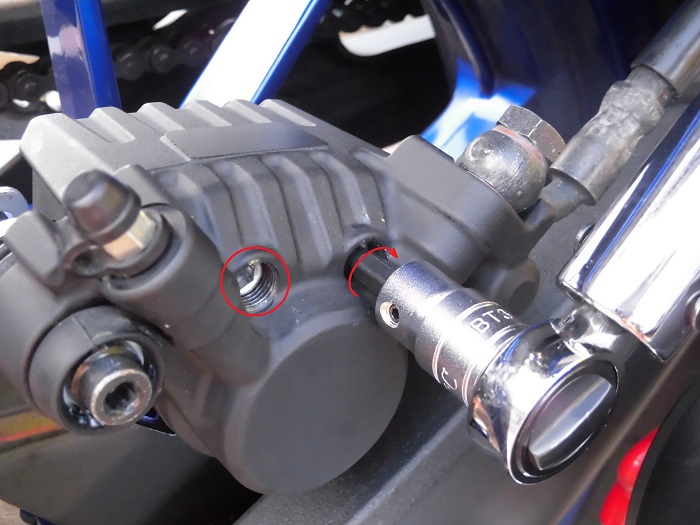
<Install pad pins 2>
Tighten the two pad pins using the same torque wrench. (18 N-m)
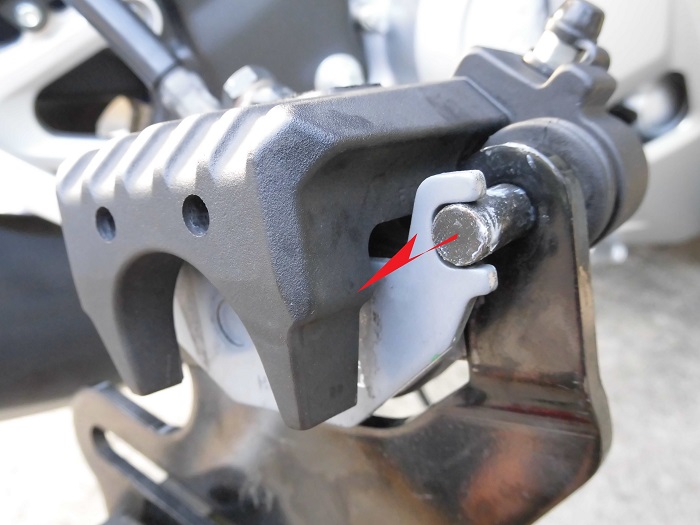
Condition of tightened slide pin
<Condition of tightened slide pin>
The white silicon grease applied to the slide pin is sticking out.
The reason why grease was sticking out before the work was done may be because the amount applied was too much.
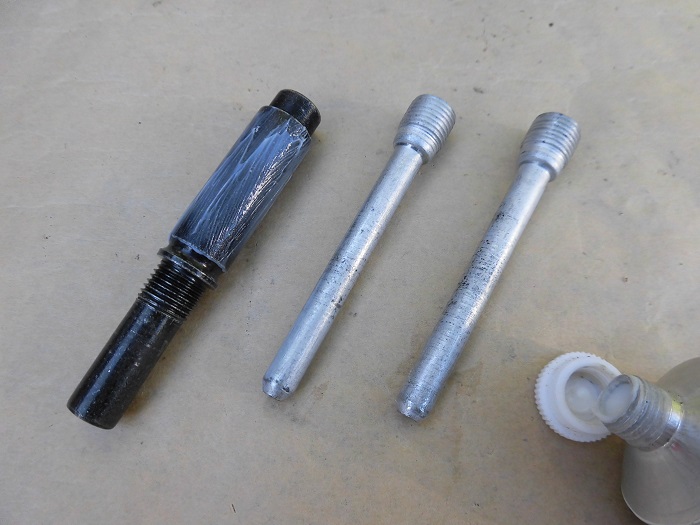
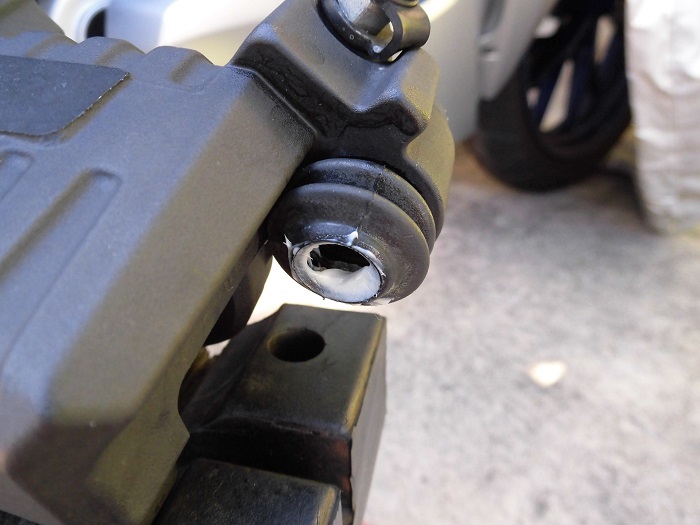
Comparison of old and new caps
This time, I have prepared a new cap.

<Comparison of old and new caps>
Left: Old
Right: New
Price, 1,309 yen, not easy to break…
(I don’t intend to break it, but I’m sure I will break it again.)
Install cap
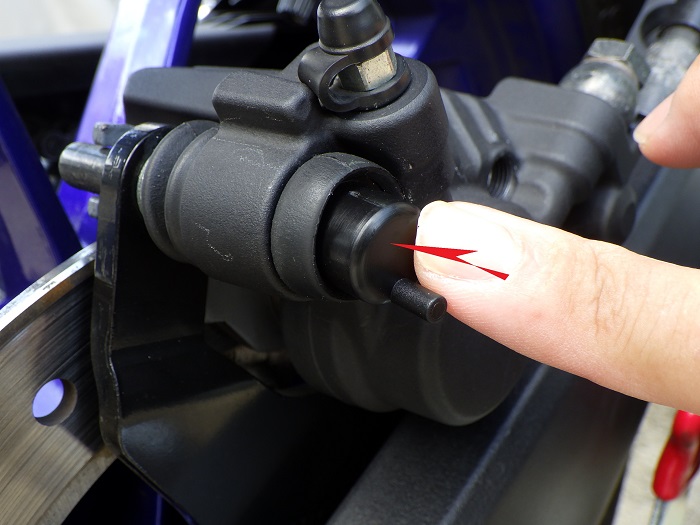
<Install cap>
Push the cap in with your finger.
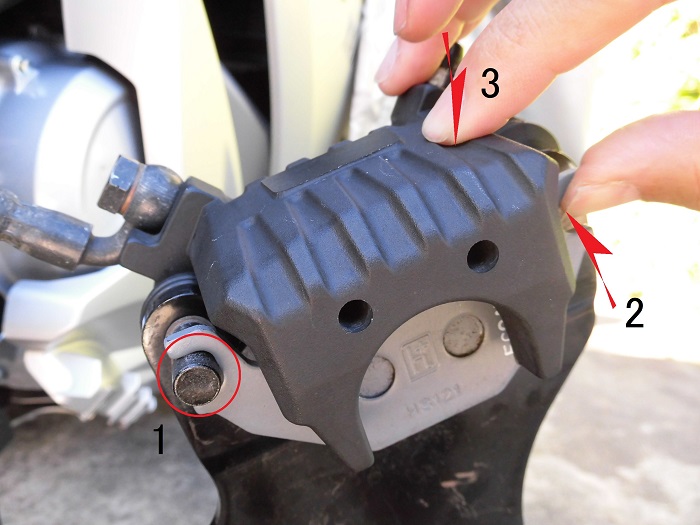
Install pad pin plugs
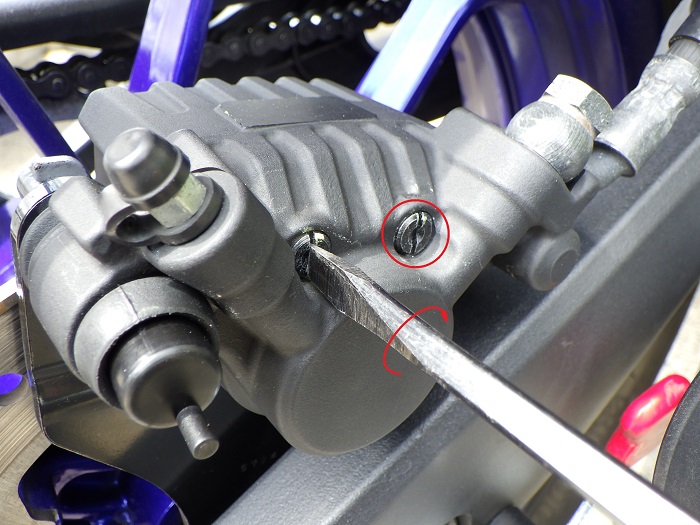
<Install pad pin plugs>
Using a flat-head screwdriver (blade width 6 mm), install the two pad pin plugs.
Then, depress the brake pedal several times to firmly press the brake piston against the brake pad and you are done.
(If you forget to do this, you will get really impatient at the first intersection.)
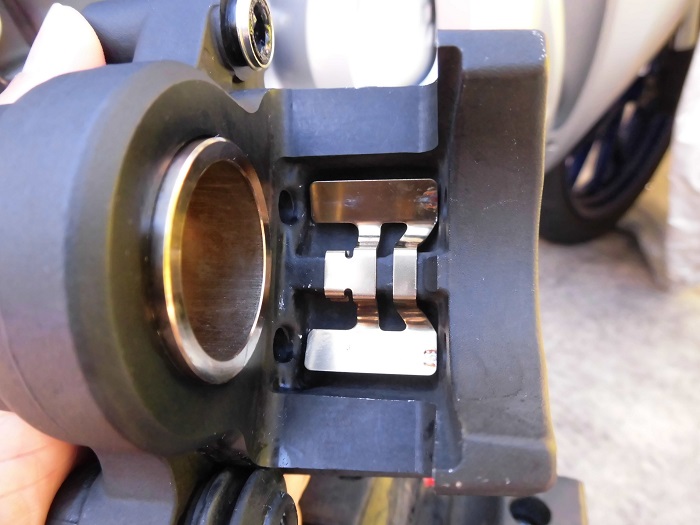
Comparison of brake calipers before and after cleaning
Now, let us compare before and after cleaning.
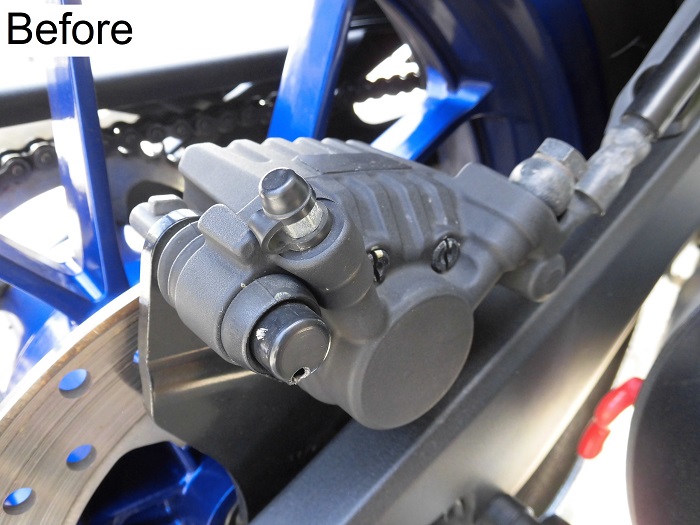
<Before>
The holes in the cap were noticeable, but overall it was not that dirty.
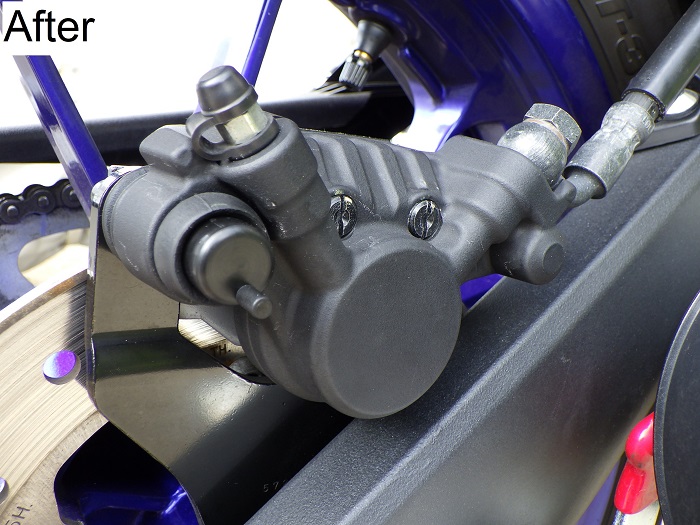
<after>
Not much has changed…
Afterwords
The key “squeaking” sound started again after riding about 300km.
I wonder why?
Continue to Maintenance Record “Rear brake fluid replacement”.
3. Summary
The following is a summary of rear brake installation, lubricant and grease application locations, and brake pad application.
It is recommended that you clean the rear brake from time to time to keep it working smoothly.
Since the 125cc is not subject to the vehicle inspection system, you may not have many opportunities to inspect it, but you may want to do it when you replace the brake pads.
- Lubricating brake pistons before assembly is recommended
- Apply silicon grease to the slide pin and pad pins
- Be careful not to break the protruding part of the slide pin cap


