Since the rear brakes were checked and cleaned, the front brake calipers should also be done, and the condition and thickness of the brake pads should be checked along with them.
From this article you will learn the following.
- How to remove the front brake caliper
- How to remove brake pads
- Structure of the front brake caliper
- How to clean the front brake
| Date | 16th September 2023 |
| Subjects | Maintenance, Failure, Repair |
| Shop or DIY | DIY |
| Difficulty | |
| Working hours | 3 |
| Costs [Yen] | 0 (Use what I have) |
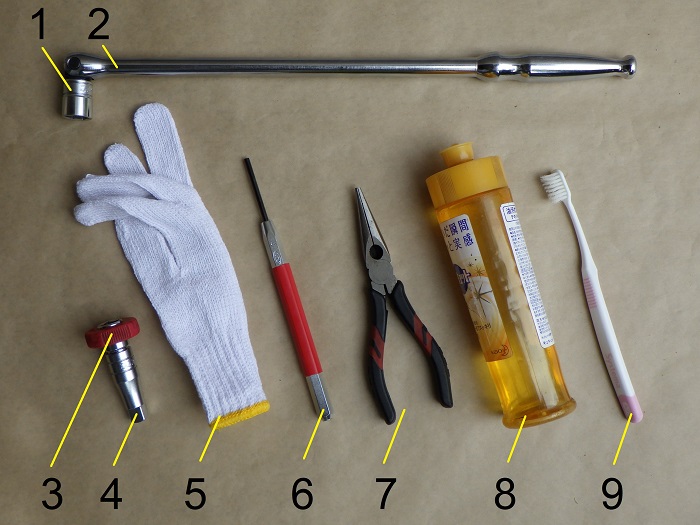
1. Goods to use
| No. | Product name | Manufacturer | Product number | Quantity | Amounts[Yen] |
| 1 | Bit socket (14mm) | KTC | B3-14 | 1 | 924 |
| 2 | Long spinner handle | KTC | BS3L | 1 | 6,083 |
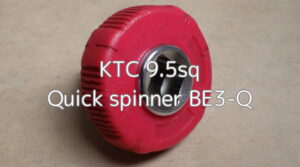
| 3 | Quick spinner | KTC | BE3-Q | 1 | 2,046 |
| 4 | Extension bar (50mm) | KTC | BE3-050 | 1 | 1,485 |
| 5 | Work gloves | – | – | 1 | 329 |
| 6 | Dowel pin punch (4mm) | KTC | PK-4185 | 1 | 2,167 |
| 7 | Pliers | KTC | PSL-150 | 1 | 4,455 |
| 8 | Dishwashing detergent | – | – | 1 | 109 |
| 9 | Toothbrush | – | – | 1 | 58 |
| 17,656 |
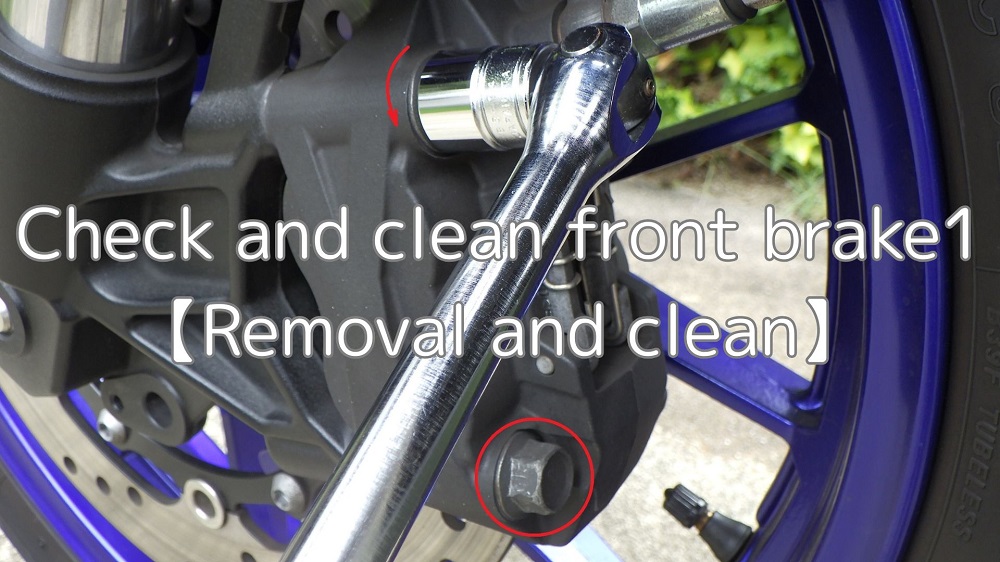
2. Check and clean front brake1【Removal and clean】 (STEP 1-19)
Front brake
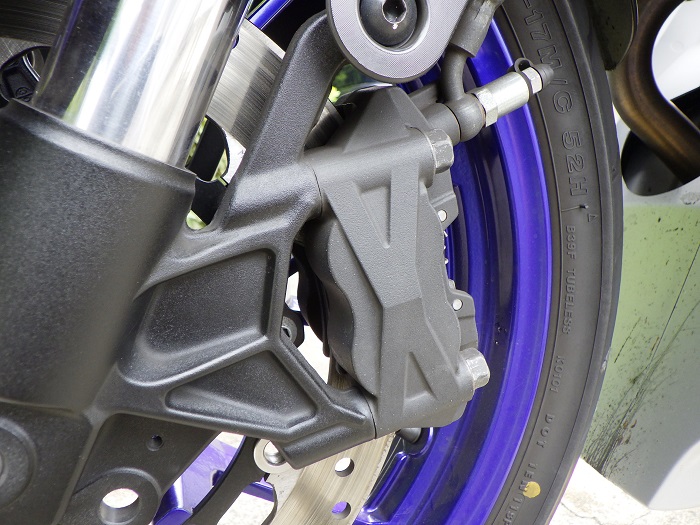
<Front brake>
The front brake on the R125 (5D7W) is 4-pistons radial mount.
Compared to floating calipers, how serviceable are they?
Work procedure
Proceed as follows.
- Remove the brake caliper
- Remove brake pads and parts from the brake caliper
- Clean the brake caliper and removed parts
- Put them back in the reverse order.
Note that the brake hose should be connected to the brake caliper without disconnecting it.
Remove left side cover
Now, let’s get to work.
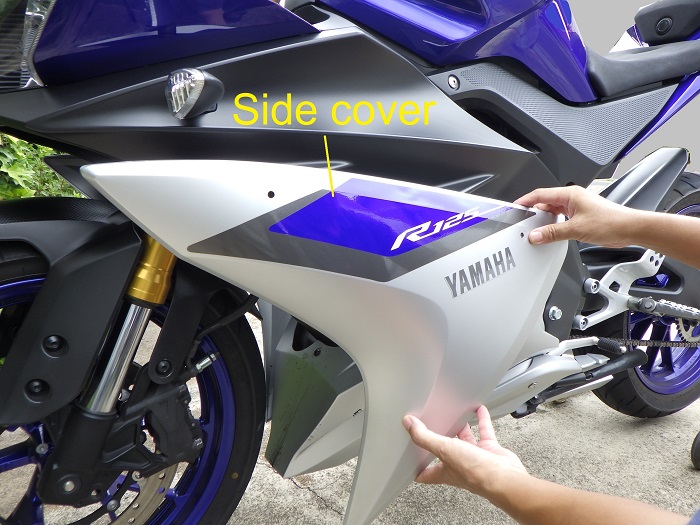
<Remove left side cover>
First, remove the left side cover to prevent the brake hose from touching and scratching the brake caliper when it is moved.
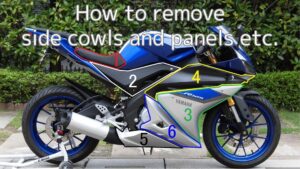
(For details, see Maintenance Record “How to remove side cowls and panels etc.” STEP 5, 6.)
Remove brake caliper 1
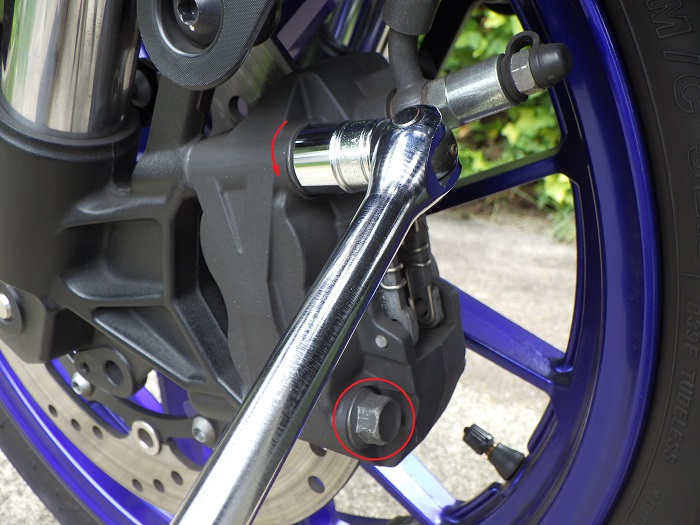
<Remove brake caliper 1>
Using a spinner handle with a socket (14 mm), loosen the two bolts that secure the brake caliper.
Remove brake caliper 2
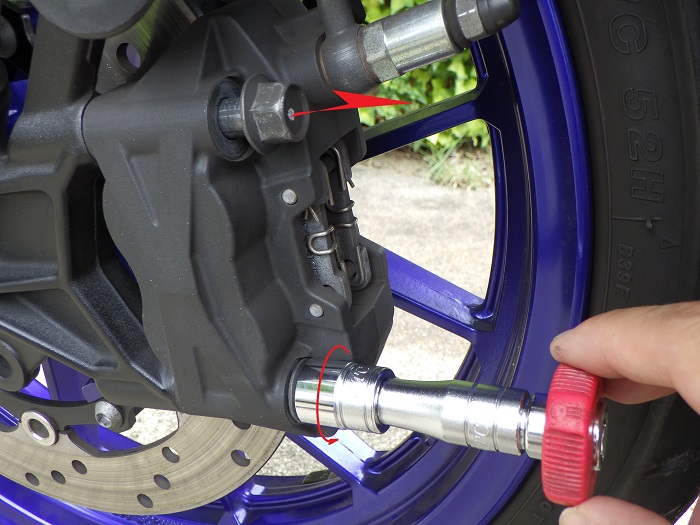
<Remove brake caliper 2>
Remove the two bolts by turning the socket (14mm) with the extension bar (50mm) and quick spinner.
Remove brake caliper 3
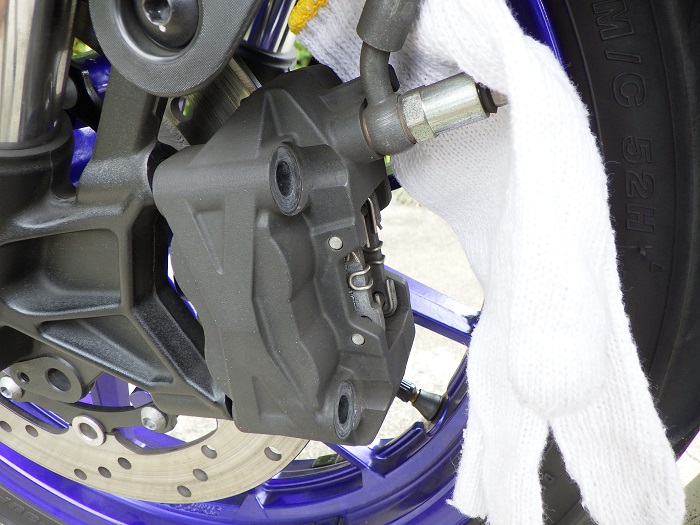
<Remove brake caliper 3>
Place a work glove between the brake caliper and the wheel to avoid hitting and scratching the wheel.
Remove brake caliper 4
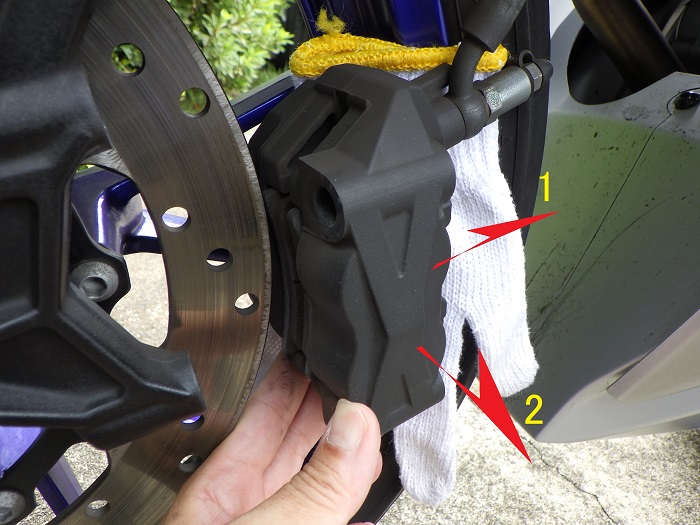
<Remove brake caliper 4>
- Remove the brake caliper from the brake rotor.
- Pull it out to the front.
Removed brake caliper
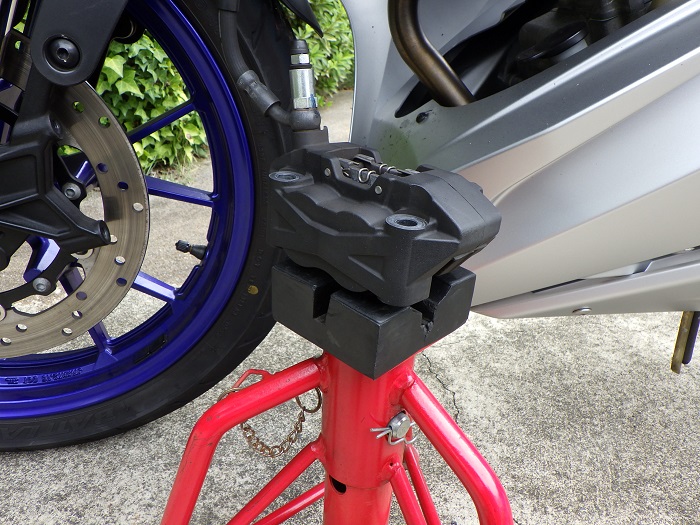
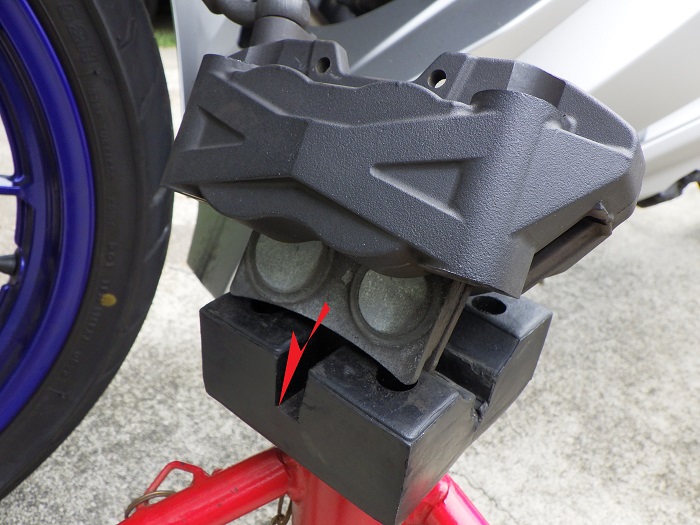
<Removed brake caliper>
Place it on the jack stand as I did with the rear.
It may be somewhat less of a problem if you hang it as is,
- It will hit the wheel and scratch it.
- It puts a strain on the hose.
So, we put it on the jack stand.
In addition, when working on the front forks, etc., I will hang them by a string because they will be in the way of my feet.
Remove pad pins 1
Next, the brake pads are removed.
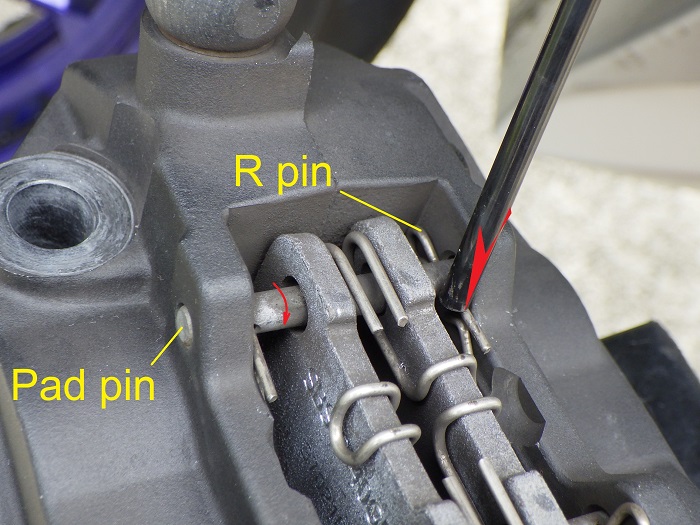
<Remove pad pins 1>
Using a dowel pin punch (4 mm), press the pad pin’s retaining R pin and turn the pad pin to the position where the R-pin can be removed.
Remove pad pins 2
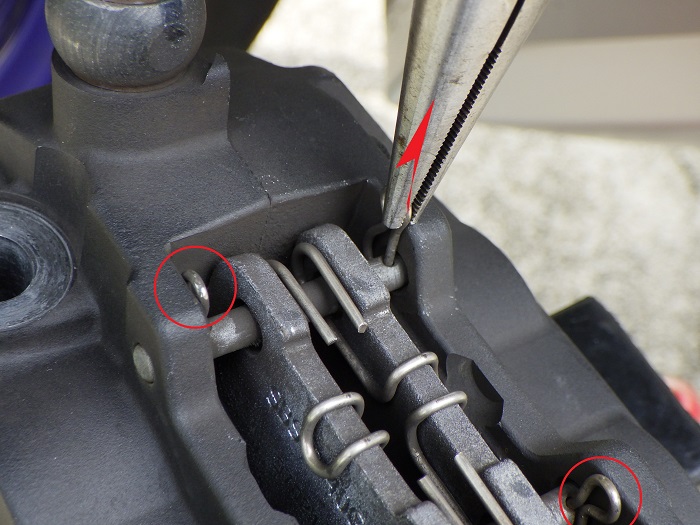
<Remove pad pins 2>
Using pliers, remove the four R pins.
Remove pad pins 3
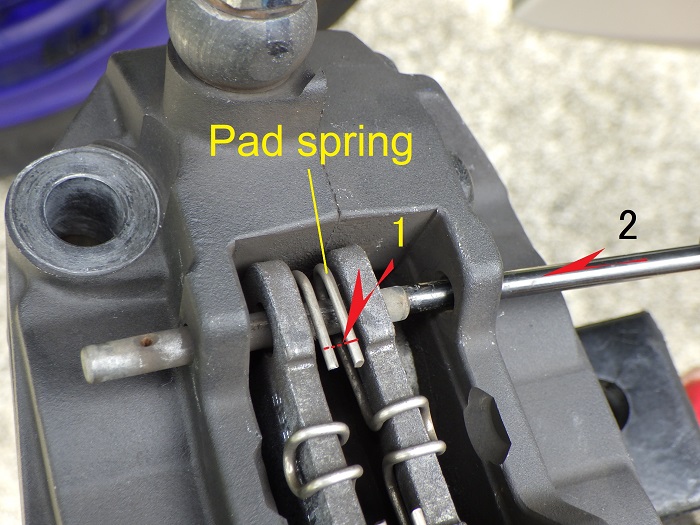
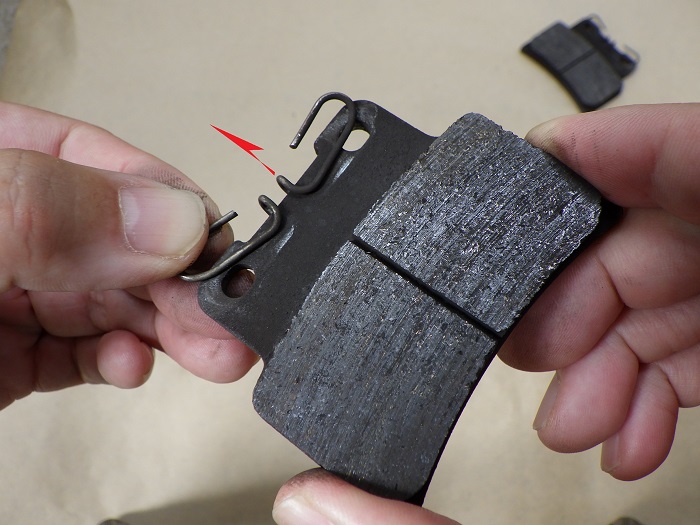
<Remove pad pins 3>
- While pushing the pad spring down.
- Push the pad pins out with a dowel pin punch (4mm).
Once one side is removed, the other side comes off easily because the tension of the pad spring does not work.
Remove brake pads 1
<Remove brake pads 1>
Once the pad pins are removed, the brake pads will disengage on the bottom side.
Remove brake pads 2
<Remove brake pads 2>
It comes off like this.
If you are holding the brake caliper by hand, be careful not to drop the brake pads.
Remove pad springs
<Remove pad springs>
The pad spring can be easily removed by pulling it by hand.
Condition of brake caliper
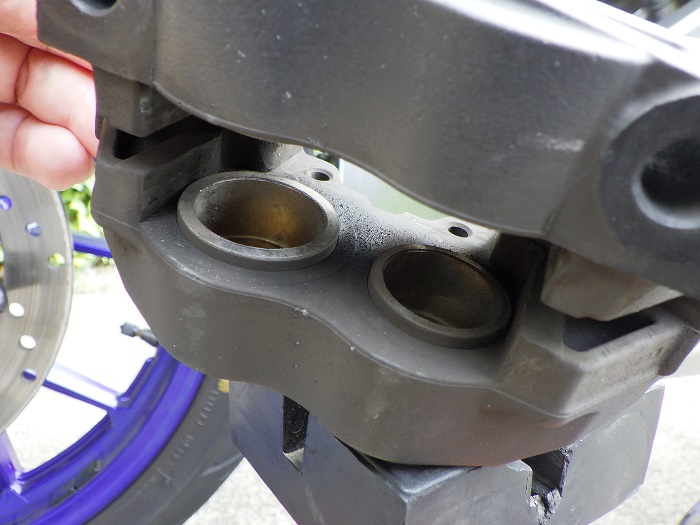
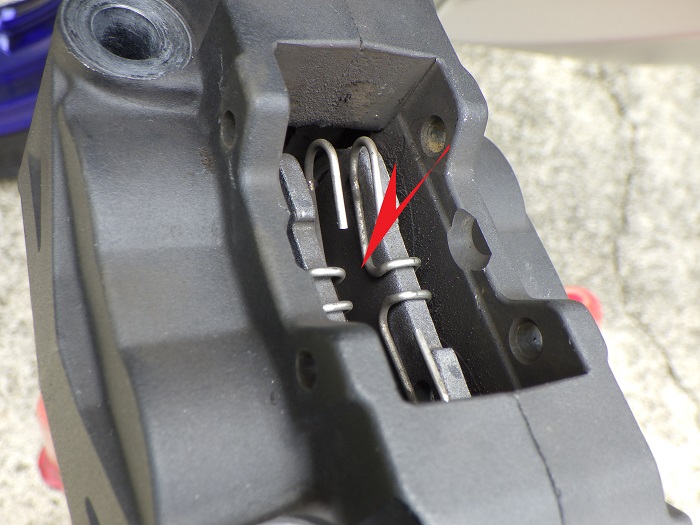
<Condition of brake caliper>
If you remove the brake pads, this is what it looks like inside.
4-pistons brake different diameters.
Upper side: φ32
Lower side: φ27
Removed parts
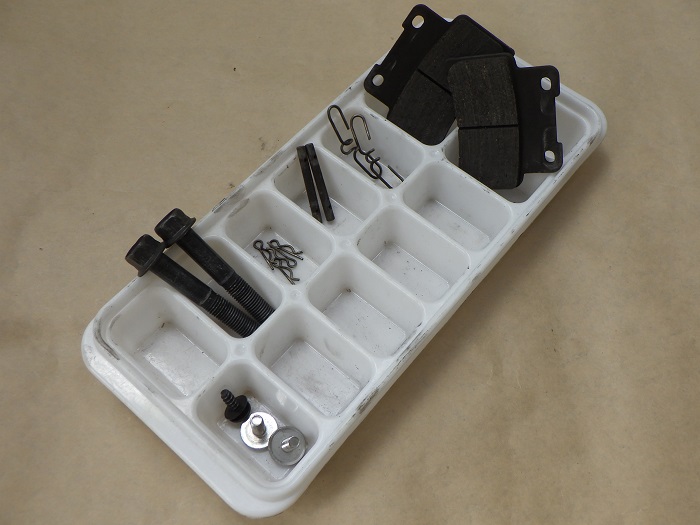
<Removed parts>
These are the parts that were removed this time. (except the brake caliper).
There were no scratches or major rust, and as with the rear, it was good to see that none of the parts seemed to be a problem.
Condition of brake pads
Check the condition of the brake pads.
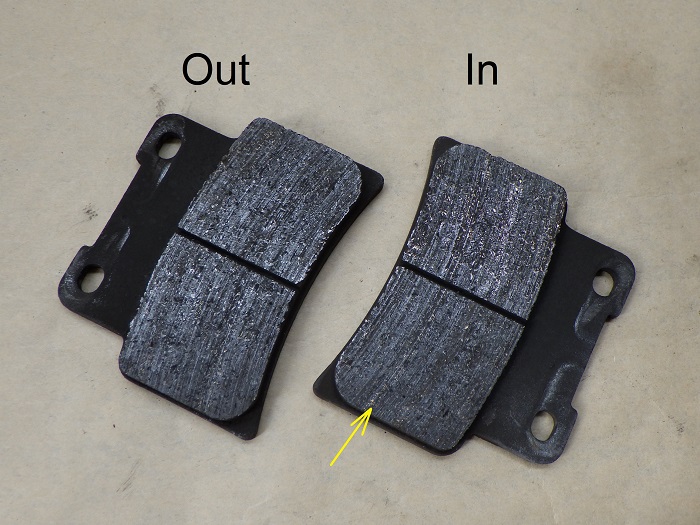
<Inside>
There was a trace of streaks left on the inner pad where something had been chewed through, but this seemed to be the extent of the problem.
Also, the thickness of the pad was as follows
Inside: 4.1mm
Outside: 4.4mm
The wear limit is 2mm, and it appears that the pads can be used until the groove in the middle disappears.
The owner’s manual says that when the groove is gone, it should be replaced by the dealer.
Like the rear, it looks like it will last a little longer, but I will get a replacement.

<Outside>
The back plate is gray, almost silver in color.
I wonder if it matched the rear.
I could tell from the SBS-S-40GF that it was made by SBS, but could not get any information from the “3702150” on the display.
I think it is probably a genuine part.
Genuine part number: 5D7-F5805-00
(Different part number from the previous year, but it seems to be available in Japan other than genuine.)
Wash brake caliper
Now, we will wash the removed parts.
Before washing, it is recommended to pull the brake lever and slightly let the brake pistons out.
They say it reduces the risk of pushing dirt between the piston and the dust seal into the seal.
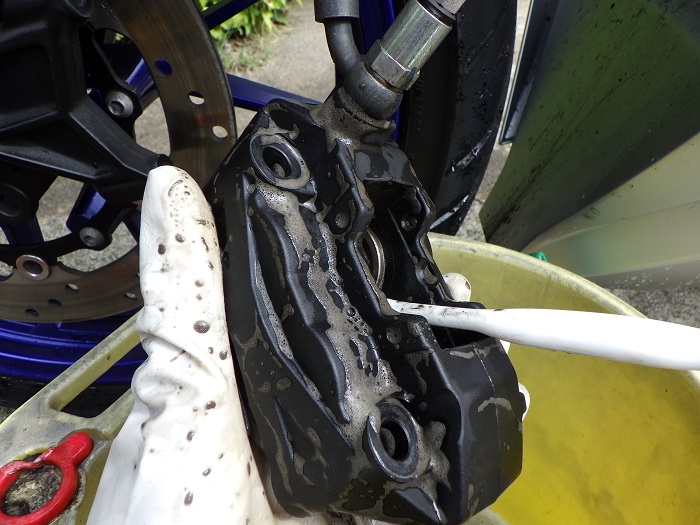
<Wash brake caliper>
Wash the brake calipers with dishwashing detergent and a toothbrush.
Be especially careful around the brake pistons.
They were dirtier with brake dust than the rear.
However, there were only a few areas where brake dust had adhered, and they were in good condition.
Wash parts
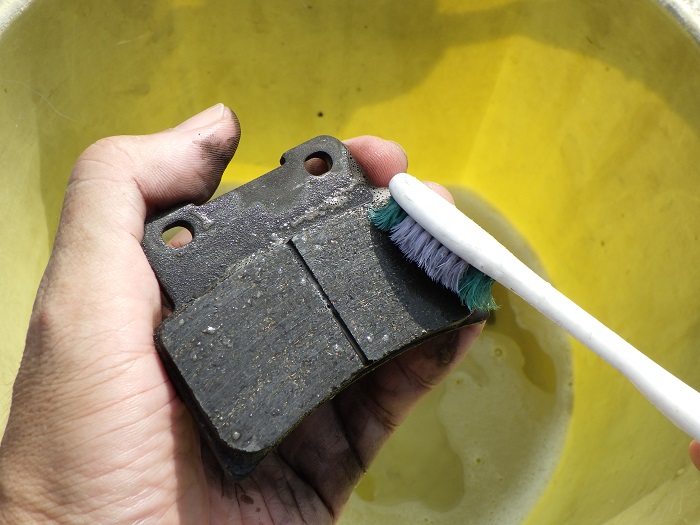
<Wash parts>
The brake pads and other child parts are also washed with dishwashing detergent.
After this, they are dried for about 30 minutes.
On this day, it dried in the midsummer-like sunlight, and air blow was not necessary.
Continue to Maintenance Record “Check and clean front brake2【Installation】”.
3. Summary
This section summarizes the removal of the front brakes, the condition of the brake pads, and how to clean them.
4-pistons caliper is simple in construction and easy to wash because there are no slide pins.
To clean the parts, use dishwashing detergent, but if the brake dust is heavily contaminated, use brake cleaner or parts cleaner.
- Curing brake calipers to avoid scratching them against the wheel.
- When washing brake pistons, slightly eject the pistons to reduce the risk of pushing dirt into them.
- Use dishwashing detergent when cleaning to avoid damaging rubber parts.


