This is a continuation of the maintenance record “Check and clean front brake 1 【Removal and clean】”.
Now that the parts have been cleaned, put them back together.
To ensure smooth movement of the brake pistons and brake pads, properly lubricate and grease them during installation.
Doing these things will make a difference in brake feel, so feel it.
From this article you will learn the following.
- Lubricating brake pistons
- How to install brake pads
- How to install brake caliper
| Date | 16th September 2023 |
| Subjects | Maintenance, Failure, Repair |
| Shop or DIY | DIY |
| Difficulty | |
| Working hours | 1 |
| Costs [Yen] | 0 (Use what I have) |
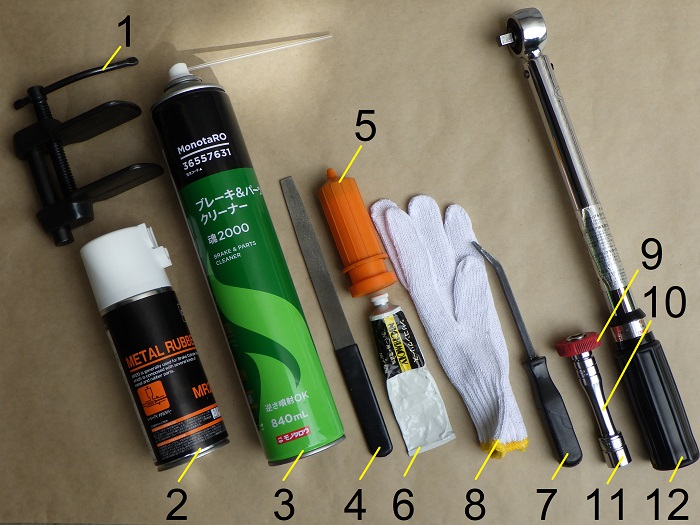
1. Goods to use
| No. | Products name | Manufacturer | Products number | Quantity | Amounts[Yen] |
| 1 | Disc brake pistons tool | KTC | AB-10 | 1 | 12,650 |
| 2 | Metal rubber | CCI | MR20 | 1 | 1,152 |
| 3 | Parts cleaner | MONOTARO | – | 1 | 296 |
| 4 | Iron file | – | – | 1 | 417 |
| 5 | General-purpose grease | – | – | 1 | 329 |
| 6 | Silicon grease | DAIZO NICHIMOLY | N920 | 1 | 1,428 |
| 7 | Pry bar | STREIGHT | 19-050 | 1 | 1,850 |
| 8 | Work gloves | – | – | 1 | 329 |
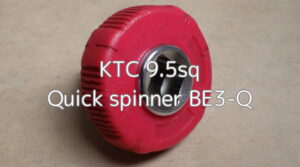
| 9 | Quick spinner | KTC | BE3-Q | 1 | 2,112 |
| 10 | Extension bar (50mm) | KTC | BE3-050 | 1 | 1,485 |
| 11 | Bit socket (14mm) | KTC | B3-14 | 1 | 902 |
| 12 | Torque wrench (Middle) | KTC | CMP102 | 1 | (54,450) |
| 77,400 |
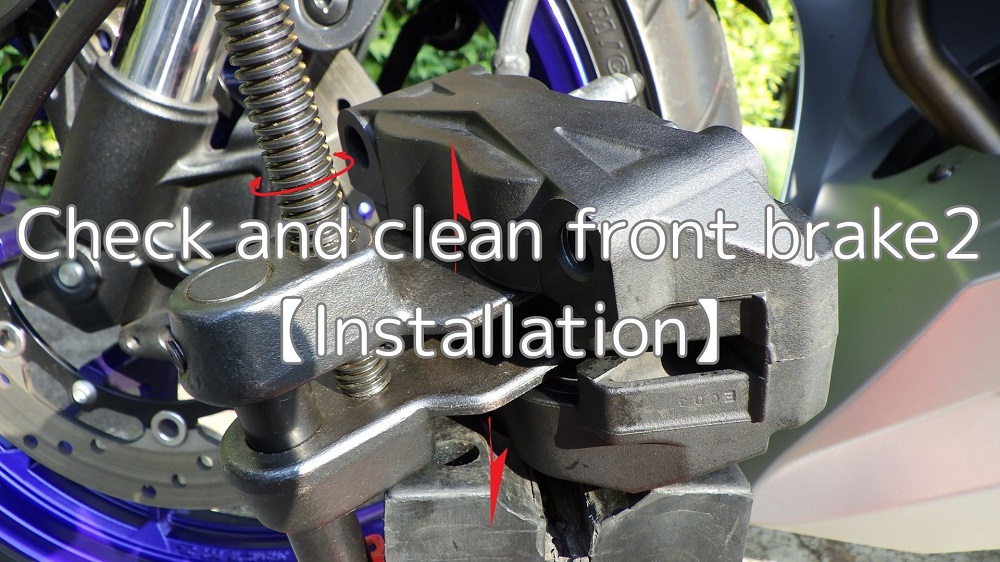
2. Check and clean front brake2【Installation】(STEP1-21)
Brake caliper pistons actuation
Now, I’m ready to lubricate the brake caliper pistons.
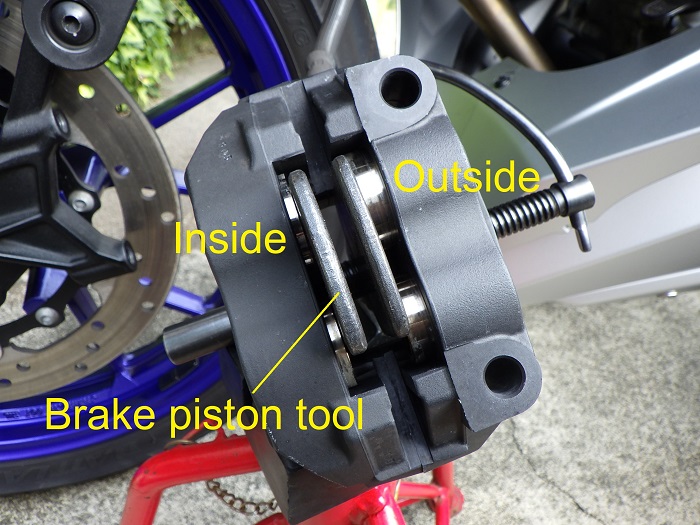
<Brake caliper pistons actuation>
Insert the brake piston tool into the brake caliper.
Then pull the brake lever several times to release the brake piston. *
The outer side seems to move better than the inner side, and the piston pops out more.
*
If you pull the brake lever repeatedly without inserting the piston tool or other tool, the brake piston will come off.
Lubrication
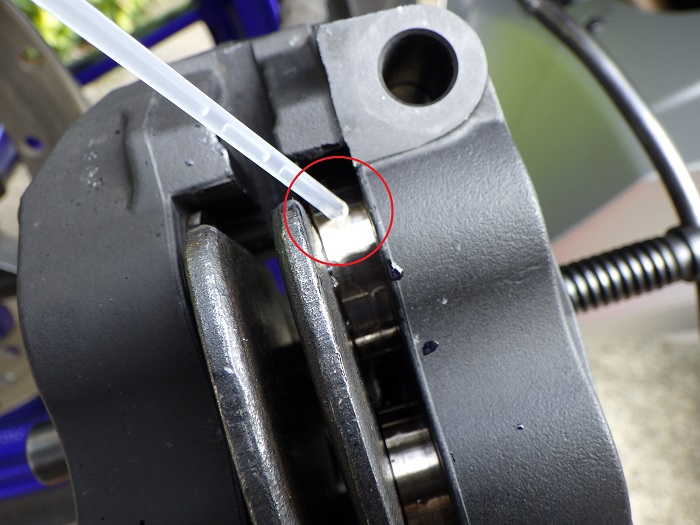
<Lubrication>
Spray lubricant all around the brake pistons.
(Pardon the out-of-focus picture.)
As with the rear, the lubricant got all over the brake calipers and made them sticky.
It was so bad that I cleaned the whole area with parts cleaner afterwards.
It would be better to put the lubricant in another container and apply it to the pistons with a brush or a spatula.
Lubricant familiarization
<Lubricant familiarization>
Open the brake piston tool and push the brake piston in.
Then remove the piston tool and pull the brake lever to release the piston.
After repeating the above about two times, the piston lightly returns with my fingers.
Brake fluid leakage 1
I noticed that after working on STEP 3…
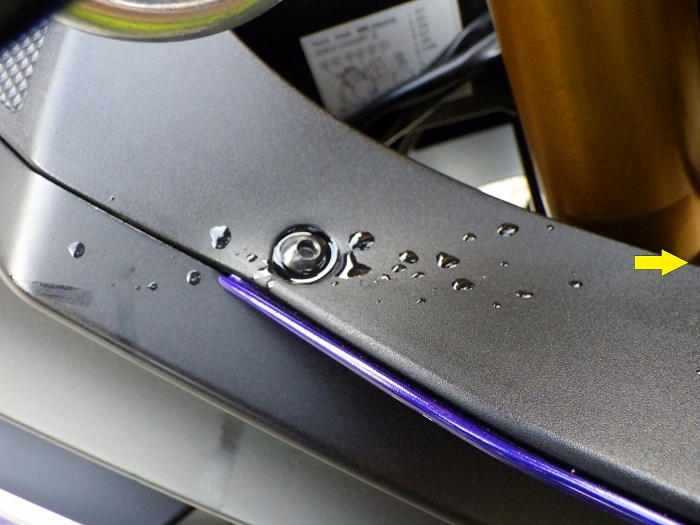
<Right front panel>
“Something is dripping!”
What a surprise, something is spilling on the front panel.
Brake fluid leakage 2
I immediately looked up and…
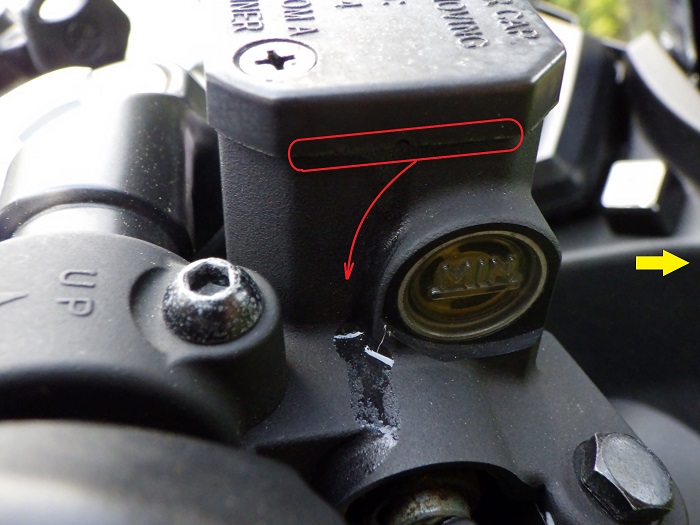
<Brake fluid reservoir tank>
‘The brake fluid leaked from the mating cap on the reservoir tank…’
Fluid was near the max in the reservoir tank, so it appears that it overflowed by pushing the piston back in.
So, before putting the piston back in, the fluid level must be checked and, if necessary, drained.
The leaked fluid was wiped off with a cloth and removed with parts cleaner.
The resin coating has peeled off and the front panel is no longer shiny.
Comparison before and after cleaning
Let’s get back to the story.
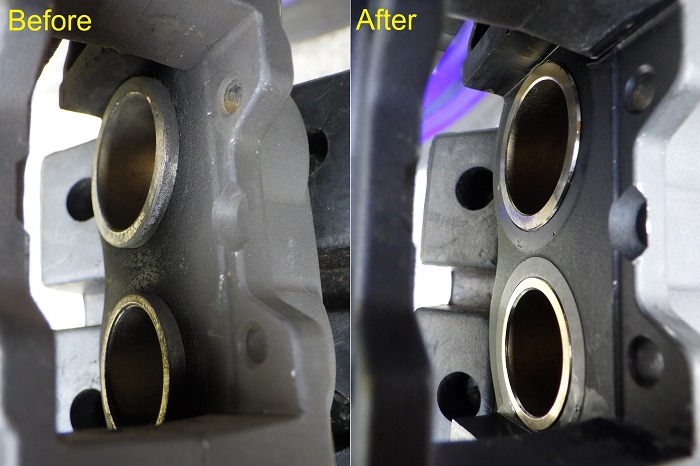
<Comparison before and after cleaning>
Comparison of the inner brake pistons before and after cleaning.
Left: Before
Right: After
At least, they are now clean.
Chamfering of brake pads
Now, I’m ready for the installation of brake pads.
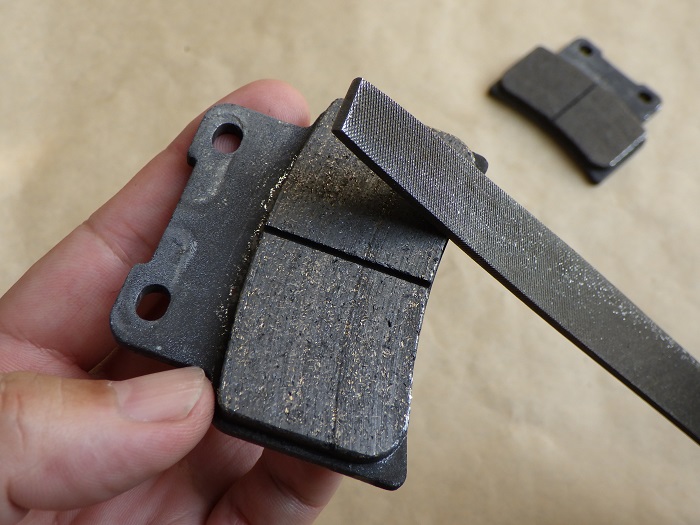
<Chamfering of brake pads>
Using an iron file, lightly chamfer the edges of the brake pads.
This is to ensure that the brake pads will hit correctly and immediately after reassembly.
Install pad springs
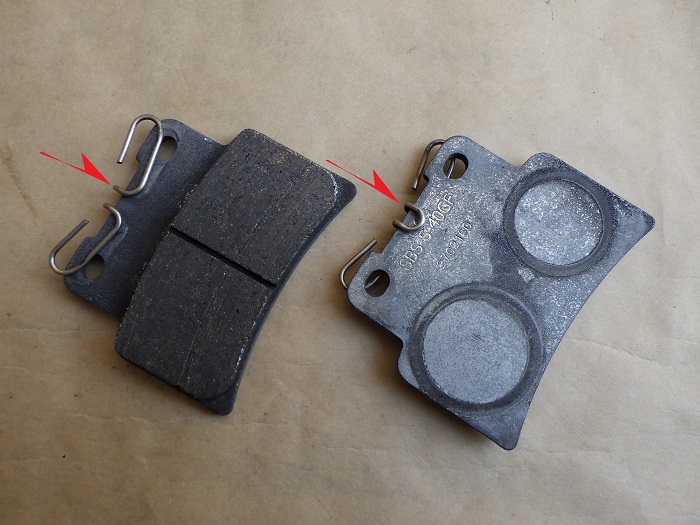
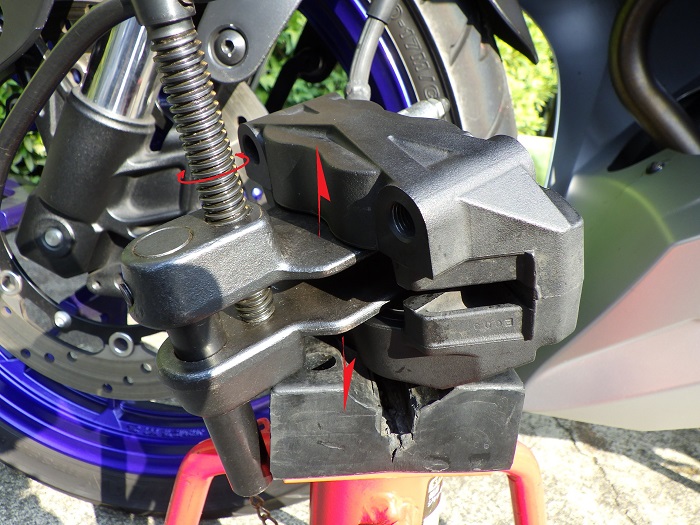
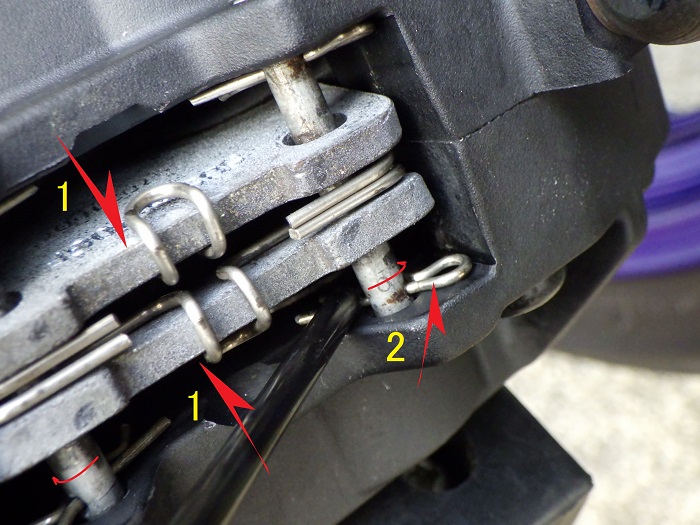
<Install pad springs>
Install the pad springs in the direction shown in the photo.
If they are installed in the opposite direction, the brake pads will always be pressed against the brake rotor side.
Greasing
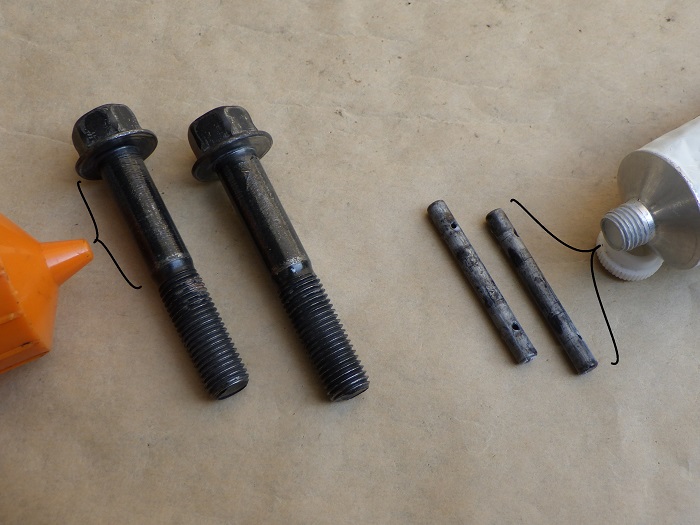
<Greasing>
Left: General-purpose grease to prevent rust on the bolts that hold the brake caliper in place.
Right: Apply a thin layer of silicon grease to the pad pins.
Install brake pads 1
Now, install the brake pads.
<Install brake pads 1>
- Thread the brake pads through the brake caliper from the inside.
(Put them back in, being aware of the brake pads inside and outside) - Thread the pad pins through the brake caliper and brake pads so that the R-pin holes face up.
At this time, the pad springs will be tilted, but do not worry about it and pass the pad pin through.
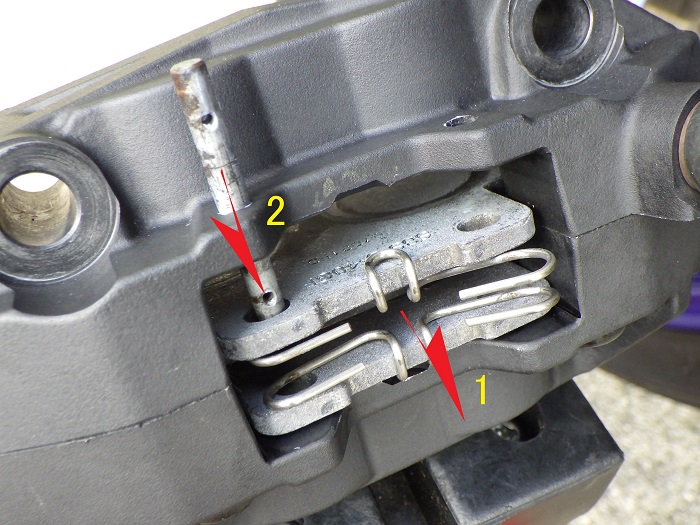
Install brake pads 2
<Install brake pads 2>
Insert the tow R pins into the pad pin.
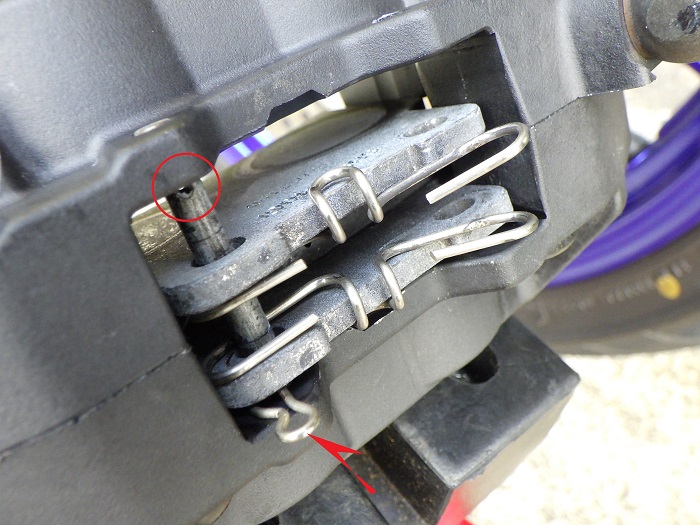
Install brake pads 3
<Install brake pads 3>
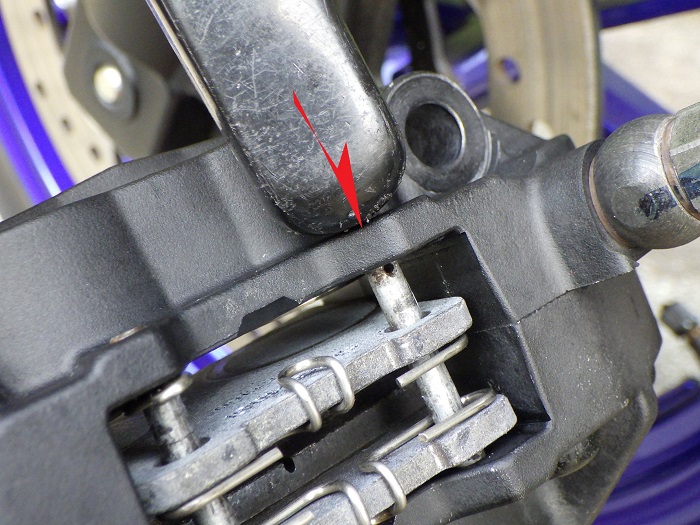
Thread the other pad pin through the brake caliper and brake pad.
At this point, push down on the pad spring and pass it through.
Install brake pads 4
<Install brake pads 4>
Then, lightly push in the pad pins with a pry bar handle or the like.
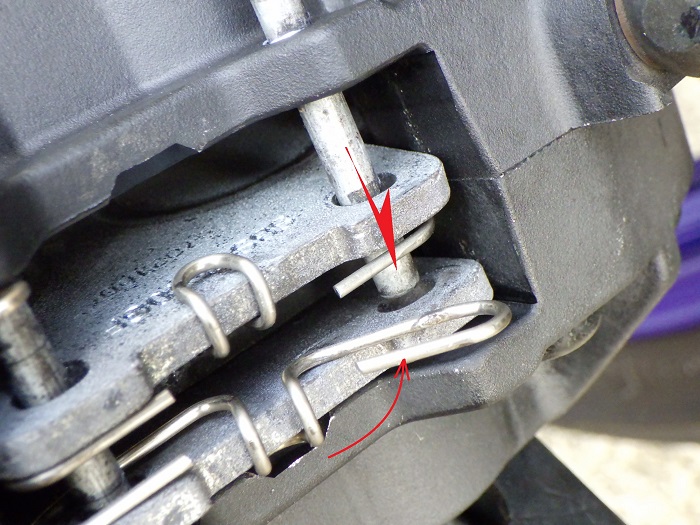
Install brake pads 5
<Install brake pads 5>
- Center the brake pad.
- Press the R pin with a dowel pin punch (4mm) and turn the pad pin
*I took a picture in the wrong position to press the pin punch
The amount of pad pin turning was set until the R pin no longer protrudes from the back of the brake caliper.
After installing brake pads
Now, open the brake pads outward again to create a gap for the disc rotor.
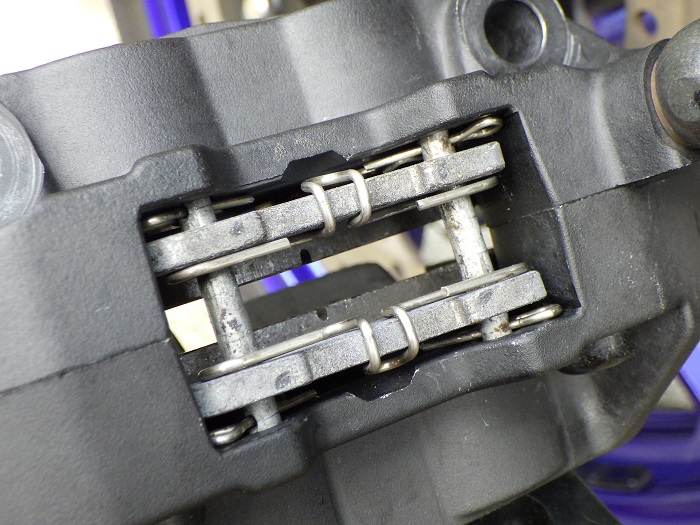
<After installing brake pads>
The finished product looks like this.
Install brake caliper 1
As when removing the caliper, place a work glove or similar object on the wheel to prevent the brake caliper from hitting the wheel.
Then, install the caliper so that it is sandwiched disc rotors.
<Install brake caliper 1>
Temporarily tighten the two bolts that secure the calipers using a quick-turn socket (14mm) with an extension bar (50mm).
Brake operation
<Brake operation>
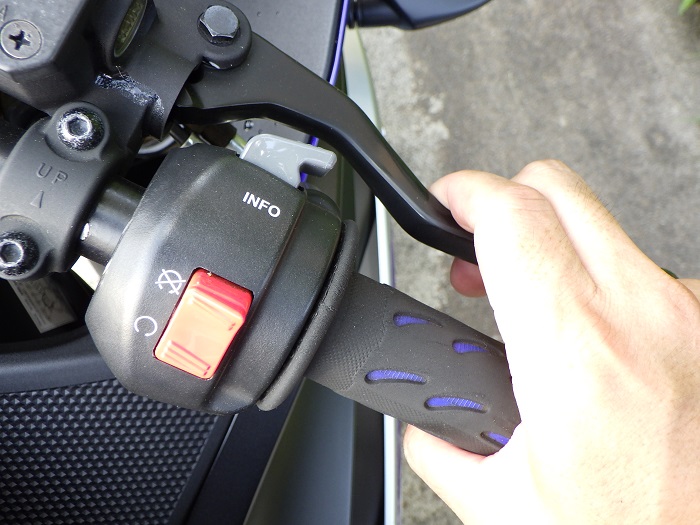
Pull the brake lever multiple times to press the brake pads against the disc rotor.
If you do not do this, you will be scared at the first traffic intersection.
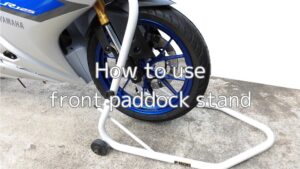
Set front stand
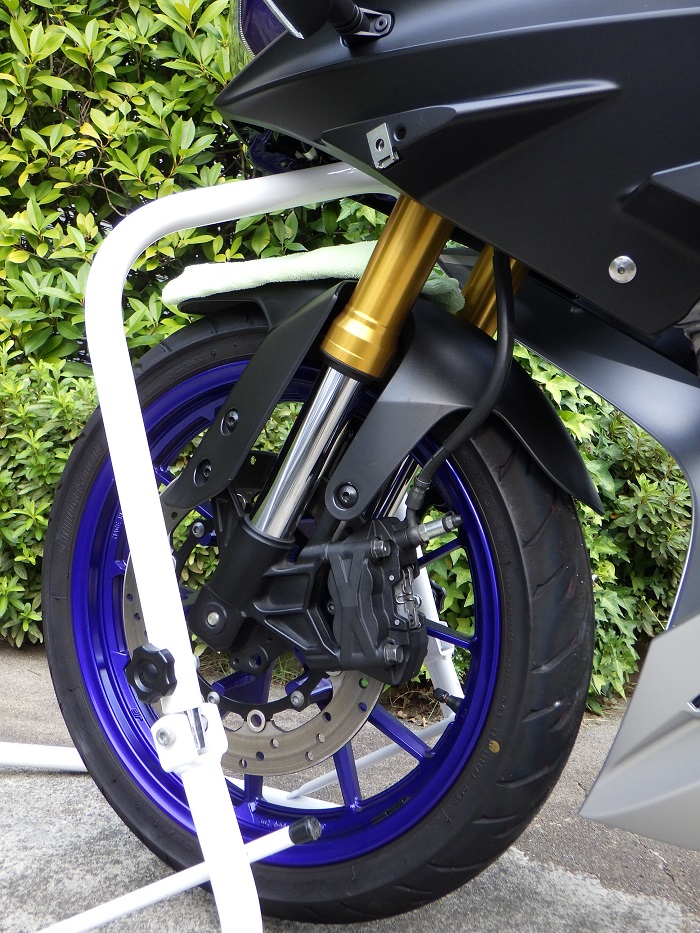
<Set front stand>
Hang the front stand and lift the front tire.
(For details, please refer to the maintenance record “How to use front paddock stand”.)
Brake caliper alignment
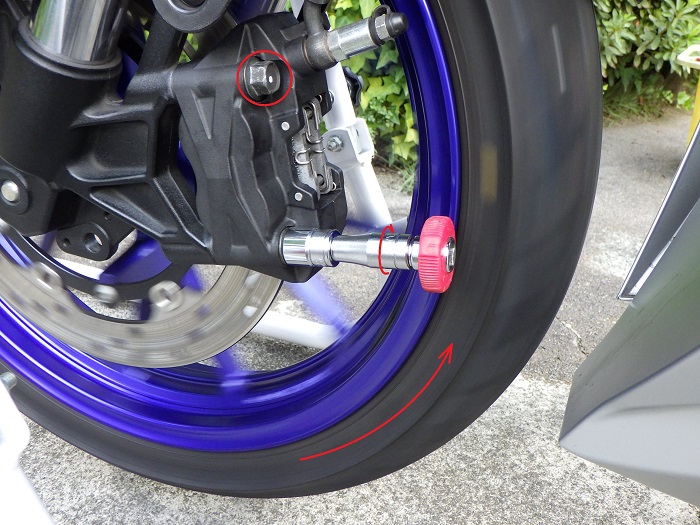
<Brake caliper alignment>
Rotate the tire to find the position of the brake caliper where there is less drag and temporarily tighten the bolts.
*Be careful not to get your fingers caught in it!
Moving the position of the brake caliper slightly will considerably change the degree of drag.
If the dragging does not disappear no matter how you try, there are the following possibilities.
- Deteriorated brake caliper seals. (pistons not returning)
- Disc rotor is distorted.
- The front forks are not aligned.
Install brake caliper 2
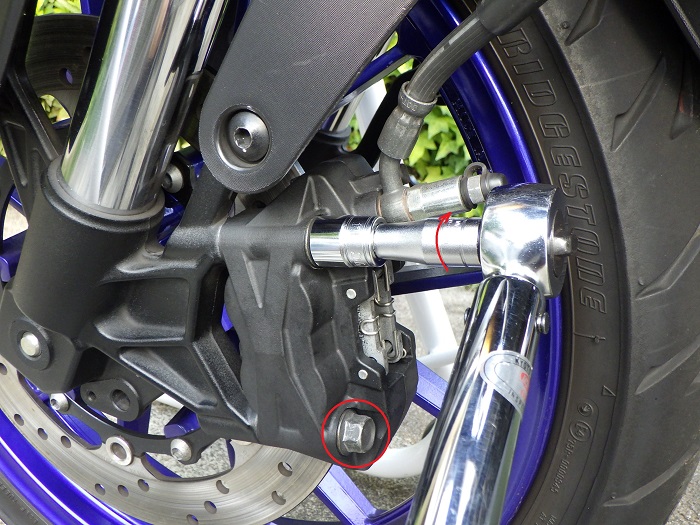
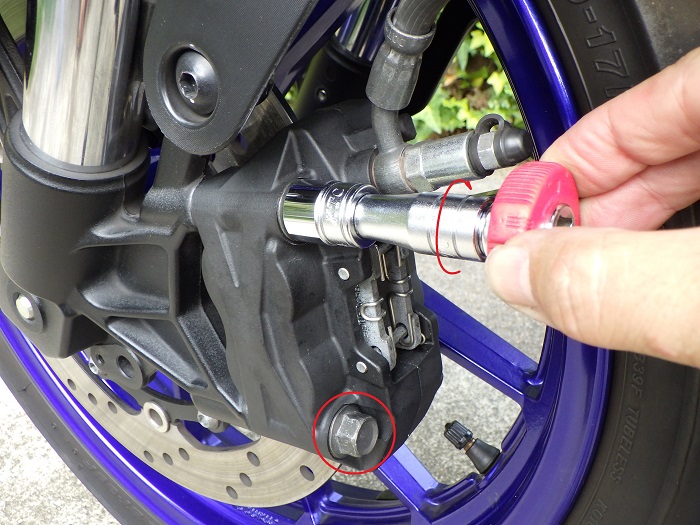
<Install brake caliper 2>
Using a torque wrench, tighten the two bolts. (38 N-m)
Then, install the left side cover and you are done.
Comparison of brake calipers before and after cleaning
Now, let us compare before and after cleaning.
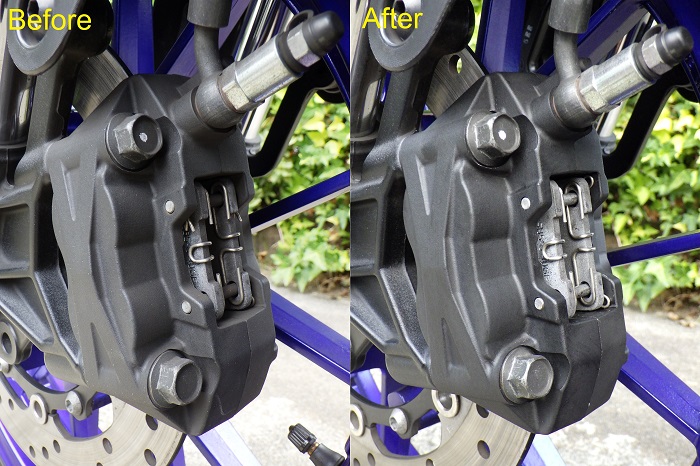
<Comparison of brake calipers before and after cleaning>
Left: Front
Right: After
The lubricant spread all over the brake caliper and it looks shiny…
I’m not satisfied with the appearance, but it is good to know that the condition of the brake pads, etc. was confirmed.
3. Summary
The following is a summary of front brake installation, lubricant and grease application locations, and brake pad application.
When you apply lubricant, you can see that the pistons move better.
So, the feeling may also improve.
- Check the amount of brake fluid before pushing the brake piston in and drain it if necessary.
- It is recommended to lubricate the brake pistons before assembly.
- Apply silicone grease to the pad pins.
- When tightening the brake caliper to the front fork, tighten in a position that minimizes drag.


