
In this fourth installment, I will install and connect the wiring prepared in the maintenance record “Install burglar Alarm3【Processing wiring】” to the moto body.
In order to install the device and wiring inside the frame and cowl, I will remove the cowls and panels.
From this article, you can learn the following.
- lnstallation and wiring of burglar alarm unit, siren, and LED indicator lamp
- How to use the burglar alarm
| Date | 2nd April 2022 |
| Subjects | Tuning, Customizing |
| Shop or DIY | DIY |
| Difficulty | |
| Working hours | 3 |
| Costs [Yen] | 626 |
1. Goods to use
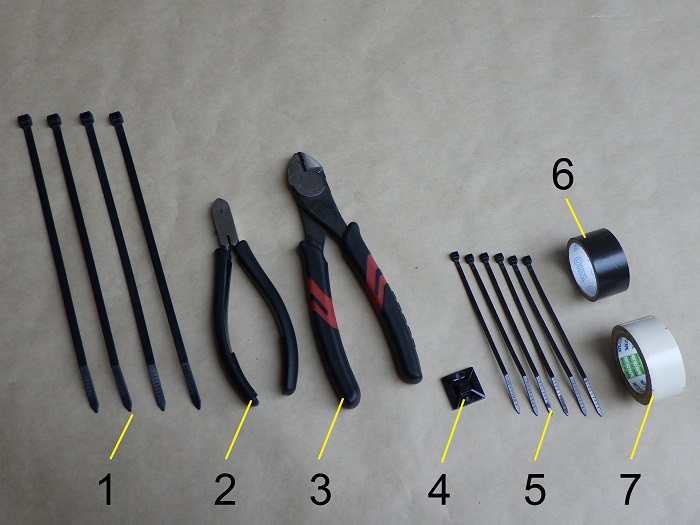
| No. | Products name | Manufacturer | Product number | Quantity | Amounts[Yen] | Purchase this time |
| ST2 | Burglar alarm | PORTEC | CS-550M | 1 | 13,409 | |
| 1 | Cable ties (4.8×200mm) | ELPA | KBF-N200100(BK) | 4 | 656 | |
| 2 | Miniature nippers | HOZAN | N-35 | 1 | 3,465 | |
| 3 | Nippers | KTC | PN1-150 | 1 | 4,950 | |
| 4 | Cable tie fixture | 3M | MTO-20EX | 2 | 626 | ○ |
| 5 | Cable ties (2.5×100mm) | ELPA | KBF-N100100(BK) | 6 | 175 | |
| 6 | Insulating tape | OHM | DE1910K | 1 | (84) | |
| 7 | Vinyl tape (White) | – | – | 1 | 76 | |
| 23,441 | 626 |
2. Install burglar alarm4【Installation】(STEP 1-28)
Remove exterior 1
First, remove the exterior.
- Rear cowls, panel and box
For details, see maintenance record “How to remove rear cowls and panel etc.”. - Fuel tank cover
For details, see maintenance record “How to remove fuel tank cover”.


Install alarm main unit
First, install the alarm main unit.
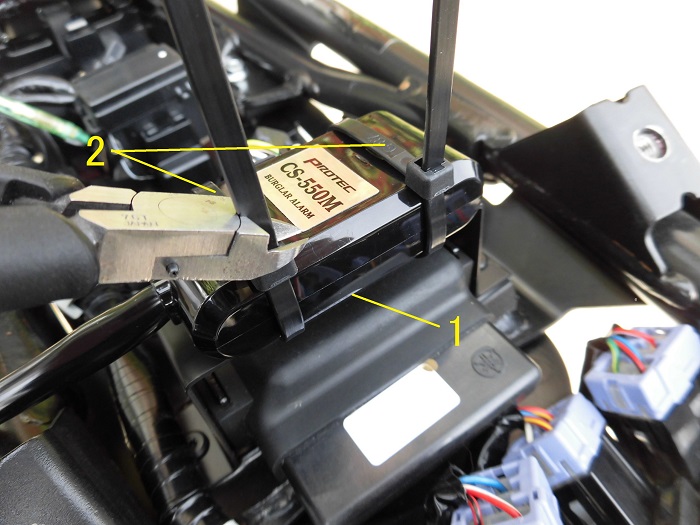
<Install alarm main unit>
Fix the alarm main unit to the bracket that is mounted across the engine computer.
- Peel off the backing of the double-sided tape and press it firmly onto the bracket.
- Wrap two cable ties around the bracket just to be safe.
(For the bracket, please refer to the maintenance record “Install burglar alarm2 【Make bracket】”.)
Cut cable ties 1
<Cut cable ties 1>
From the middle of the left side to the rear, use nippers to cut the three cable ties that hold the main harness, etc. in place.
Cut cable ties 2
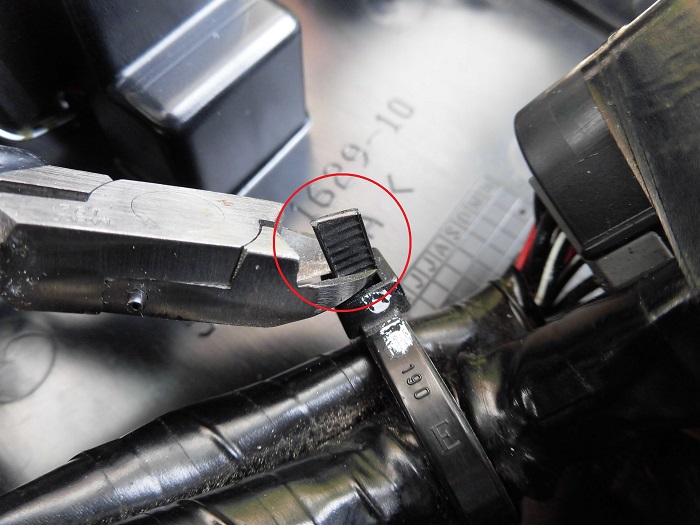
<Cut cable ties 2>
By the way, I cut the protruding part of the cable ties in several places.
Every time I work on it, it sticks in my hand and hurts.
Fix wiring of alarm main unit 1
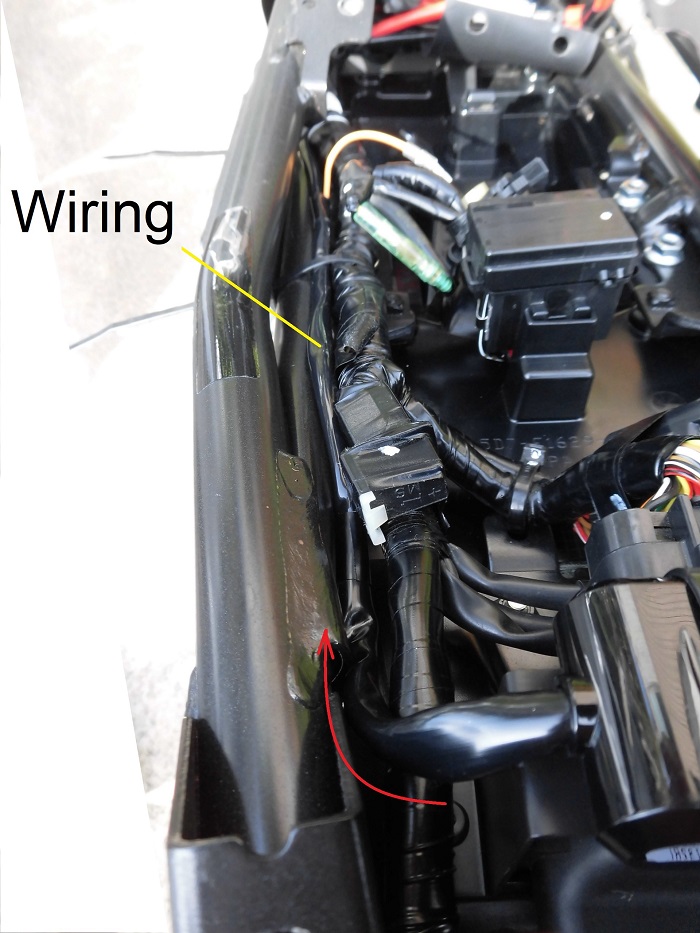
<Fix wiring of alarm main unit 1>
Align the wiring of the alarm main unit with the main harness.
The outer diameter of the main harness is large, so the wiring should be aligned with the gap between the harness and the main harness.
Fix wiring of alarm main unit 2
<Fix wiring of alarm main unit 2>
Once the wiring routing is determined, fix it with cable ties.
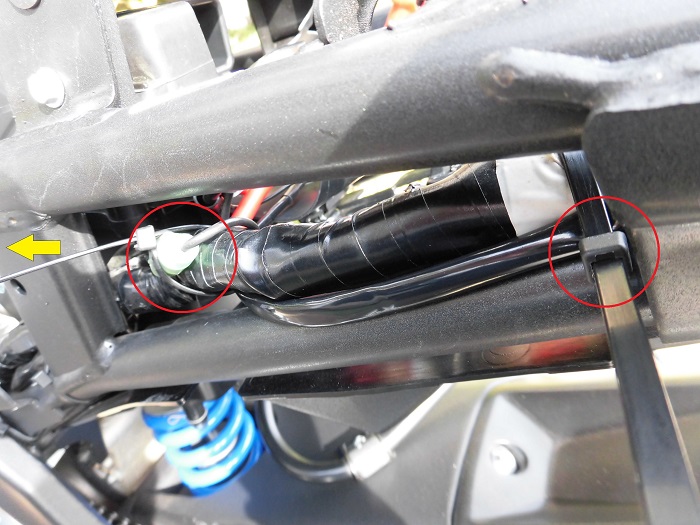
Fix siren wiring
Route the siren wires that were separated in the second branch through the bottom of the relay and into the top of the tank.
<Fix siren wiring>
Paste the cable tie fixture to the side of the relay and secure the siren wiring with the cable ties.
This will prevent the wires from moving toward the air intake of the air cleaner.
Fix wiring of alarm main unit 3
<Fix wiring of alarm main unit 3>
The wiring of the permanent 12V and the LED indicator lamps are now grouped together in the harness protector.
Note that the harness protector was removed for the convenience of taking pictures.
Fix wiring of alarm main unit 4
<Part A of STEP 8>
- Secure with insulation tape along with other power wiring
- Pull the round terminal through the terminal cover and out over the positive terminal of the battery
The positive wire has no play and could have been made about 20 mm longer.
Fix wiring of alarm main unit 5
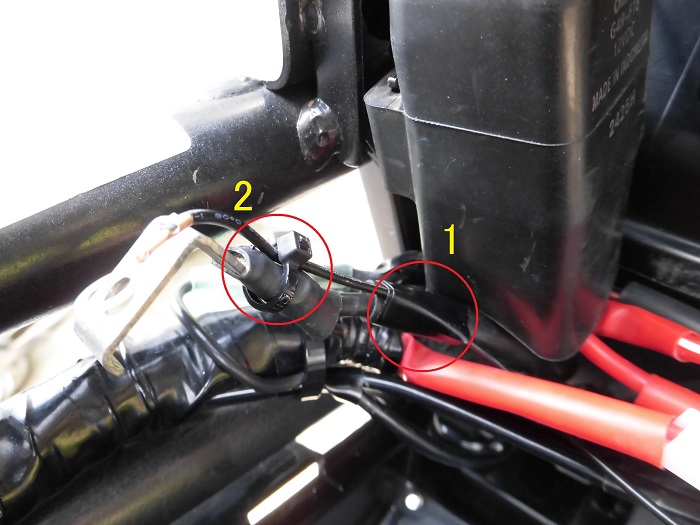
<Part B of STEP 8>
- Secure the negative wiring to the end of the harness tube with insulation tape
- Secure with cable ties at the heat shrink tube section and take the round terminal out over the negative terminal of the battery
There is room for consideration regarding the routing of the round terminals, but I think I will stick with this until the next electrical component is installed.
Install siren
Next, install the siren on top of the fuel tank.
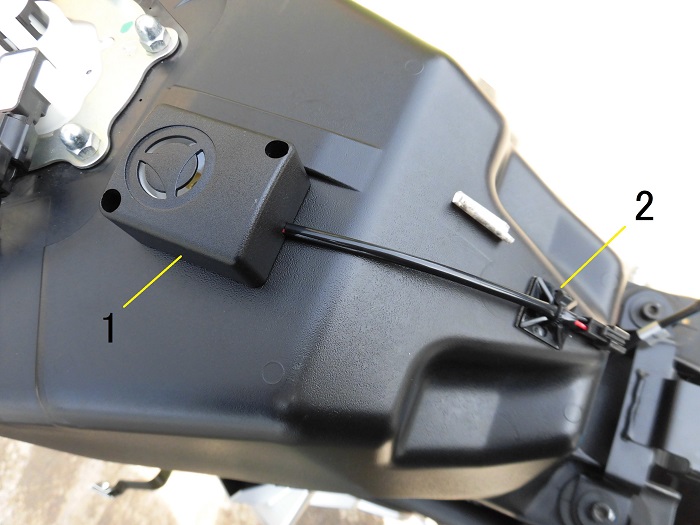
<Install siren>
- Peel off the backing of adhesive tape and press firmly onto the fuel tank.
- Attach the cable ties fixture and secure the wire with the cable ties.
Connect siren connector
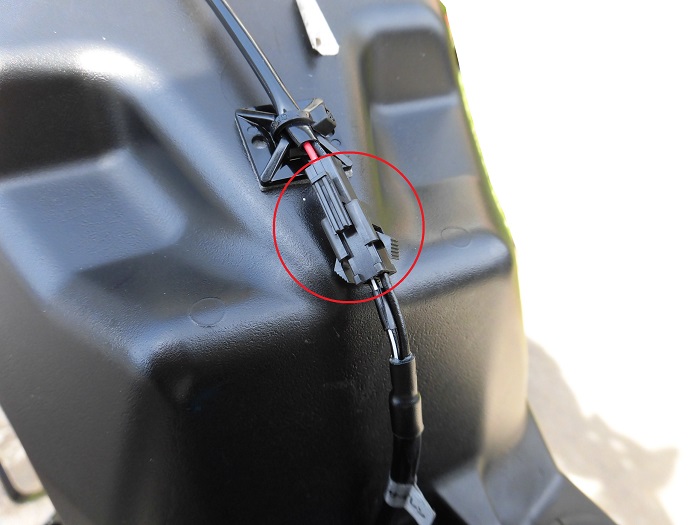
<Connect siren connector>
Connect the wiring of the siren to the wiring of the alarm main unit.
I used a general-purpose connector so that it can be easily connected and disconnected when removing and installing the fuel tank.
Remove exterior 2
Next, remove the following exterior components in order to install the wiring of the LED indicator lamps.
- Front cowl and panels
For details, see maintenance record “How to remove front cowls and panels etc.”. - Front stay
For details, see maintenance record “How to remove front stay”. - Meter
Install LED indicator lamp
<Install LED indicator lamp>
- Peel off the backing of the adhesive tape and stick it to the position that I have confirmed beforehand.
- Pass the wires through the hole in the stay.
Install meter
<Install meter>
When installing the meter, be careful not to pinch the wiring at the meter’s fastening points.
Note that there is a gap between the meter and the stay, so there is room for the wires to pass through.
Fix wiring of LED indicator lamp 1
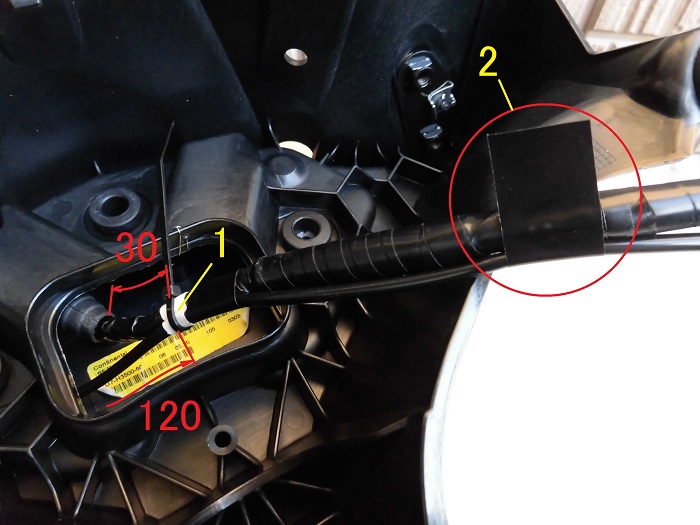
<Fix wiring of LED indicator lamp 1>
- Fasten the wires with cable ties at a position 30 mm from the meter and 120 mm from the LED indicator light.
- Wrap the meter wires and indicator wires with insulation tape and white tape at approximately 10cm intervals.
Fix wiring of LED indicator lamp 2
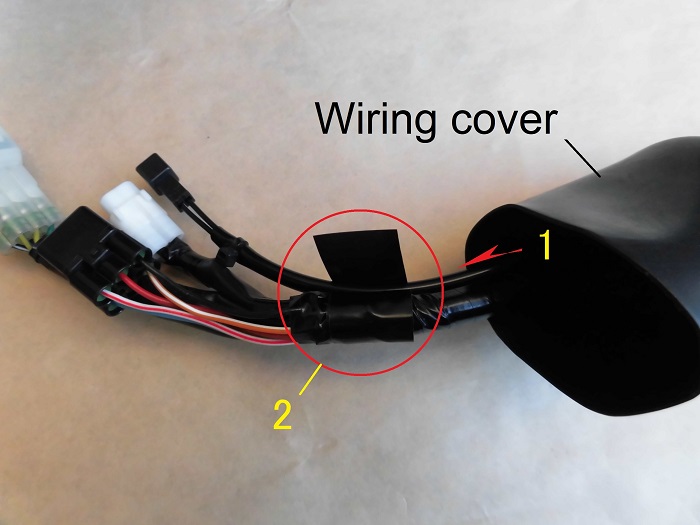
<Fix wiring of LED indicator lamp 2>
- Pass the wiring of LED indicator lamp through the wiring cover.
- Wrap the ends of the wirings with insulation tape.
The indicator wiring is now roughly the length I expected.
Now, I can remove it along with the other connectors when I remove the front stay.
There will be less risk of forgetting to remove it and pulling it off.
Wiring of LED indicator lamp attached to front stay
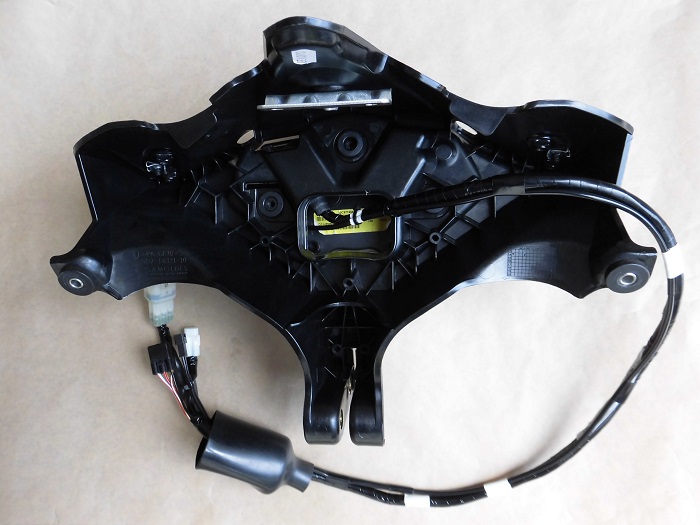
<Wiring of LED indicator lamp attached to front stay>
It came together like this.
There is one more harness tube, but it may not look much different.
Install exterior 1
The exterior is then installed on the body of the moto.
- Front stay
For details, see maintenance record “How to install front stay”. - Front cowl, panels
For details, see maintenance record “How to install front cowls and panels etc.”.
Wiring of LED indicator lamps attached to the moto body
<Wiring of LED indicator lamps attached to the moto body>
It could be neatly aligned with the meter wiring.
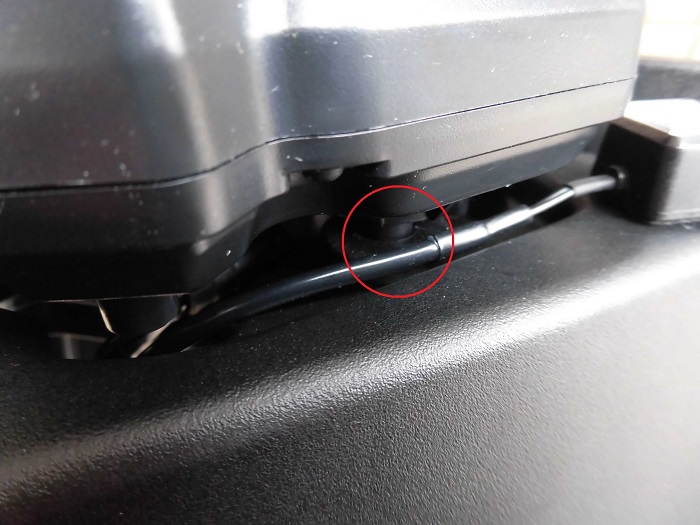
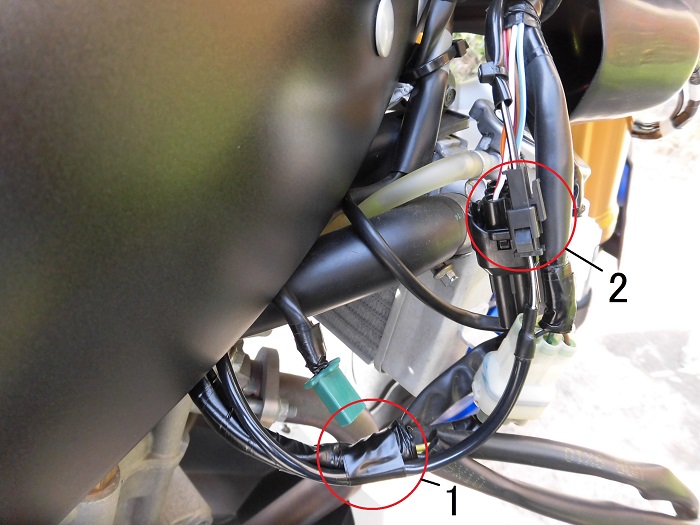
Connect extension wiring
And finally, install the extension wiring.
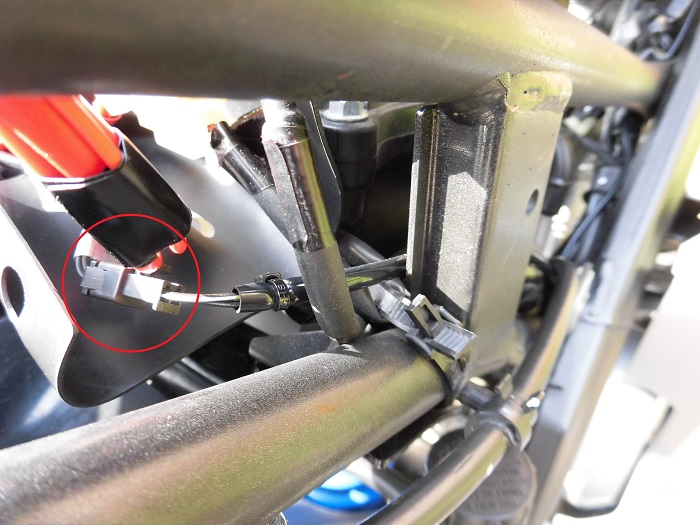
<Connect extension wiring>
Connect the wiring of LED indicator lamp (on the alarm main unit side) and the extension wiring in the harness protector.
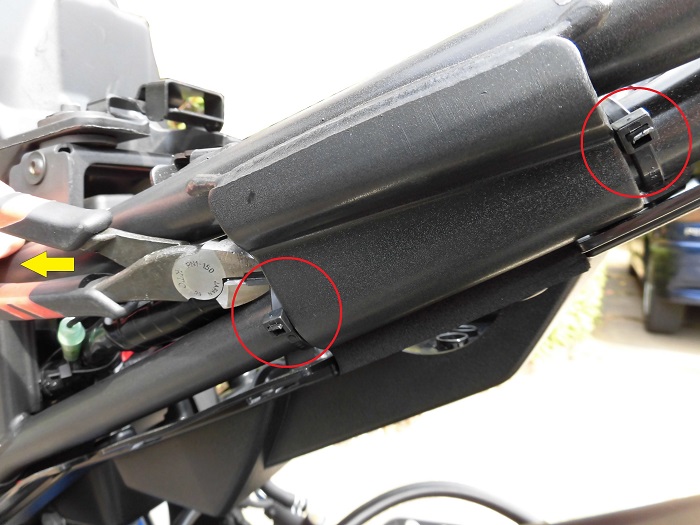
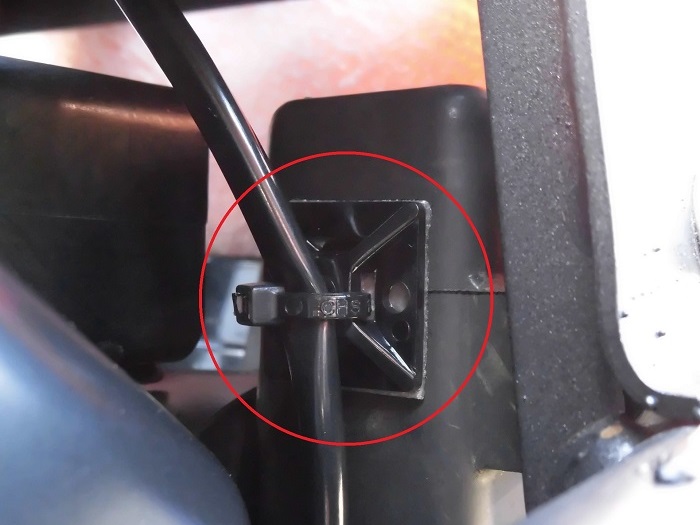
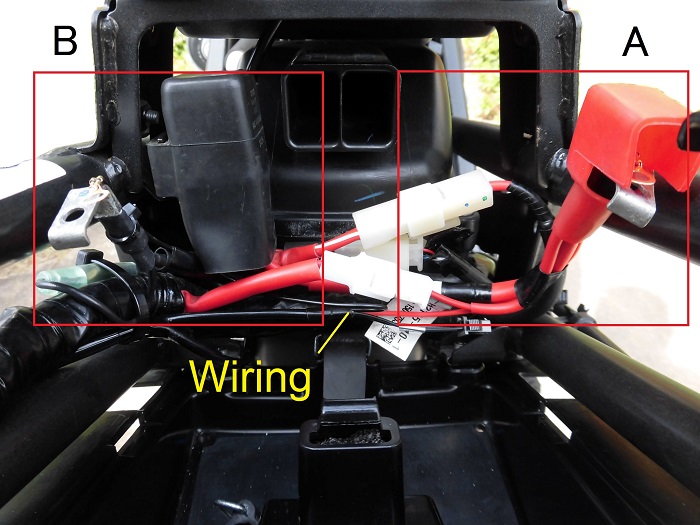
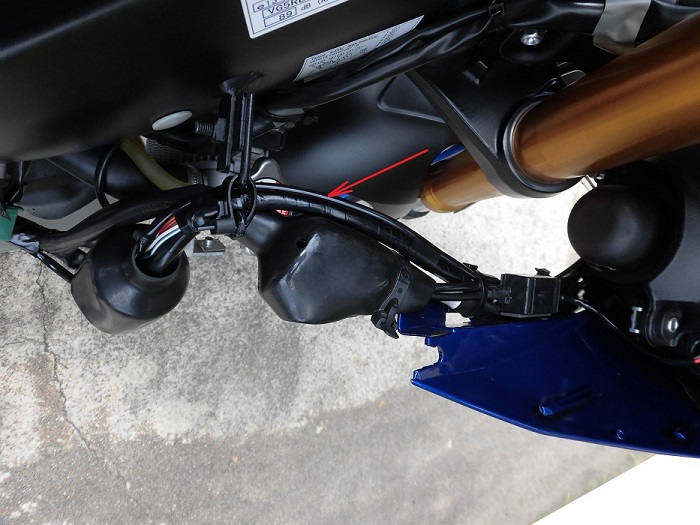
Fix extension wiring 1
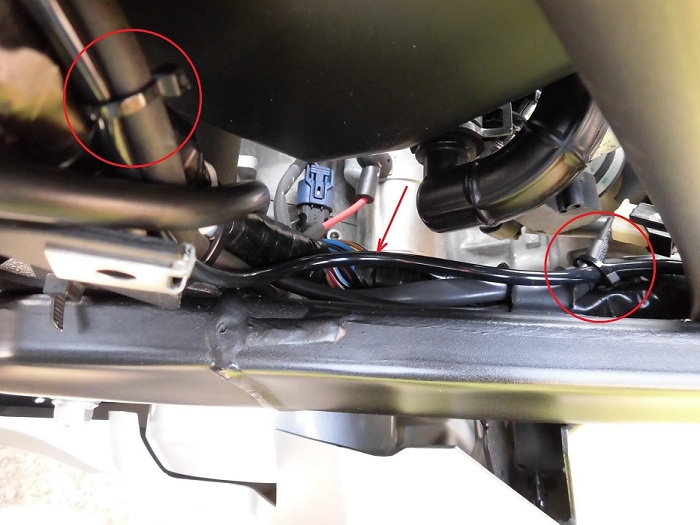
<Fix extension wiring 1>
Align the extension wiring with the main harness on the right side of the frame.
For now, I secured the two places (○) in the photo with cable ties.
I plan to re-fix them when I remove the gas tank and air cleaner box.
Fix extension wiring 2
<Fix extension wiring 2>
- Secure the ends of the wires with insulation tape.
- Connect the extension wiring to the wiring of LED indicator lamp.
This completes the wiring routing.
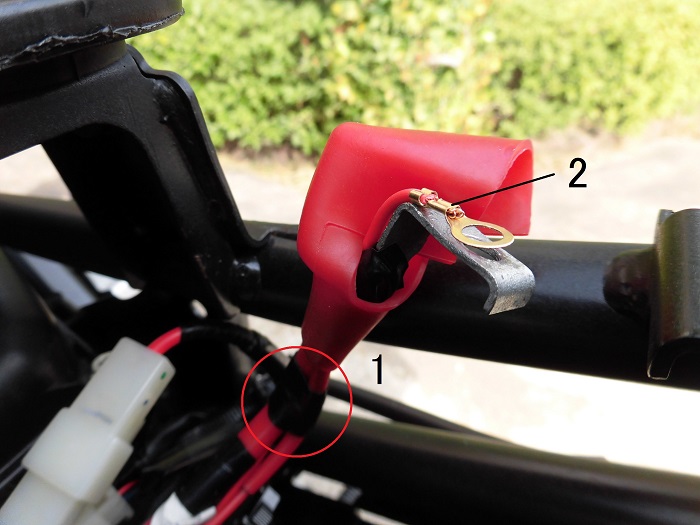
Connect buttery etc.
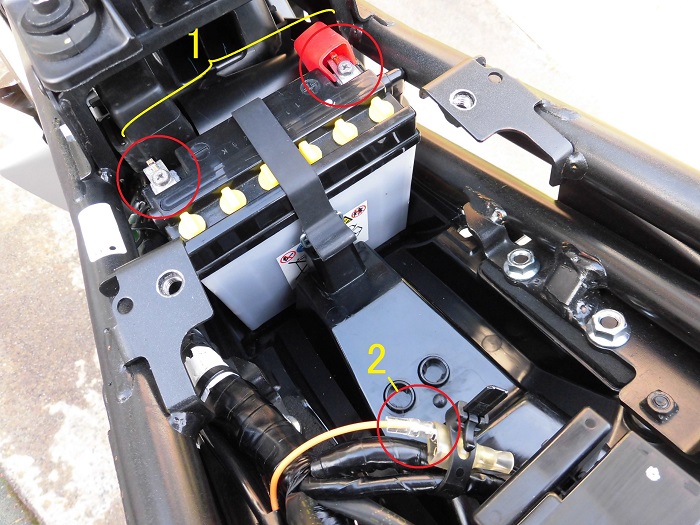
<Connect buttery etc.>
- Connect the terminals to the battery in the order of positive and negative
- Connect the ignition wiring (bullet terminal) to the ignition ON wiring.
Install exterior 2
Then, install the removed exterior back on.
- Fuel tank cover
For details, see maintenance record “How to install fuel tank cover”. - Rear cowls, panel and box
For details, see maintenance record “How to install rear cowls and panel etc.”.

Confirm operation
I’ll see if it works as soon as possible.
I am a little nervous because it took some time to install it and I hit the alarm main unit against the frame many times…
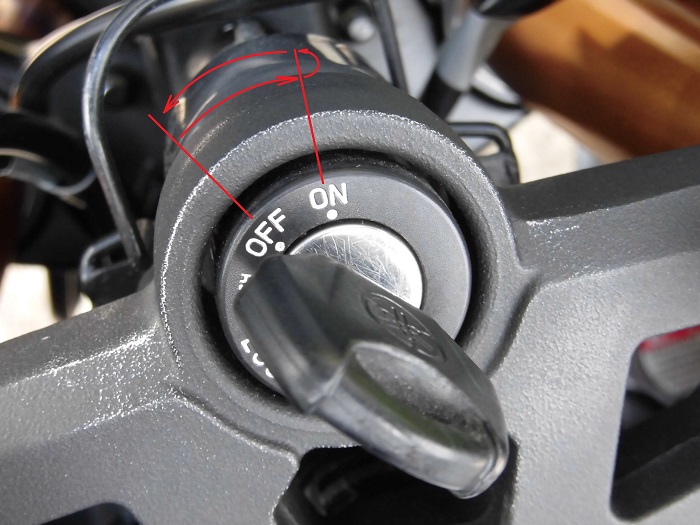
<Confirm operation>
Move the ignition switch from OFF to ON to OFF within 5 seconds.
LED indicator lamp
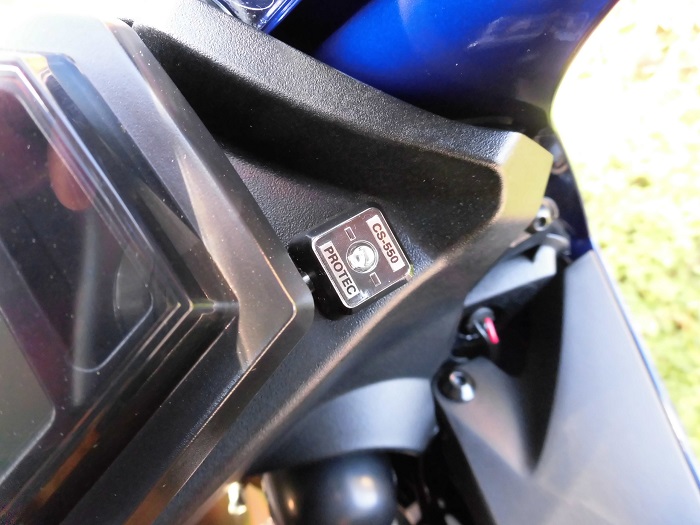
<LED indicator lamp>
I actually tried to take a picture of the lamp glowing. But it was only for a moment. So, I gave up.
After setting the alarm, I moved the bike and the alarm went off without incident.
Actually, at first, I was a bit nervous because the siren didn’t sound.
But I found that it doesn’t sound for one minute after I set it.
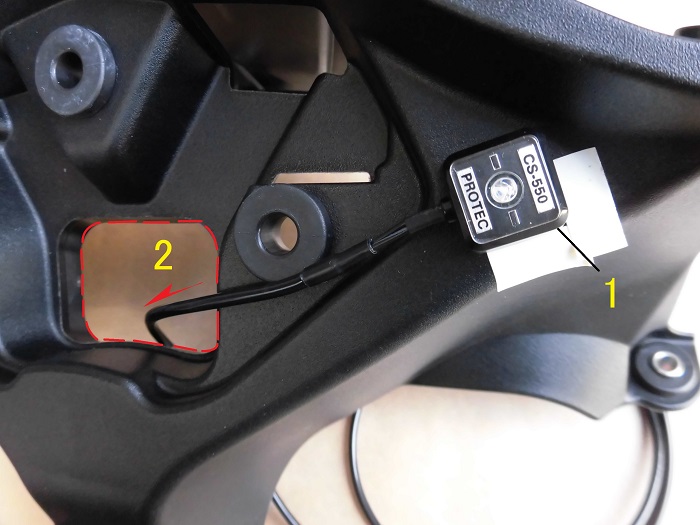
Alarm main unit
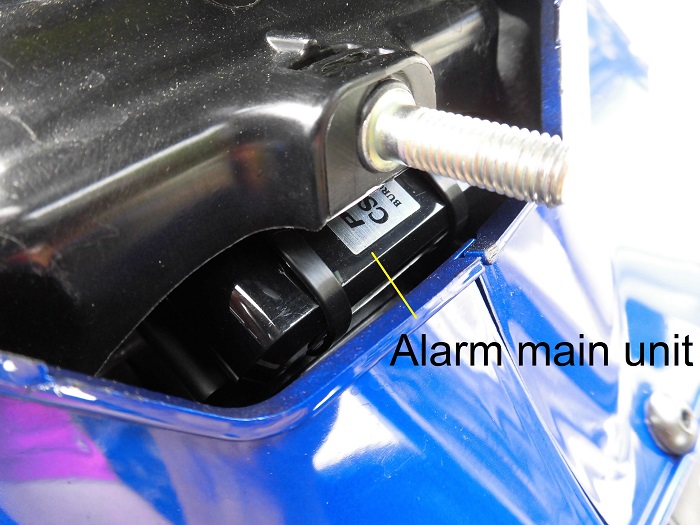
<Alarm main unit>
The alarm main unit can be seen through a gap in the seat cowl when the tandem seat is removed.
3. Summary
In this issue, we summarize the installation of the burglar alarm body, siren, LED indicator, and other components on the body.
Since the R125 has a full cowl, I was able to fit everything but the LED indicator light and its wiring in a position that could not be seen from the outside.
I also used a lot of black harness tubing, so even when bundled with the genuine harness, it does not look out of place.
- When installing a burglar alarm, the exterior must be removed.
- For wiring routing, it is recommended to follow the genuine wiring
- Use cable ties, insulation tape, or vinyl tape to secure the wiring
- Use of general-purpose connectors makes it easier to remove and install when disconnecting other parts.


