In this second installment, I’ll be making the bracket for the dash cam main unit.
<Location for the Dash Cam Main Unit>
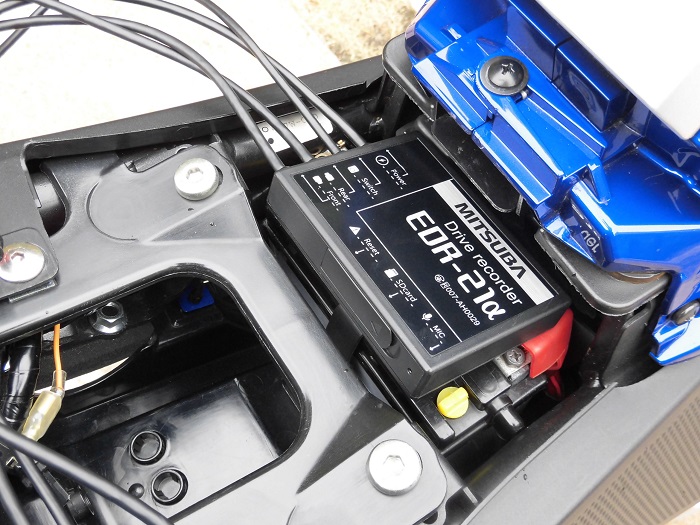
As decided in Maintenance record “Motorcycle Dash Cam Installation Part 1 – Planning the Setup”, the unit will be placed on top of the battery.
With this in mind, the bracket will be designed to:
- Match the shape of the battery and the dash cam unit
- Allow simple fastening of the bracket and unit
Although making the bracket takes some effort, it’s surprisingly straightforward for the following reasons:
- It uses commercially available aluminum sheet
- The thin sheet allows for easy cutting and bending
From this article, you’ll learn:
- How to make a bracket for the dash cam unit
- How to fix the bracket to the bike
| Date | 12th December 2021 |
| Subjects | Tuning, Customizing |
| Shop or DIY | DIY |
| Difficulty | |
| Working hours | 12 |
| Costs [Yen] | 1.558 |
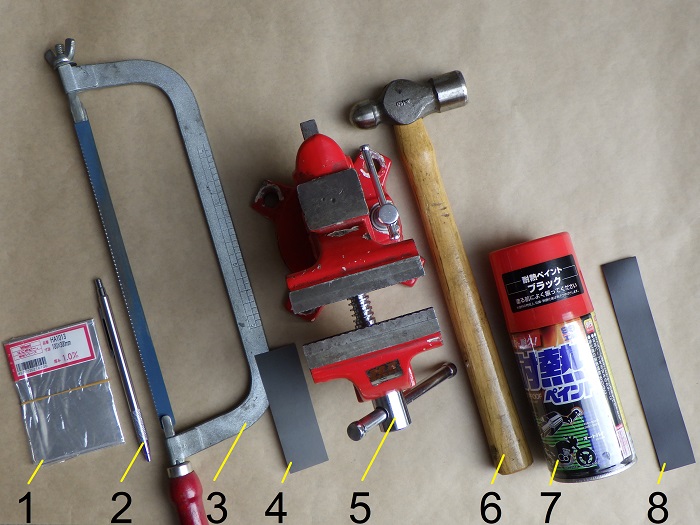
1. Goods to use
| No. | Product name | Manufacturer | Product number | Quantity | Amounts[Yen] | Purchase this time |
| 1 | Aluminum sheet (1.0mm) | HIKARI | HA1013 | 1 | 428 | |
| 2 | Pencil-type scriber | STRAIGHT | 19-640 | 1 | 980 | |
| 3 | Hand saw | – | – | 1 | 670 | |
| 4 | Waterproof sandpaper (#320) | – | – | 1 | 185 | |
| ST2 | Hand nibbling tool | Three axis | 11334 | 1 | 1,558 | ○ |
| 5 | Vice 90mm | Fujiwara Industrial | 220915 | 1 | (4,398) | |
| 6 | Hammer | – | – | 1 | 1,648 | |
| 7 | Heatproof paint Black | SOFT99 | 08020 | 1 | 1,538 | |
| ST8 | Compact curing oven | CARVEK | 1026 | 1 | 20,350 | |
| 8 | Sponge sheet (1.5mm) | INOAC | – | 1 | 625 | |
| 32,380 | 1,558 |
2. Crafting the Main Unit Bracket (STEP 1–13)
Cutting Aluminum Sheet 1
Let’s begin.
The bracket will sit beneath the seat, so it won’t be exposed to impacts.
For ease of processing over strength, a thin aluminum sheet (1.0mm thick) will be used.
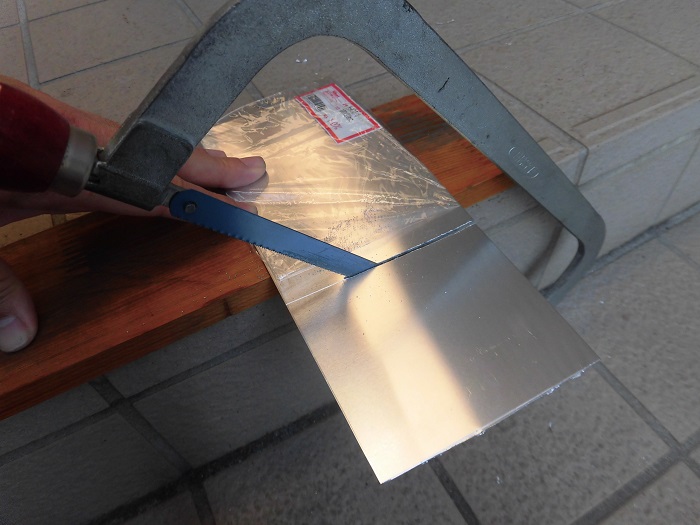
<Cutting Aluminum Sheet 1>
After marking the cut and bend lines, use a hand saw to cut it out.
The edge ended up jagged, so I smoothed it out with waterproof sandpaper (grit 320).
Cutting Aluminum Sheet 2
<Cutting Aluminum Sheet 2>
Use a hand nibbling tool to cut a groove.
Because it’s just 1mm thick, the cutting is easy.
This task was unexpectedly enjoyable—I ended up cutting away without thinking.
Removed Fragments
<Removed Fragments>
The fragments cut with the hand nibbling tool are roughly 6×2mm rectangles.
Cut Aluminum Sheet
<Cut Aluminum Sheet>
Here’s what the cut-out piece looks like.
A hand nibbling tool allows for the freeform shaping that a hand saw can’t achieve.
Bending Aluminum Sheet
<Bending Aluminum Sheet>
Clamp the aluminum sheet in a vice, and bend it using a hammer.
It’s only 1mm thick, so bending is effortless.
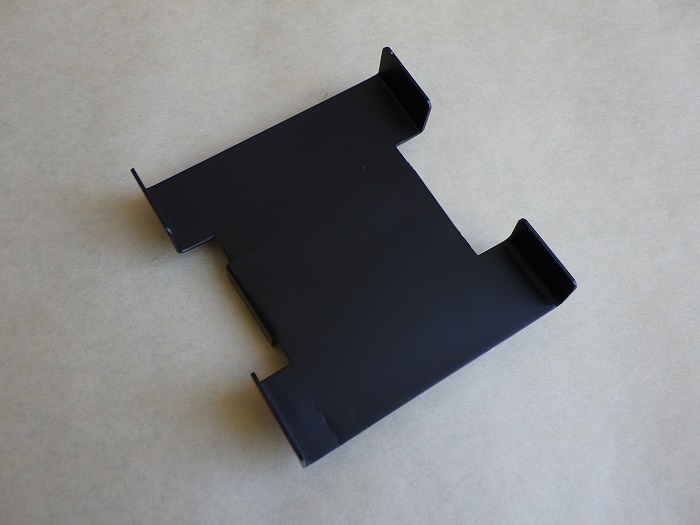
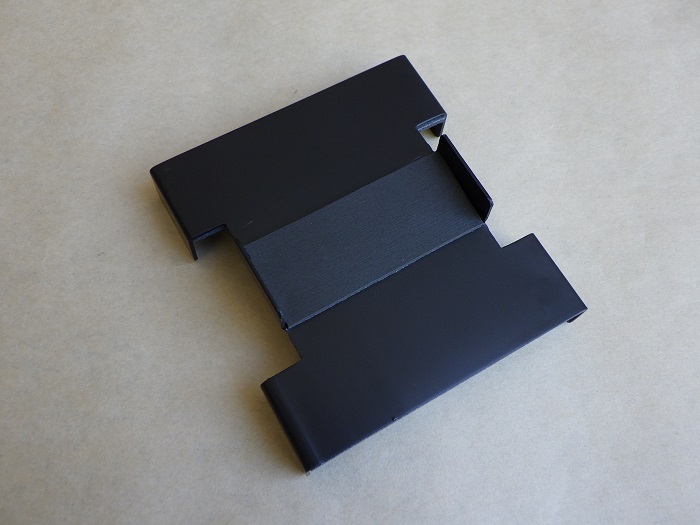
Finished Bracket
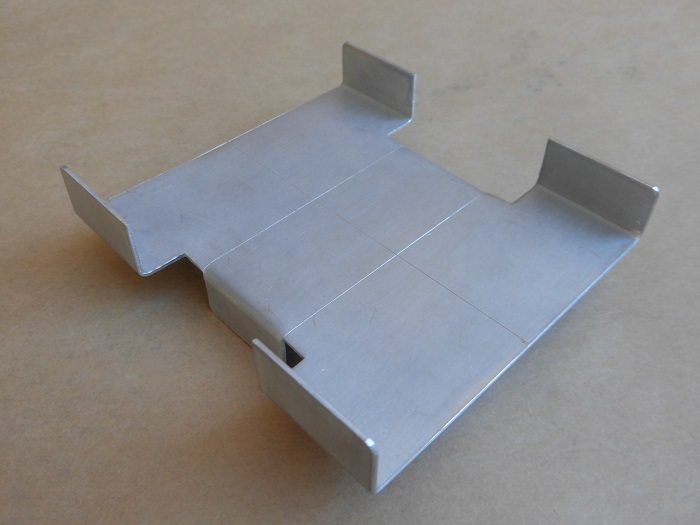
<Front Side>
Here’s the finished piece.
The dash cam unit will sit on this surface. It came out cleaner than expected.
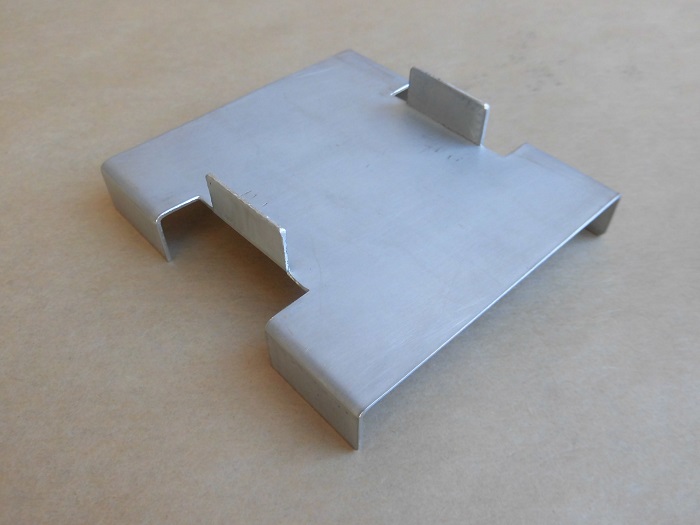
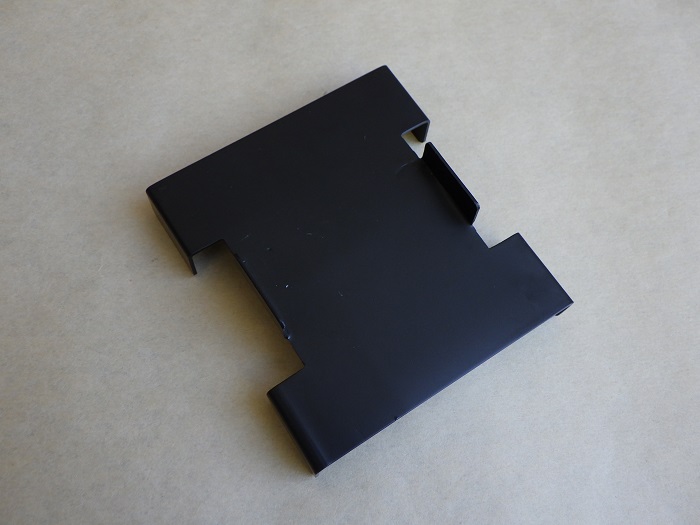
<Back Side>
This side will rest on the battery.
The bracket was sized to prevent shorting between the battery’s positive and negative terminals when placed.
Painting the Bracket
As a final step, painting for the finish.
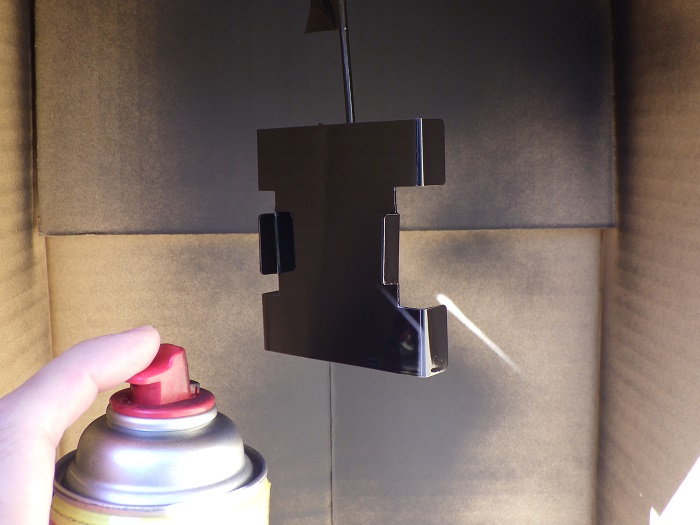
<Painting the Bracket>
I stubbornly went for heat-resistant paint again.
Heat-resistant paint seems to adhere better than regular paint and is less prone to peeling.
Curing
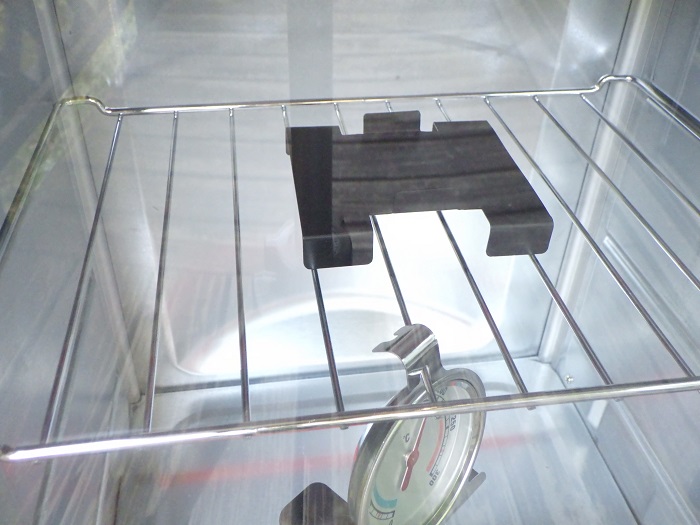
<Curing>
Heated in a curing oven at 150°C for 1 hour.
Although the paint had some unevenness, it’s barely noticeable once cured.
Painted Bracket
<Front Side>
Finished product looks like this.
<Back Side>
Scratches from bending are more noticeable than the paint coat itself.
Applying Sponge Sheet
Next, apply sponge sheets to the bracket.
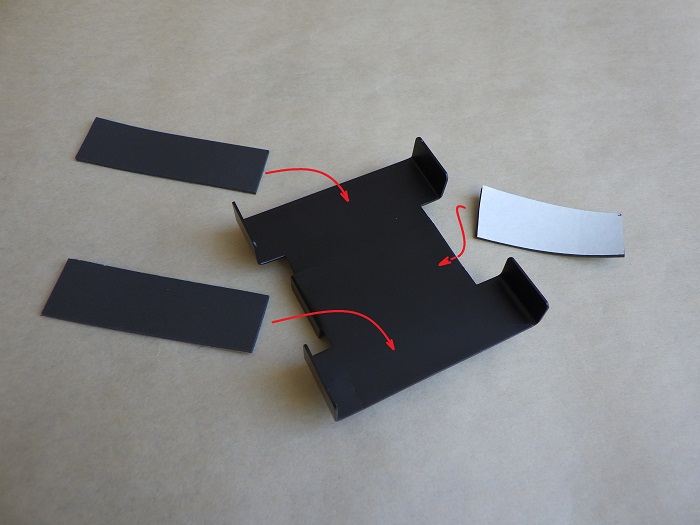
<Applying Sponge Sheet>
Attach 1.5mm sponge sheets to the areas touching the dash cam unit and the battery.
Dash Cam Unit Bracket
And now—it’s complete.
<Front Side>
Black makes it look pretty sleek.
<Back Side>
Due to the paint texture, it almost looks like steel.
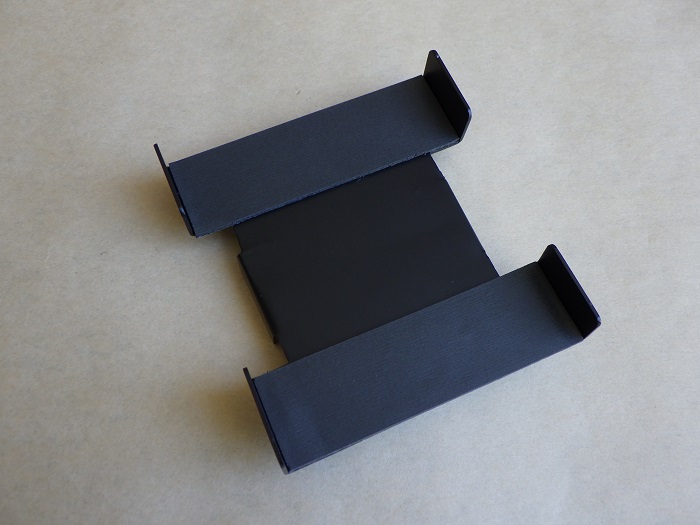
Finished Brackets
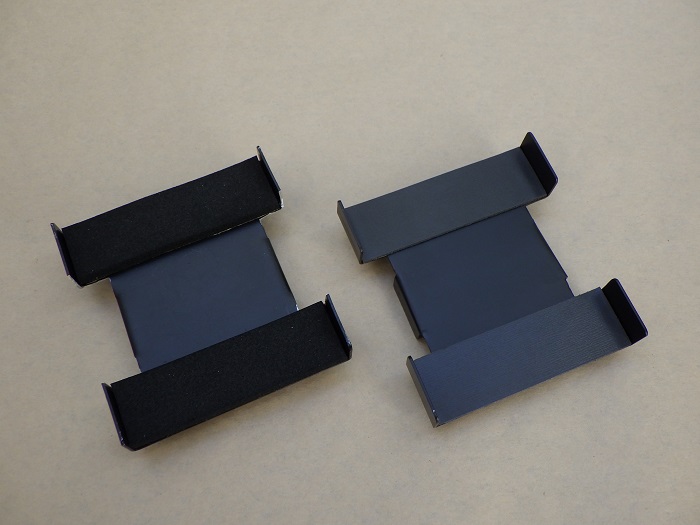
<Finished Brackets>
Actually, I made two brackets:
- Left: First one, made in December 2021 (was paused for a while afterward)
- Right: Second one, made from Feb–Nov 2023
The first one was better made, but I rebuilt it to use repeat tie straps for fastening the unit.
Bracket with Dash Cam Mounted
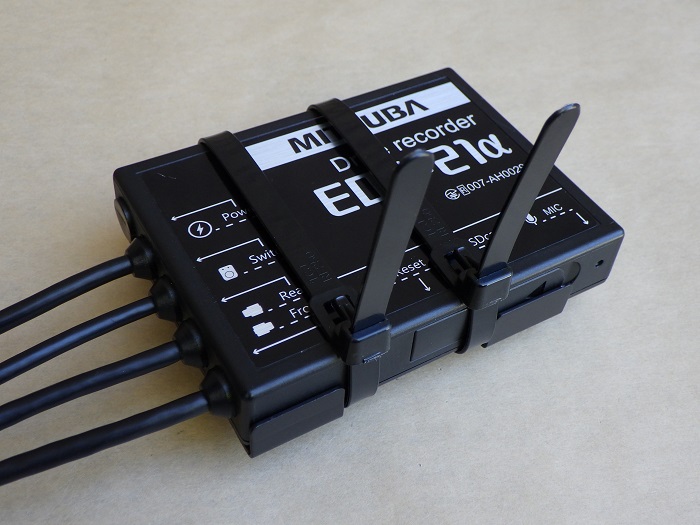
<Bracket with Dash Cam Mounted>
Here’s how the dash cam unit is mounted.
- The bracket is secured using the rubber strap that holds the battery
- The dash cam is attached to the bracket using zip ties
Next up: Dash Cam Installation Part 3 – Crafting the Camera Bracket
3. Summary
This time, I focused on crafting a bracket for the dash cam main unit.
While specific tools are required to work with aluminum sheets, the overall difficulty of the task isn’t very high.
Once you have the tools, you can make all kinds of things—definitely give it a try.
- Used thin aluminum sheet for ease of processing
- Heat curing makes paint adhere better and helps hide imperfections
- Added sponge sheets to avoid scratching the battery and dash cam
- Bracket secured using battery’s rubber strap
- Dash cam unit fastened with zip ties (repeat ties)


