This guide explains how to remove and install the low beam bulb.
The low beam is the headlight on the right side when facing forward, and the bulb type is H7.
Once you know how to remove the bulb, you’ll be able to:
- Replace a burnt-out bulb
- Upgrade to a high-performance bulb
- Switch to an LED bulb
Note:
I removed the front cowl to make it easier to take photos.
If you’re just removing or installing the bulb, there’s no need to remove the cowl.
From this article, you’ll learn:
- How to remove and install the low beam bulb
| Date | 6th February 2022 |
| Subjects | Maintenance, Failure, Repair |
| Shop or DIY | DIY |
| Difficulty | |
| Working hours | 0.5 |
| Costs [Yen] | 0 |
1. Goods to use
(No tools required for this procedure)
2. How to Remove and Install the Low Beam Bulb (STEP 1–10)
Inside the Front Cowl
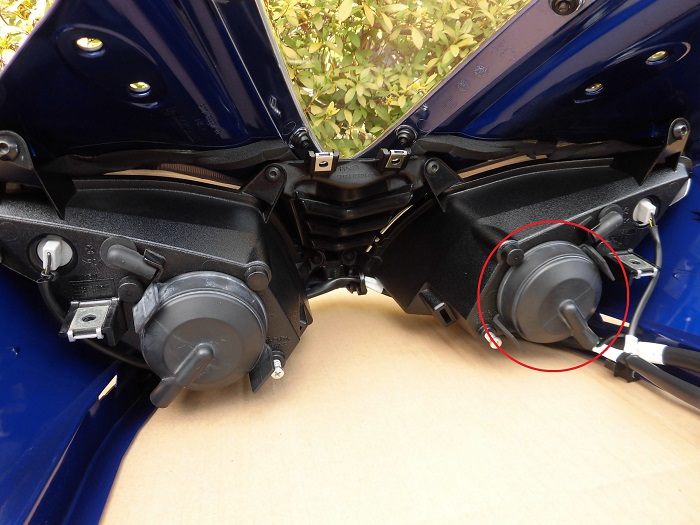
<Inside the Front Cowl>
The low beam is on the right side.
Removing the Rear Headlight Cover
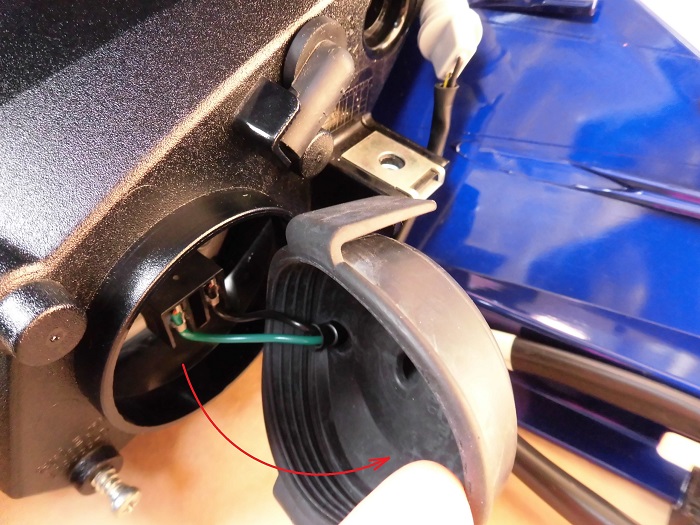
<Removing the Rear Headlight Cover>
Pull the rear headlight cover off with your fingers.
There’s no lock—it’s simply press-fit.
Disconnecting the Bulb Socket
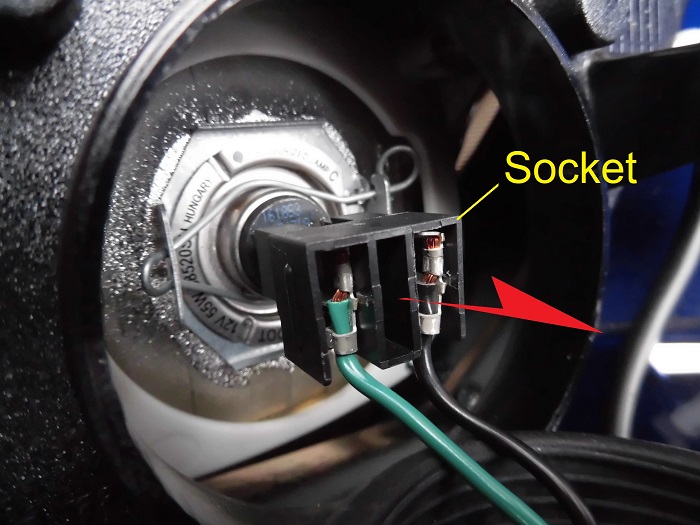
<Disconnecting the Bulb Socket>
Pull the socket connected to the headlight bulb off with your fingers.
It’s pretty tight, so be careful not to bang your hand when it comes loose.
Removing the Bulb 1
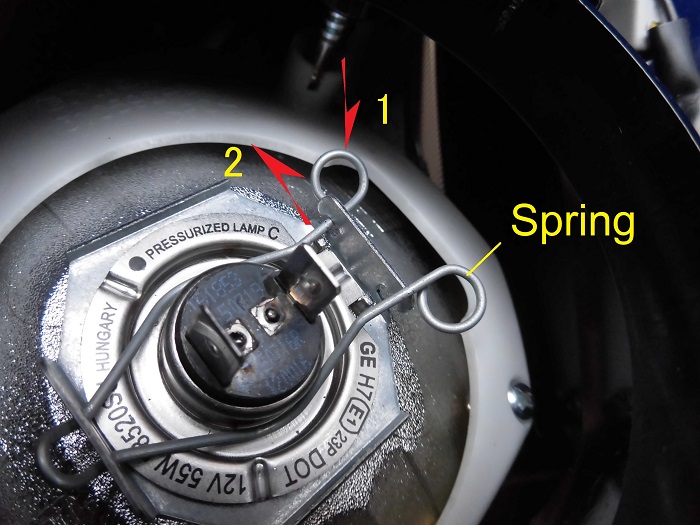
<Removing the Bulb 1>
Release the spring that holds the bulb in place from the right-side hook.
- Press the round part of the spring
- Move it upward (the other side moves downward)
This will release the spring.
Removing the Bulb 2
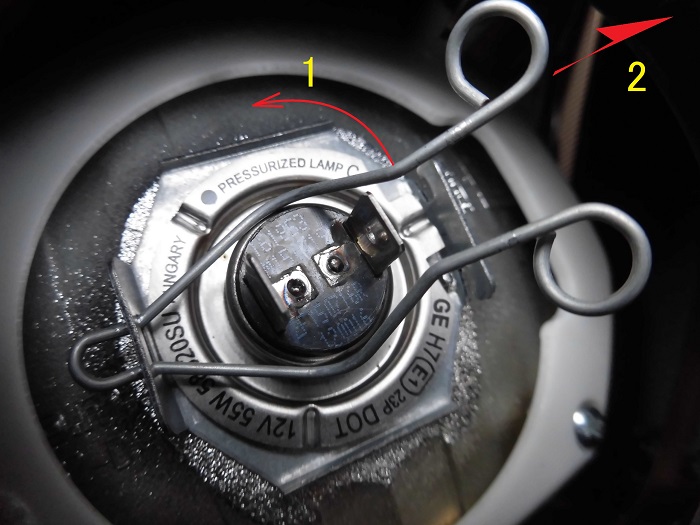
<Removing the Bulb 2>
- Lift the spring
- Pull it to the right
This will fully detach the spring.
I left the spring loose without locking it, and it dropped into the headlight housing—gave me a bit of a scare.
Luckily, since the front cowl was off, I flipped the bike over and retrieved it.
Removing the Bulb 3
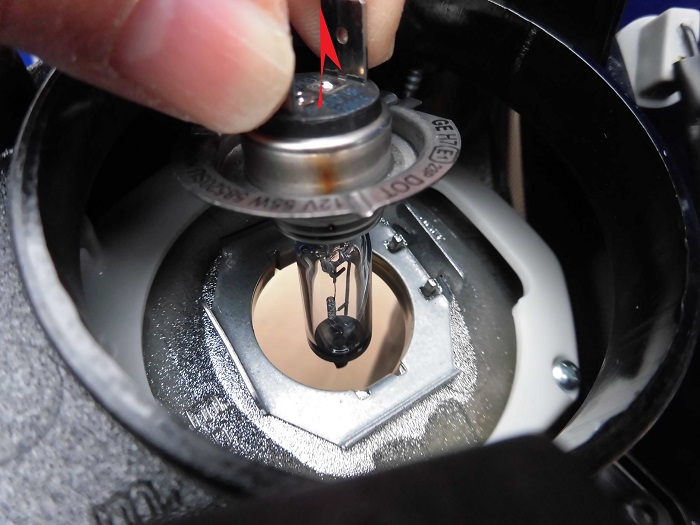
<Removing the Bulb 3>
Now just lift the bulb out.
If the headlight was recently on (engine running), the bulb will be extremely hot—do not touch it under any circumstances.
Removed Bulb
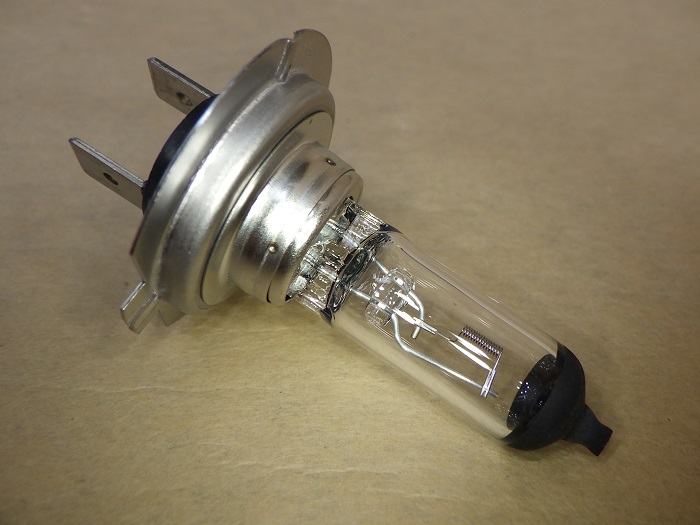
<Lamp Side>
The bulb type is H7.
Avoid touching the glass part to keep it clean.
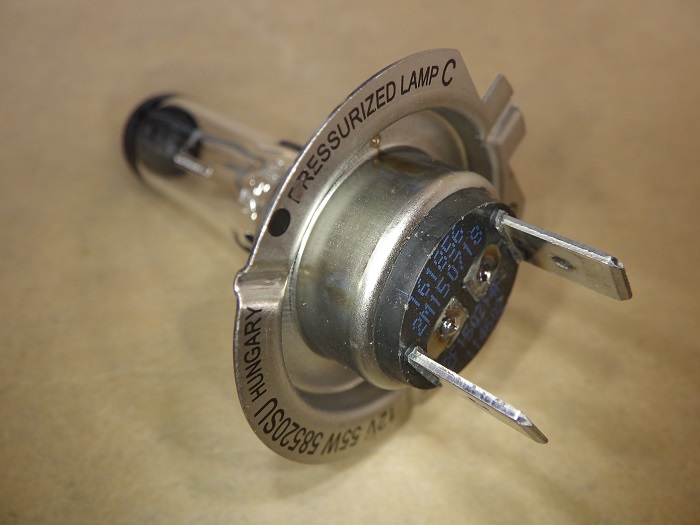
<Socket Side>
It’s a 2-pin connector.
Installing the Bulb
Let’s put the bulb back in.
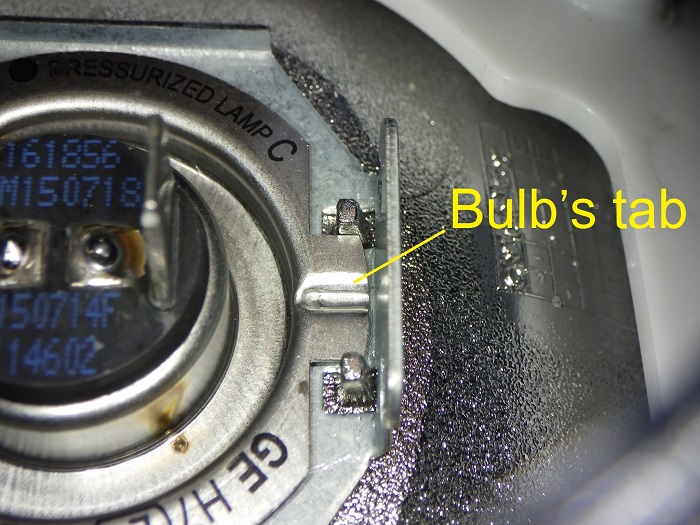
<Installing the Bulb>
Align the bulb’s tab with the groove in the headlight housing.
When installed correctly, there will be no gap between the bulb and housing, and it will sit vertically.
Now reinstall everything in reverse order.
If the Spring Doesn’t Lock

<If the Spring Doesn’t Lock>
If the spring won’t lock while the bulb is installed on the bike, check the following:
- Is the bulb properly seated in the headlight housing?
- Is the spring hooked in the correct position?
Note:
Securing the LED bulb base or similar components may deform the spring, which can make it difficult to install a standard bulb afterward.
Rear Headlight Cover
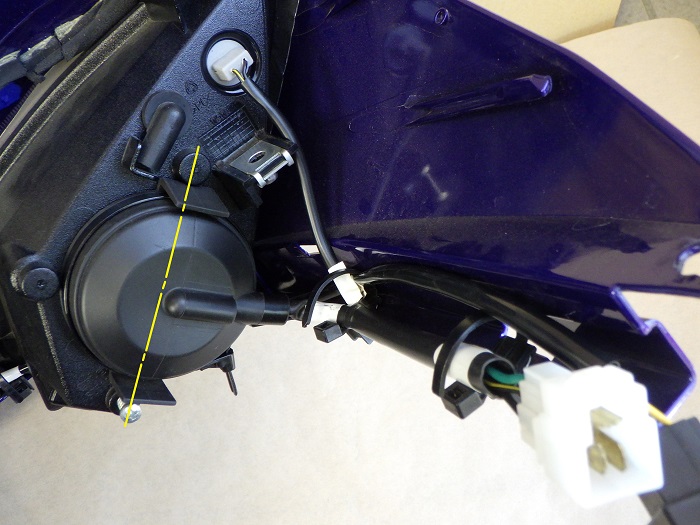
<Rear Headlight Cover>
Reinstall the rear headlight cover.
Align the cover’s tab with the headlight unit’s protrusion and beam adjustment screw for a natural cable routing.
3. Summary
Here’s a recap of how to remove and install the low beam bulb.
Steps 4 and 5 are tricky when the bulb is installed on the bike, so take your time and avoid bending the spring.
- To prevent the spring from falling into the headlight housing, it’s best to remove it completely.
- Never touch the bulb right after the headlight has been on.
- If the spring won’t lock, don’t force it—check the installation carefully.