The high beam is the left-side headlight in the direction of travel, and the bulb type is H7.
Unlike the low beam, the socket is fixed directly to the headlight unit.
Once you know how to remove the bulb, you can do the following tasks:
- Replace a burnt-out bulb
- Upgrade to a high-performance bulb
- Switch to an LED bulb
Note:
I removed the front cowl to make it easier to take photos.
If you’re just removing or installing the bulb, there’s no need to remove the cowl.
From this article, you’ll learn:
- How to remove and install the high beam bulb
| Date | 2nd January 2023 |
| Subjects | Maintenance, Failure, Repair |
| Shop or DIY | DIY |
| Difficulty | |
| Working hours | 0.5 |
| Costs [Yen] | 0 |
1. Goods to use
(No tools required for this procedure)
2. Removing and Installing the High Beam Bulb (STEP 1–11)
Inside the front cowl
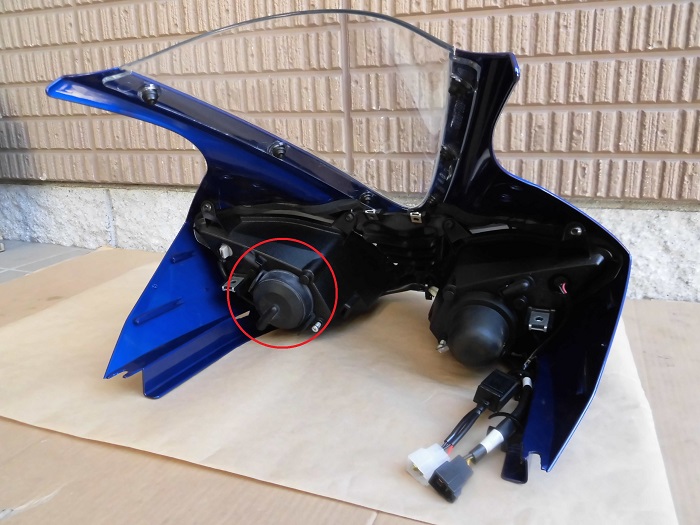
<Inside the front cowl>
The left side is the high beam.
Removing the rear headlight cover

<Removing the rear headlight cover>
Pull off the rear headlight cover with your fingers.
This part is the same as the low beam—it’s just press-fit.
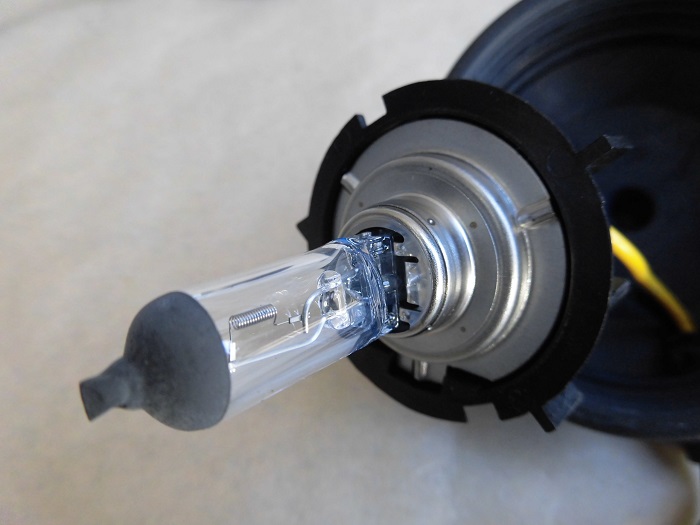
Bulb socket
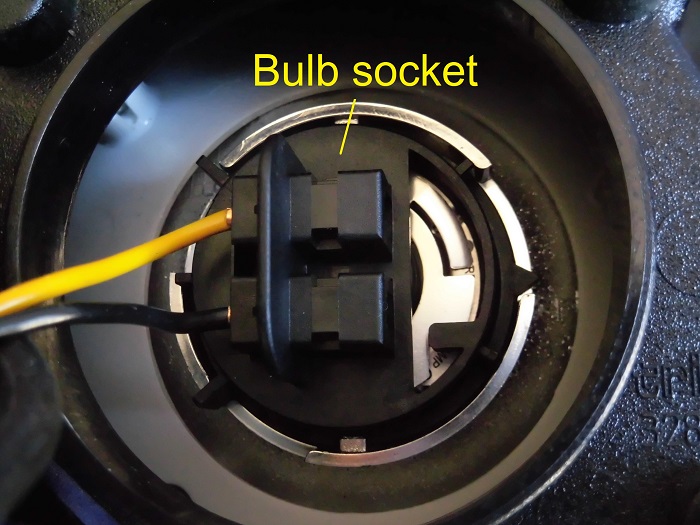
<Bulb socket>
Looking inside, you’ll see that the socket connected to the bulb and the part that secures the bulb are integrated.
This was the first time I’d seen this design.
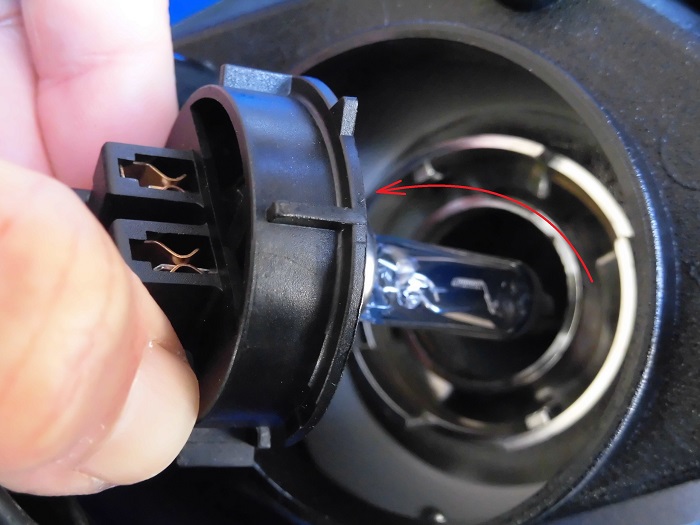
Removing the bulb socket 1
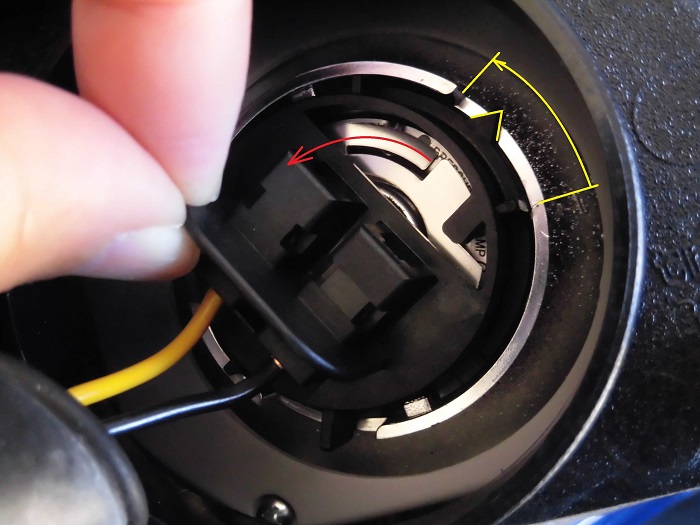
<Removing the bulb socket 1>
Pinch the rib at the top of the socket and rotate it about 30° counterclockwise.
Using the triangular protrusion on the right side as a reference makes it easier.
Removing the bulb socket 2
<Removing the bulb socket 2>
Lift the socket, and the bulb comes out together with it.
Replacing the high beam bulb is easier than the low beam.
Removed socket 1
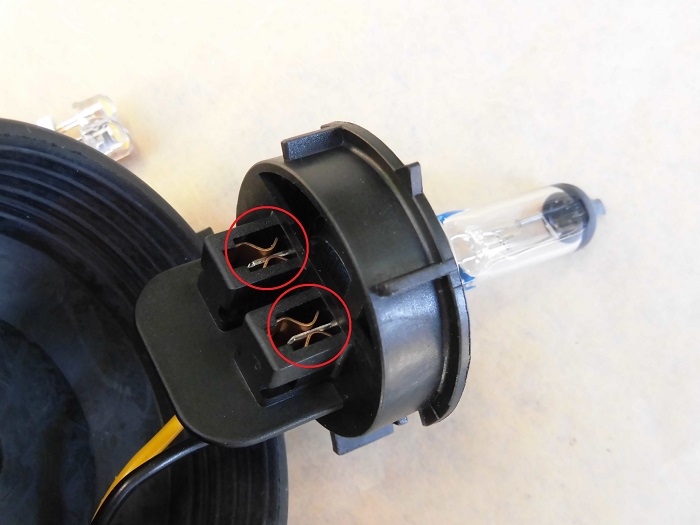
<Removed socket 1>
You can see that the socket terminals clamp onto the bulb terminals.
Removed socket 2
<Removed socket 2>
Because of this, the bulb won’t easily fall out of the socket.
Removing the bulb
<Removing the bulb>
Simply pull the bulb out.
Notes:
Right after turning on the headlight (with the engine running), the bulb will be extremely hot—never touch it.
Bulb spring
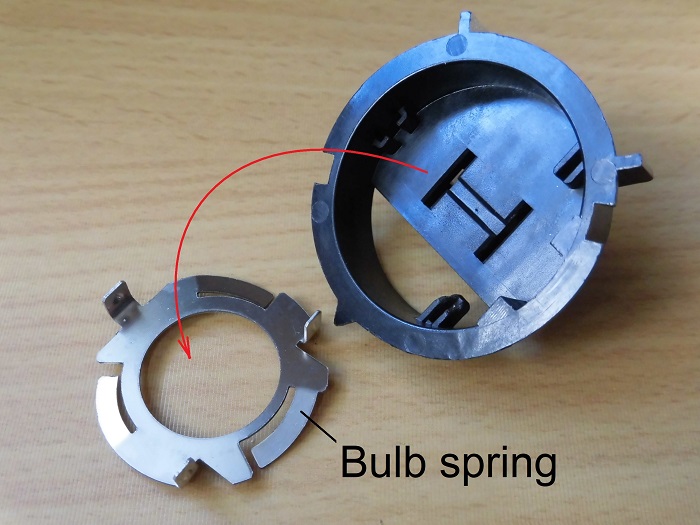
<Bulb spring>
By the way, the bulb spring can detach from the socket, so be careful not to lose it.
Removed bulb
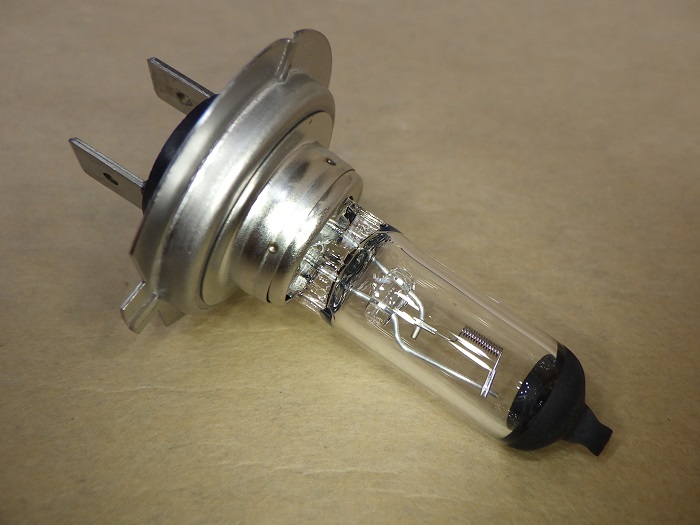
<Lamp side>
The bulb type is H7.
Handle it carefully so you don’t touch or dirty the glass part.
<Socket side>
It’s a two-pole terminal.
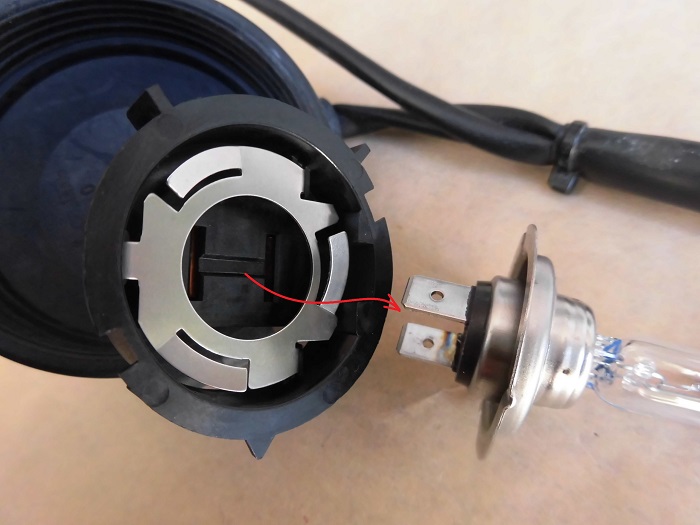
Installing the bulb
Now let’s put the bulb back in.

<Installing the bulb>
- Align the protrusion on the bulb with the groove in the socket
- Push the bulb into the socket terminals
Then reinstall everything in the reverse order of removal.
Finally, put the rear headlight cover back on, and you’re done.
3. Summary
We’ve gone over how to remove and install the high beam bulb.
Even with the bulb mounted on the bike, unlike the low beam you won’t struggle with a spring lock—it should be easy to install.
- The socket connected to the bulb and the part securing the bulb are integrated.
- Never touch the bulb right after turning on the headlight.
- The bulb spring can detach from the socket, so be careful not to lose it.