The YZF-R125 is a true super sport, with a forward leaning position.
After riding for a long time, your hands, feet, back, etc. will become tired and sore.
To reduce such fatigue and pain as much as possible, it is important to adjust the position.
So, the first step is to check and adjust the levers and pedals.
Although the adjustment possibilities are limited with stock levers and pedals, I would like to find a position that is less tiring (easier to operate).
This time, I will check and adjust the following four points.
- Brake lever
- Clutch lever
- Shift pedal
- Brake pedal
| Date | 20th March 2021 |
| Subjects | Tuning, Customize |
| Shop or DIY | DIY |
| Difficulty | |
| Working hours | 1 |
| Costs [Yen] | 0 (Use what I have) |
1. Lever/pedal adjustment (STEP 1-12)
Brake lever adjustment
Start with the brake lever.
<Brake lever>
Oops, there was no adjustment part.
The owner’s manual says that the play is 2-5 mm, otherwise you have the shop look at it.
The lever touches the piston in the master cylinder and feels like it moves immediately when the lever is pulled.
I think the brakes start to work at about 2-5 mm, so it’s not a problem.
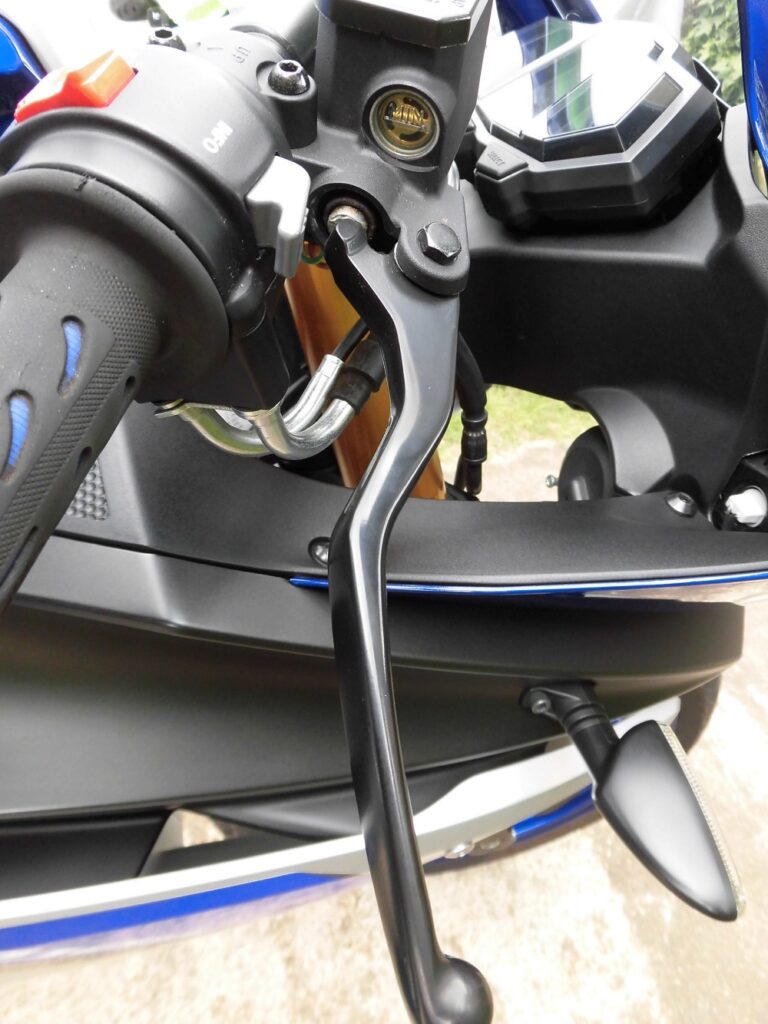
Clutch lever condition 1
Next, the clutch lever.
<Clutch lever>
‘Oh, the cover is off! And the locknut turns with my fingers…”
I was surprised.
The locknut must have been forgotten to be tightened during inspection and adjustment at the shop.
Clutch lever adjustment
As for the point of the clutch-meet, it was generally OK, so I will fine-tune it after a bit of riding.
The owner’s manual said “10-15 mm play”.
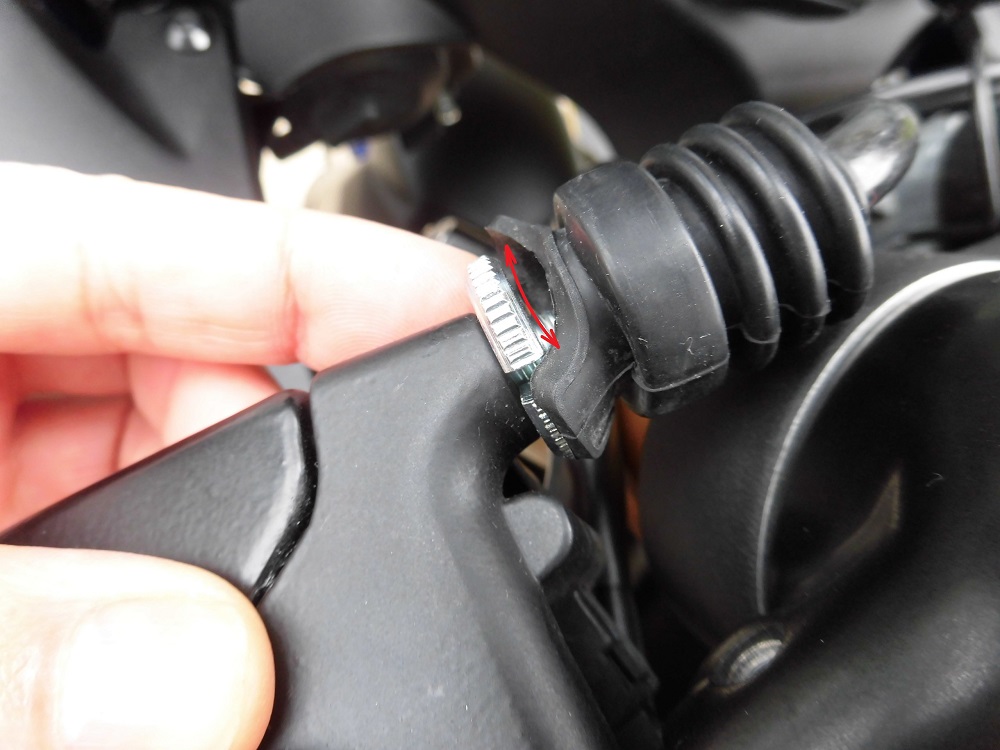
Lock nut tightening
<Lock nut tightening>
Tighten the locknut with pliers.
The photo shows it directly between the pliers, but I actually tightened it with a rag wrapped around it, as I didn’t want to damage the locknut or its surroundings.
Clutch lever condition 2

<With the cover on>
It feels rich to have a cover even though it’s a 125cc.
Do all bikes now have them?
Shift pedal adjustment 1
Next, the shift pedal.
<Shift pedal 1>
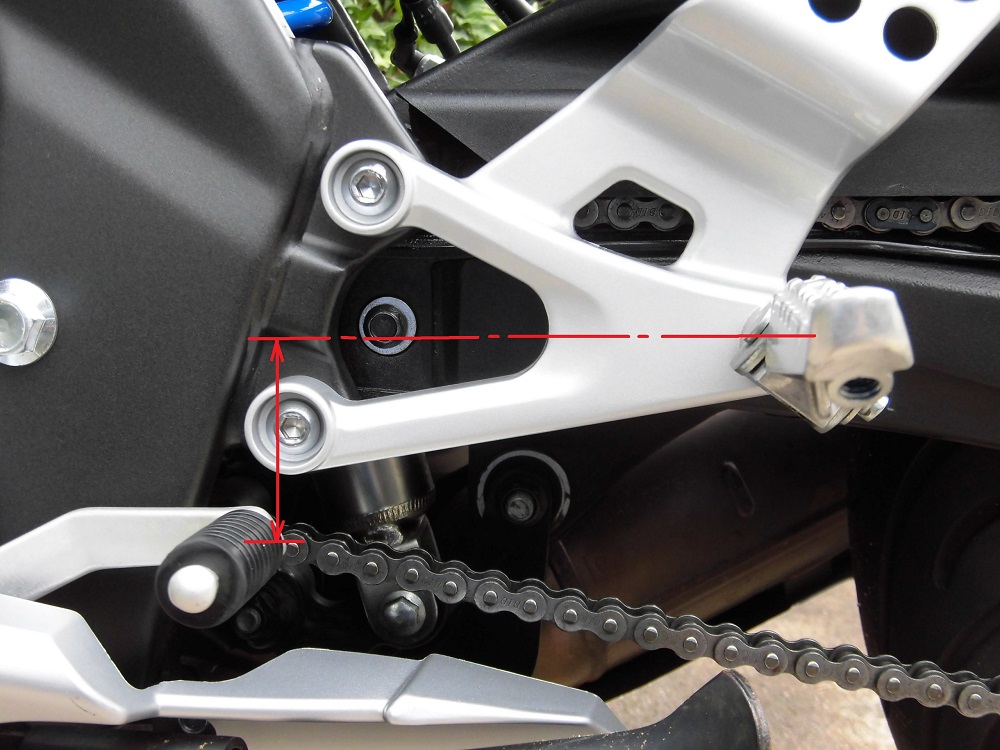
It is a bit low and I want to raise it.
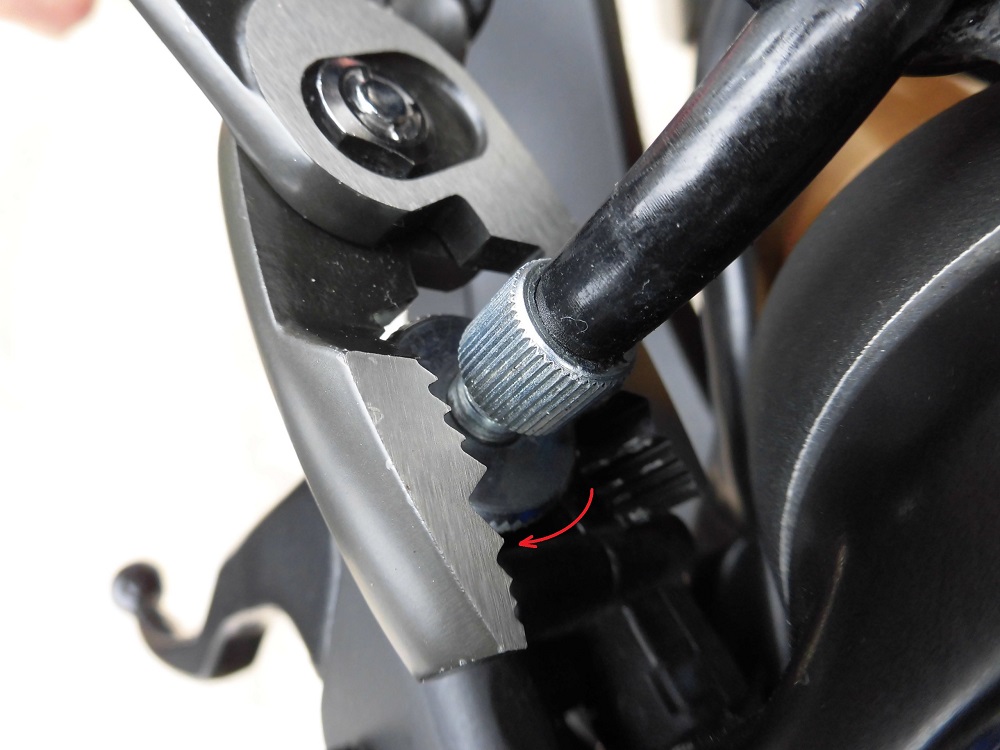
Shift pedal adjustment 2
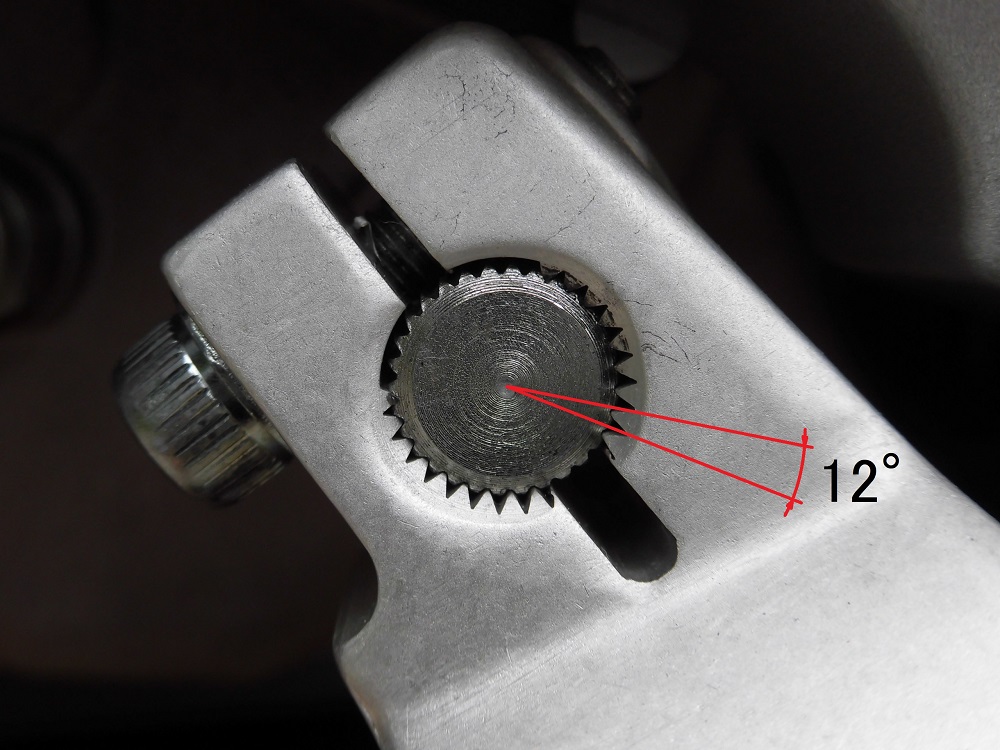
<Shift pedal 2>
The shift shaft has serrations cut into it.
And shifting by one serration changes the angle by 12°.
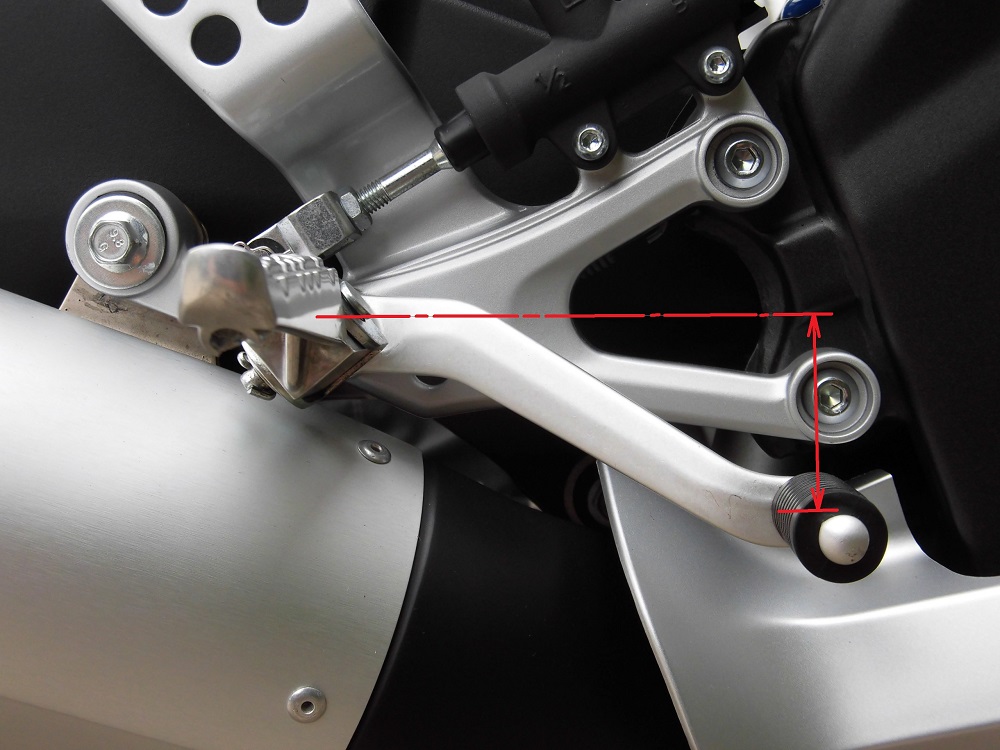
Shift pedal adjustment 3
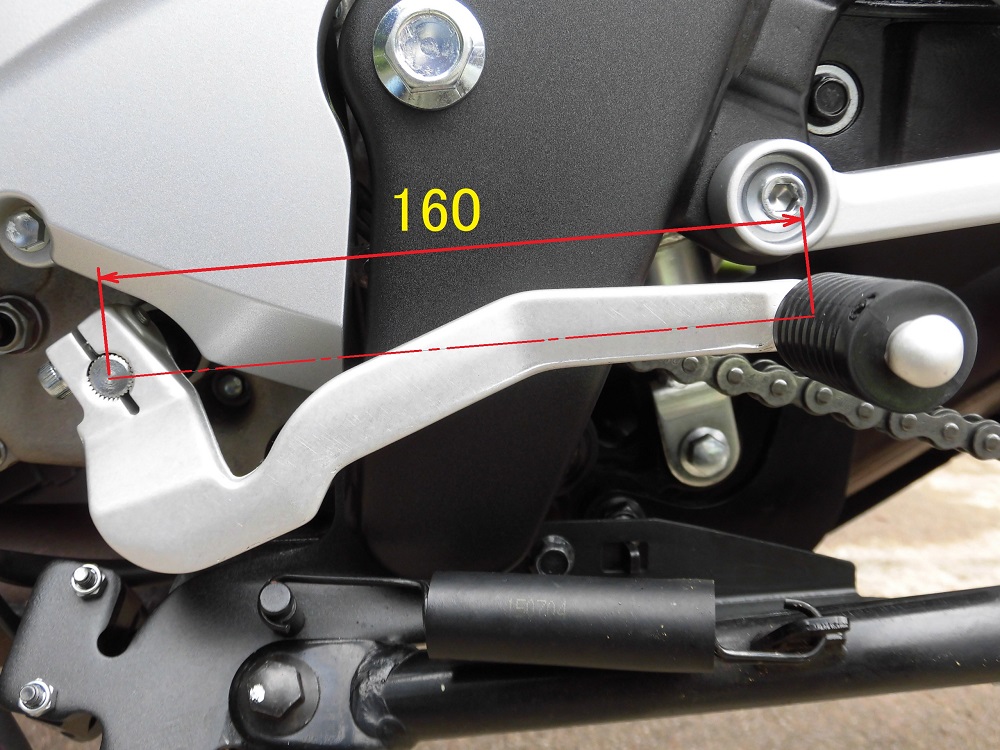
<Shift pedal 3>
So the shift pedal position (160 mm from the shift shaft) changes by about 33 mm.
Adjusting the angle of the shift pedal is difficult or…
Before and after shift pedal adjustment
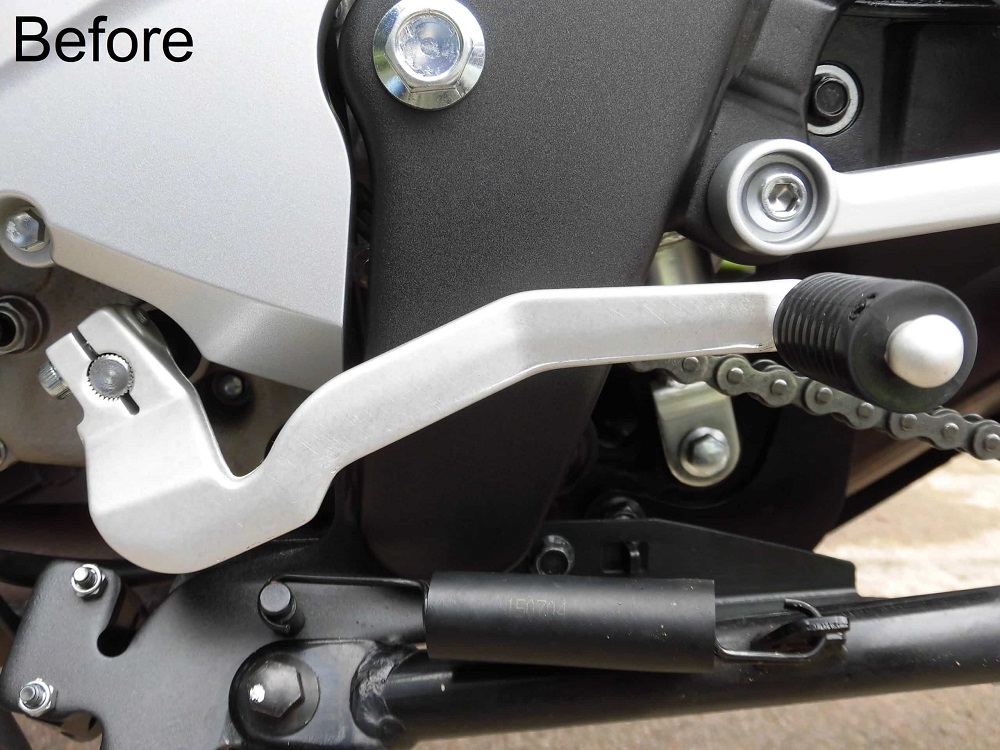
<Before adjustment>
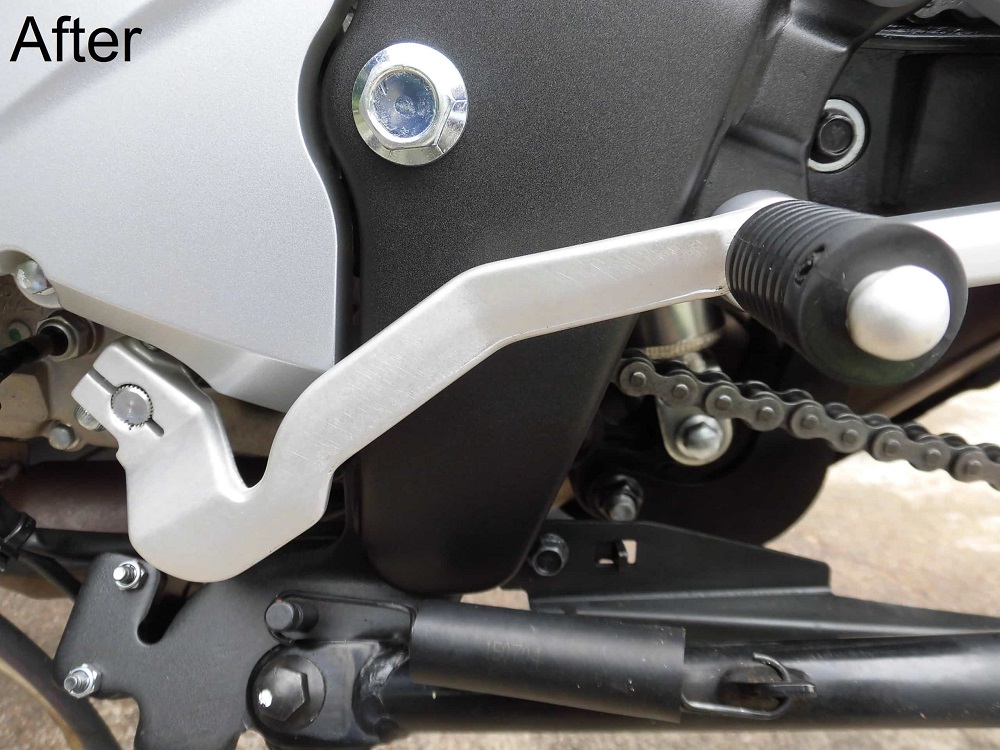
<After adjustment>
Anyway, I shifted one serration and increased the angle of the pedal.
It feels good.
Interference with shift pedal
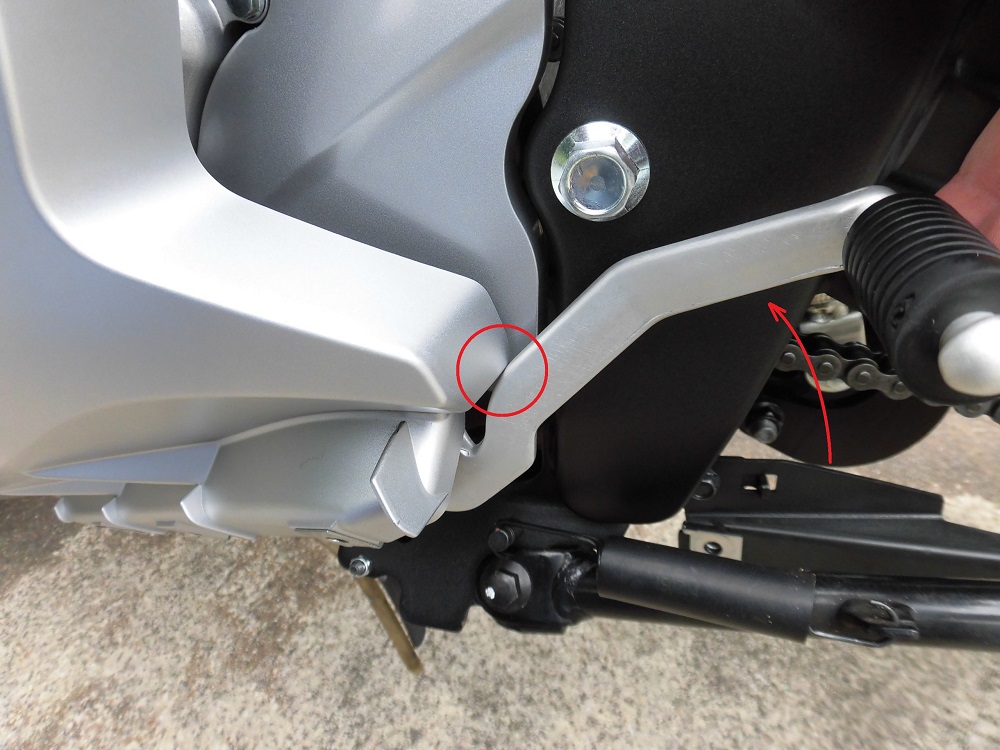
<Interference with cowl>
But then the pedal hit the cowl and I couldn’t shift up.
Shame.
By the way, up to the 2013 model, the pedals seemed to move around the step via a link.
I wonder if they have reduced the cost since the 2014 model.
Apart from the adjustment, can I replace the shift pedal/link on 2013 models before?
Condition of the brake pedal
Finally, the brake pedal.
<Brake pedal>
This is also a bit low and I would like to raise it.
Brake pedal adjustment
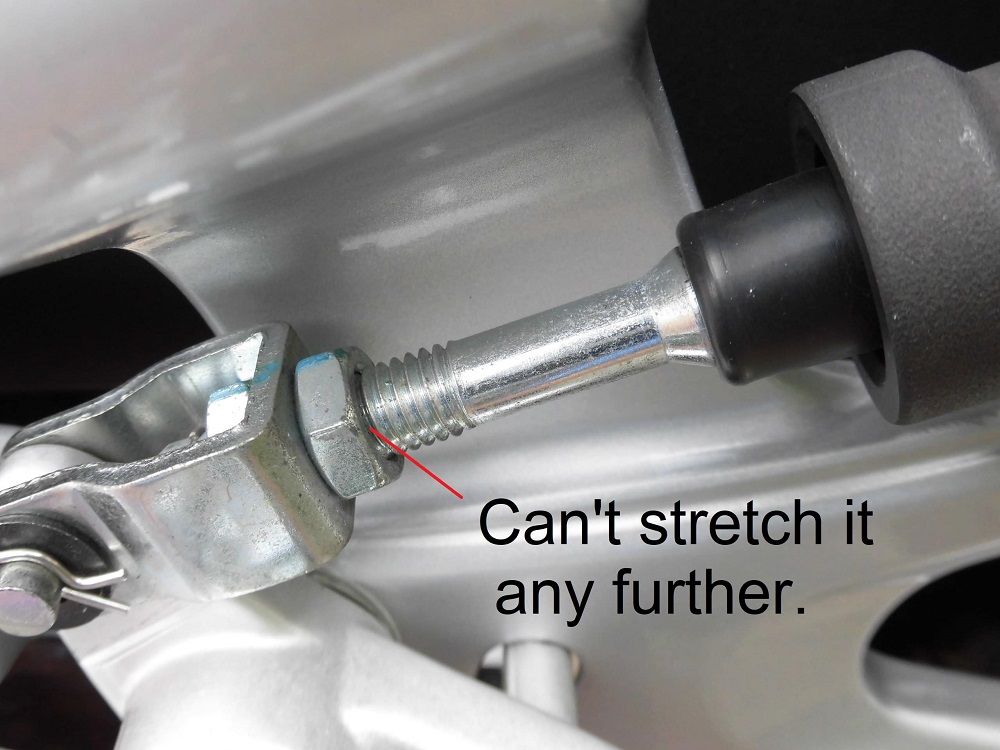
<Adjustment screw>
But there was no adjustment allowance.
The brake pedal position is adjustable, but it was in the most raised position.
The previous owner thought the same?
2. Summary
This time, in the end, I could not adjust anywhere.
Some days are like this.
Let’s just be glad that I noticed the untightened locknut on the clutch lever.
It remains a hard spec to ride for me.
It seems to take a bit of getting used to.
- Brake lever not adjustable (it’s 125cc, of course…)
- Note the loose clutch locknut.
- The shift pedal cannot be adjusted, given the angle of the serration.


