This section summarizes the ceramic coating of front stay and meter unit.
In recent years, the sun’s rays have been so strong that plastic parts are getting sunburned.
The front stay, which occupy a large area around the front of the moto, have also been exposed to the sun without mercy and have lost their luster.
Therefore, in order to restore some of the shine to the resin parts, we are going to apply a resin coating.
From this article, you can learn the following.
- Repair and replacement of parts around front stays
- How to apply ceramic coating
| Date | 20th March 2022 |
| Subjects | Maintenance, Failure, Repair |
| Shop or DIY | DIY |
| Difficulty | |
| Working hours | 3 |
| Costs [Yen] | 1,716 |
1. Goods to use
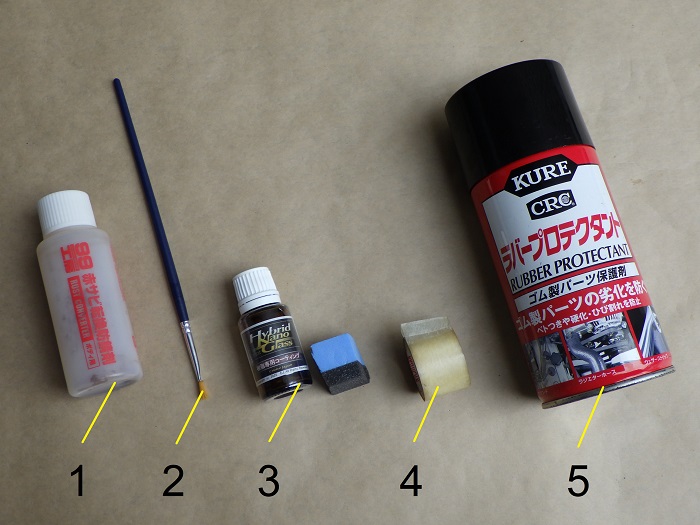
| No. | Product name | Manufacturer | Product number | Quantity | Amounts[Yen] | Purchase this time |
| 1 | Rust converter | SOFT99 | B-204 | 1 | 1,518 | |
| 2 | Paintbrush | DAISO | – | 1 | 110 | |
| 3 | Resin coating | Cruise Japan | Resin-coating201806 | 1 | 5,800 | |
| 4 | Masking tape | – | – | 1 | 197 | |
| ST12 | Grommets | Genuine parts | 90480-15X01 | 3 | 1,716 | ○ |
| 5 | Rubber protectant | KURE | 1036 | 1 | 835 | |
| 10,176 | 1,716 |
2. Apply ceramic coating on front stay and meter unit (STEP 1-15)
Remove front cowl, stay, and meter unit
First, remove the front cowl, stay, and meter unit.
- Front cowl
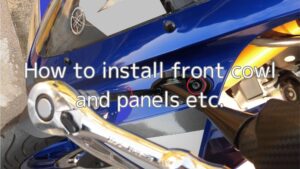
For details, see the maintenance record “How to remove front cowl and panels etc.”. - Front stay
For details, please refer to the maintenance record “How to remove front stay”. - Meter unit
For details, please refer to the maintenance record “How to remove and install meter unit”.
When you remove the parts, you can clean and coat the back side and even the deepest parts.
This is another advantage of doing the installation yourself.
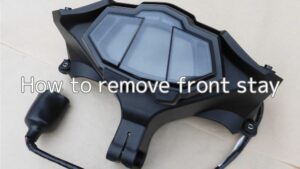
Removed front stay
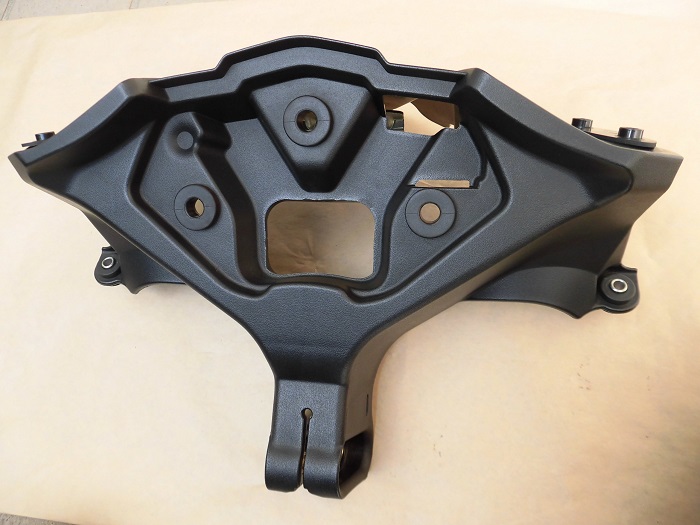
<Removed front stay>
This is the front stay as a single item.
From here, I will start the work.
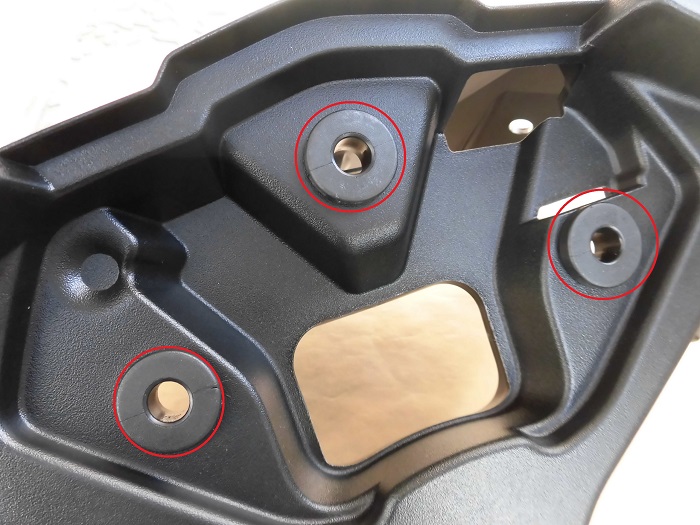
Remove grommets
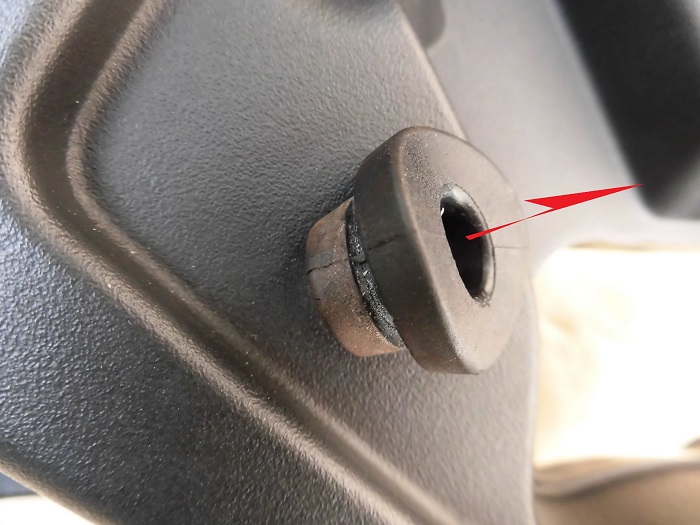
<Remove grommets>
Push three grommets where the meter unit mounting fits outward with your fingers.
The rubber was quite hard.
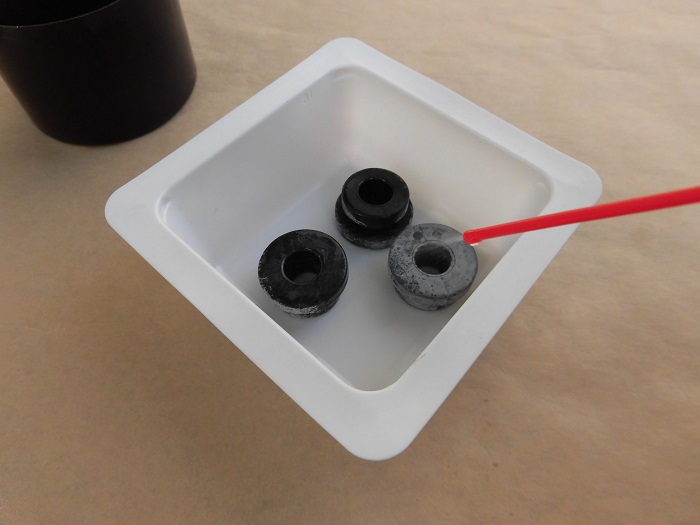
Grommet condition
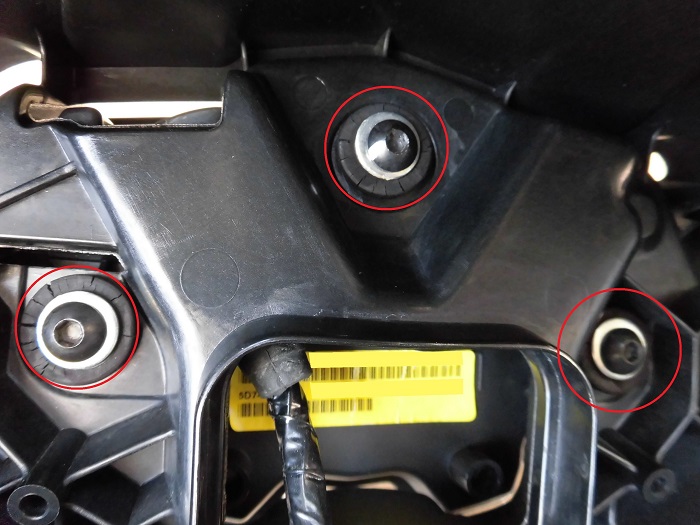
<Grommet condition>
In fact, these grommets had severe crack on the inside of the front stay.
So, I will replace them this time.
Remove mirror dampers
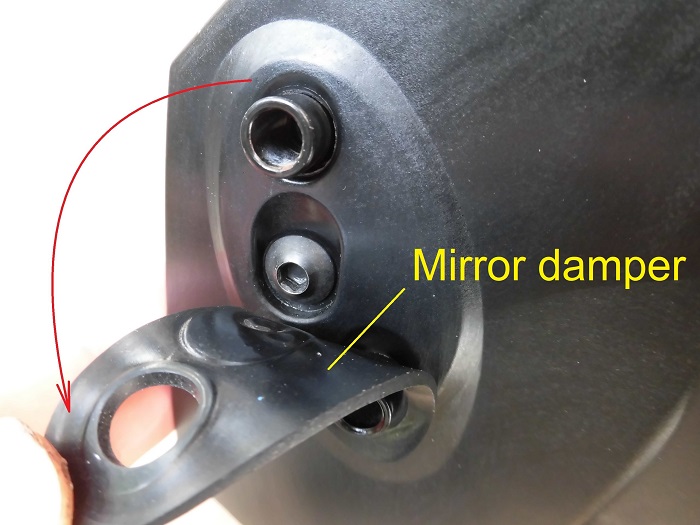
<Remove mirror dampers>
Two mirror dampers are also removed with the fingers.
Wash front stay
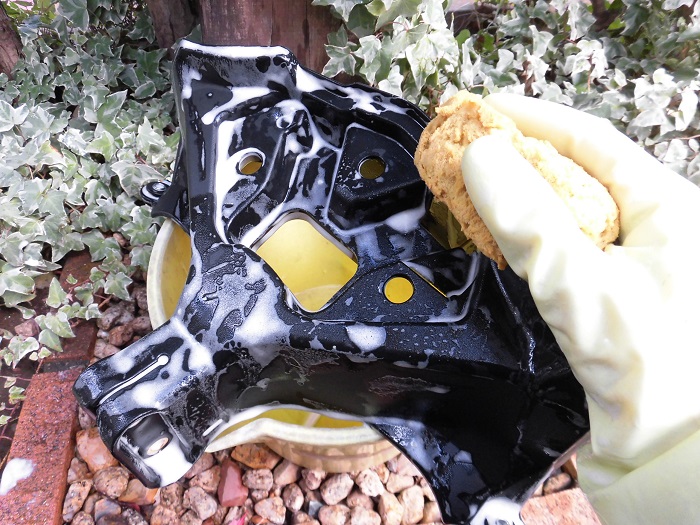
<Wash front stay>
Put on car shampoo and wash off the dirt.
The smallest parts are carefully washed using a toothbrush.
Rinse off the car shampoo, wipe off the water with a microfiber cloth, and let dry naturally.
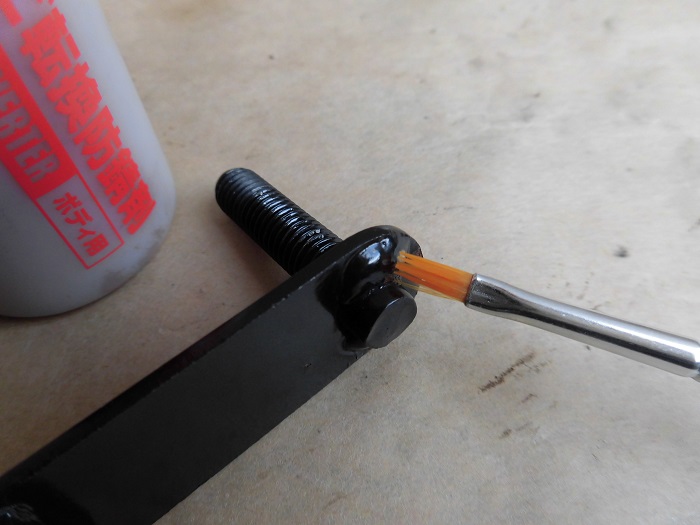
Apply rust-converting on mirror bracket
The tip of the mirror bracket was rusted and will be repaired.
<Apply rust-converting on mirror bracket>
The correct approach would be to remove the rust and paint. But as I didn’t have time, I applied a rust converter.
After it dried, I applied another coat.
This prevents the rust from spreading.
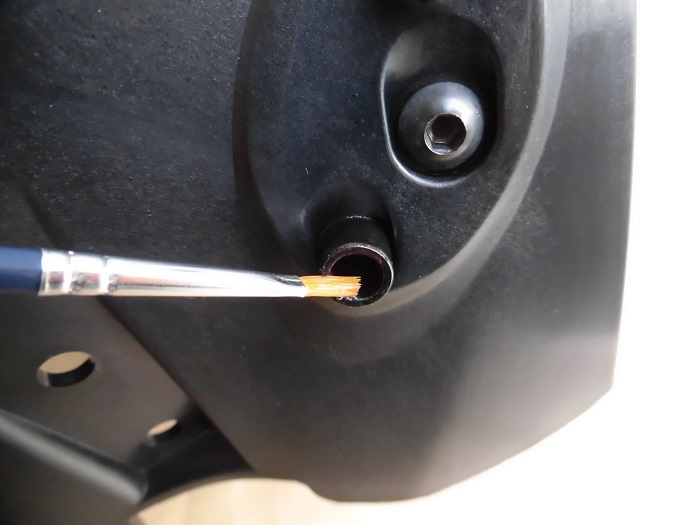
Apply rust-converting on plate
<Apply rust-converting on plate>
Similarly, the welds on the plate that holds the stay to the frame were rusted. So, a rust converter was applied.
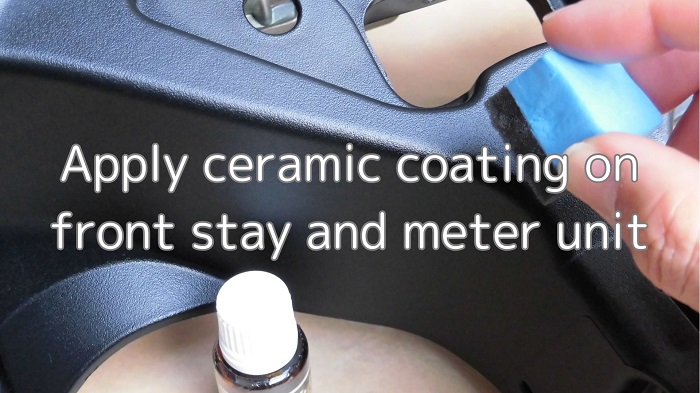
Apply ceramic coating on front stay
Now, I will apply the ceramic coating agent on front tray.
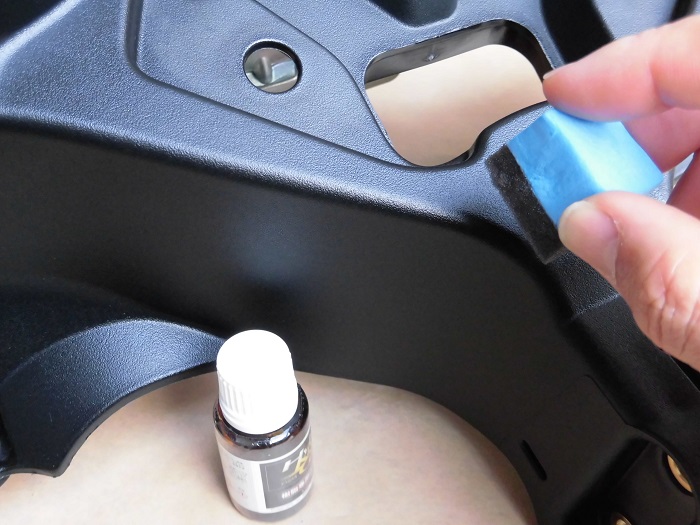
<Apply ceramic coating on front stay>
Put a few drops of the ceramic coating on a sponge and spread it over the entire surface.
Then, immediately use a paper cloth to spread the coating thinly and evenly.
Apply ceramic coating on meter unit
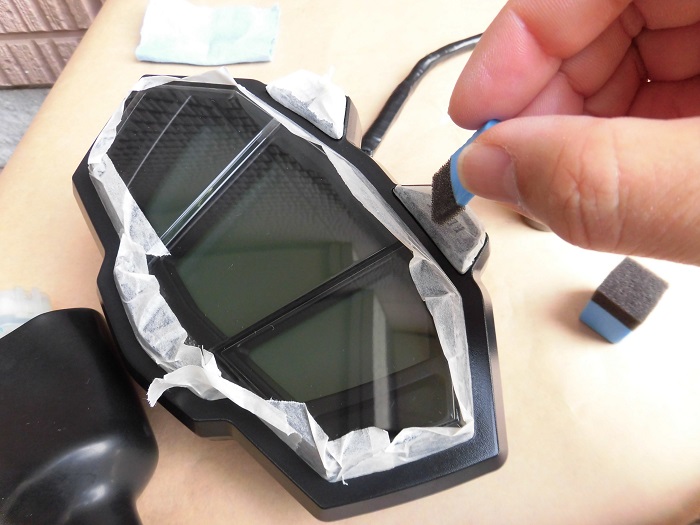
<Apply ceramic coating on meter unit>
The same ceramic coating is applied to the meter unit.
This one is covered with masking tape to prevent the coating from getting on the transparent part.
Comparison of before and after ceramic coating
Now, I will compare the before and after ceramic coating of the front stay.
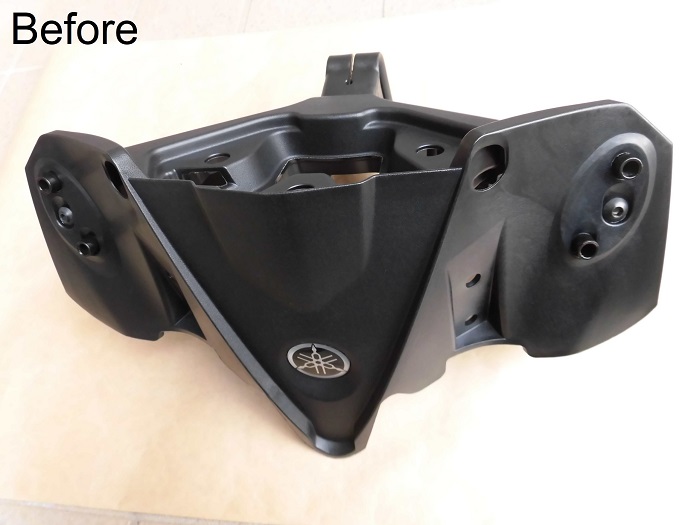
<Before>
Not very shiny, but not in bad condition.
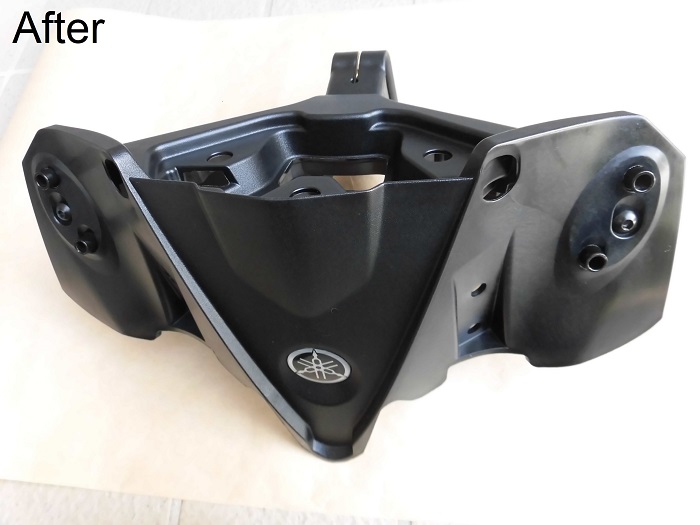
<After>
It has a calming sheen.
Too bad you can’t see much difference in the photo.
Comparison of old and new grommets
Now, let’s get ready to install the parts.
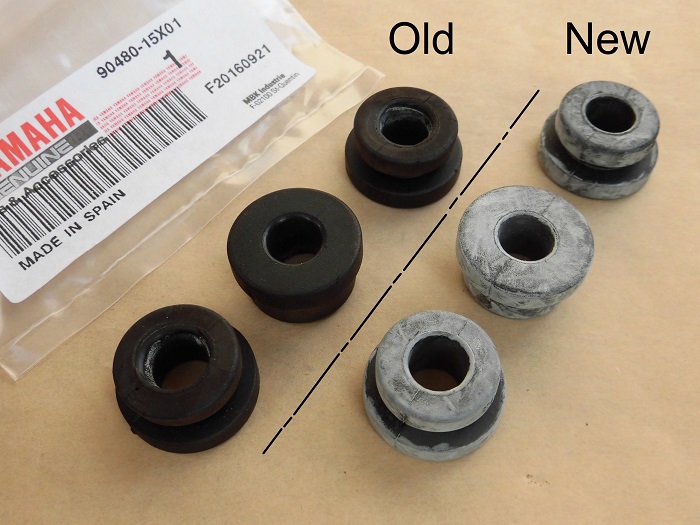
<Comparison of old and new grommets>
Left: the one removed
Right: the one put on
The new grommets are pure white.
It may be to prevent rubber from sticking and deteriorating, but I have never seen such white grommets…
By the way, they are made in Spain.
Apply rubber protectant to grommets
<Apply rubber protectant to grommets>
I was still concerned about the white color, so I applied rubber protectant.
Now that the white color has been removed a little, I can install them on the front stay.
Condition of grommets installed
<Condition of grommets installed>
The grommets are also soft and could be installed smoothly.
This may be due to the rubber protectant applied.
And don’t forget to install the mirror dampers.
Install meter unit, front stay, and cowl
The meter unit, front stay, and cowl are then installed.
- Meter unit
For details, please refer to the maintenance record “How to remove and install meter unit”. - Front stay
For details, please refer to the maintenance record “How to install front stay”. - Front cowl
For details, please refer to the maintenance record “How to install front cowl and panels etc.”.
3. Summary
The following is a summary of the ceramic coating of the front stay and meter unit.
The front of the front stay is exposed to the sun through the screen, while the rear is directly exposed to the meter and its surroundings. Since running in the sun is inevitable, the resin parts will deteriorate.
This ceramic coating forms a hardened film that protects the resin from sunlight and dirt. Hopefully it will stay as clean as possible…
- Rust converter can be used to treat rust on mirror brackets and plates.
- The whiteness of the grommets is relieved after applying a rubber protectant.
- Ceramic coating protects from sun and dirt.


