Sometimes there is a strange “squealing” noise coming from the rear brakes.
It doesn’t start when the brakes are applied, but just before stopping, so people around me react to the sound and turn around.
As it is very embarrassing, I decide to have it serviced.
There are many possible causes for the noise, but first, I will check and clean the brake caliper and improve the movement of the brake piston. I will also check the condition and thickness of the brake pads.
From this article, you can learn the following.
- How to remove the rear brake caliper
- How to remove the rear brake pads
- Rear brake caliper construction
- How to clean the rear brake
| Date | 12th August 2023 |
| Subjects | Maintenance, Failure, Repair |
| Shop or DIY | DIY |
| Difficulty | |
| Working hours | 2 |
| Costs [Yen] | 0 (Use what I have) |
1. Goods to use
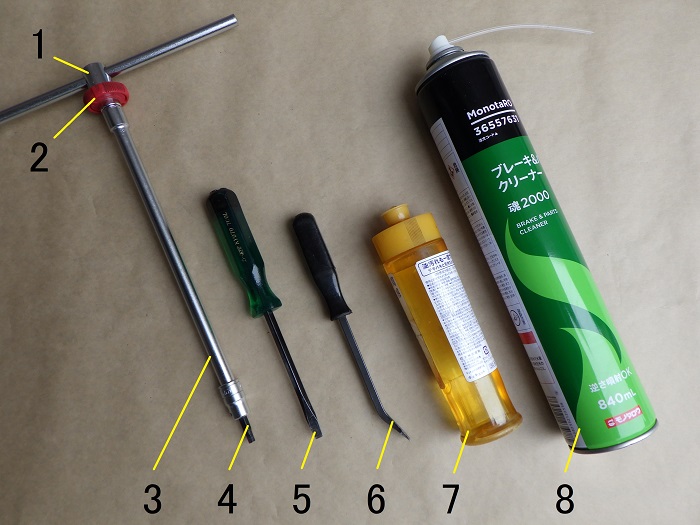
| No. | Products name | Manufacturer | Product number | Quantity | Amounts[Yen] |
| 1 | Slide head handle | KTC | BHM3 | 1 | 2,970 |
| 2 | Quick spinner | KTC | BE3-Q | 1 | 2,046 |
| 3 | Extension bar (250mm) | KTC | BE20-250 | 1 | (2,783) |
| 4 | Hexagon bit socket (5mm) | KTC | BT3-05S | 1 | 1,045 |
| 5 | Flat-head screwdriver (Width 6 mm) | KTC | DMD-100 | 1 | (1,584) |
| 6 | Pry bar | STREIGHT | 19-050 | 1 | 1,850 |
| 7 | Dishwashing detergent | – | – | 1 | 109 |
| 8 | Parts cleaner | MONOTARO | – | 1 | 296 |
| 12,683 |
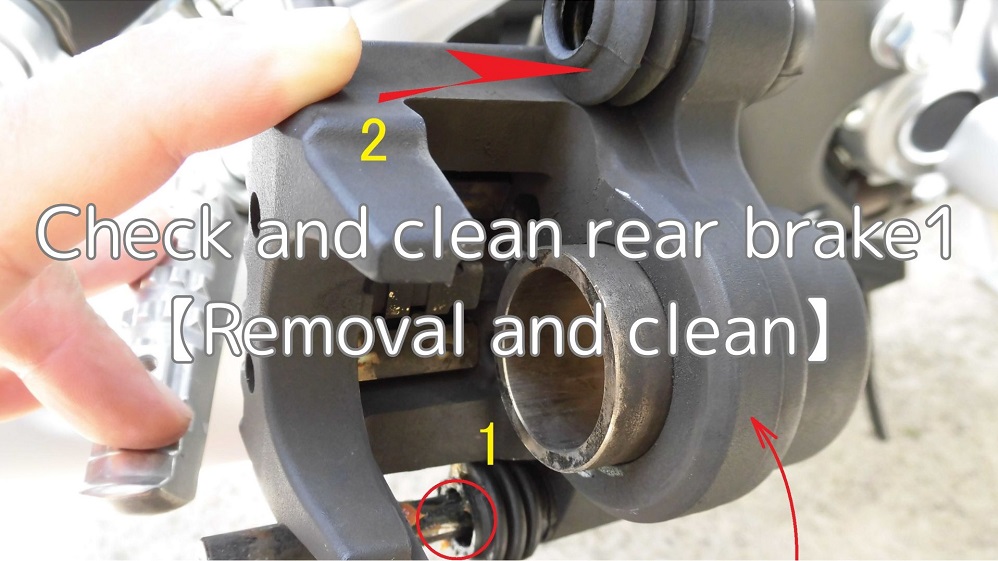
2. Check and clean rear brake1【Removal and clean】 (STEP 1-23)
Rear brake condition
<Rear brake>
From the looks of it, the rear brake pads still appear to be thick enough.
Also, the brake rotor do not appear to be discolored or severely warped.
Work procedure
The following procedure is to be followed.
- Remove and loosen the parts around the brake caliper and pads
- Remove the entire brake caliper bracket from the moto
- Remove and clean as many parts as possible, including the brake pads
- Put them back in the reverse order
Note that the brake hoses should be connected, not disconnected.
Remove slide pin cap
Now, let’s get to work.
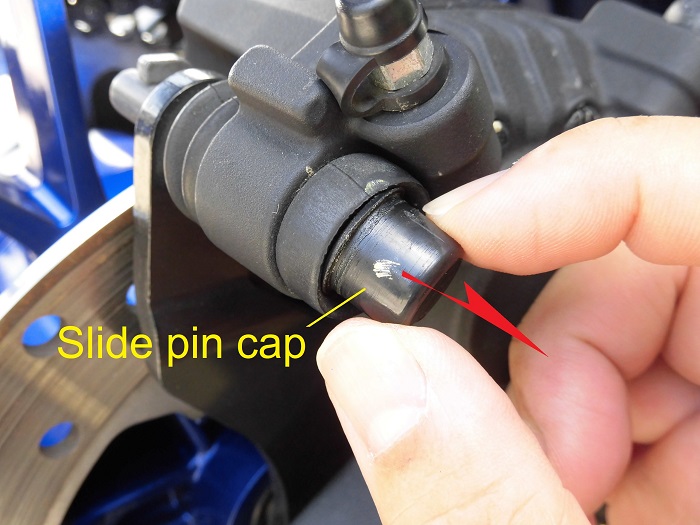
<Remove slide pin cap>
Remove the rear slide pin cap with my finger.
The protruding part of the cap was broken off early after delivery, so there is a hole in the cap.
Condition of removed cap
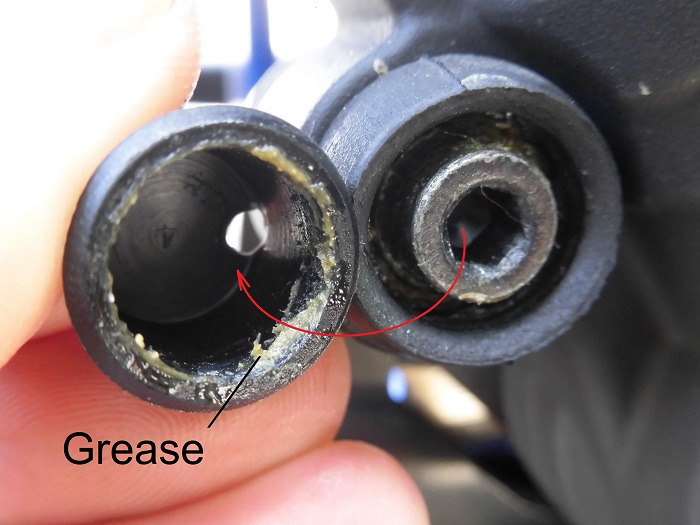
<Condition of removed cap>
There was grease inside.
Since the grease designation in the service manual for the previous model was “S,” I was expecting white silicon grease, but the grease was brown.
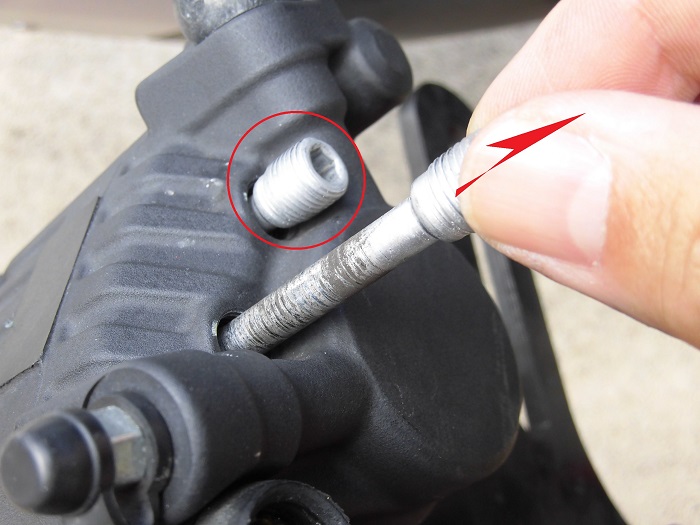
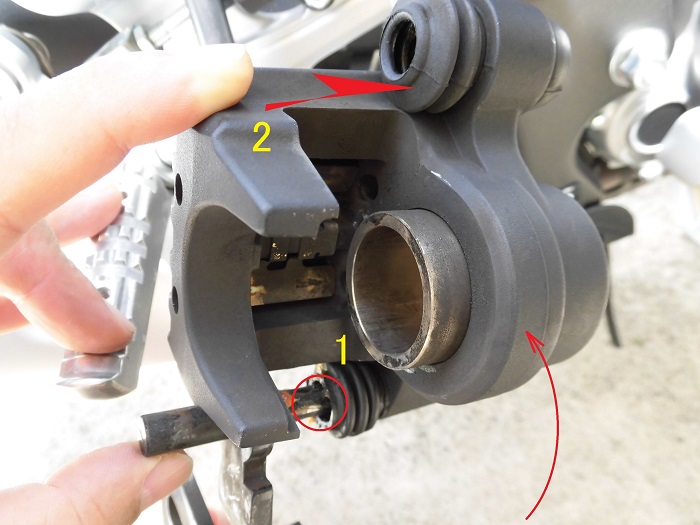
Loosen rear slide pin
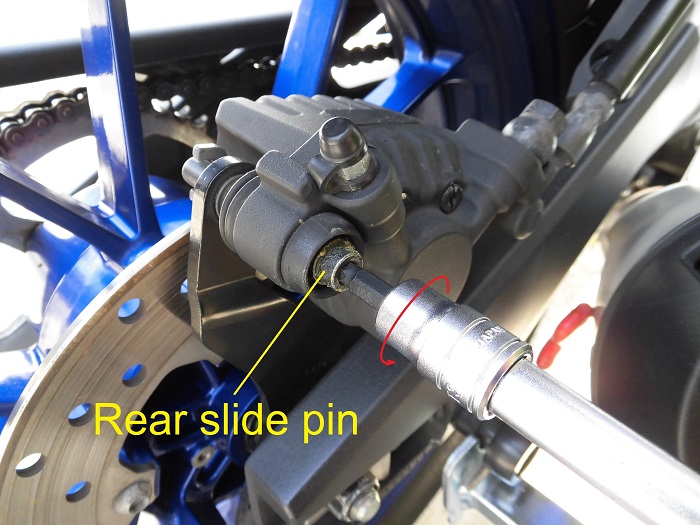
<Loosen rear slide pin>
Using a T-bar handle with a hexagon socket (5 mm), loosen the rear slide pin.
At this point, only loosen it and remove it later.
Remove pad pin plugs
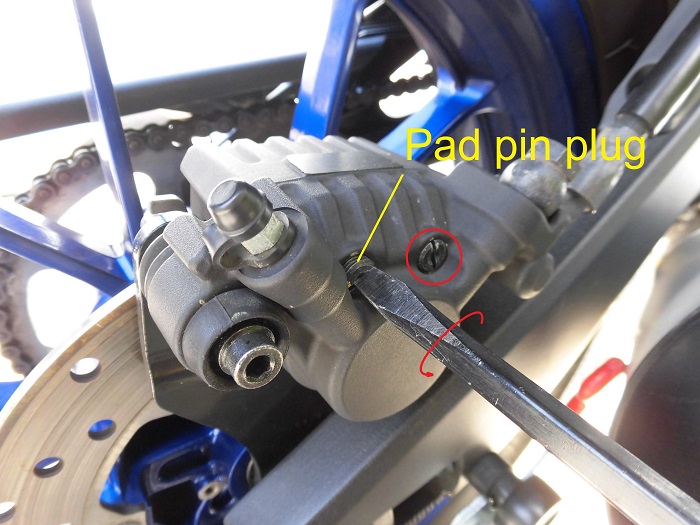
<Remove pad pin plugs>
Using a flat-head screwdriver (Width 6 mm), remove the pad pin plugs (2 places).
They loosened easily, probably due to vibration.
Losse pad pins
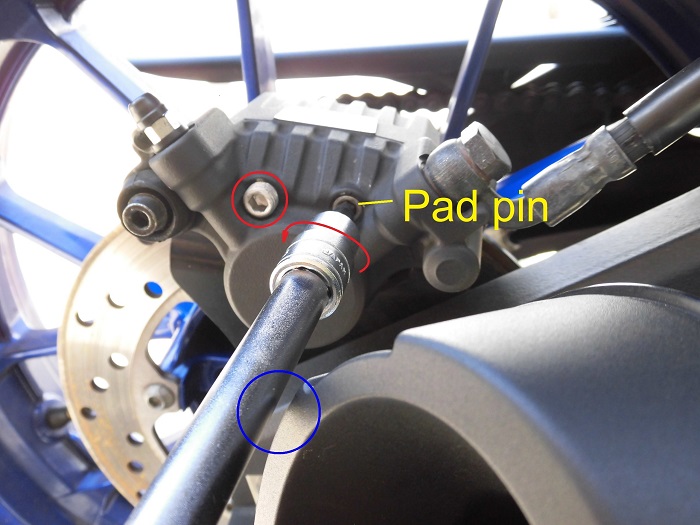
<Losse pad pins>
Loosen the pad pins (2 places) with a T-bar handle with a hexagon socket (5 mm).
As with the slide pins, simply loosen and remove them later.
For the front pad pin, using a T-bar handle, the bar will almost hit the muffler. (○ section)
So, you may want to use a hexagon wrench to loosen it.
Come to think of it, I think I’ve been bothered by the muffler a few times in all the work I’ve done…
- When drilling the stand hook hole, the drill hit it.
- When hanging the rear stand, the tip of the V2-fixtures catches.
Lift up brake caliper
By the way, this is a bit off topic, but as a test, I removed the slide pin and pad pin and lifted the brake caliper on the axis of the forward slide pin.

<Lift up brake caliper>
As a result, the brake hose hit the swing arm as per the internet information. (○ section)
So, the brake caliper was not lifted enough,
- Although the brake pads could be removed
- The brake caliper feels like it hits the brake caliper bracket or the brake disc and cannot be removed.
Remove bottom cowl
Now, let’s get back to the task at hand.

<Remove bottom cowl>
Remove the right-side bottom cowl just to be safe.
We did not want to scratch the bottom cowl after removing the brake caliper.
(For details, please refer to the maintenance record “How to remove side cowls and panels etc.” STEP15-17)
Remove rear wheel
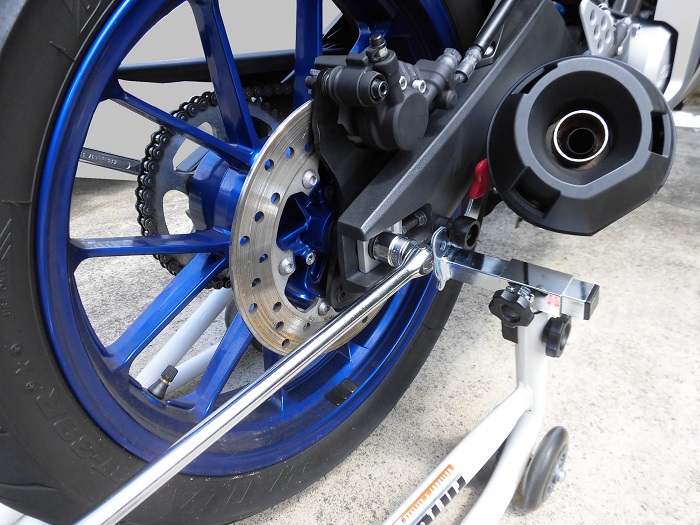
<Remove rear wheel>
Next, remove the rear wheel in order to remove the brake caliper bracket.
Then, remove the brake hose clamps from the brake hose on the side of the rear fender, and remove the bracket from the swingarm.
Removed brake caliper bracket
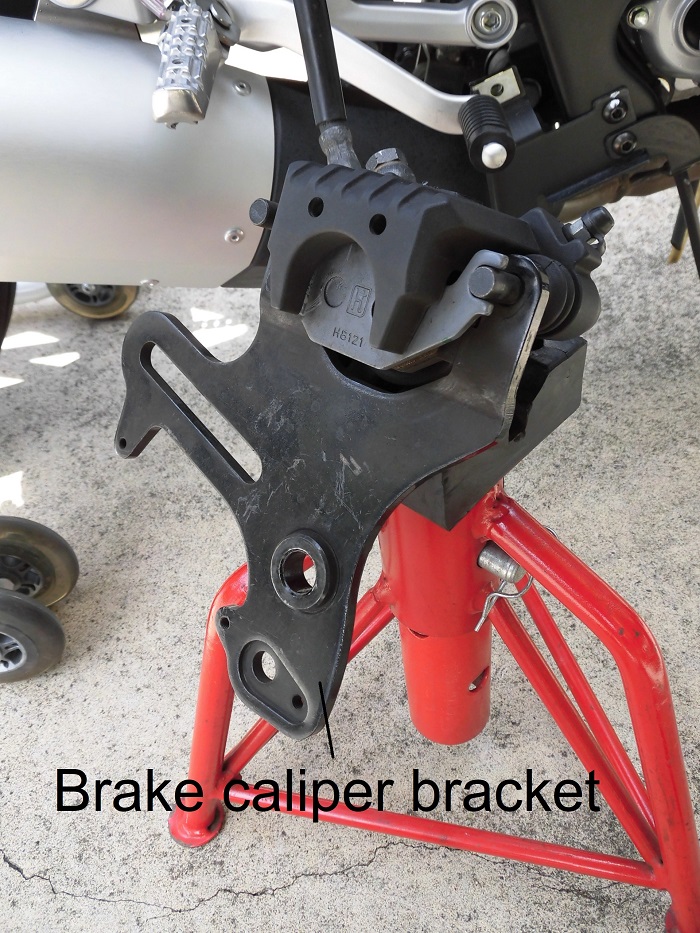
<Removed brake caliper bracket>
I was able to remove it like this, although the brake hose is connected, so there are some restrictions on how it can be removed.
I always do this when I remove a wheel, because putting it on jack stands stabilizes the posture.
Remove rear slide pin 1
Now, I will remove each component attached to the brake caliper bracket.
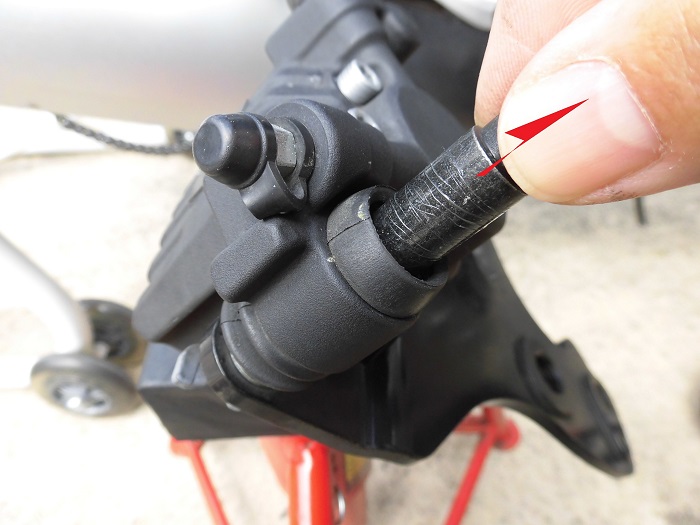
<Remove rear slide pin 1>
Loosen the slide pin that was loosened in STEP 5 further and pull it off with my fingers.
Remove rear slide pin 2
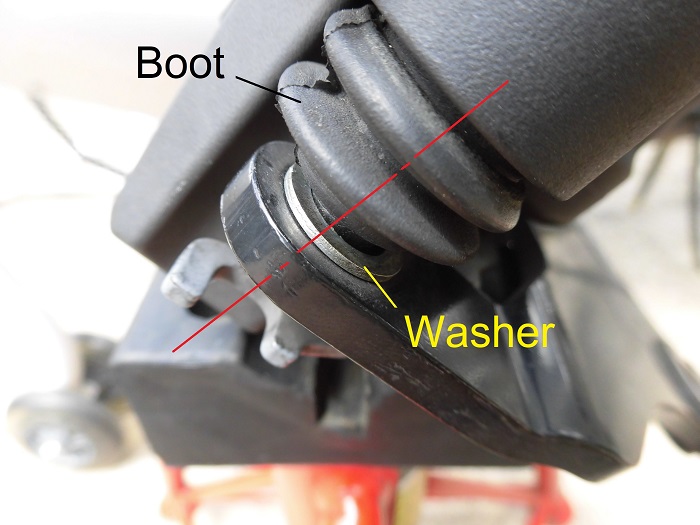
<Remove rear slide pin 2>
When removing the slide pin, be careful not to lose the washer between the boot and the brake caliper bracket.
On my first attempt, I suddenly dropped the washer and it rolled about 1 meter and fell into a hole in the gutter.
I had a hard time pulling the washer up, although I was lucky that I was able to use a pickup tool I had on hand.
Why is it that dropped parts get sucked into the most unbelievable places?
Remove pad pins
<Remove pad pins>
Loosen the pad pins (2 places) that I loosened in STEP 7 further and pull them off with my fingers.
The surface of the pad pins was not so rough.
Remove brake pads
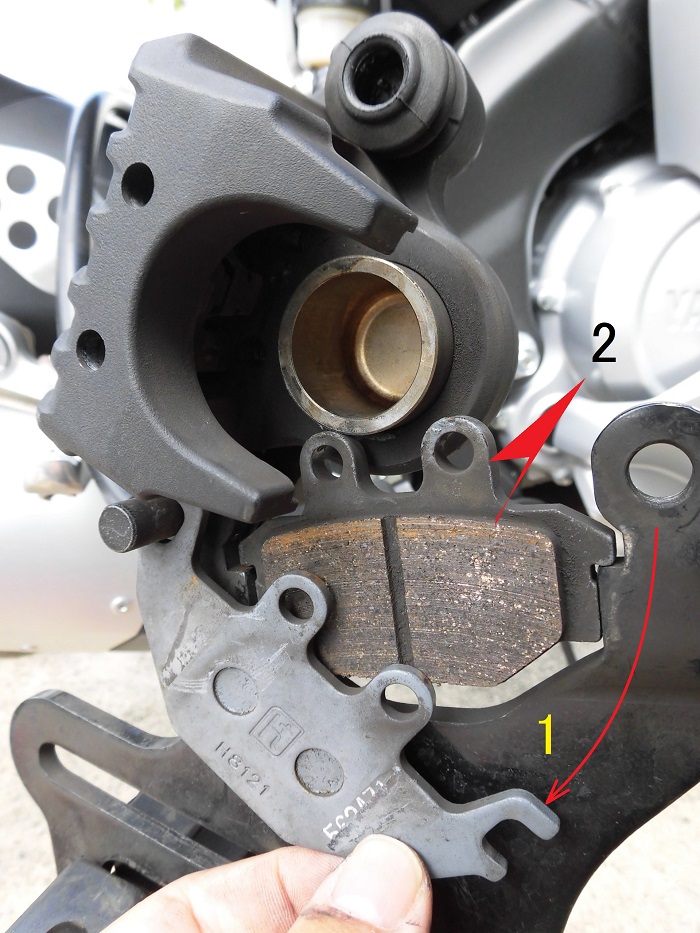
<Remove brake pads>
- Once the pad pin is removed, the inner brake pad will be removed
- Lift up the brake caliper and remove the outer brake pad
Remove brake caliper
<Remove brake caliper>
With the brake caliper lifted,
- Remove the boot from the groove in the brake caliper bracket
- Remove the caliper from the bracket
Condition of front slide pin
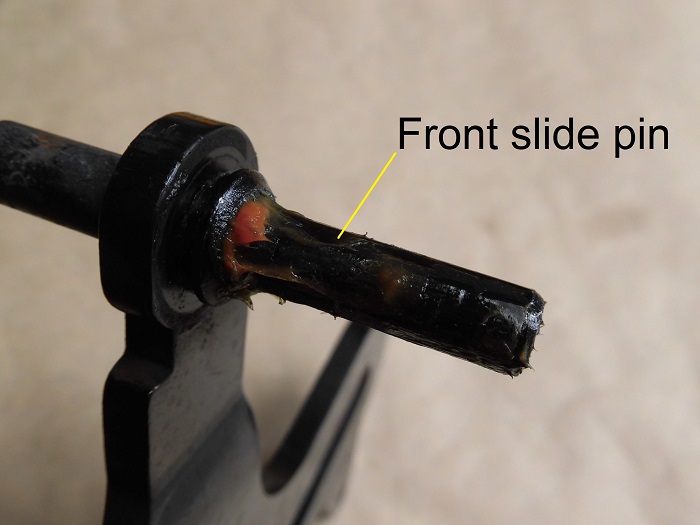
<Condition of front slide pin>
The forward slide pin on the brake caliper bracket was well greased and free of rust.
The slide pins were in good condition both front and rear, including the hole side.
Remove pad spring
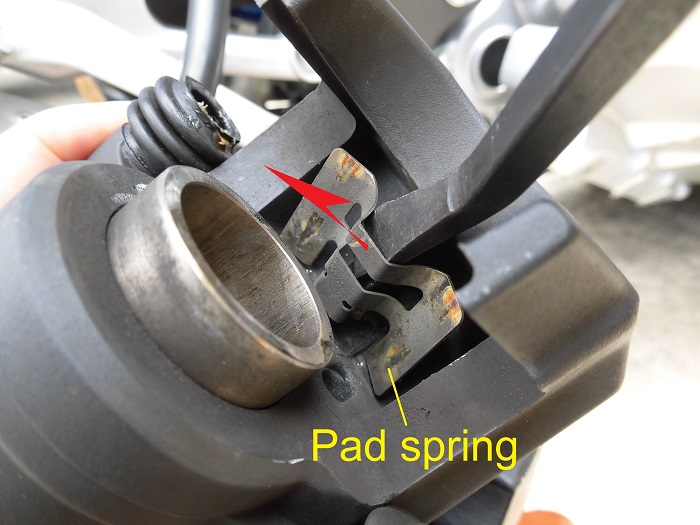
<Remove pad spring>
Using a pry bar, remove the pad springs that are seated in the brake caliper.
Remember to check the orientation before removing.
Removed parts
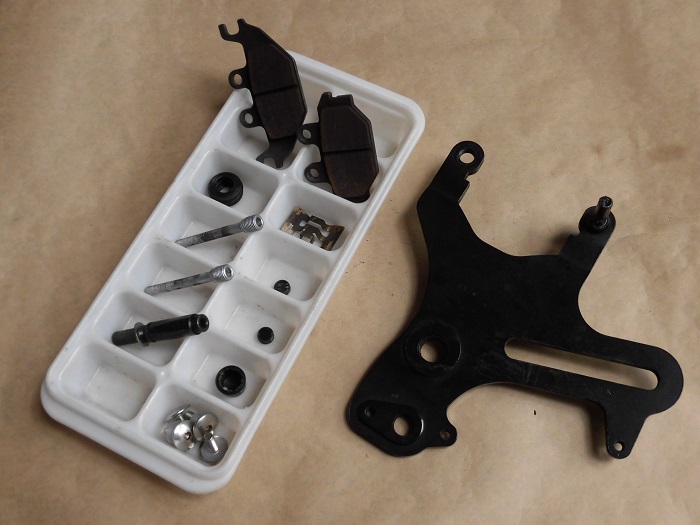
<Removed parts>
These are all the parts that were removed this time. (except the brake caliper).
I am glad to see that none of the boots were cut and none of the parts seem to be a problem.
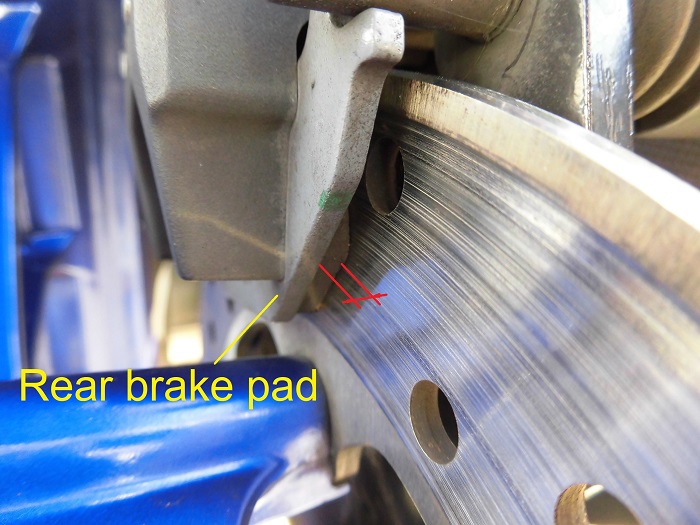
Brake pads
Check the condition of the brake pads.
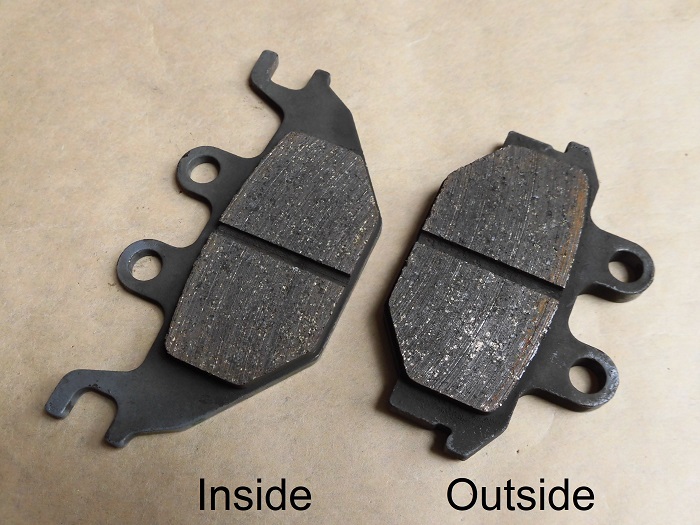
<Reinig side>
There seems to be no evidence of wear or pebbles that could cause the “squeaking” sound.
This means that there was a problem with the movement of the brake piston itself.
The pad thickness was as follows.
Inside: 3.1mm
Outside: 2.6mm
According to the owner’s manual, the wear limit is 1mm, so I wonder if I can use them until the groove in the middle disappears?
Also, the owner’s manual says, “If it gets less than 1.5mm, replace it at the dealer.
It looks like I can go a little longer, but I think it is safer to have a replacement ready by now.
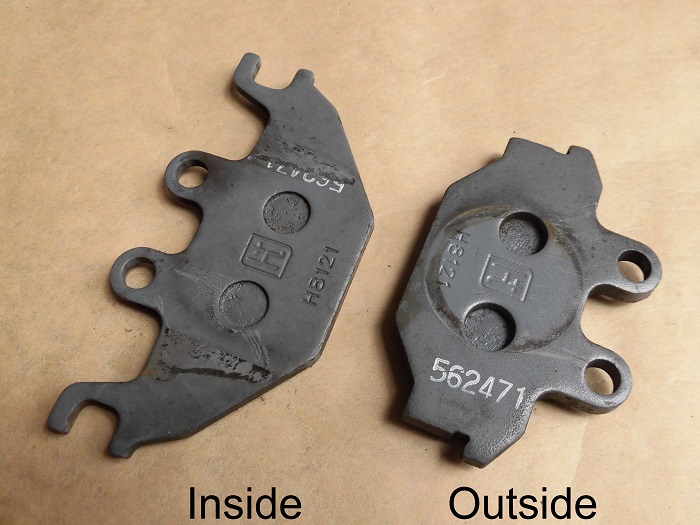
<Back plate side>
The color of the back plate is gray.
It is probably a genuine part, since it is almost the same color compared to the pictures on the Internet.
Unfortunately, I could not get any information from the display “H8121” and “562471” and “h+”.
Genuine part number: 5D7-F5911-00
(This is the same part number as the previous model, so availability does not seem to be an issue)
Clean brake caliper
Now, I will wash the removed parts.
Before washing, it is recommended to press the brake pedal and let the brake piston out slightly. *
This reduces the risk of pushing dirt between the piston and the dust seal into the seal.
*Do not press the brake pedal repeatedly. The brake piston will come off.
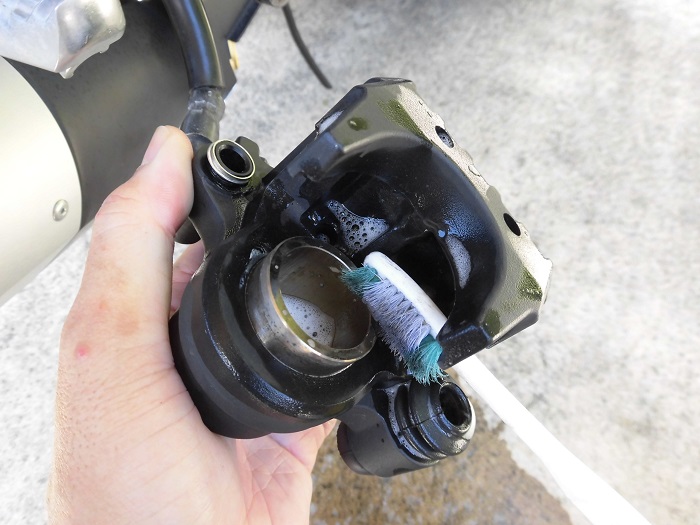
<Clean brake caliper>
Wash the brake calipers with dishwashing detergent and a toothbrush.
Be especially careful around the brake pistons.
There were black stains on the surface of the brake pistons, but no rust or roughness.
It was not heavily soiled, so cleaning was easy.
Other child parts and brake pads are also washed with dishwashing detergent.
Clean slide pin
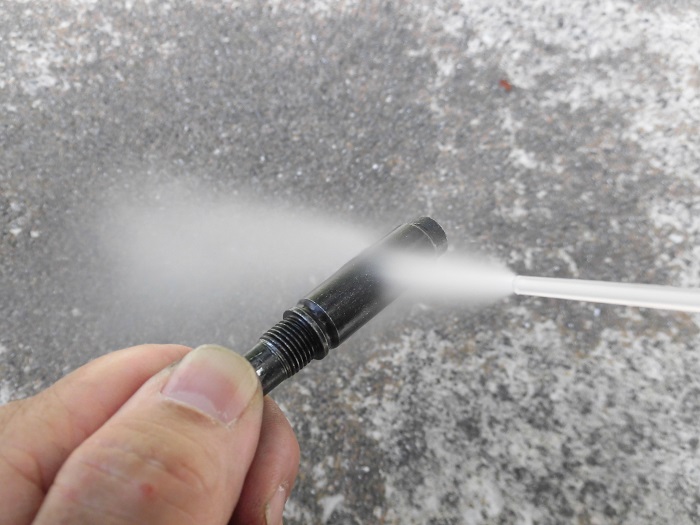
<Clean slide pin>
Parts with grease on them, such as slide pin and pad pins, are cleaned with parts cleaner.
Clean slide pin hole

<Clean slide pin hole>
Clean the holes of the slide pins (2 locations) with parts cleaner.
Since the grease will be replaced this time, make sure that as little of the old grease as possible remains.
Finally, dry all other parts thoroughly.
If you install the brake in a freshly dried condition, it will be the same as putting water inside and covering it with a lid.
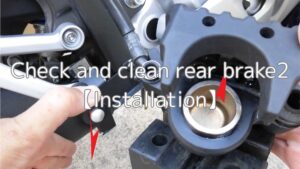
Continue to Maintenance Record “Check and clean rear brake2【Installation】”.
3. Summary
In this issue, I summarize the removal of the rear brakes, the condition of the brake pads, and how to clean them.
To clean the parts, use dishwashing detergent, but if the brake dust is heavily contaminated, use brake cleaner or parts cleaner.
However, it is better to minimize the use of brake cleaner or parts cleaner, which is gentler on both your wallet and the rubber parts.
- Brake calipers cannot be removed from the bracket without removing the wheel.
- When washing the brake pistons, let the pistons out slightly to reduce the risk of pushing dirt into them.
- Use dishwashing detergent for cleaning to avoid damaging rubber parts.


