
1. Remove parts for checking and cleaning
This is a continuation of the maintenance record “How to remove steps and pedals”.
If you are riding your R125 and see any of the following signs, I recommend that you have your step pedals checked.
- If the brake pedal is not moving smoothly, it may be out of grease.
- If you hear a rattling sound coming from the step area, a bolt may be loose.
From this article you can learn the following.
- Step and pedal construction
- Inspection points for removed brake pedal
- Alternative method for split pin
- How to assemble pedals and steps
| Date | 30th May 2021 |
| Subjects | Maintenance, Failure, Repair |
| Shop or DIY | DIY |
| Difficulty | |
| Working hours | 3 (Not included coating drying time) |
| Costs [Yen] | 0 (Use what I have) |
2. Check and Clean steps and pedals (STEP 1-13)
Remove return spring
Further parts are removed.
If not stated otherwise, the following is a picture of the right-hand bracket.
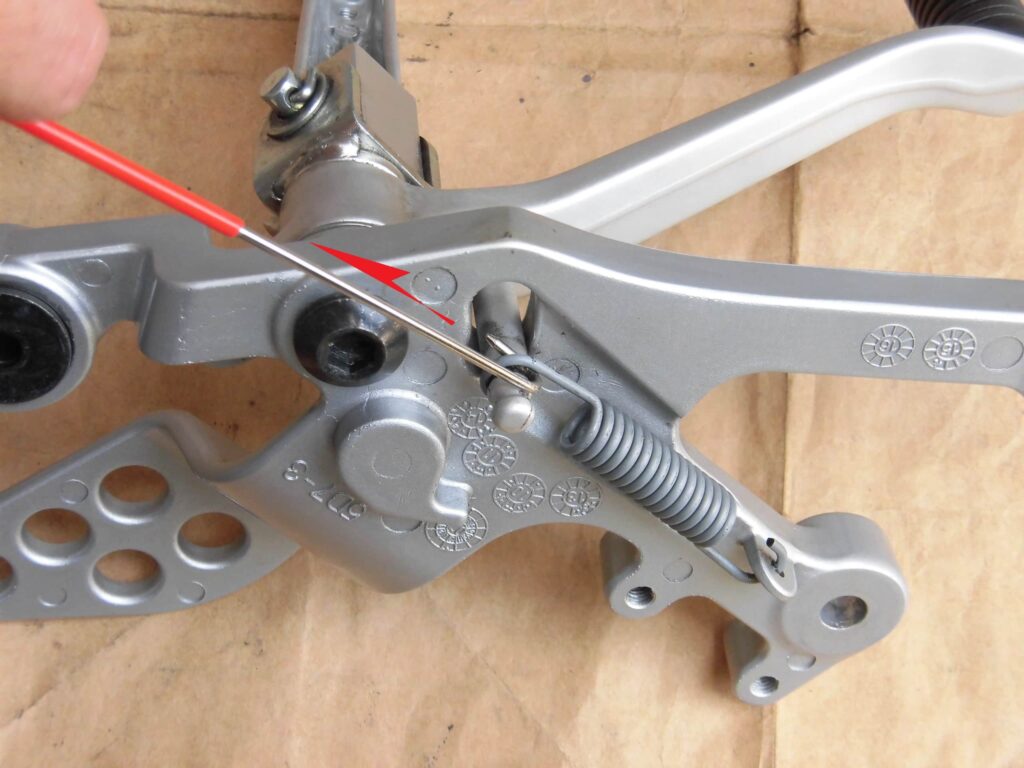
<Remove return spring>
With the spring remover, pull the return spring on the rear brake pedal to remove it.
The pedal will clatter as it is removed.
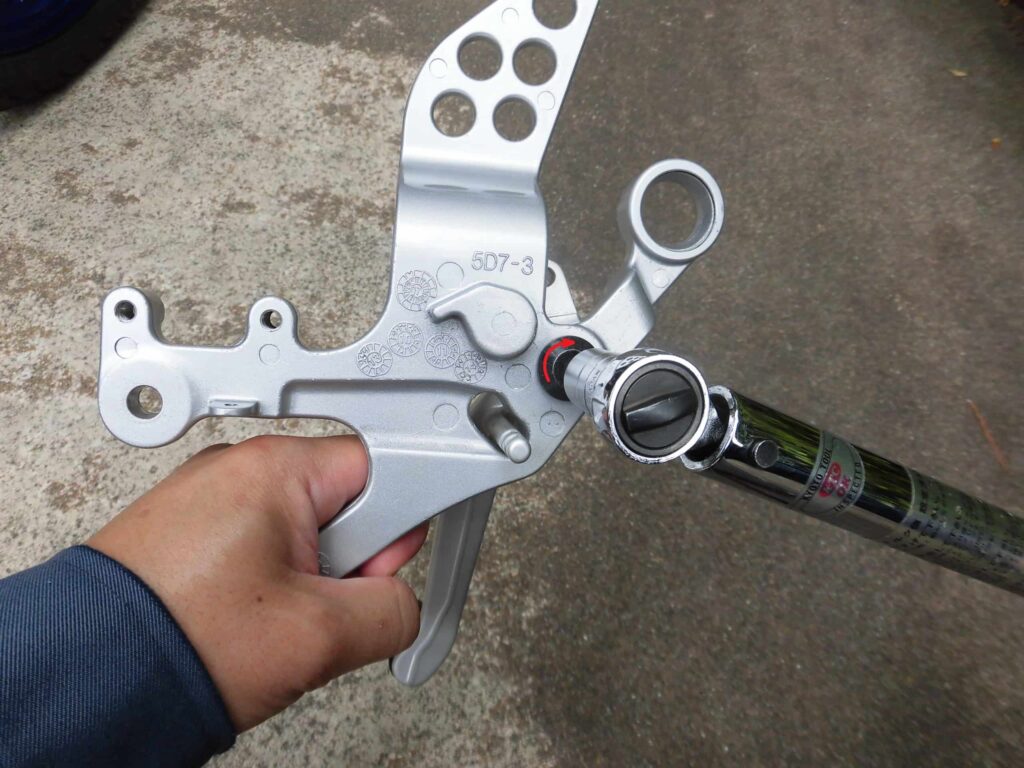
Remove step
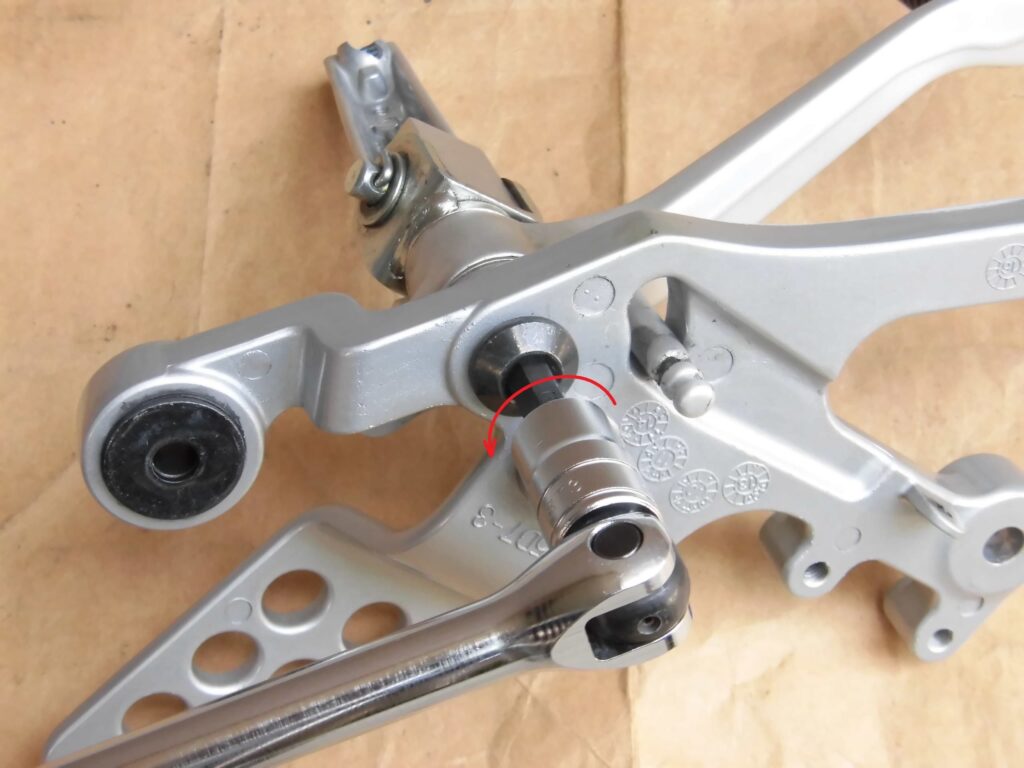
<Remove step>
Loosen the bolts securing the steps with a spinner handle fitted with a hexagon socket (8 mm).
It is a little stiff because of the thread-locking agent.
Remove the left bracket in the same way.
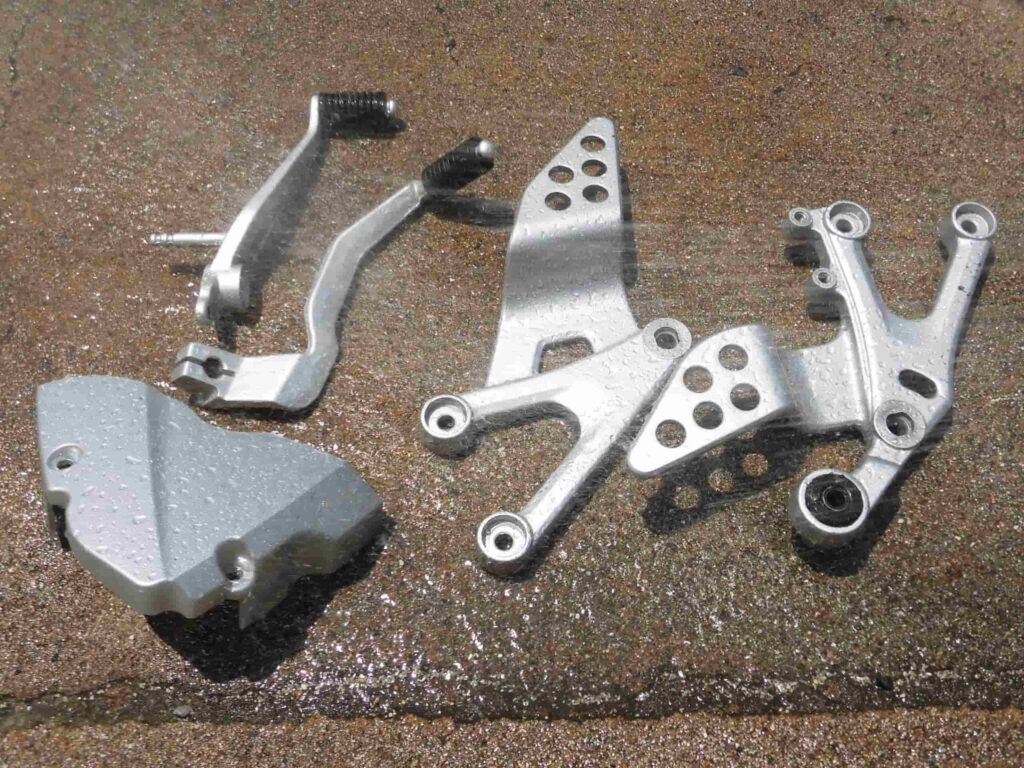
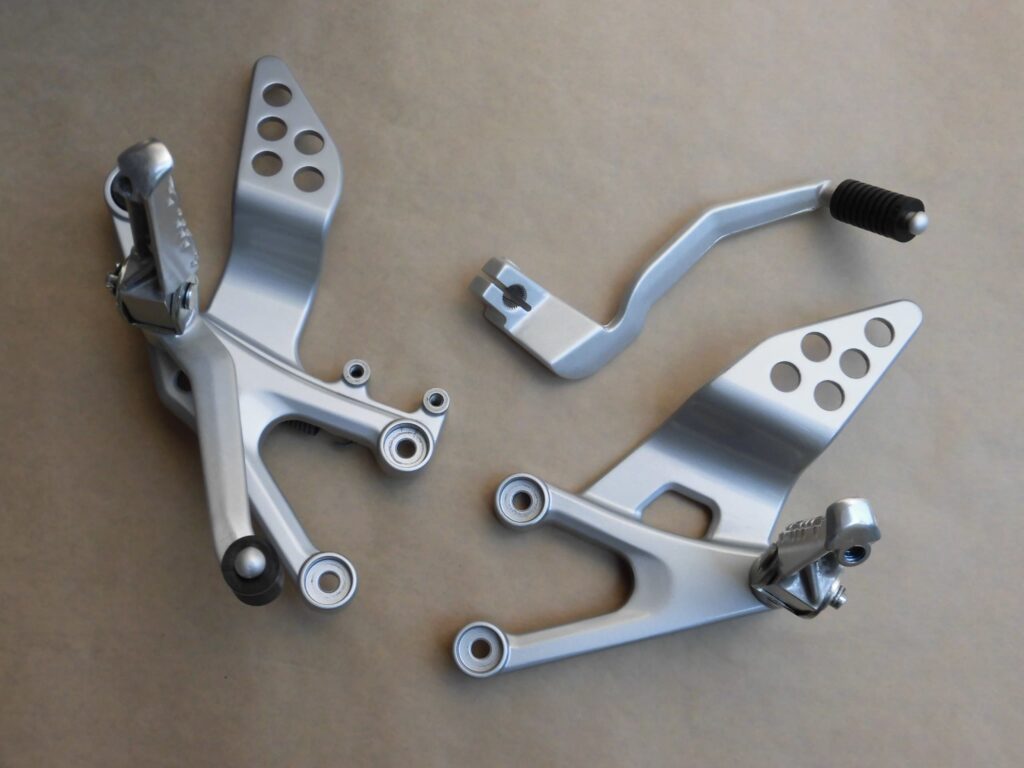
Removed bracket and steps
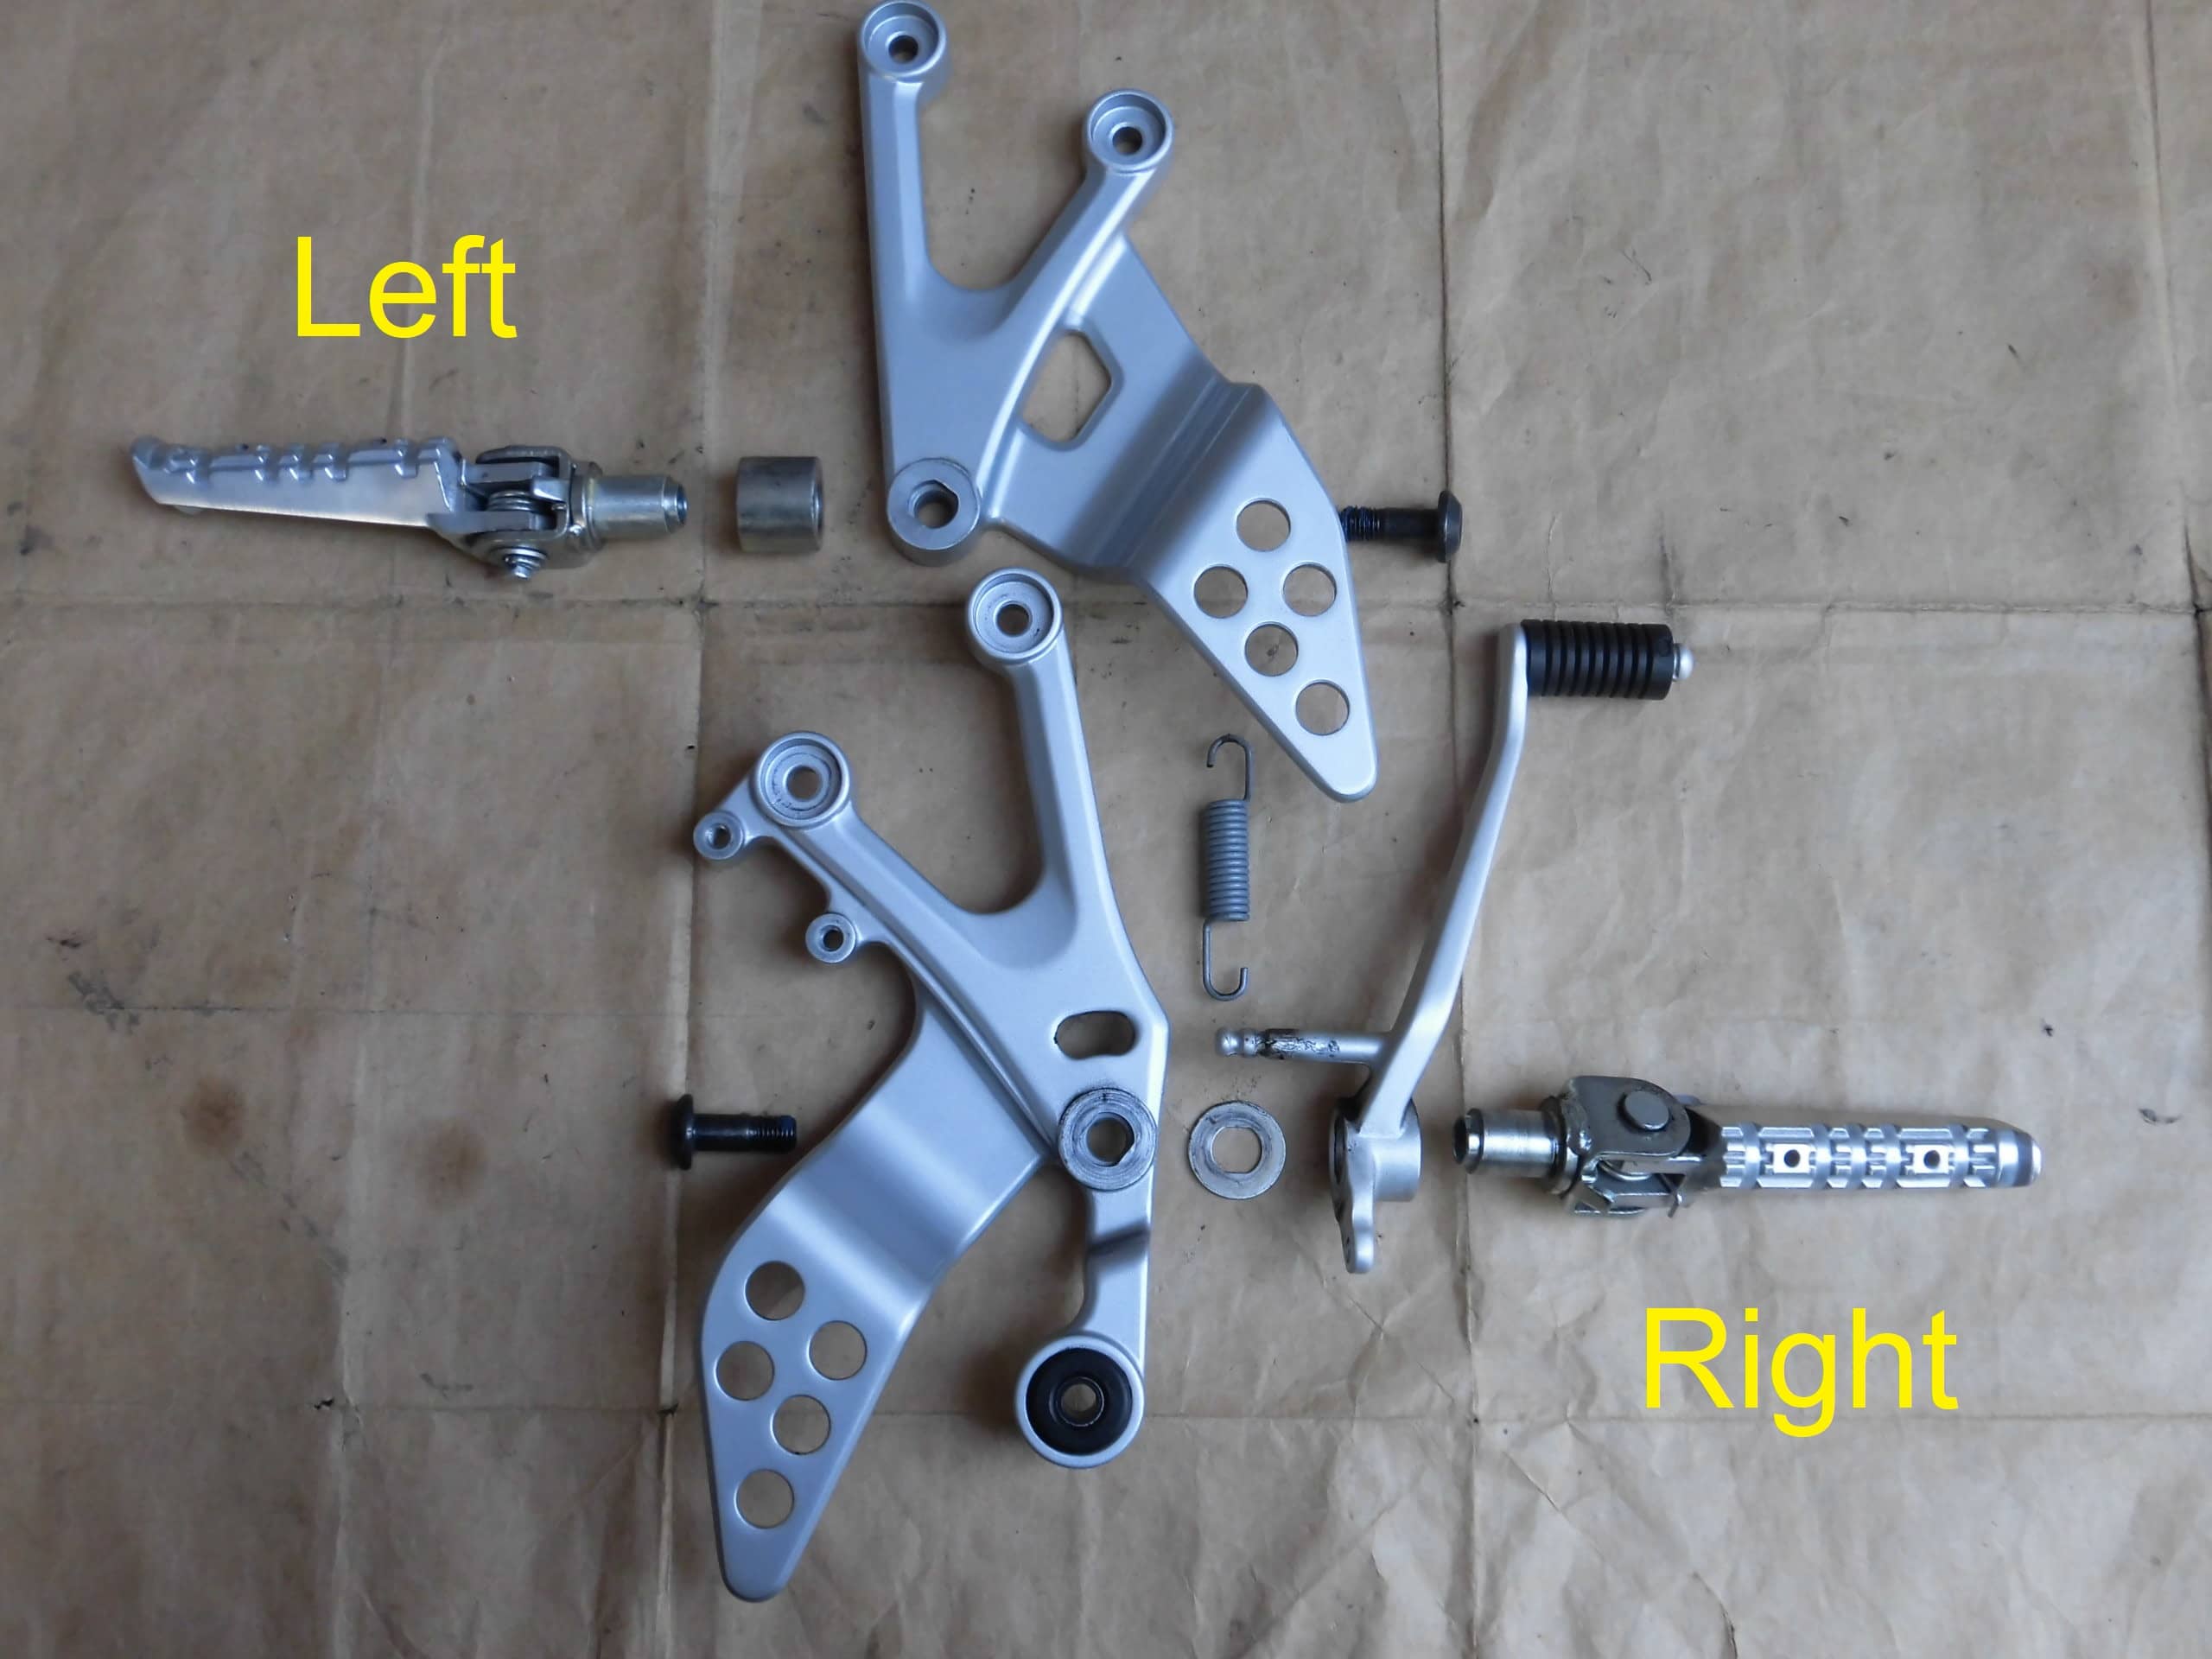
<Removed bracket and steps>
Above: left side
Bottom: right side.
The left side has a collar for the missing pedals.
Further parts can be removed from the steps as well.
However, as they are not coated, they are not dismantled.
Checking the removed parts,
- No elongation in the brake pedal return spring
- There is grease in the brake pedal hole and no wear
- No bends in the bracket
Therefore, it looks like it will work fine!
Clean bolts
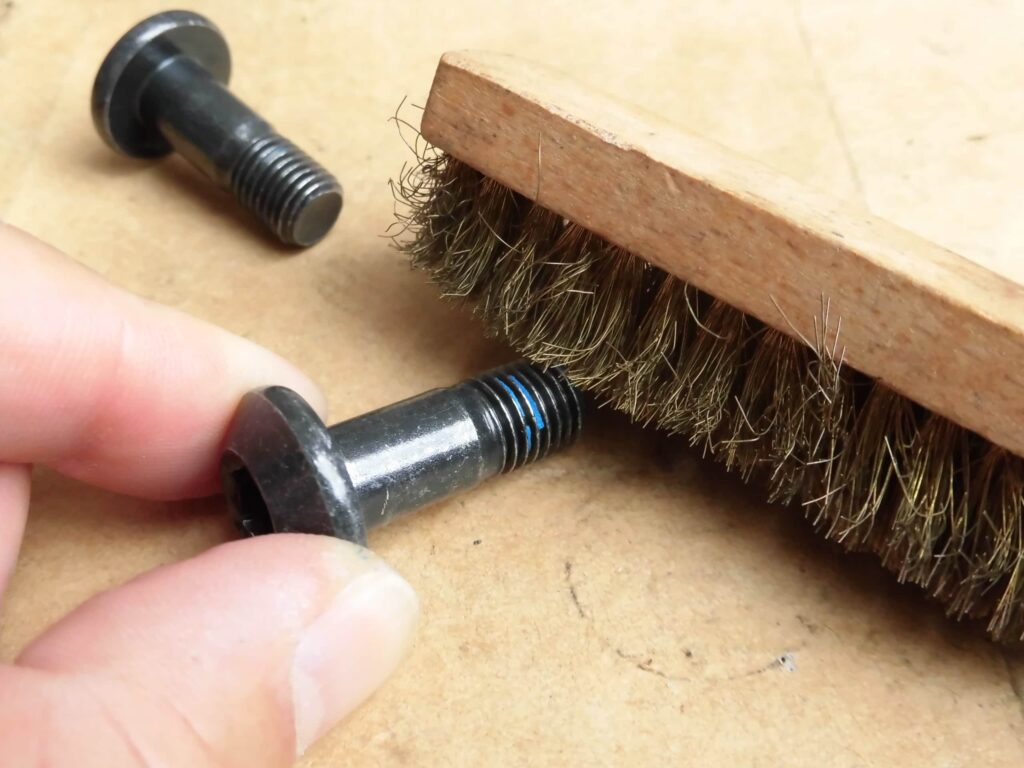
<Clean bolts>
The bolts securing the steps have thread locking agent on them, which can be removed with a cutter and wire brush.
Wash parts
<Wash parts>
Wash the removed parts in water with car shampoo.
The sprocket cover, which was removed in a separate operation, was washed together.
The steps were only wiped clean to avoid the grease falling off completely.
Ceramic coating
Next, coat brackets and pedals.
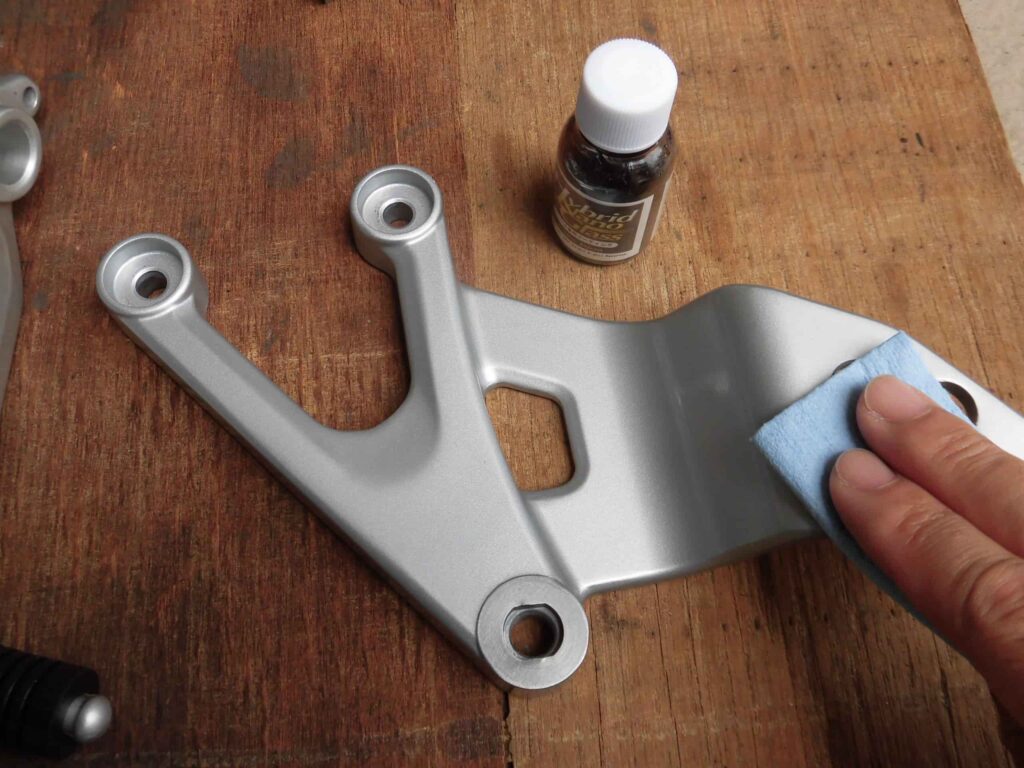
<Ceramic coating>
Apply the ceramic coating on a paper cloth to the entire part, spreading it thinly.
Then, the coating is flattened with a dry paper cloth and allowed to dry.
This was repeated three times on different days.
Split pin and R-pin
Before I start assembling, I will devise.
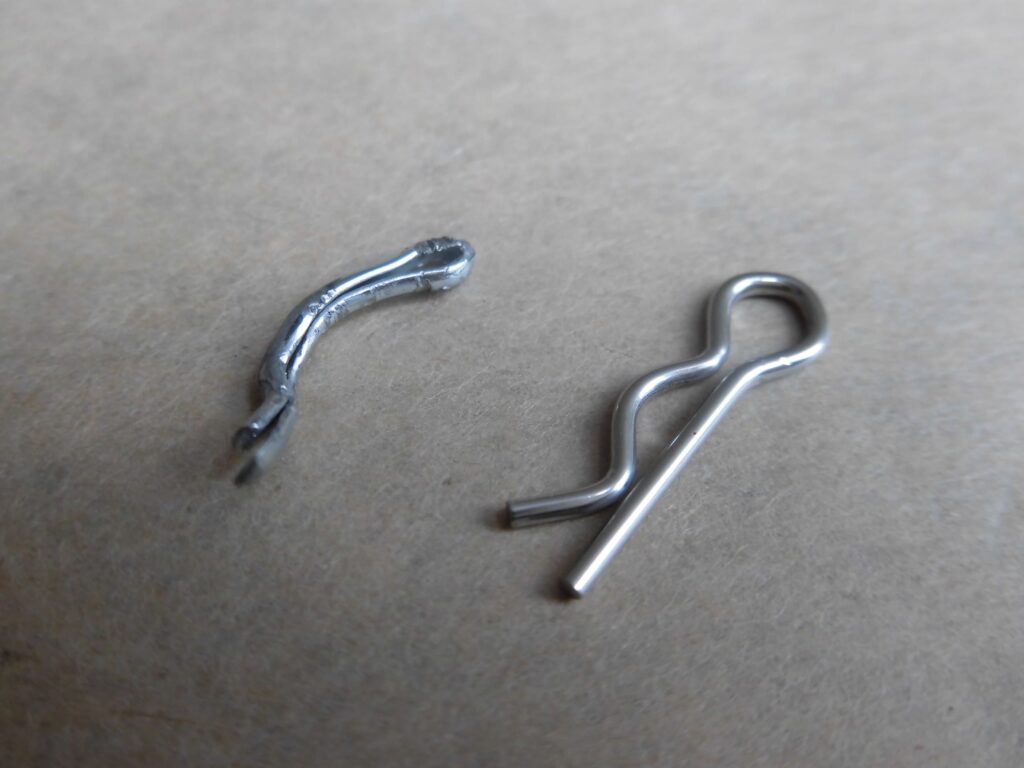
<Split pin and R-pin>
Left: Split pin
Right: R-pin
Use R-pins instead of split pins to stop the rear brake pedal pin from slipping out.
The R-pin is quicker to install and remove, but there is a risk of it coming off easily.
(Installation of the R-pin will be covered in the next maintenance record “How to install steps and pedals”).
Step machining
In addition, we will try to prevent the R-pin from being lost.
We will drill a hole in the step for the wire to pass through and wire the R-pin.
<Step machining>
Drill a 1.6 mm hole in the protruding part of the step.
After drilling
<After drilling>
I drilled a hole like this.
It’s a bit off-center, but it’s a good hole for me to have drilled.
Apply grease and thread locking agent
Now, let’s start the assembly.
<Apply grease and thread locking agent>
- Grease the brake pedal mounting area of the step and the area where the spring hooks up.
If the grease runs out on the part of the step where the brake pedal goes through, the hole (aluminum) on the pedal side will wear and rattle.
- Apply thread locker agent to the bolts securing the step.
This prevents the step from loosening due to vibration when riding.
Assemble bracket 1
<Assemble bracket 1>
Assemble the parts carefully to ensure that the washers are not forgotten or installed in the wrong position.
Note that the step has a locating groove so that it will not rotate when the bolts are tightened.
Assemble bracket 2
<Assemble bracket 2>
Using a torque spanner, tighten the bolts securing the steps to 15 Nm.
Then install the return spring for the rear brake pedal using the spring remover.
Assemble the left bracket in the same way.
Assembled brackets and shift pedal
<Assembled brackets and shift pedal>
It’s clean now, but I don’t think there’s much difference compared to the picture before cleaning…
(Continues with maintenance record “How to install steps and pedals”.)
3. Summary
After inspection, no parts were found to be faulty, and the parts could be re-used without problem.
The grease on the brake pedal was also replaced, the steps were securely tightened, and the feeling was renewed.
- R-pins can be used instead of split pins
- Apply grease to the part of the step where the brake pedal passes through
- Apply thread locker agent to the bolts securing the step
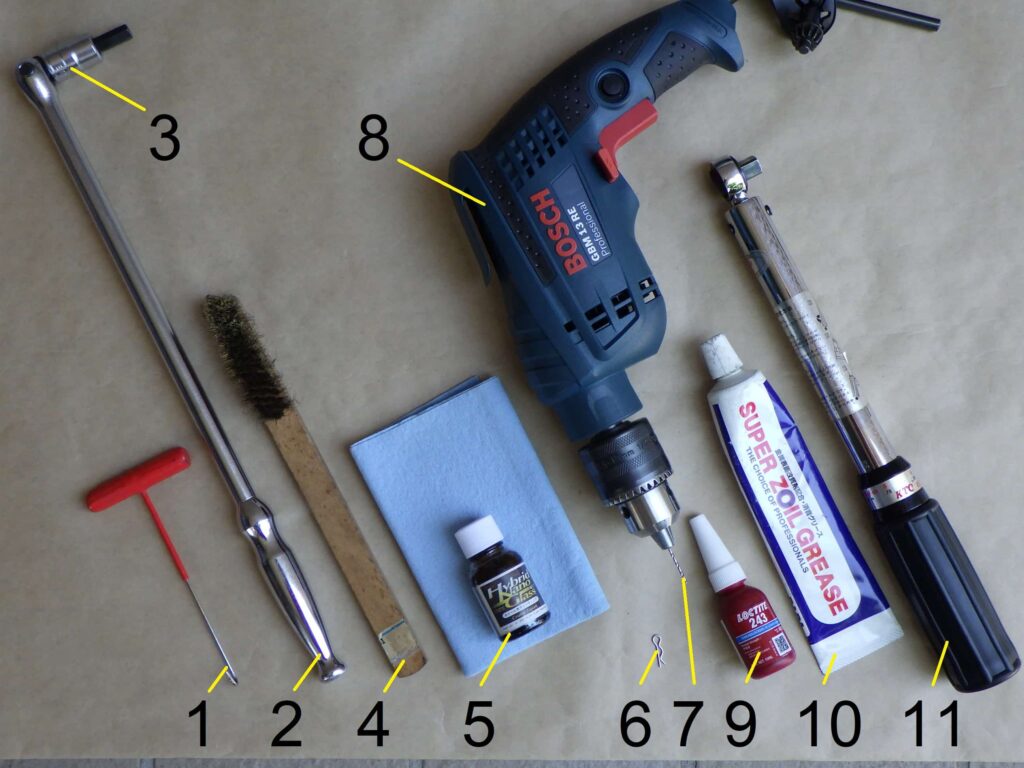
Goods used:
| No. | Name | Manufacturer | Parts number | Quantity | Amounts [Yen] |
| 1 | Spring remover | Kijima | 302-2021 | 1 | 990 |
| 2 | Long spinner handle | KTC | BS3L | 1 | 5,907 |
| 3 | Hexagon bit socket (8mm) | KTC | BT3-08S | 1 | 1,012 |
| 4 | Wire brush | – | – | 1 | (300) |
| 5 | Wheels coating agent | Cruise Japan | tirewheelcoating-001 | 1 | 4,600 |
| 6 | R-pins | – | – | 1 | (300) |
| 7 | Drill (1.6mm) | Mitsubishi materials | BSDD0160 | 1 | 571 |
| 8 | Electronic drill | Bosch | GBM13RE | 1 | 20,800 |
| 9 | Thread locking agent | Loctite | 243 | 1 | 870 |
| 10 | Lithium grease | Super zoil | ZG100 | 1 | 2,420 |
| 11 | Torque wrench (Small) | KTC | CMP0252 | 1 | (44,990) |
| 82,760 |


