This is a continuation of “Motorcycle Dash Cam Installation 8 – Installing the Switch”.
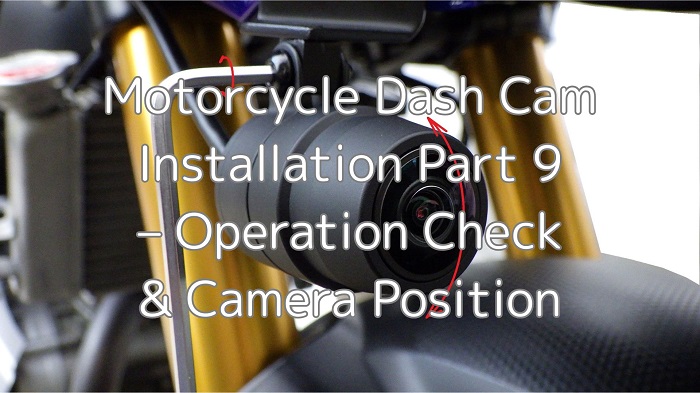
In this final ninth installment, I’ ll verify the operation of the installed dashcam and adjust the camera positions.
The drive recorder used is the Mitsuba Sankowa / EDR-21A.
I’ll show how the footage looks from the installed camera positions.
From this article, you’ll learn:
- How to check dashcam operation
- The mounting status of the cameras and switch
- Sample footage recorded by the dashcam
| Date | 16th December 2023 |
| Subjects | Tuning, Customizing |
| Shop or DIY | DIY |
| Difficulty | |
| Working hours | 1 |
| Costs [Yen] | 0 (Use what I have) |
1. Goods to use
| No. | Product name | Manufacturer | Product number | Quantity | Amounts[Yen] |
| ST1 | Dual-channel motorcycle dash cam | Mitsuba Sankowa | EDR-21A | 1 | 39,380 |
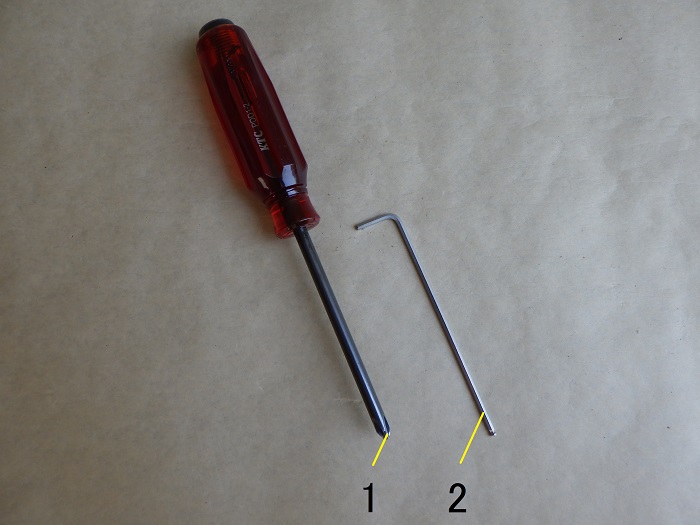
| 1 | Phillips screwdriver (No.2) | KTC | PDD1-2 | 1 | 1,606 |
| ST3 | Moto DR (Software) | Mitsuba Sankowa | – | 1 | 0 |
| 2 | Long hex key (2.5mm) | KTC | HLD250-2.5 | 1 | 1,122 |
| 42,108 |
2. Operation Check & Camera Position Adjustment (STEP 1–18)
Battery Connection
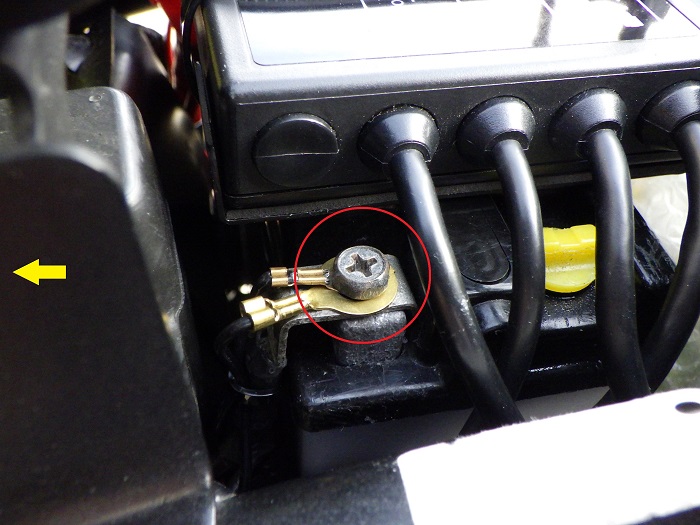
<Battery Connection>
First, connect the wiring to the battery and check whether the dashcam powers on properly.
Since the dashcam unit was covering the positive terminal, I temporarily removed it to connect the terminal.
Signal Wire Connection
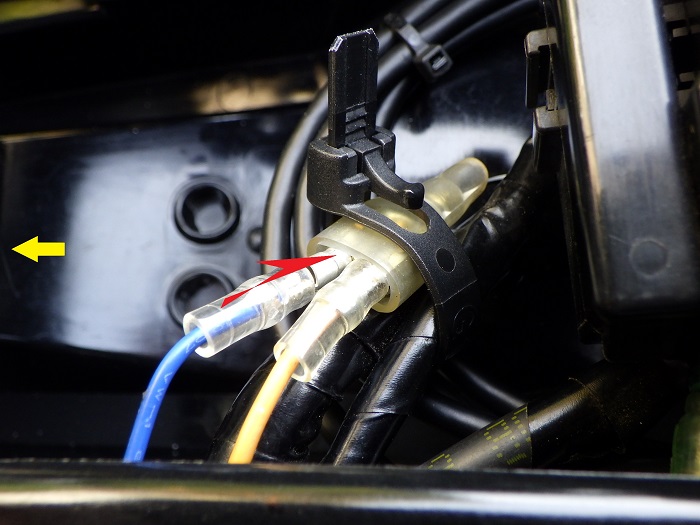
<Signal Wire Connection>
Next, connect the bullet terminal of the blue power wire to the ignition power line.
For details on the ignition power source, refer to the maintenance log: “Extract wiring from ignition power supply”

Moto DR

<Moto DR>
Turn on the ignition switch and launch Mitsuba Sankowa’s “Moto DR” app on your smartphone.
It took a while to connect to the dashcam—probably due to unstable signal—but that’s part of the charm.
From the settings screen, I checked the front and rear camera feeds to confirm they were displaying correctly.
Front & Rear Camera Position Adjustment
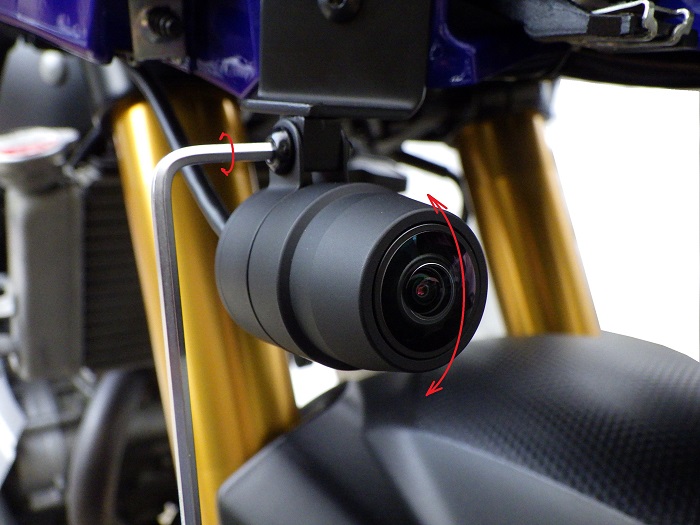
<Front Camera Position Adjustment>
Using a 2.5mm hex wrench, loosen the camera ring and adjust the rotation and height of the camera.
Adjustments are made while viewing the smartphone screen, but due to the wide-angle lens, fine-tuning the rotation is quite tricky.
I also pre-checked how to view the recorded footage, so I can review it anytime.
Dashcam Unit 1
Now, here’s a photo showing the dashcam installed with the fairings reattached.

<Dashcam Unit 1>
The dashcam unit fits nicely like this.
Of course, the seat can be installed without any issues.
Dashcam Unit 2
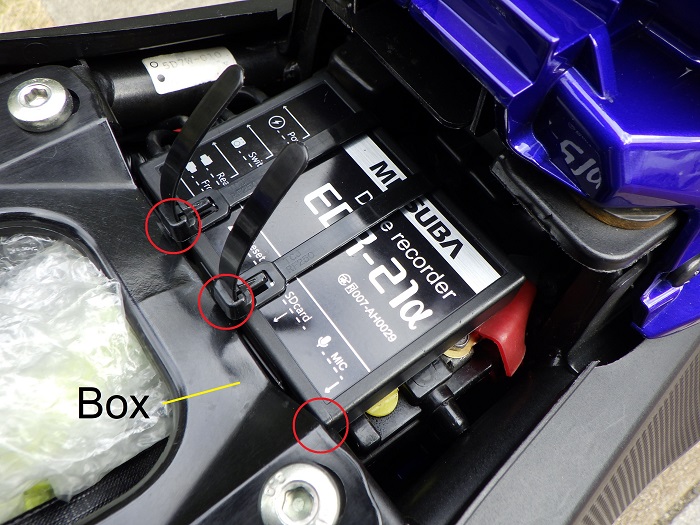
<Dashcam Unit 2>
The clearance with the box was extremely tight.
The reusable cable tie lightly touches it, but it fits—barely.
By loosening the cable tie, the dashcam unit can be moved, allowing:
- SD card insertion/removal
- Battery removal/installation
All without any problems.
Oh, and the terminal cover got a bit squished.
Under-Seat Space

<Under-Seat Space>
Surprisingly, the bundled rear camera wiring takes up quite a bit of space under the seat.
Some of the onboard tools are also touching it.
Still, there’s enough room to store a helmet lock or seat bag lock.
Rear Camera Status 1
Next, the rear camera.

<Rear Camera Status 1>
It’s installed under the rear side cowl, so there’s no risk of bumping it when mounting a seat bag or getting on the bike.
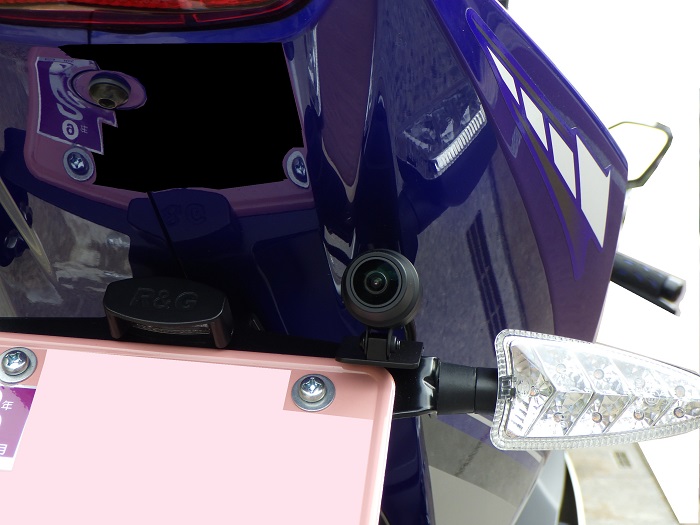
Rear Camera Status 2
<Rear Camera Status 2>
This is a close-up of the red-framed area from STEP 8.
It’s positioned so it doesn’t interfere with the rear side cowl or tail tidy.
Rear Camera Status 3
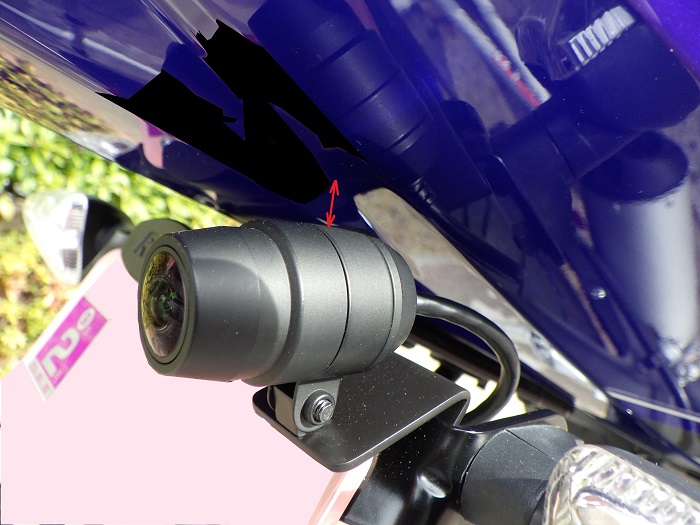
<Rear Camera Status 3>
From a slightly different angle.
I considered the gap between the rear side cowl and the camera, so I can still wipe the cowl with a microfiber cloth during washes.
To create this gap, I bent the lower part of the bracket significantly.
Rear Camera Status 4
<Rear Camera Status 4>
From the rear.
You can see it’s mounted under the side cowl.
I generally avoid riding in the rain, but in light rain, it shouldn’t get directly wet.
However, since the camera protrudes below the bracket, it might get splashed by muddy water kicked up by the rear tire.
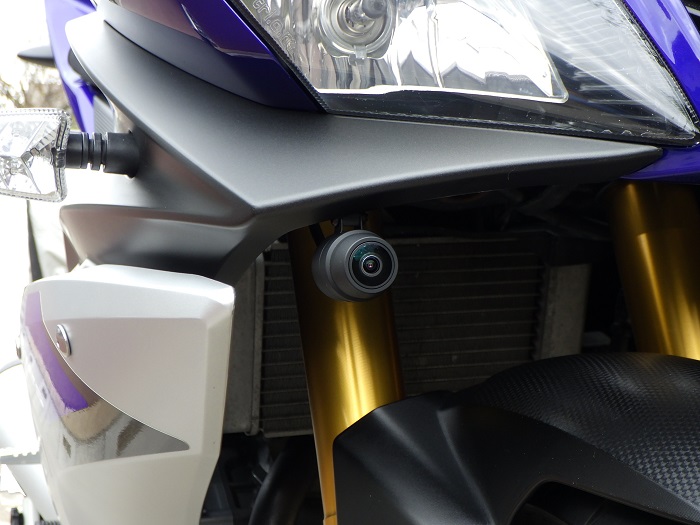
Front Camera Status 1
Now for the front camera.
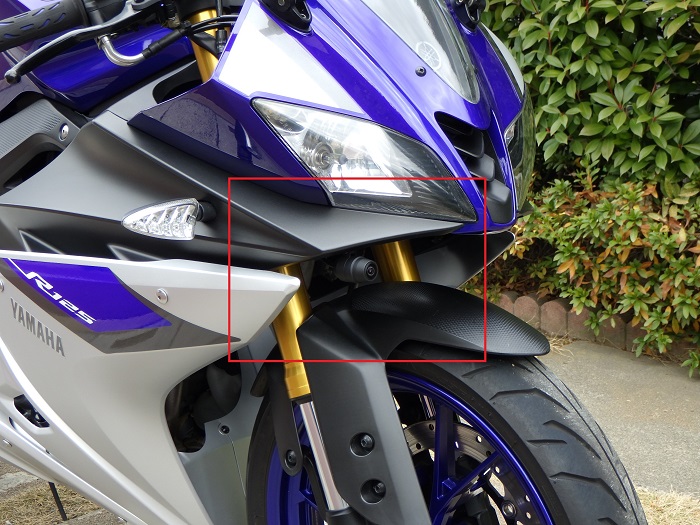
<Front Camera Status 1>
It’s mounted in a precise spot that avoids the upper side cowl.
If I didn’t mention it, no one would probably notice it’s there.
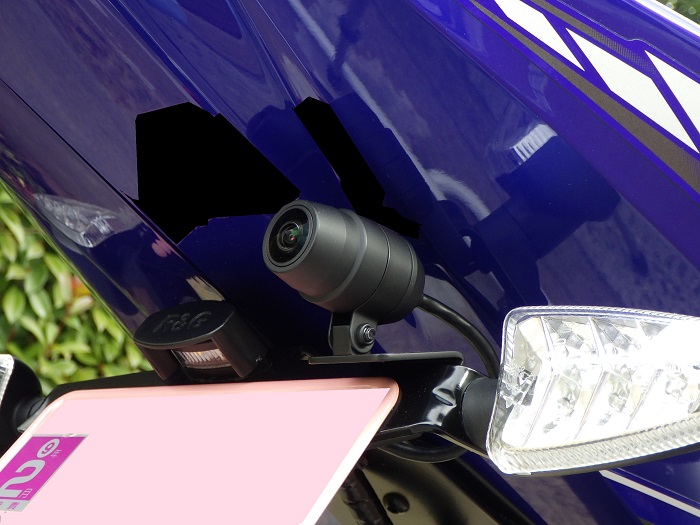
Front Camera Status 2
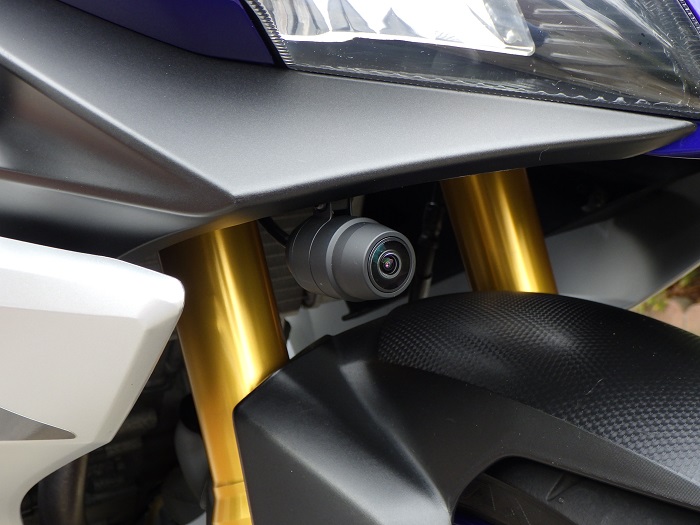
<Front Camera Status 2>
This is a close-up of the red-framed area from STEP 12.
This might be the part where DIY really paid off.
By fabricating a simple bracket, I was able to mount it far more cleanly than expected (if I may say so myself).
Front Camera Status 3

<Front Camera Status 3>
I didn’t account for the thickness of the double-sided tape, so the gap with the upper side cowl ended up being very tight.
Still, I managed to leave a 1–2mm clearance.
Front Camera Status 4
<Front Camera Status 4>
From the front.
Even when the front forks move, the camera doesn’t touch the front fender.
Switch Status
Now for the switch.
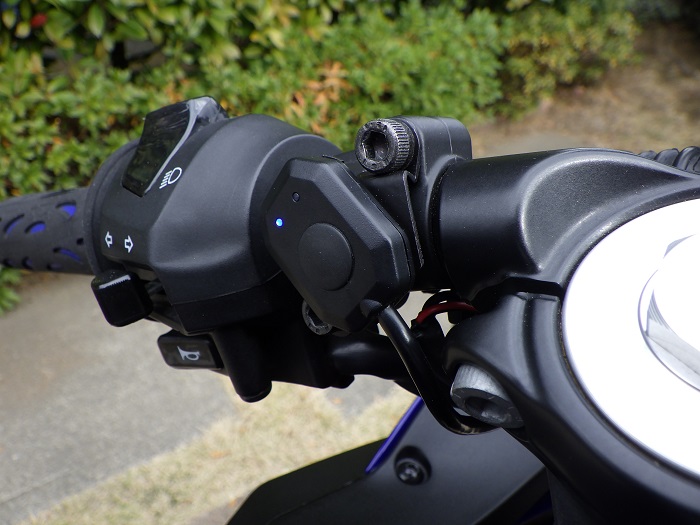
<Switch Status>
I took inspiration from the mounting position on the Kawasaki Eliminator.
With this placement, you can quickly press the switch in an emergency.
Rear Footage
Here’ s some sample footage.
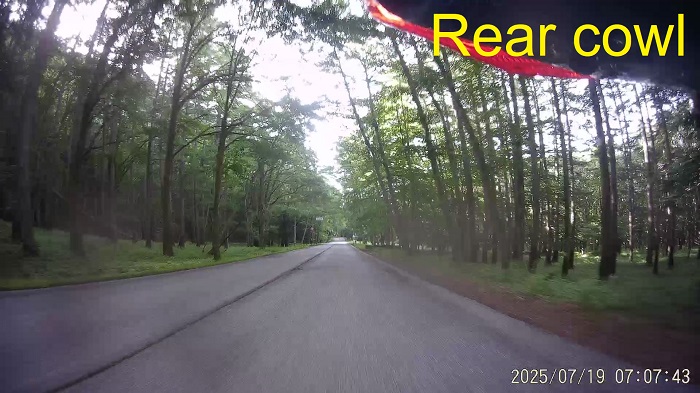
<Rear Footage>
It’s ideal to position the dashcam so part of the bike is visible in the frame.
This time, I managed to capture it nicely.
Although it’s mounted on the right side, it still seems capable of capturing impacts from the left rear.
Front Footage
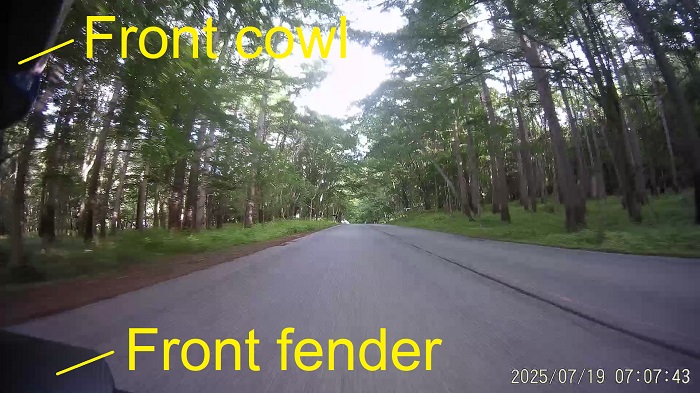
<Front Footage>
Same here—the footage includes part of the bike, and the positioning worked well.
The date and time appear in the bottom-right corner of the screen.
3. Summary
This wraps up the steps for checking dashcam operation and adjusting camera positions.
As long as you don’t forget to connect the power or ignition wires—or leave the relay connector unplugged—the dashcam should function properly.
For camera positioning, as long as it’s roughly level, it should be fine.
Now that the dashcam is installed, even my immature riding moments will be recorded.
I’ll have to be more mindful of safe riding than ever before.
- It’s best to position the camera so part of the bike is visible in the footage.
- Don’t forget—your riding is being recorded.