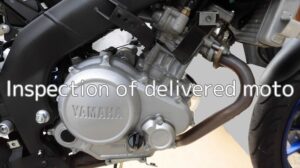
In the maintenance record “Inspection of delivered moto” STEP 3-8, it was noticed that engine oil was leaking from the drain bolt area.
<Engine oil leakage>
Oil was also dripping onto the muffler and under cowl and was quite oily.
I will check the cause of the leakage, as it would be sad if the oil gets on the side cowl and panels again, even though I have just been cleaned in the maintenance record “Apply ceramic coating on side cowl and panel etc.”.
In fact, I have hardly ridden moto since delivery, but I will take this opportunity to change the oil and oil filter as well.
Note that the model: BVD, which has been on sale in Japan since 2023, has the same structure.
So, engine parts are used, generation after generation.
From this article you can learn more about below,
- How to change the engine oil and oil filter
- Causes of engine oil leaks
| Date | 22nd May 2021 |
| Subjects | Maintenance, Failure, Repair |
| Shop or DIY | DIY |
| Difficulty | |
| Working hours | 2 |
| Costs | 2,815 Yen |
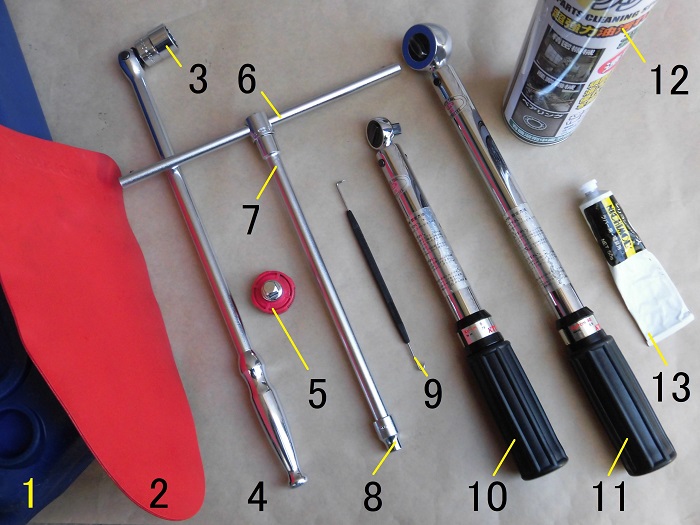
1. Goods to use
| No. | Name | Manufacturer | Parts number | Quantity | Amounts[Yen] | Purchasing this time |
| 1 | Oil drain pan 8L | Straight | 36-229 | 1 | 2,200 | |
| 2 | Flexible funnel 370mm | Straight | 36-6600 | 1 | 2,880 | |
| 3 | Socket wrench(19mm) | KTC | B3-19 | 1 | 968 | |
| 4 | Long spinner handle | KTC | BS3L | 1 | 5,907 | |
| 5 | Quick spinner | KTC | BE3-Q | 1 | 2,046 | |
| 6 | Slide head handle | KTC | BHM3 | 1 | 2,970 | |
| 7 | Extension bar (250mm) | KTC | BE20-250 | 1 | (2,783) | |
| 8 | Socket wrench (8mm) | KTC | B3-08 | 1 | 825 | |
| 9 | O-ring seal pick tools | Straight | 19-7001 | 1 set | 490 | |
| ST18 | O-RING | Genuine parts | 93210-19X00 | 1 | 78 | ○ |
| ST18 | O-RING | Genuine parts | 93210-34802 | 1 | 99 | ○ |
| ST18 | O-RING | Genuine parts | 93210-53801 | 1 | 522 | ○ |
| ST22 | ELEMENT ASSY, OIL CLEANER | Genuine parts | 38B-E3440-00 | 1 | 971 | ○ |
| 10 | Torque wrench (Small) | KTC | CMP0252 | 1 | (44,990) | |
| 11 | Torque wrench (Middle) | KTC | CMP102 | 1 | (47,300) | |
| ST30 | YAMALUBE standard plus | Y’S GEAR | – | 1 | 1,145 | ○ |
| 12 | Parts cleaner | – | – | 1 | (500) | |
| 13 | Silicon grease | – | – | 1 | (1,000) | |
| 117,674 | 2,815 |
2. Engine oil change (STEP 1-35)
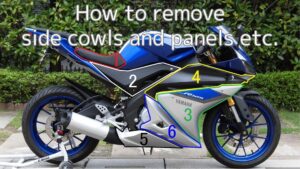
Remove side cowls and panels etc.
First, remove the side cowls and panels etc. in order to remove the drain bolts and oil filter.
In the photos below, both the left and right sides are removed, but the work can be done by removing only the right side.
(For information on how to remove the side cowls and panels, etc., see below).
Engine oil leakage condition
<Engine oil leakage condition>
I have left it for a few weeks after wiping the oil off, but from the drain bolt, very little oil has seeped through.
When the engine was started and warmed up before the oil was changed, the oil gradually leaked out.
Remove oil filler cap
Now, I will start to drain the engine oil.
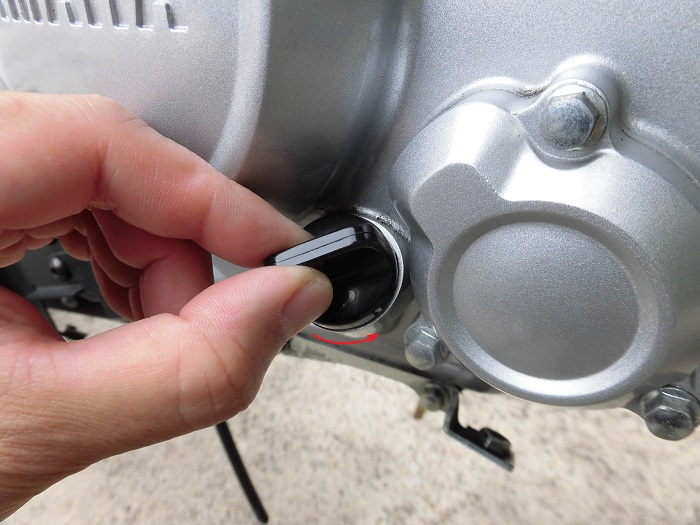
<Remove oil filler cap>
Twist off the oil filler cap to allow oil to drain easily.
Put oil tray and flexible funnel
As described in event “Delivered YZF-R125 5D7W!”, the attachment that prevents engine oil from dripping onto the muffler was not included.
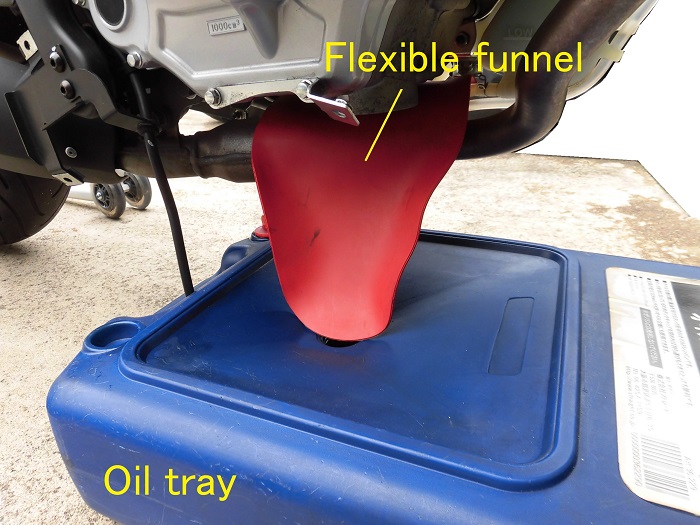
<Put oil tray and flexible funnel>
Therefore, use a flexible funnel.
Laying down the flexible funnel also prevents burns from accidentally touching the muffler.
Also, although I use an oil tray out of habit, it is easier to clean up afterwards if I lay the oil pack directly on them.
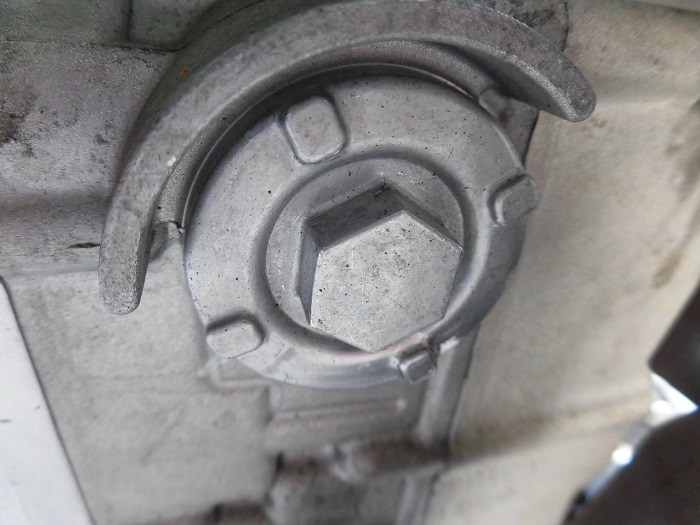
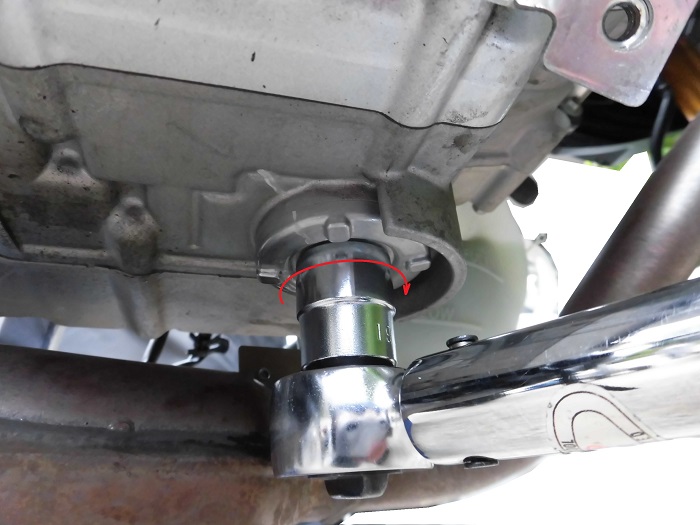
Remove drain bolt 1
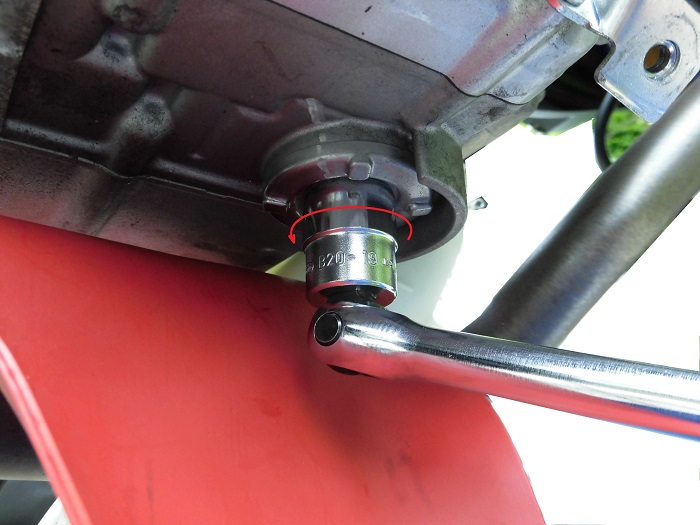
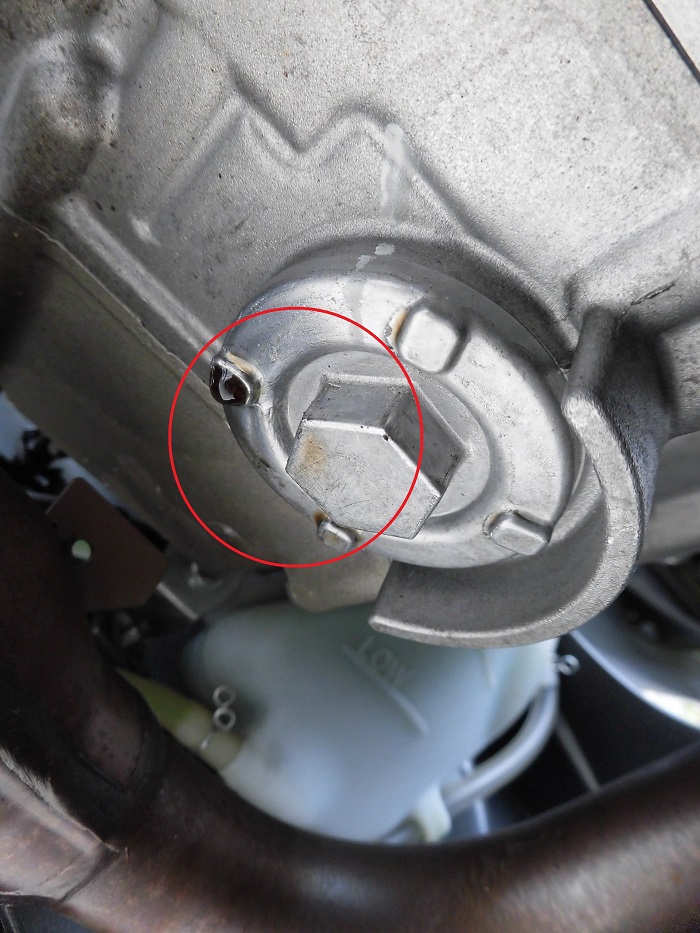
<Remove drain bolt 1>
Loosen the drain bolt with a spinner handle fitted with a socket (19 mm).
It has loosened without being tightened particularly tightly.
The drain bolt has a special shape, with a projection around the central hexagon.
I used a socket wrench because I felt that a ring spanner would not be able to hang on tight enough.
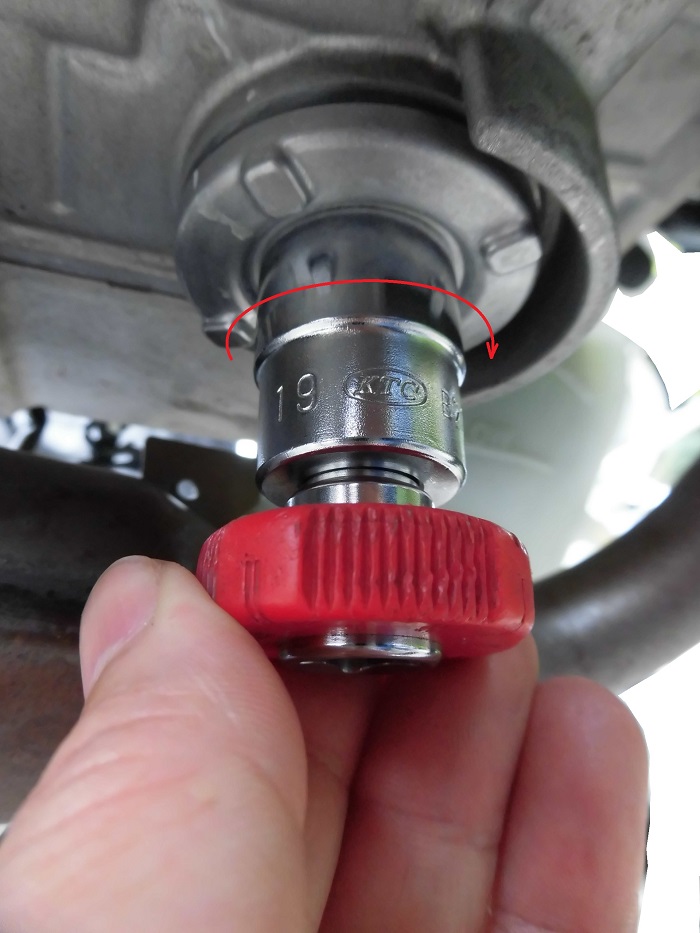
Remove drain bolt 2
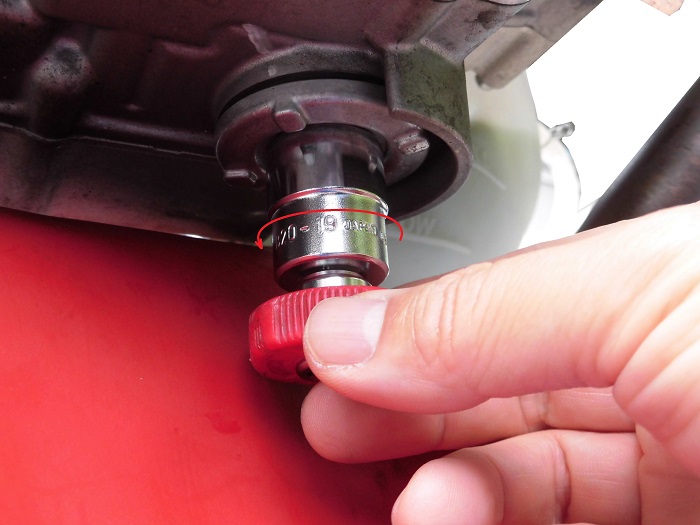
<Remove drain bolt 2>
Replace the socket with a quick spinner and loosen the drain bolt by hand.
There is a 3 mm gap between the crankcase and the drain bolt, but no engine oil spills out.
The photo shows bare hands, but in reality, oil gloves are worn.
Be aware that immediately after driving, hot oil may get on your hands and burn you.
Engine oil drain
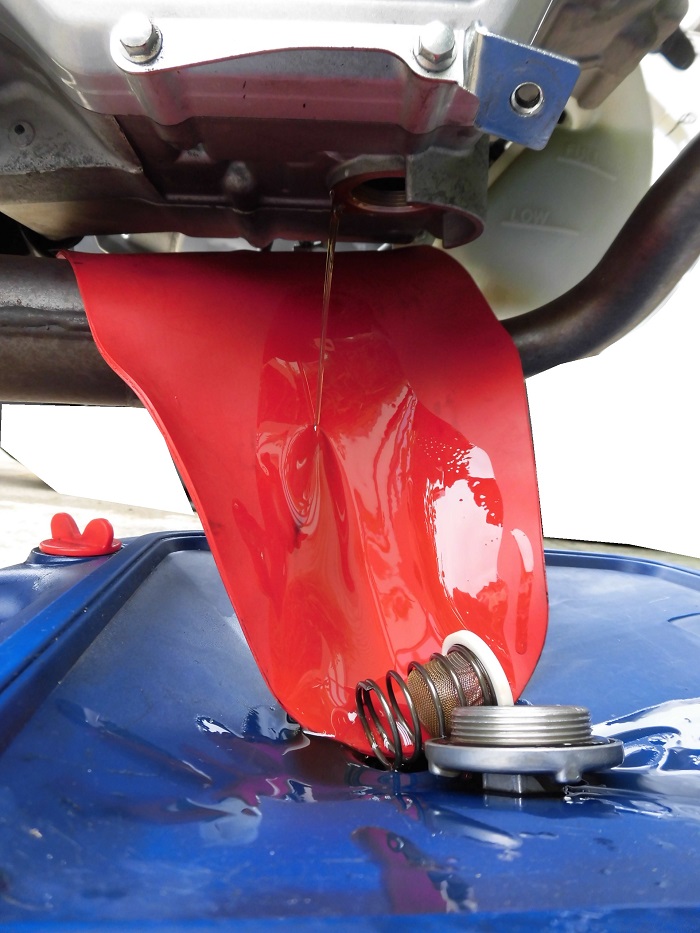
<Engine oil drain>
When the drain bolt is removed, oil comes out vigorously.
The flexible funnel is doing a good job.
Drain bolt fitting
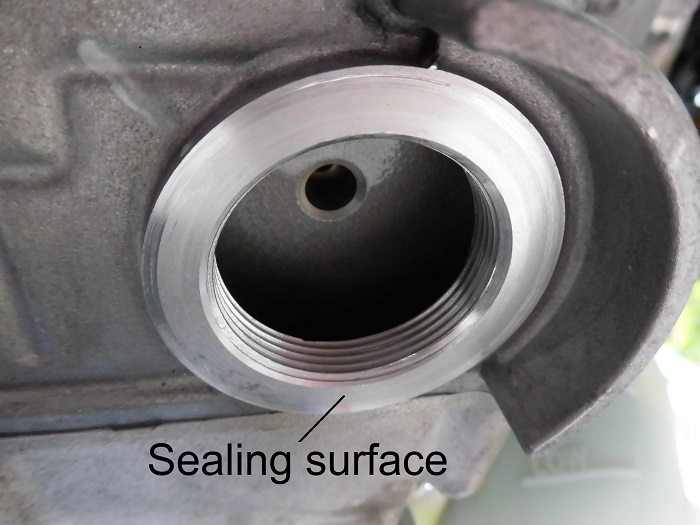
<Drain bolt fitting>
The drain bolts are sealed with O-ring.
The sealing surface of the crankcase are very clean and there was no damage to the crankcase that would cause engine oil to leak.
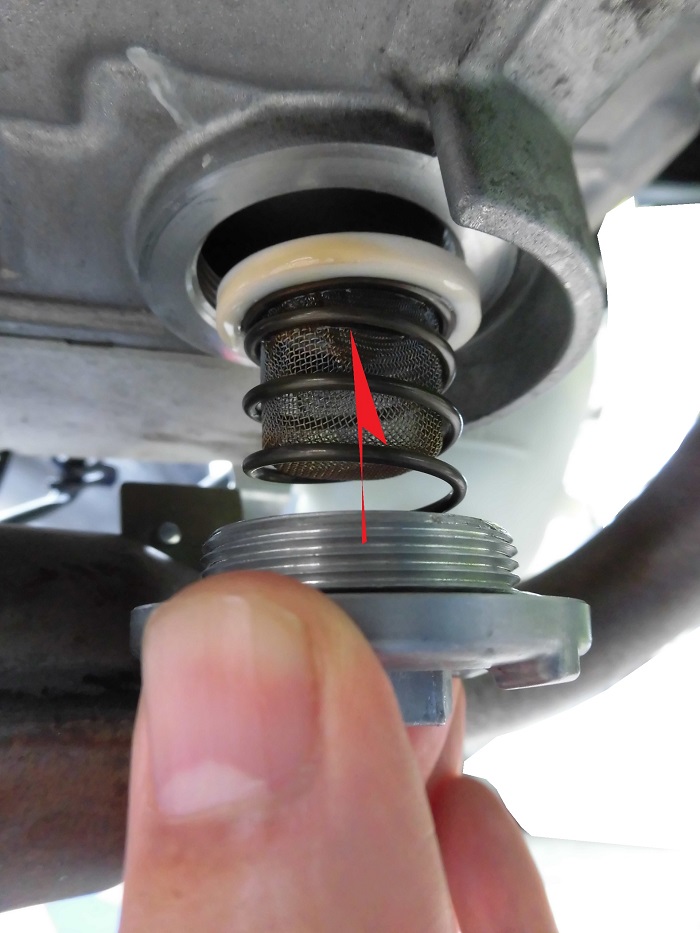
Removed drain bolts etc.
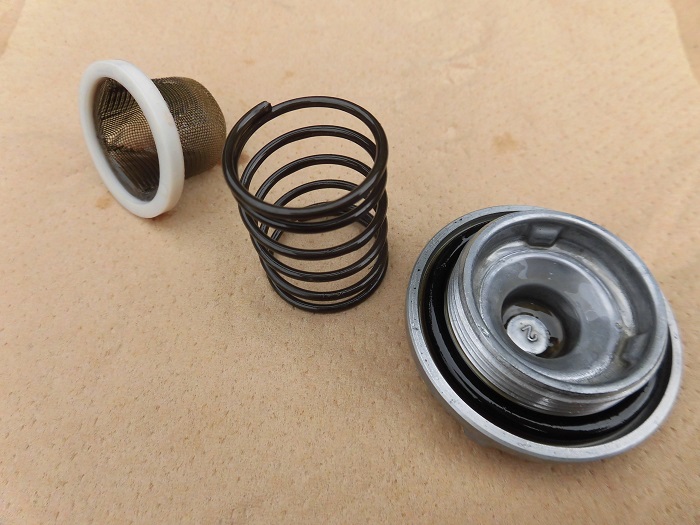
<Removed drain bolts etc.>
The drain bolt consists of four parts, from left to right
- Strainer
- Spring
- O-ring + drain bolt
The strainer is supposed to remove large debris, but I feel it can also be removed by the oil filter.
For what purpose?
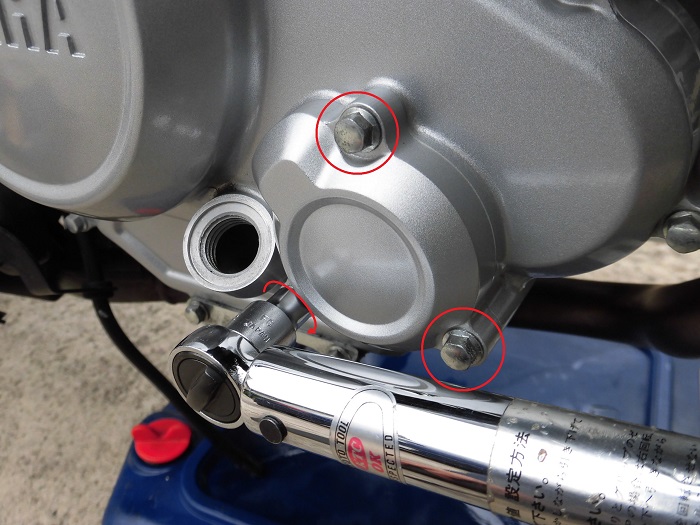
Remove oil filter cover 1
Now, remove the oil filter.
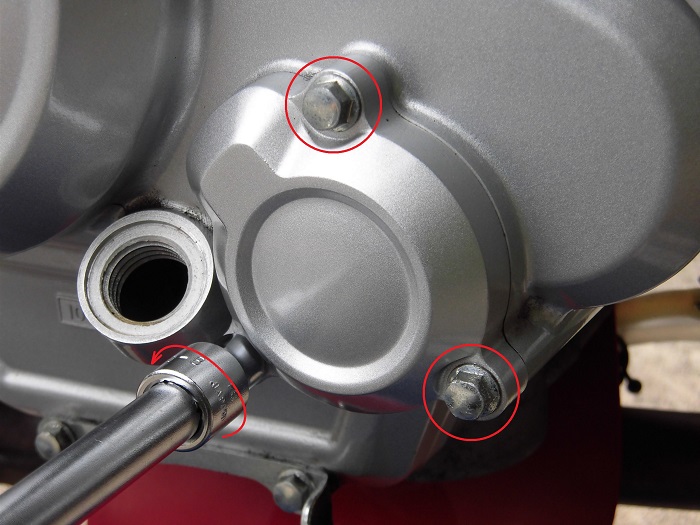
<Remove oil filter cover 1>
Using a T-bar handle with a socket (8 mm), loosen the three bolts fixing the oil filter cover.
Remove oil filter cover 2
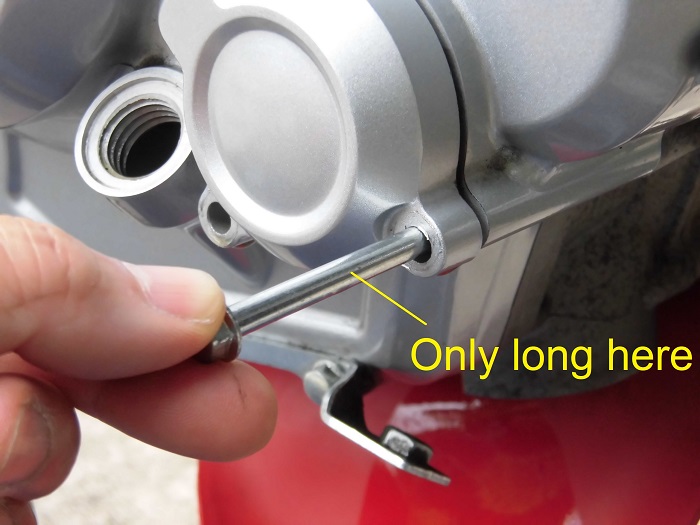
<Remove oil filter cover 2>
Only the bottom right bolt is longer.
Remove oil filter cover 3
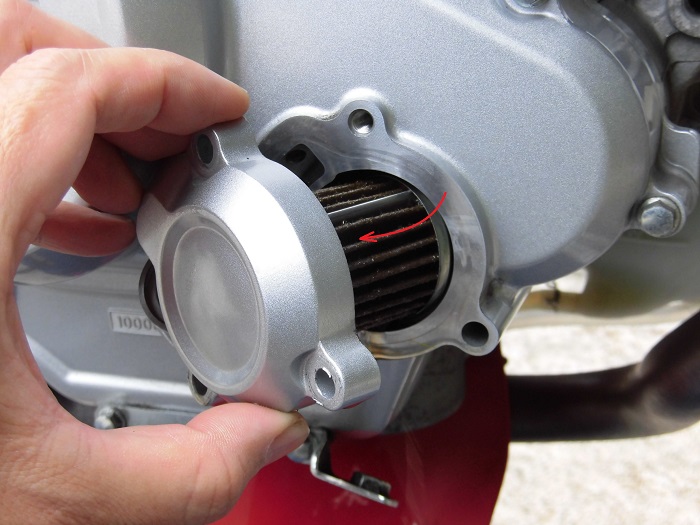
<Remove oil filter cover 3>
Remove the oil filter cover by hand.
The oil filter comes off together.
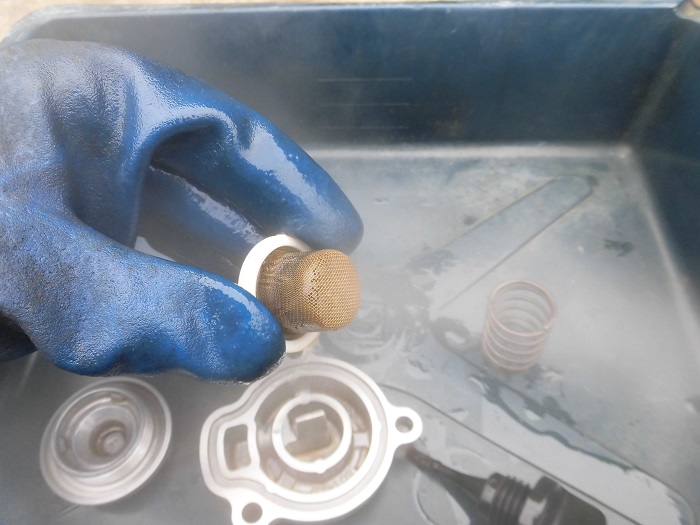
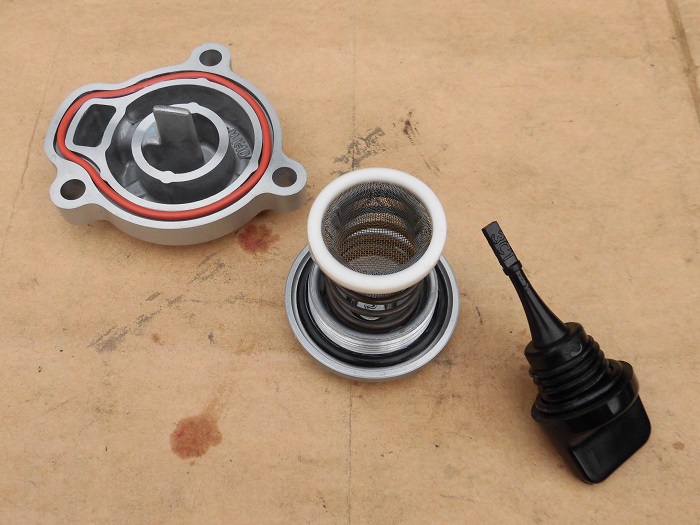
Condition of oil filter removed
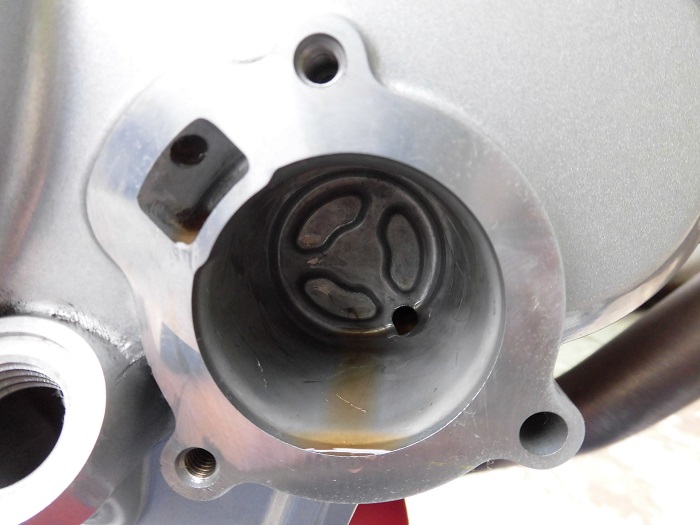
<Condition of oil filter removed>
When the oil filter is removed, it is empty inside.
So, the oil filter is only fixed by pressing the rubber parts on both sides.
Remove O-ring
Three O-rings are used to seal the engine oil, and these will also be replaced.
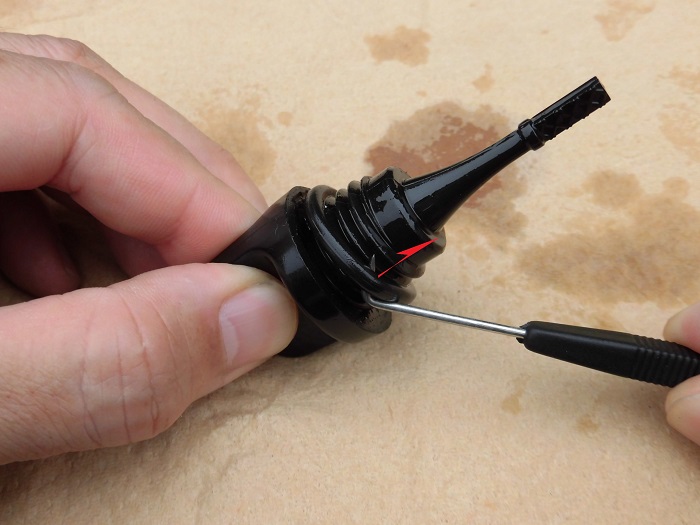
<Remove O-ring>
Remove the O-ring with an O-ring pick tool.
Condition of oil filler cap
<Condition of oil filler cap>
There was black debris on the part where the oil filler cap and O-ring touch.
Has the plastic of the oil filler cap peeled off?
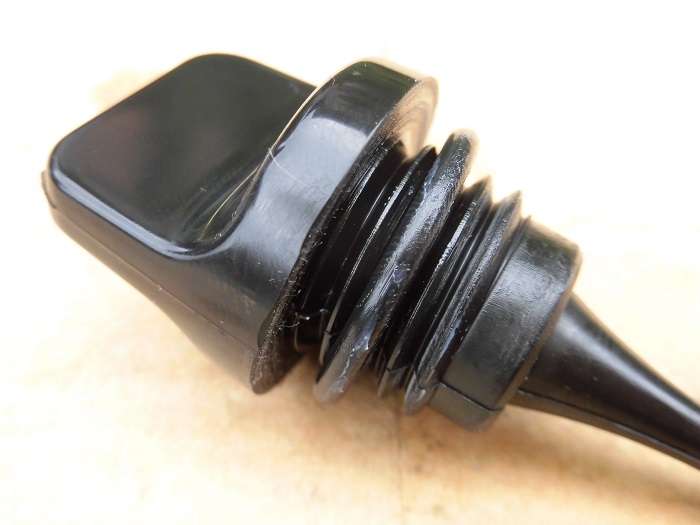
Condition of drain bolt

<Condition of drain bolt>
I was surprised when I removed the O-ring from the drain bolt.
The sealing surface is quite rough.
Circumferential irregularities like those on a record disc are still there, but the radial scratches are not acceptable.
What is the condition of your drain bolt?
Parts cleaning
<Parts cleaning>
Clean the removed parts with parts cleaner.
Clean off any spilled engine oil on the drain bolts and oil filter cover.
O-rings comparison
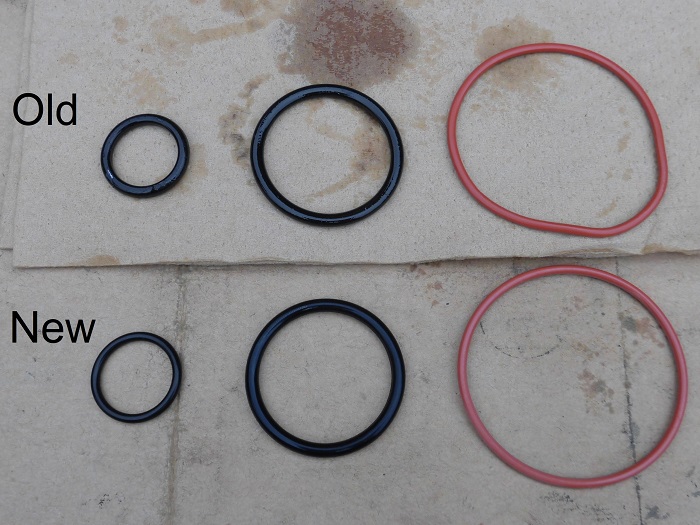
<O-rings comparison>
Upper: Removed O-ring
Bottom: New O-ring, Genuine part
From left,
- O-ring for oil filler cap / 93210-19X00
- O-ring on drain bolt / 93210-34802
- O-ring for oil filter cover / 93210-53801
The size of the O-ring for the oil filler cap is clearly different.
Did the specification change during the process or did the previous owner put a different O-ring?
The O-ring for drain holt at the middle had a square cross-section.
Perhaps never replaced?
Apply silicon grease
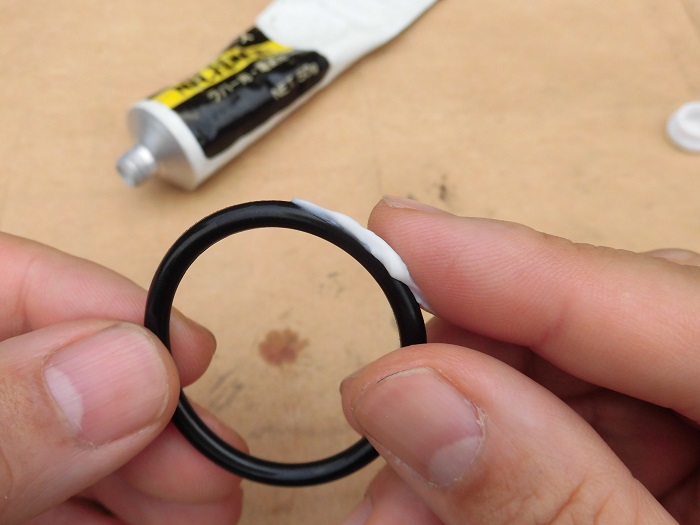
<Apply silicon grease>
The sealing surface of the drain bolt was rough, so more silicon grease was applied to the O-ring.
The strategy is to fill the rough areas with silicon grease.
Condition of O-ring installed
Now, fit the O-ring.
<Condition of O-ring installed>
It fitted like this.
As it doesn’t have too many scratches on other parts, it looks and feel new.
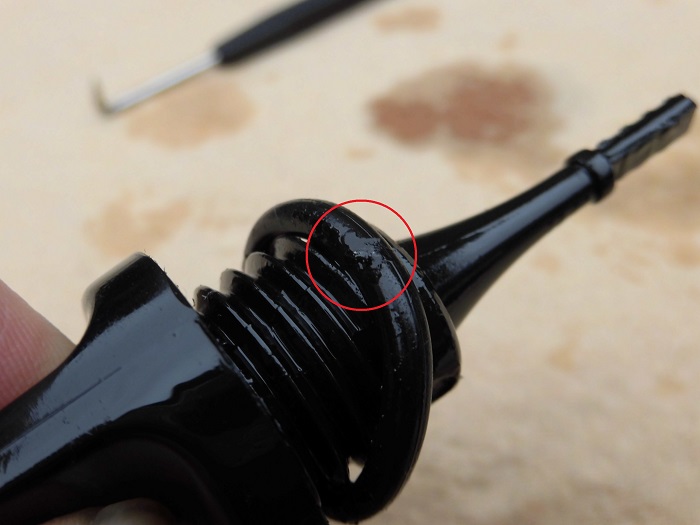
O-ring on oil filler cap
<O-ring on oil filler cap>
As the O-ring on oil filler cap has a large inner diameter, it moves.
It does not come off, but it does not fit well and if I am not careful, I may crush it at an angle when tightening.
Oil filters Comparison
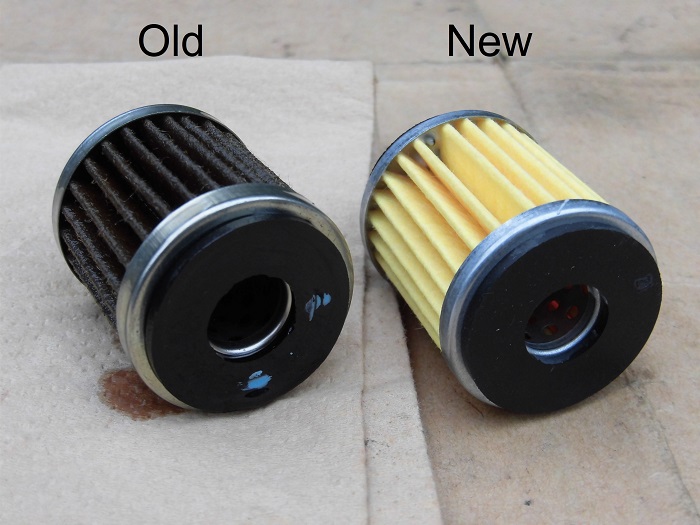
<Oil filters Comparison>
Left: Removed oil filter
Right: New oil filter, genuine part – 30g
The one I removed is probably an external part as the shape of the disc holding the filter is different.
I intend to try different manufacturers in the future.
I don’t think I’ll be able to tell the difference.
Mounting surface cleaning
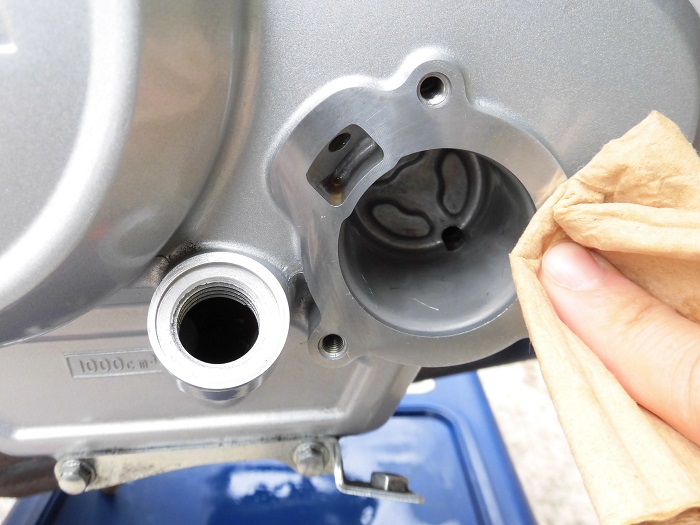
<Mounting surface cleaning>
Clean the oil filter cover and the oil inlet fitting with a paper towel so that the O-ring does not get caught in dirt.
The condition of the sealing surface is very different from the drain bolt.
The sealing surface has to be like this, otherwise I’m worried that it will leak someday.
Install oil filter
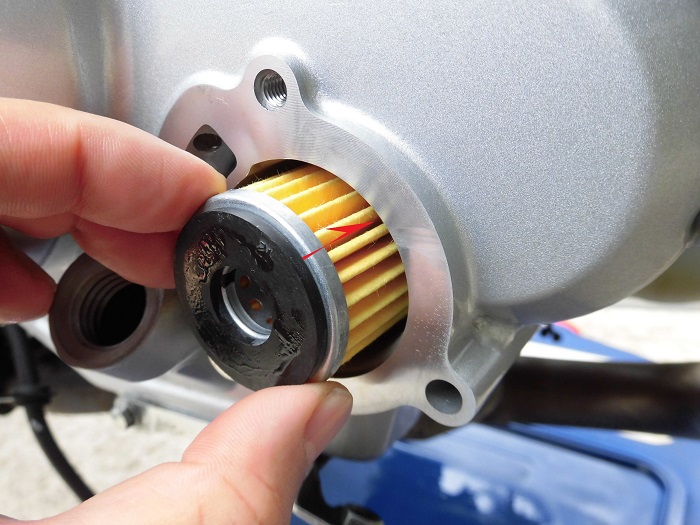
<Install oil filter>
Install the oil filter.
The one with the hole in the middle should be facing you.
If you put it on backwards, the filter cover cannot be tightened, so you can’t go wrong.
(I tried it, so there is oil on the rubber part in the front.)
Install oil filter cover 1
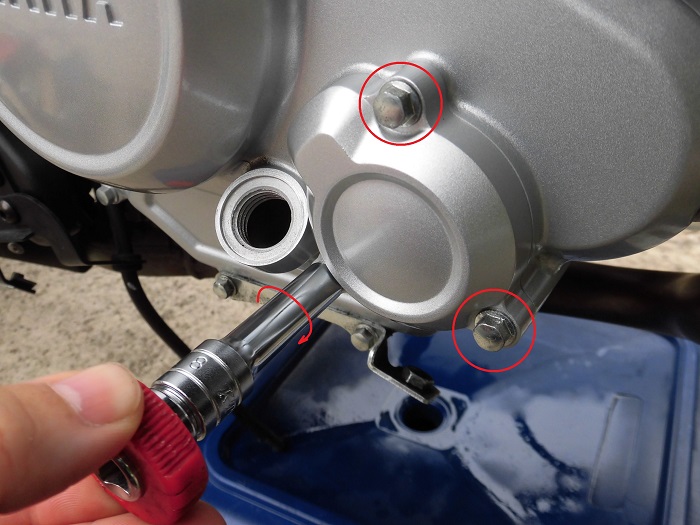
<Install oil filter cover 1>
Put the socket (8 mm) on the quick spinner and tighten the three bolts evenly by hand.
Install oil filter cover 2
<Install oil filter cover 2>
Then, using a torque wrench, tighten to 10 Nm.
Install drain bolt 1
<Install drain bolt 1>
Tighten the drain bolt while pressing down on the spring by hand.
Be careful not to hang the threads at an angle.
Install drain bolt 2
<Install drain bolt 2>
Attach the socket (19 mm) to the quick spinner and tighten the drain bolt by hand.
Install drain bolt 3
<Install drain bolt 3>
Use a torque wrench and tighten to 32 Nm.
Engine oil comparison

<Engine oil comparison>
Left: Drained engine oil
Right: New engine oil, Yamaha Standard Plus
The oil drained is almost new oil.
It has only been run for a few dozen kilometers since delivery, so it is hardly dirty.
It is a waste, but it will be treated as waste oil.
Engine oil filling
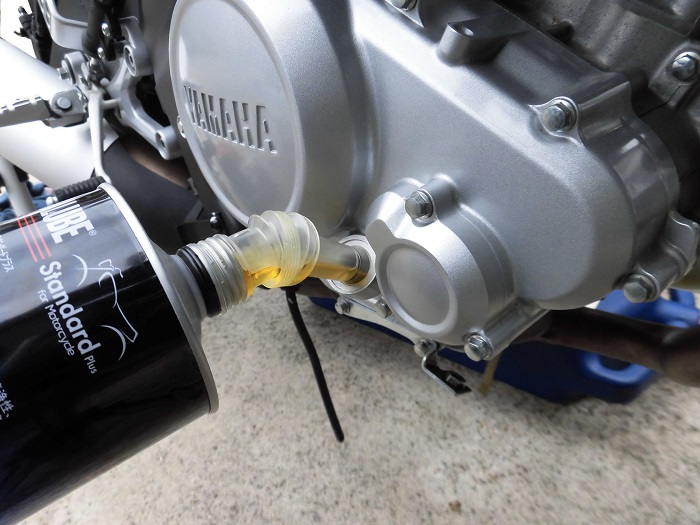
<Engine oil filling>
Pour new oil into the filling port.
Quantity of oil required,
- When replacing oil only: 0.95ℓ
- When replacing the oil filter: 1.00ℓ
After pouring in about 0.90ℓ, the engine was started and stopped, and the oil was added little by little.
A 1 litter can is enough, so it’s easy on the wallet.
You can pour it in with the nozzle provided, so it’s easy to work with.
Oil level

<Oil level>
I was too lazy to take photos and lost track of the levels.
I got in about where the line was.
Around the oil filter cover
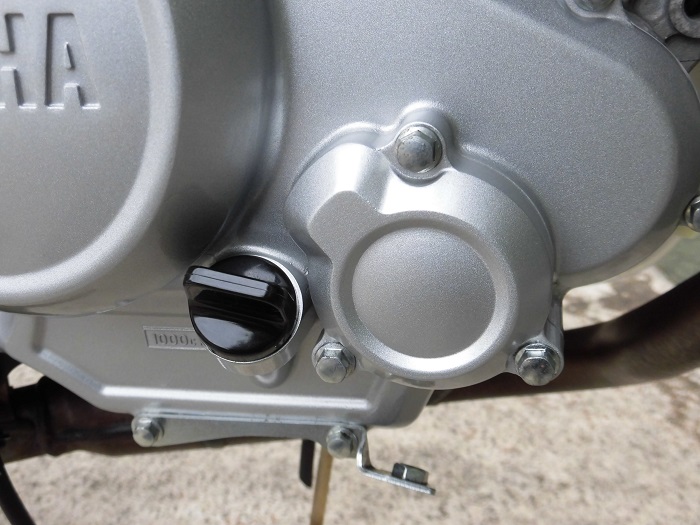
<Around the oil filter cover>
Clean the spilled engine oil with parts cleaner and finish.
Engine underbody
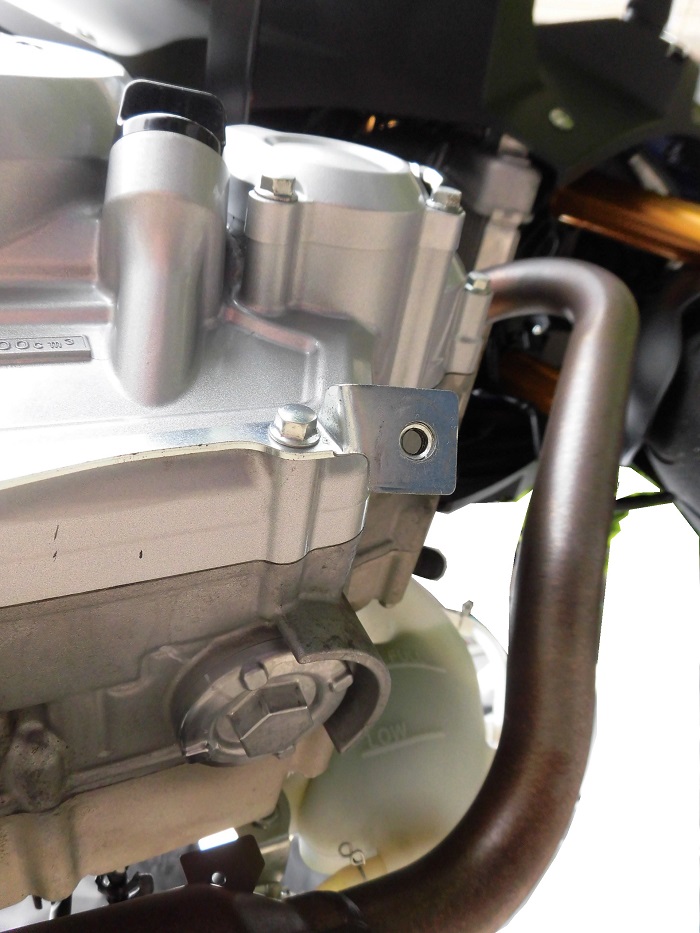
<Engine underbody>
The engine oil leak has now been successfully eliminated.
Possible causes of leakage are below.
- Deterioration of the drain bolt O-ring
- Roughness of the sealing surface of the drain bolt
Install side cowls and panels etc.
Finally, put the removed side cowl panels etc. back on.
(See below for information on how to put the side cowl panels etc. back on).

3. Summary
Replacing the O-ring stopped the engine oil leaking from the drain bolt.
However, the sealing surface was rough, so if it starts leaking after a while, I will replace the drain bolt.
In any case, I’m glad it wasn’t a crack in the crankcase or a broken thread on the drain bolt.
- Use a socket wrench to prevent licking the drain bolt
- Use a flexible funnel to prevent burns and oil getting on the muffler
- O-rings on drain bolt can deteriorate, leading to oil leaks


