After some work, I repeated the removal and installation of the fuel tank, and I will summarize how I did it and what I noticed.
Removing the fuel tank,
- Cleaning and replacing the air cleaner filter
- Cleaning the throttle body
- Replacing the ignition coil
etc. can be done.
Note that fire is strictly prohibited since the fuel hose is to be disconnected.
Also, if you remove the hose immediately after activating the fuel pump, fuel may splatter-wearing protective goggles is strongly recommended.
From this article, you can learn the following.
- How to remove and install the fuel tank
- Shape of the fuel tank and how it is removed
| Date | 15th December 2023 |
| Subjects | Maintenance, Failure, Repair |
| Shop or DIY | DIY |
| Difficulty | |
| Working hours | 0.5 |
| Costs [Yen] | 0 (Use what I have) |
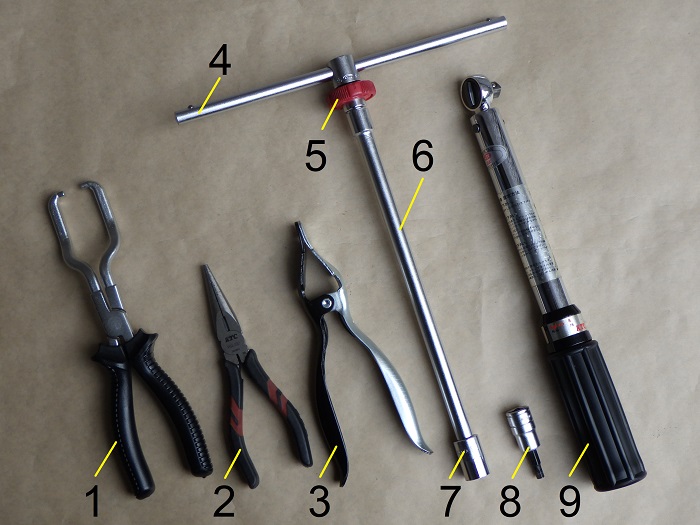
1. Goods to use
| No. | Product name | Manufacturer | Product nuber | Quantity | Amounts[Yen] |
| 1 | Fuel hose connector pliers | STRAIGHT | 19-118 | 1 | 3,440 |
| 2 | Pliers | KTC | PSL-150 | 1 | 4,455 |
| 3 | Hose puller pliers | STRAIGHT | 12-0003 | 1 | 1,750 |
| 4 | Slide head handle | KTC | BHM3 | 1 | 2,970 |
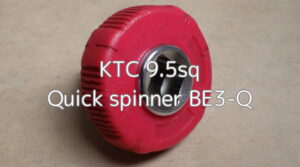
| 5 | Quick spinner | KTC | BE3-Q | 1 | 2,046 |
| 6 | Extension bar (250mm) | KTC | BE20-250 | 1 | (2,783) |
| 7 | Bit socket (10mm) | KTC | B3M-10 | 1 | 1,419 |
| 8 | Hexagon bit socket (5mm) | KTC | BT3-05S | 1 | 1,045 |
| 9 | Torque wrench (Small) | KTC | CMP0252 | 1 | (44,990) |
| 64,898 |
2. How to remove and install fuel tank (STEP 1-24)
Remove fuel tank cover
First, remove the fuel tank cover.
For details, see the maintenance record “How to remove fuel tank cover”.

Condition of fuel tank cover removed
<Condition of fuel tank cover removed>
From this state, the work begins.
Remove fuel hose connector cover
First, remove the fuel hose.
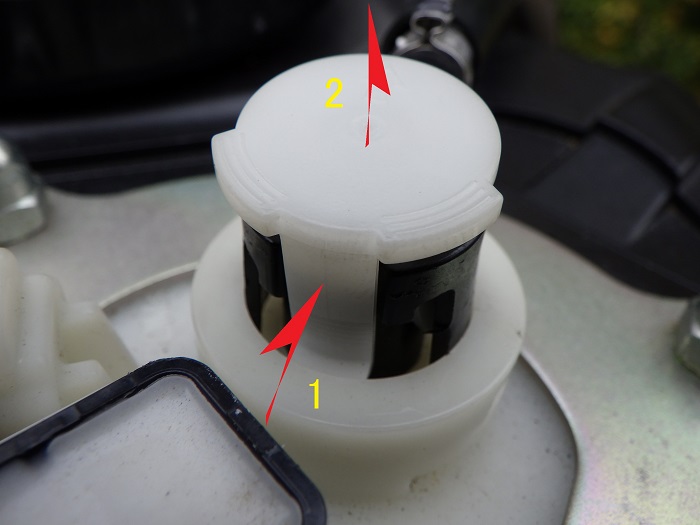
<Remove fuel hose connector cover>
Remove the fuel hose connector cover that holds the fuel hose connector.
- Press down on the claw parts and
- Lift it up
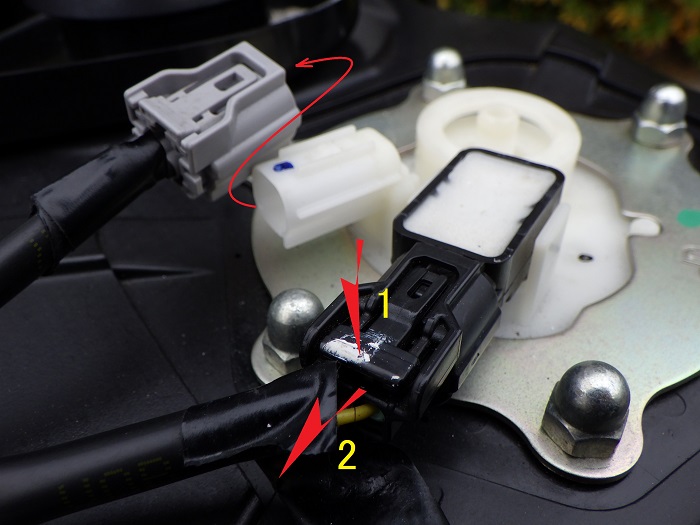
Remove fuel hose connector 1
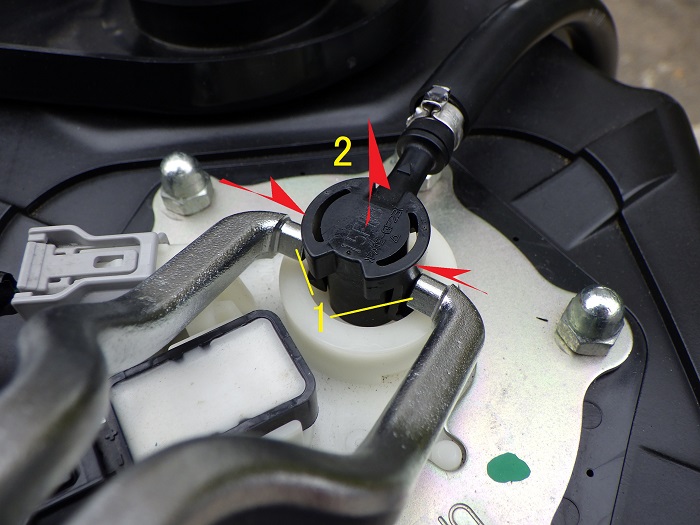
<Remove fuel hose connector 1>
With fuel hose connector pliers,
- Press down on the two claws of the fuel hose connector.
- Lift it up slightly.
These pliers are used to remove the connector with the button, and I happened to be able to use them this time.
If you can use your fingers to remove the connector, that is the best way.
Remove fuel hose connector 2
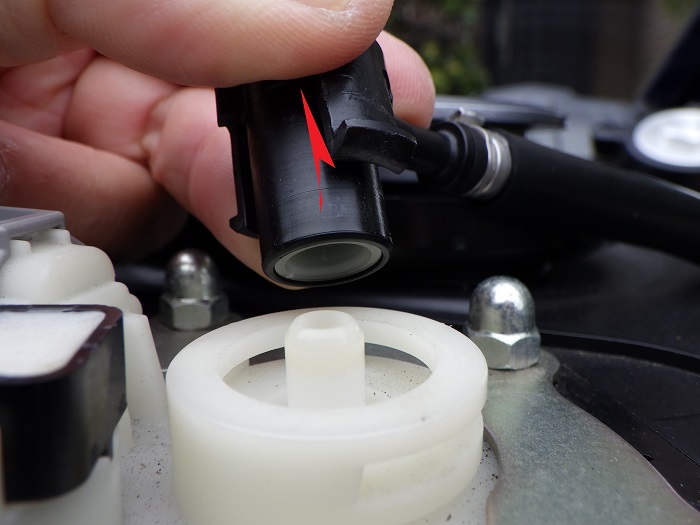
<Remove fuel hose connector 2>
Now, lift up the connector.
It is a little stiff because of the tightness of the O-ring.
When I removed the connector, there was no splashing of fuel.
The ignition switch had not been turned on the previous day (the fuel pump was not energized), so the fuel pressure may have been low.
Note that if you can prepare a platform on the right side of the vehicle body that is about the same height as the fuel tank, there is no need to disconnect the fuel hose.
Remove fuel hose
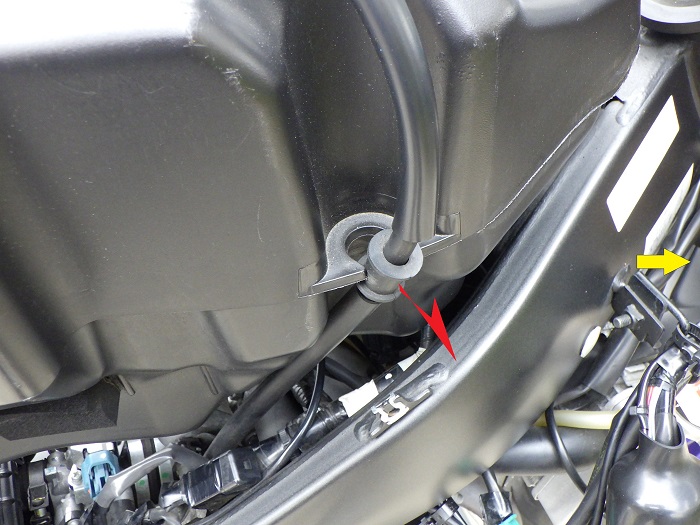
<Remove fuel hose>
From the right side of the fuel tank, remove the fuel hose grommet.
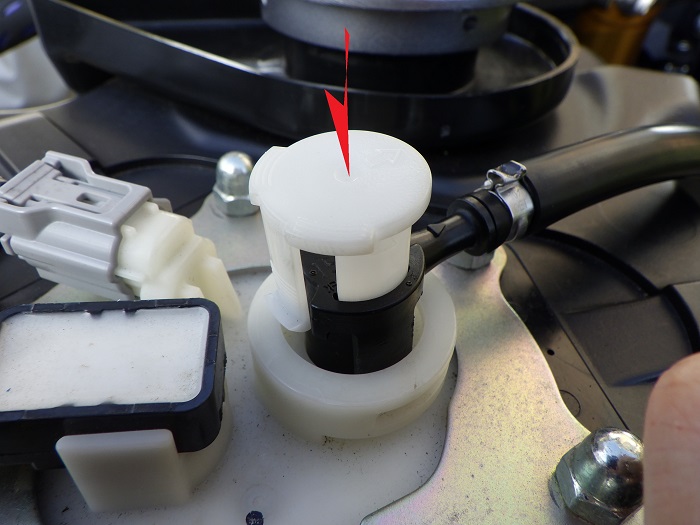
Remove fuel pump connector
<Remove fuel pump connector>
Left: Disconnect fuel gauge connector
Right: Disconnect fuel pump connector
- Push the lever to unlock and pull the connector to disconnect.
- Pull the connector to remove it.
Remove fuel overflow hose

<Remove fuel overflow hose>
Disconnect the fuel overflow hose from the left side of the fuel tank.
- Using pliers or the like, push down the clip.
- Using a hose puller pliers, remove the hose from the fuel tank.
Remove overflow hose and wiring
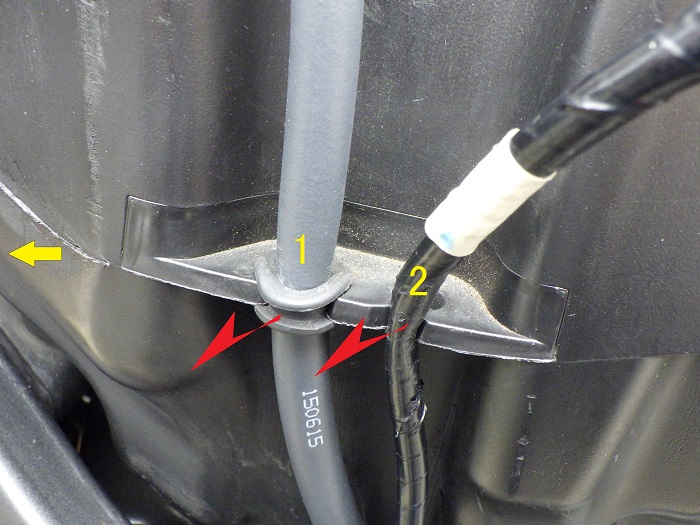
<Remove overflow hose and wiring>
From fuel tank,
- Remove fuel overflow hose grommet
- Remove the fuel gauge and fuel pump wiring
The grommet of the genuine part did not fit into the groove of the fuel tank. So, it was replaced with a commercially available grommet.
For details, please refer to the maintenance record “Replace grommet and cap around fuel tank”.

Disconnect buzzer wiring for burglar alarm
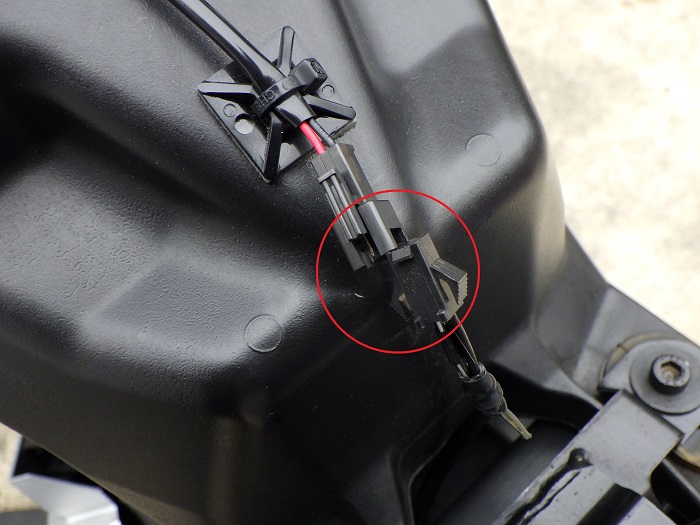
<Disconnect buzzer wiring for burglar alarm>
I have a theft alarm buzzer on top of the fuel tank. So, I will also disconnect that wire.
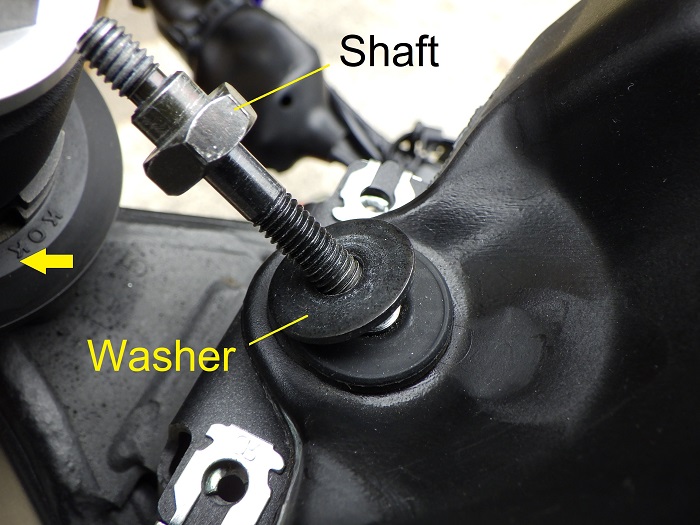
Remove washer
Next, begin removing the fuel tank itself.
The fuel tank is held in place by a shaft at the front and two bolts at the rear.
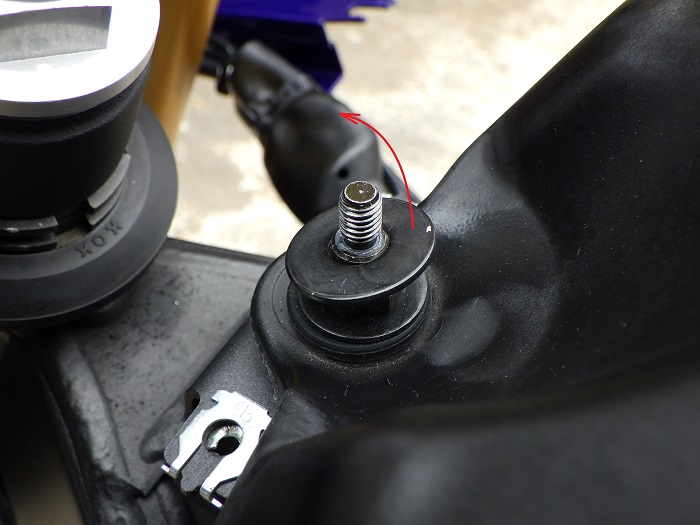
<Remove washer>
Remove the washer on the forward shaft.
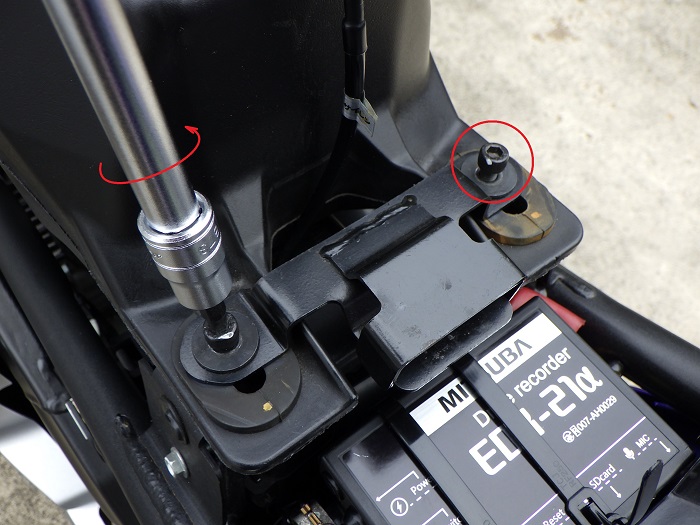
Remove shaft 1

<Remove shaft 1>
Remove the shaft with a T-handle with a socket (13 mm) attached.
Since the tip of the shaft hits the inside of the socket, a slightly deeper socket is better.
Remove shaft 2
<Remove shaft 2>
When lifting the shaft, do not forget to remove the washer attached under it.
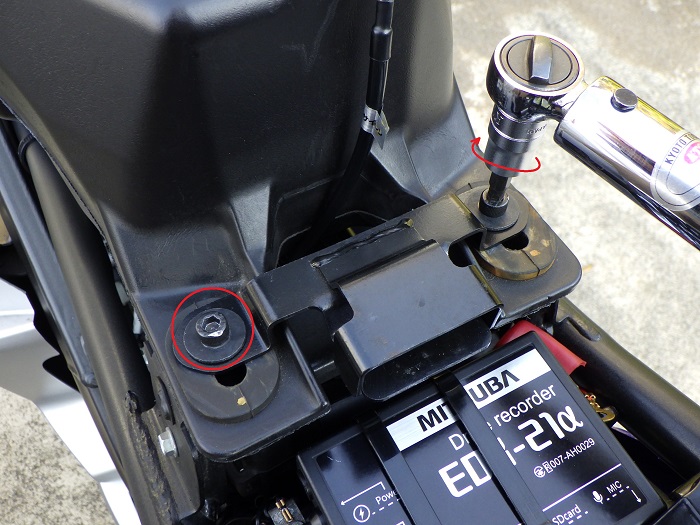
Remove bolts
<Remove bolts>
Using a T-handle with a hexagon socket (5 mm), remove the rear two bolts.
Remove bracket
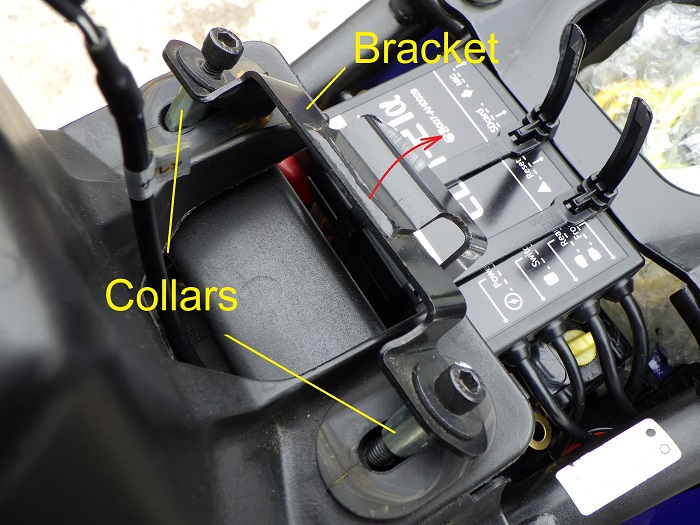
<Remove bracket>
Lift up the bracket so as not to drop the bolt, washer, and collar.
The collar may remain in the grommet. So, be careful not to lose it.
Remove fuel tank
<Remove fuel tank>
Now, lift up the fuel tank and remove it.
It is lighter to work with less fuel.
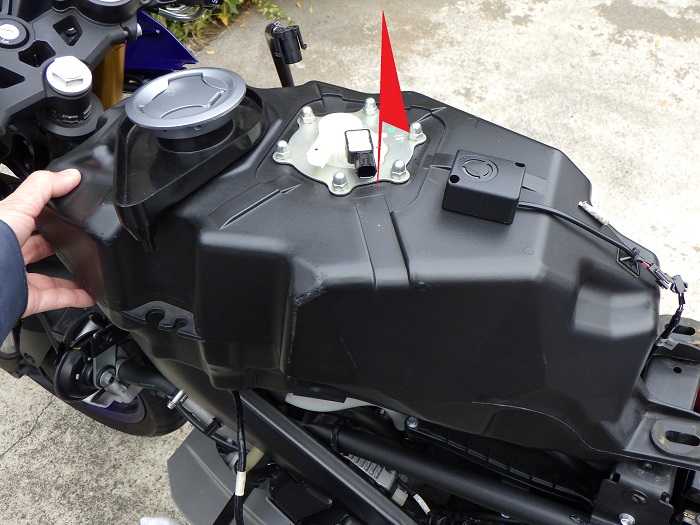
Removed fuel tank
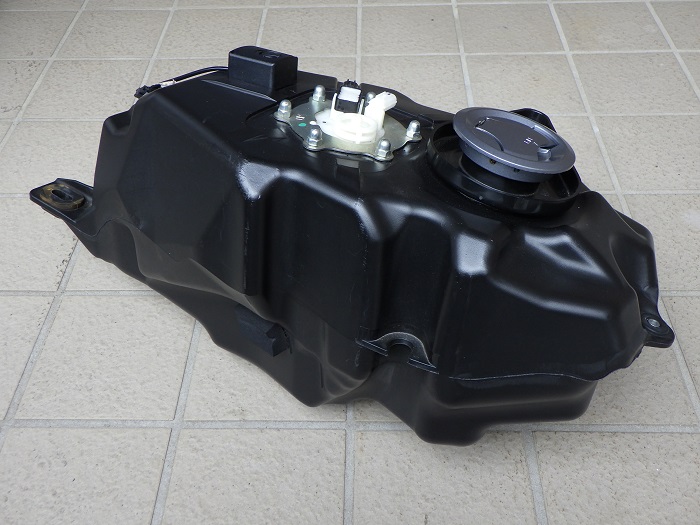
<From the front>
With a plastic tank, rust does not occur and it is less careless to handle than a steel tank.
When I read “no rust in the tank” in the description of an R125 being sold at an auction, I sometimes think that there is indeed no rust.
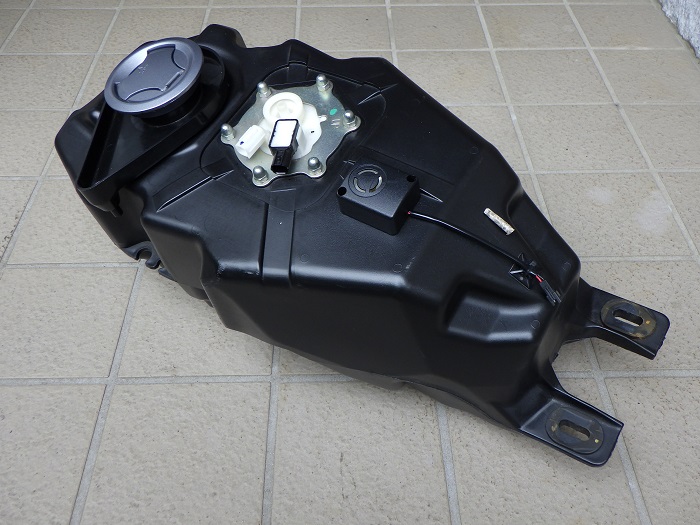
<From the back>
I did not check whether it is because of the shape or the center of gravity, but it leans to the left side.
Is it possible that the center of gravity is intentionally placed on the left side where the sidestand is located?
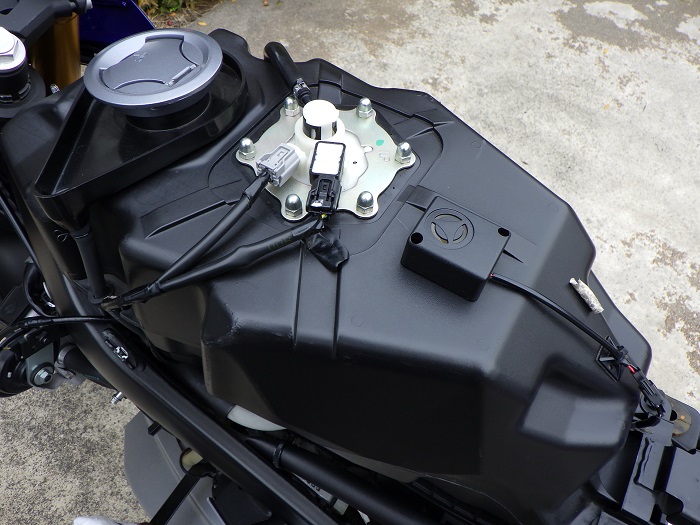
Condition of fuel tank removed
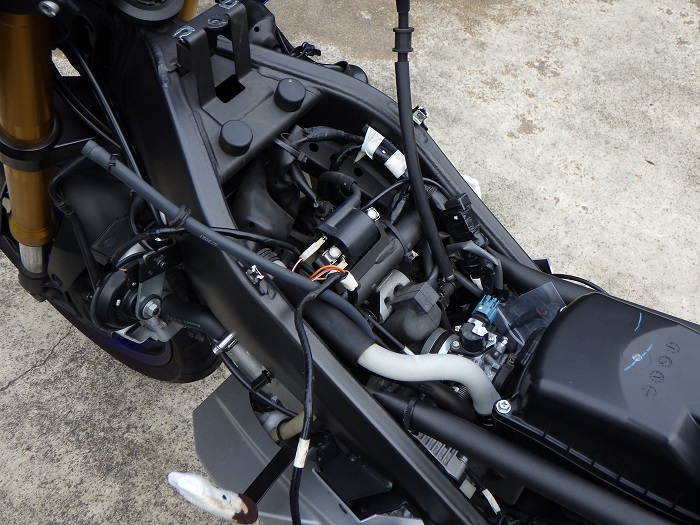
<Condition of fuel tank removed>
In this condition, the air cleaner box and throttle body can be easily serviced.
Install collars
Now, let’s start the installation.
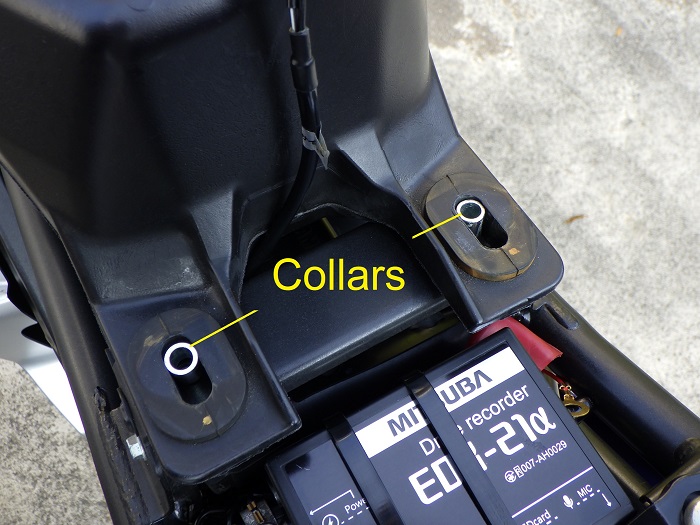
<Install collars>
Place the fuel tank on the frame and place the collars beforehand in the grommet at the rear.
On my moto, the collars were attached closer to the front.
Then, temporarily tighten the forward washer and shaft.
(See STEP 13 for details.)
Tighten bracket
<Tighten bracket>
After temporarily tightening the rear bracket, tighten two bolts using a torque wrench with a hexagon socket (5 mm). (10 Nm)
Tighten shaft
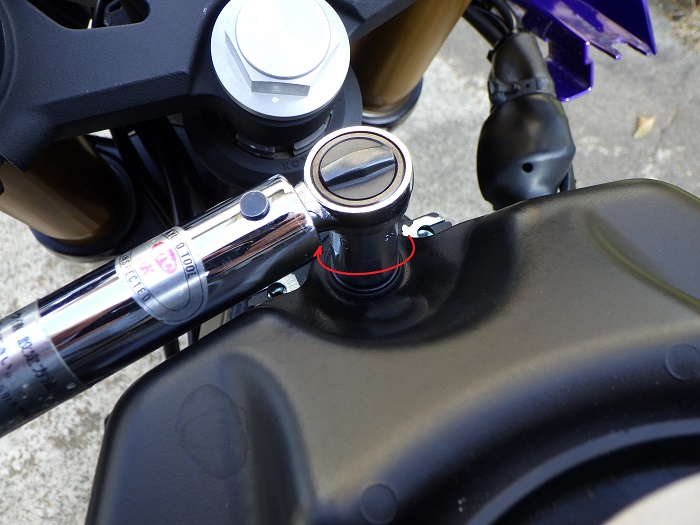
<Tighten shaft>
Tighten the forward shaft with a torque wrench attached to the socket (13 mm). (10 Nm)
Install hose and other
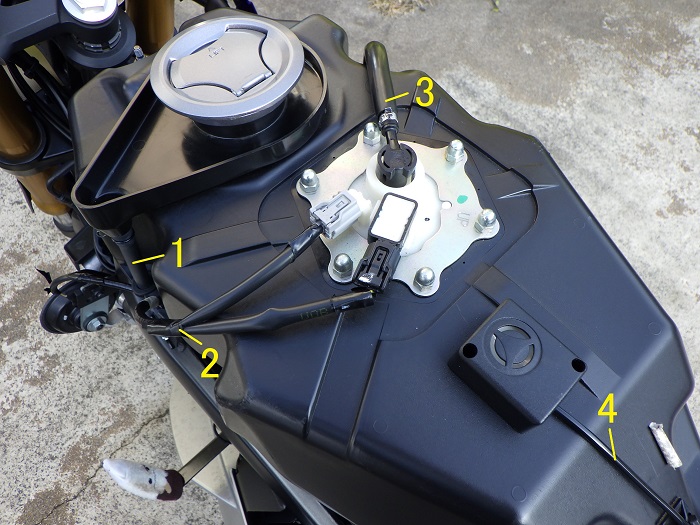
<Install hose and other>
Left side:
- Install the fuel overflow hose to the tank.
- Install the fuel gauge and fuel pump wiring to the tank.
Right side:
- Install the fuel hose to the tank and insert the fuel hose connector.
Middle:
- Connect the burglar alarm buzzer wiring to the tank.
Install fuel hose connector cover
<Install fuel hose connector cover>
Finally, insert the fuel hose connector cover into the fuel hose connector.
Oh, my finger is in the picture.
Install fuel tank cover
Then, just install the fuel tank cover and you are done.
For details, please refer to the maintenance record “How to install fuel tank cover”.

3. Summary
I showed you how to remove and install the fuel tank.
I was able to work on it peacefully because the fuel did not spill as much as I expected.
However, I am a little worried that the claws of the fuel hose connector might break if I work on it too many times.
- If you remove the hose immediately after activating the fuel pump, fuel may splatter-wearing protective goggles is strongly recommended
- Use fuel hose connector pliers to easily remove the fuel hose connector by pushing on the claws of the fuel hose connector
- Be careful not to lose the collars that secure the rear of the tank


