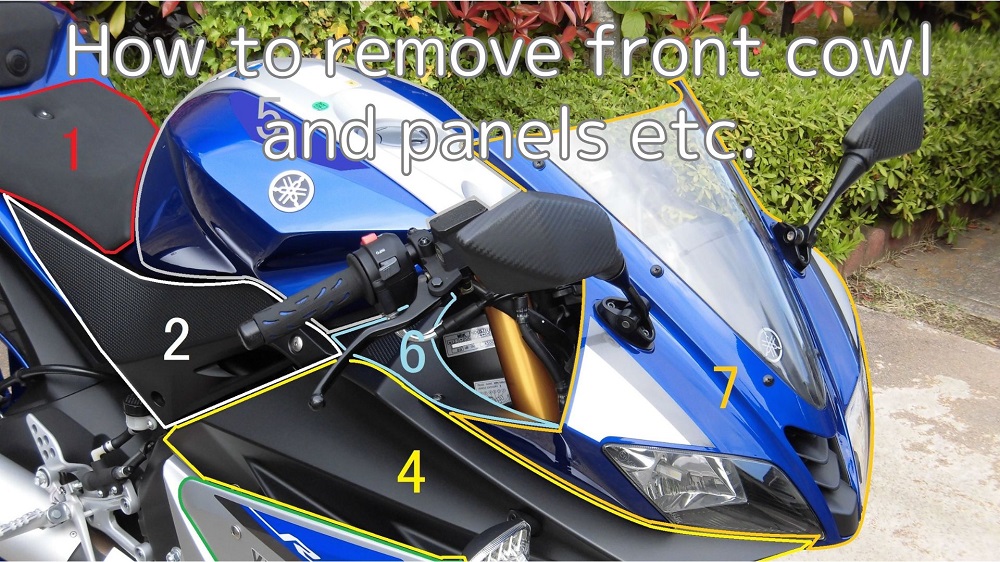
Following the side and rear, this section summaries the maintenance record ‘How to remove and install front cowl and panels etc.’.
If the front cowl panel can be removed, the range of customization and maintenance can be expanded.
For example,
- Conversion of the headlight to LED
- Installation of drive recorders, shift position indicators, theft alarms and other units
- Replacement of screens
- Repair or replacement of damaged cowl and panels
Working with the front cowl and panels removed also allows the wiring to be routed freely.
So, you can expect a finish that looks like a genuine part.
From this article you will know as follows.
- How to remove front cowl, panels etc.
- How to route and secure various wiring
- How to avoid losing removed bolts etc.
| Date | 23rd January 2022 |
| Subjects | Maintenance, Failure, Repair |
| Shop or DIY | DIY |
| Difficulty | |
| Working hours | 0.5 |
| Costs [Yen] | 0 (Use what I have) |
1. Goods to use
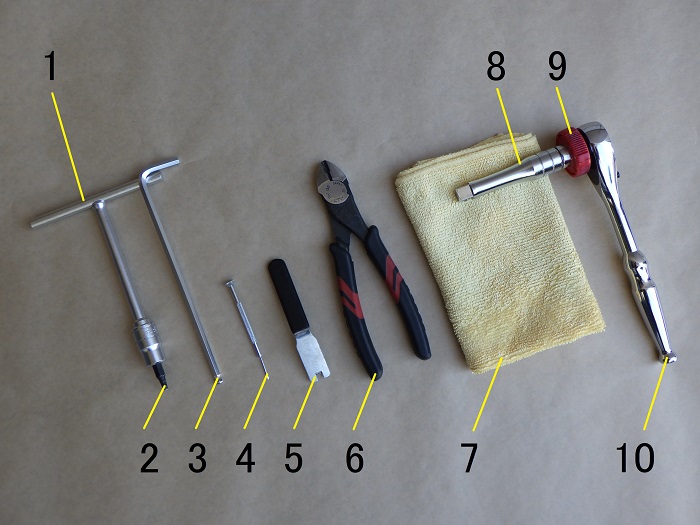
| No. | Products Name | Manufacturing | Products number | Quantity | Amounts[Yen] |
| 1 | Handle | KTC | AB-53 | 1 | 1,430 |
| 2 | Hexagon bit socket (4mm) | KTC | BT3-04S | 1 | 1,012 |
| 3 | Long hex key (5mm) | KTC | HLD250-5 | 1 | 1,375 |
| 4 | Precision screwdriver (Flathead) | DAISO | – | 1 | 110 |
| 5 | Disconnecting wiring coupler tool | STRAIGHT | 19-1102 | 1 | 1,080 |
| 6 | Nippers | KTC | PN1-150 | 1 | 4,499 |
| 7 | Microfiber cloth | – | – | 1 | (197) |
| 8 | Extension bar (75mm) | KTC | BE3-075 | 1 | 1,529 |
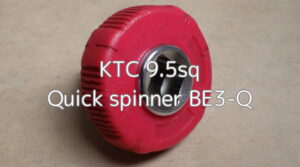
| 9 | Quick spinner | KTC | BE3-Q | 1 | 2,046 |
| 10 | Rachet wrench | KTC | BR3E | 1 | (6,545) |
| 19,823 |
2. How to remove front cowl and panels etc. (STEP 1-29)
Removal and installation sequence
Before starting work, the sequence of removal and installation is described.
I always remove and install in the following sequence, roughly in reverse sequence.
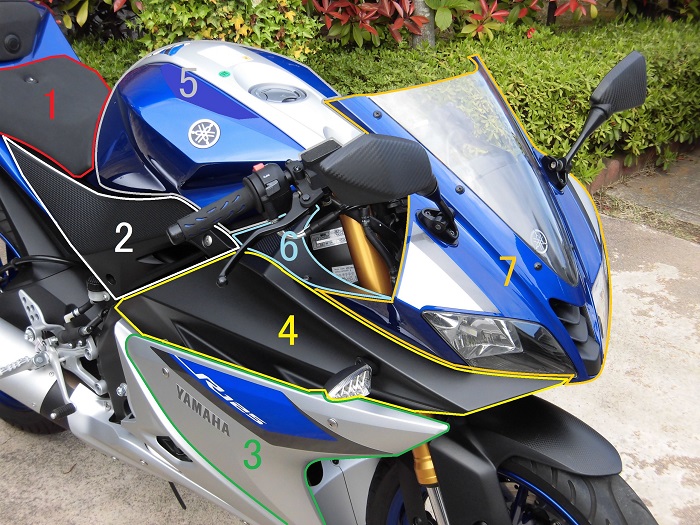
<Around front cowl>
- Seat
- Side panel
- Side cover
- Upper side cowl
- Fuel tank cover※1
- Front panel
- Front cowl
※1 You can work without removing the cover by lifting the front of the cover slightly.
Remove each part
First remove parts 1 to 5 in STEP 1.
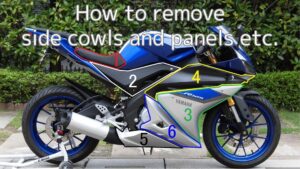
For information on how to remove the seat, side panels, side covers and upper side cowls, see maintenance record ‘How to remove side cowls and panels etc.’.
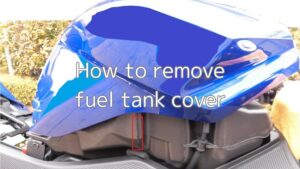
For information on how to remove the fuel tank cover, see maintenance record ‘How to remover fuel tank cover’.
Remove front panel 1
First, remove the right-hand front panel.
The front panel is held in place by two tapping screws and one bolt.
Of these, the screw (1 place) has already been removed when removing the upper side cowl.
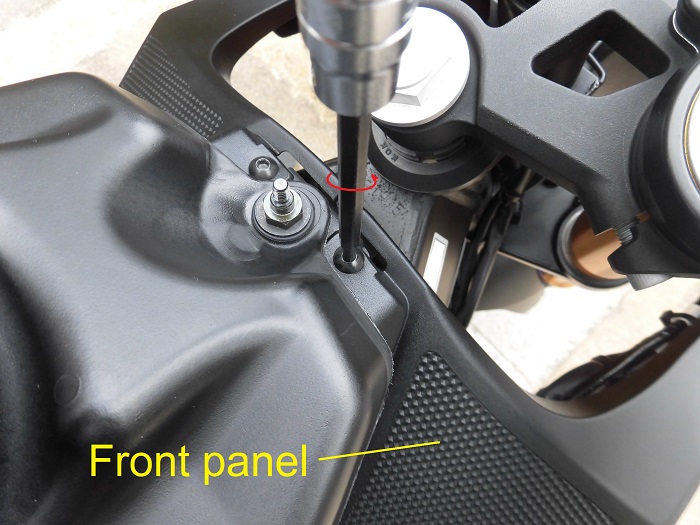
<Remove front panel 1>
Using a handle fitted with a hexagon socket (4 mm), remove the screw by the fuel tank.
Remove front panel 2
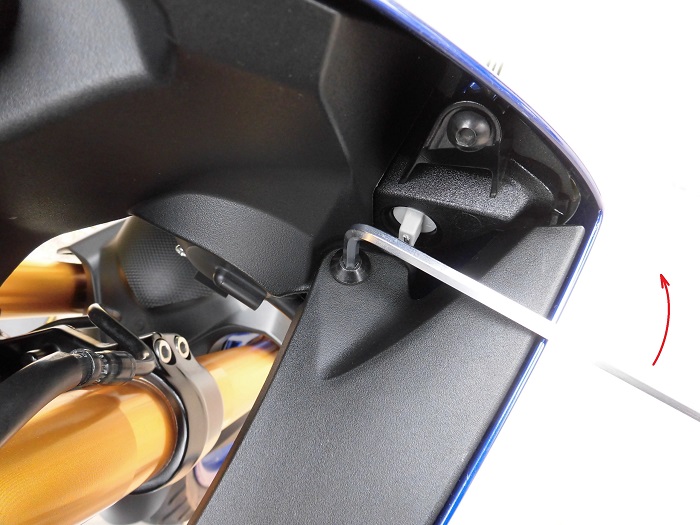
<Remove front panel 2>
Remove the forward bolt with a hexagonal spanner (5mm).
At first, I tried to use a hexagon socket, but it seemed to hit the front stay and scratch it.
So, I decided not to use it.
Note that most of the bolts securing the cowl are made with a 4 mm hexagonal spanner, but here they are 5 mm.
Remove front panel 3
Then remove the prongs and claws that hold the panel in place and remove the panel.
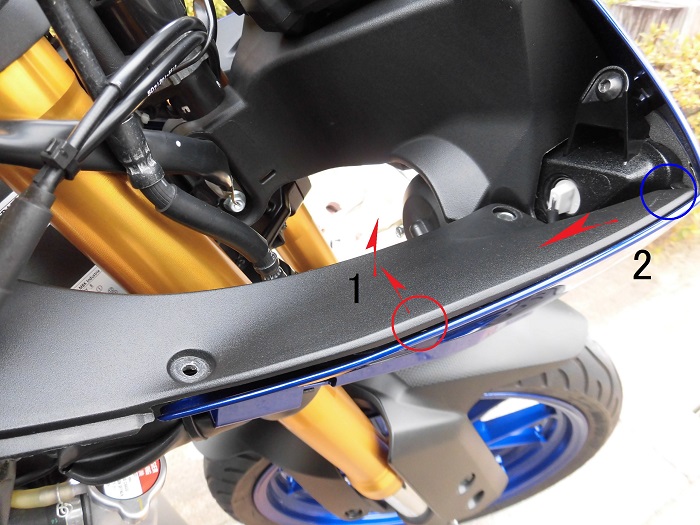
<Remove front panel 3>
- Remove the protrusion by gently pulling the ○ part towards the inside of the vehicle and lifting it upwards.
- Move the front panel backwards and remove the claw at the ○ part.
Remove the left-hand front panel in the same way.
Front cowl fixing part 1
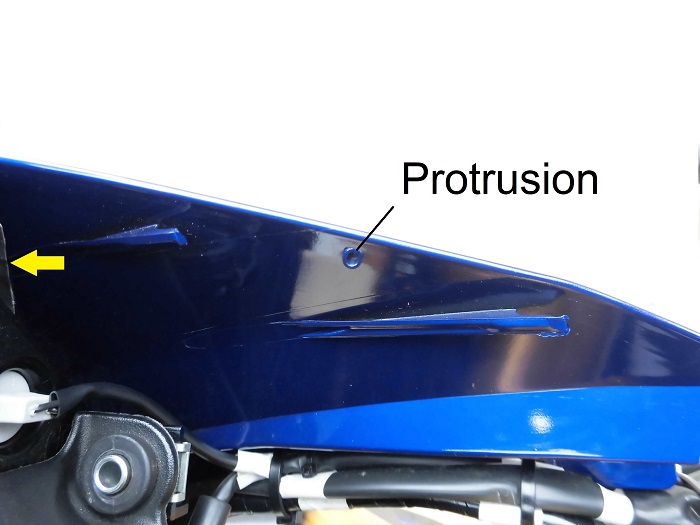
<Front cowl’s prong>
This is a picture of the protrusion in STEP 5, 1.
The protrusion fits into the hole and the front panel is fixed in place.
Front cowl fixing part 2
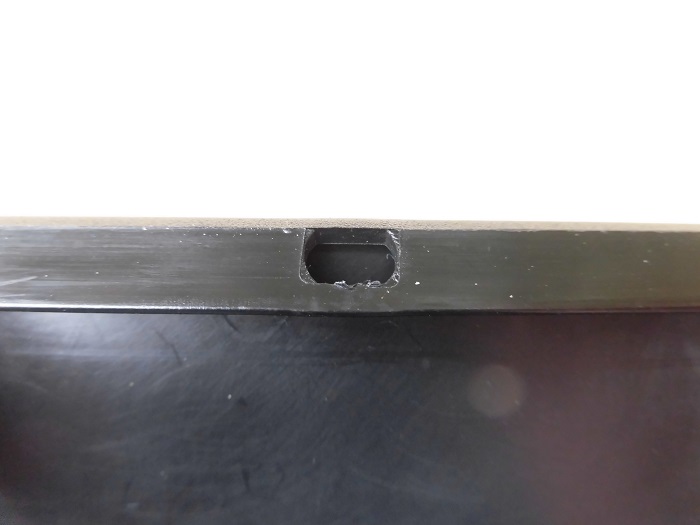
<Front panel’s hole>
This is a picture of the hole in STEP 5, part 1.
Condition of the front panel removed
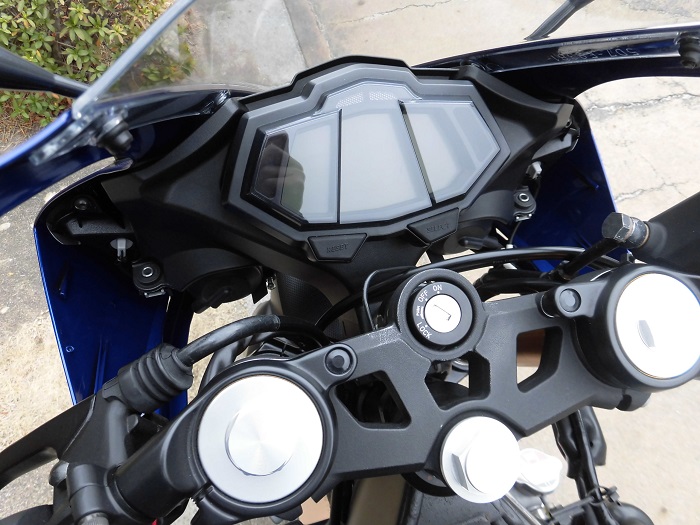
<Condition of the front panel removed>
The front area has been cleaned up.
When the front panel is removed, below are easier to do.
- Replacing the position lamps
- Replacing the headlight bulbs
Wiring condition
Next, disconnect the wiring at the right front of the frame.
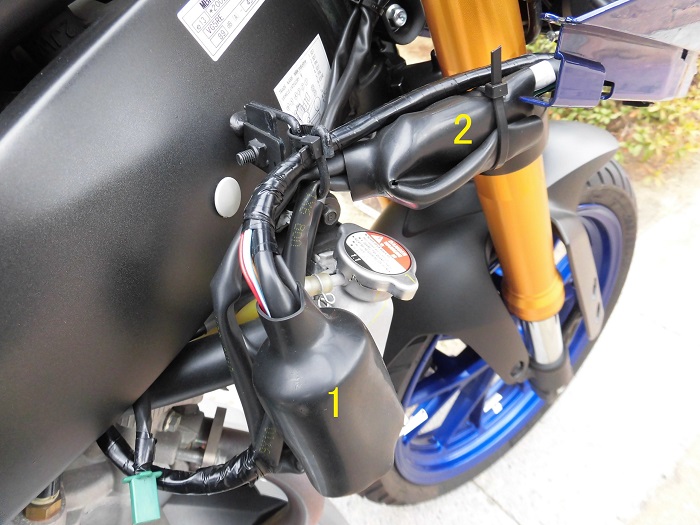
<Wiring condition>
- Meter-related wiring
- Headlight and position lamp wiring
are put together.
Remove wiring 1
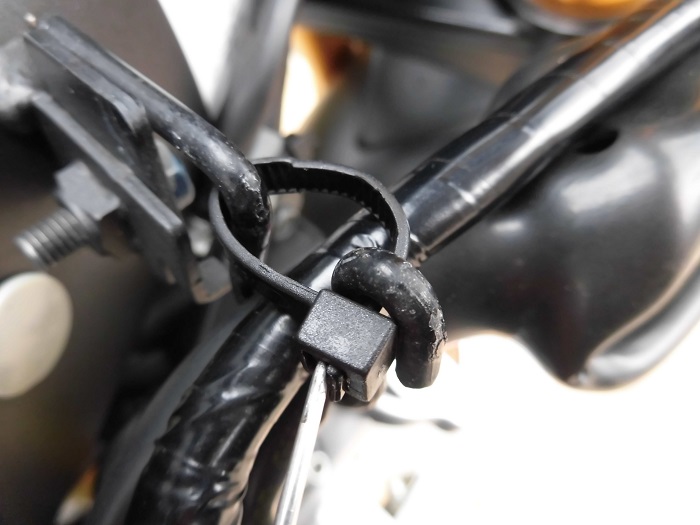
<Remove wiring 1>
With a precision screwdriver, remove the cable tie holding the wires in place.
I could have cut the band, but as I intend to remove them in a separate operation one of these days, I decided to re-use them this time.
Remove wiring 2
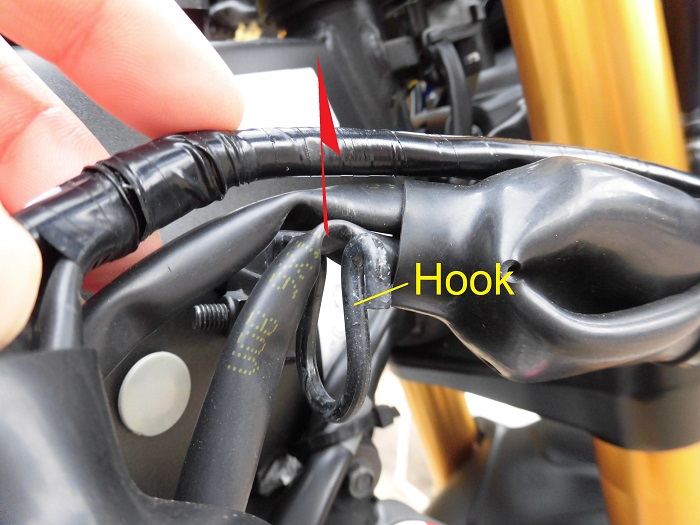
<Remove wiring 2>
Lift the wires off the hook on the body side.
Remove connector cover
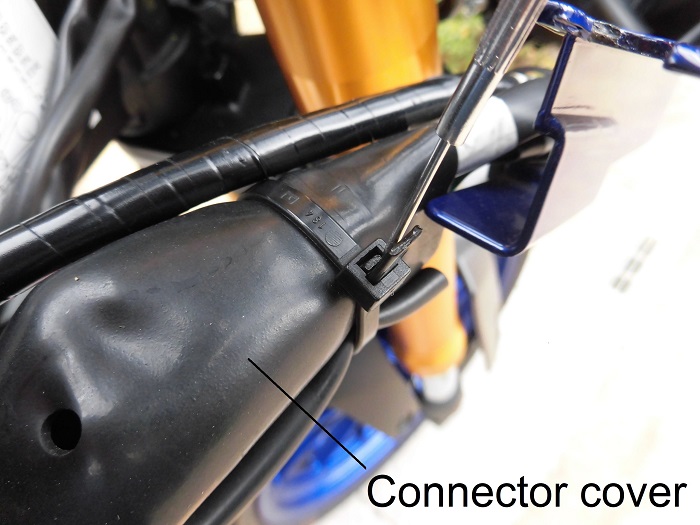
<Remove connector cover>
Using a precision screwdriver, remove the cable tie that hold the connector cover in place.
Re-use the band here in the same way as in STEP 10.
Then move the connector cover to the rear of the moto.
Remove connector
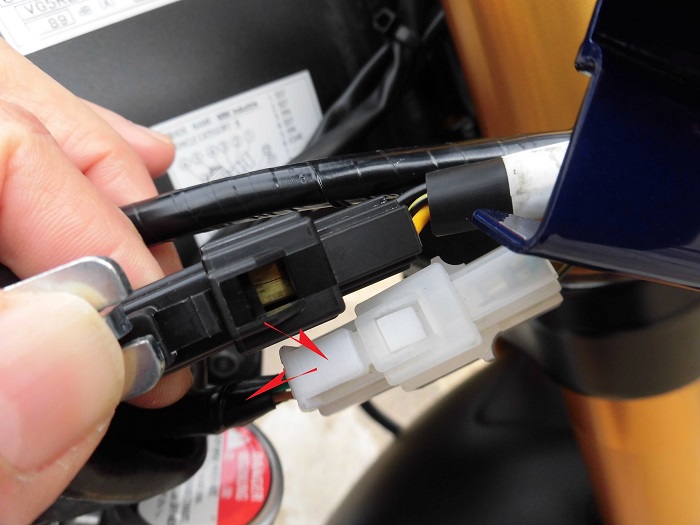
<Remove connector>
With the tool for disconnecting wiring coupler, pull the connector while pressing down on the connector pawl.
White connector: Low side headlight + right side position lamp
Black connector: High side headlight + left side position lamp
In the past, when I pushed with my fingernail, the nail almost came off.
So, I try to use the wiring coupler remover as much as possible.
Remove wiring 3
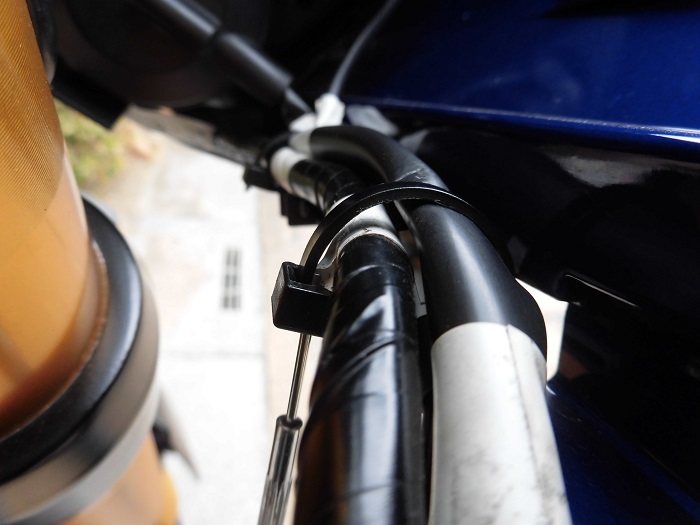
<Remove wiring 3>
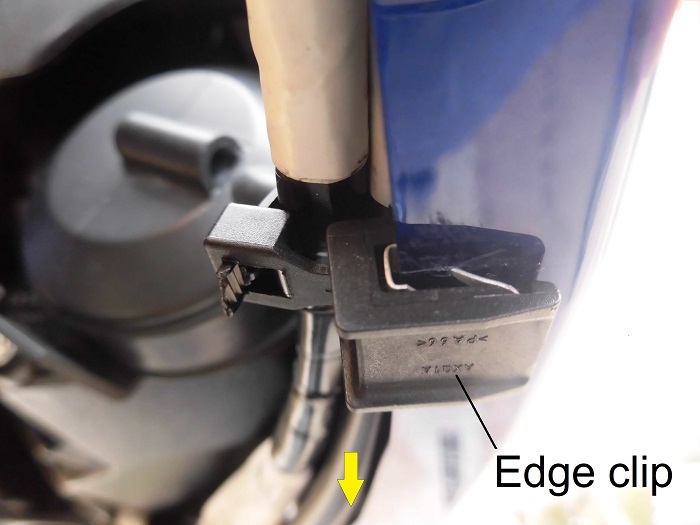
Then, using a precision screwdriver, remove the three ties securing the wiring at the bottom right and front of the front cowl.
I recommend that you do not cut these.
Edge clip
<Edge clip>
This is because the ties are integral to the edge clip.
If the ties are cut, the entire edge clip has to be replaced, or another fixing method has to be devised.
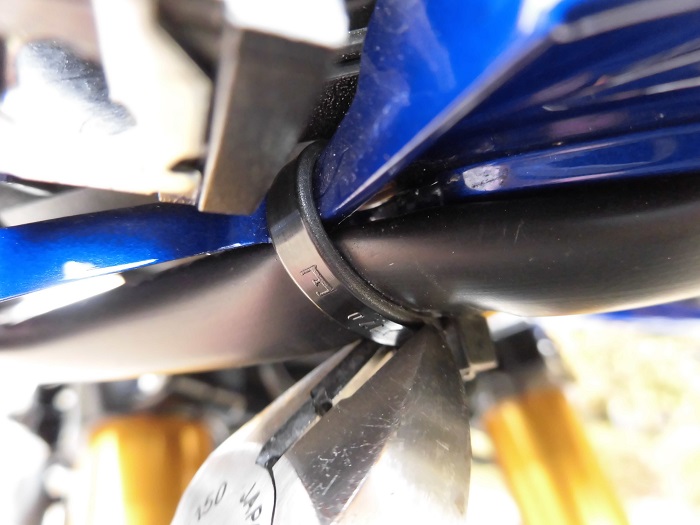
Remove wiring 4
<Remove wiring 4>
Using nippers, cut the cable tie securing the wires under the right-hand headlight.
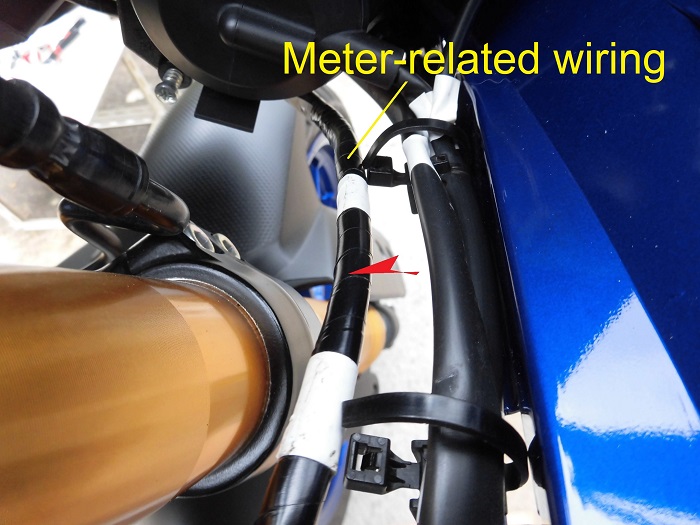
Remove wiring 5
<Remove wiring 5>
Disconnect the meter-related wiring, which has black tape wrapped around it, from the ties with edge clips.
Leave the headlight and position lamp wires that are threaded through the harness tube in place.
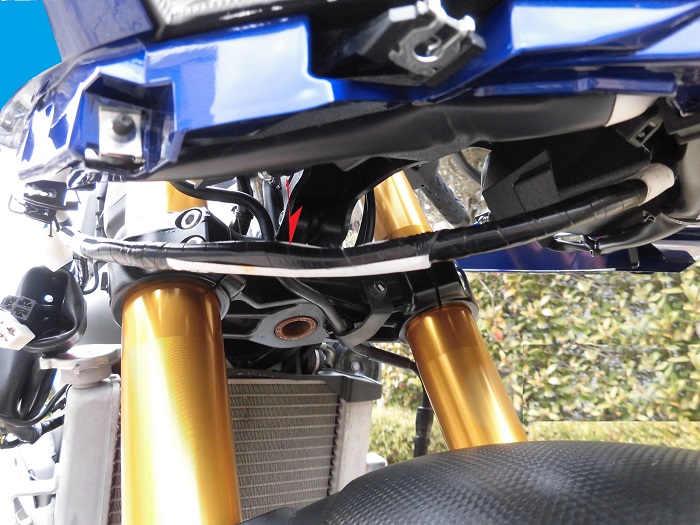
Condition of removed meter-related wiring
<Condition of removed meter-related wiring>
The meter-related wiring will then hang under the front cowl.
Remove mirror 1
Now, it is time to remove the front cowl.
First, remove the mirror.
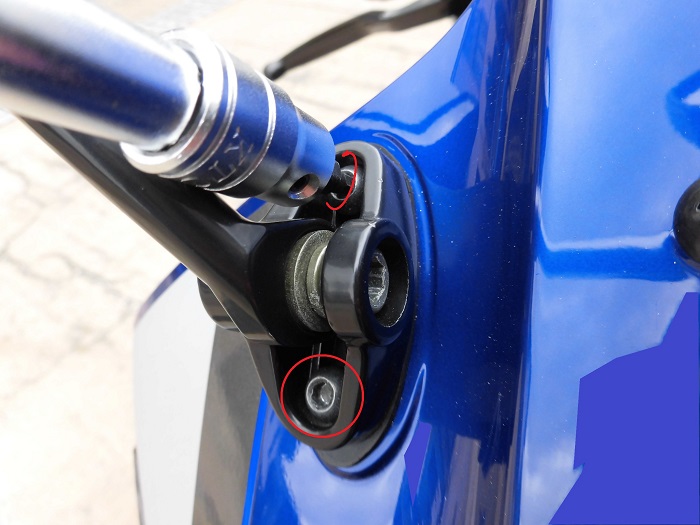
<Remove mirror 1>
Using a handle fitted with a hexagon socket (4 mm), remove the two bolts securing the mirror.
Remove mirror 2
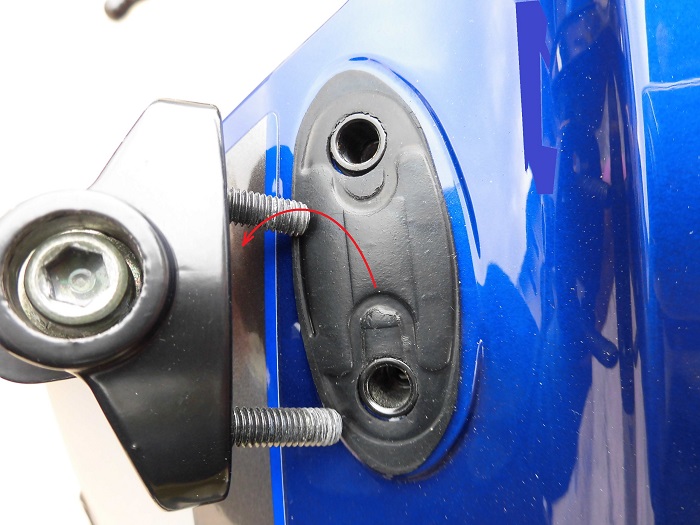
<Remove mirror 2>
Now just lift the mirror and it will come off.
Remove the other side in the same way.
Remove front cowl 1
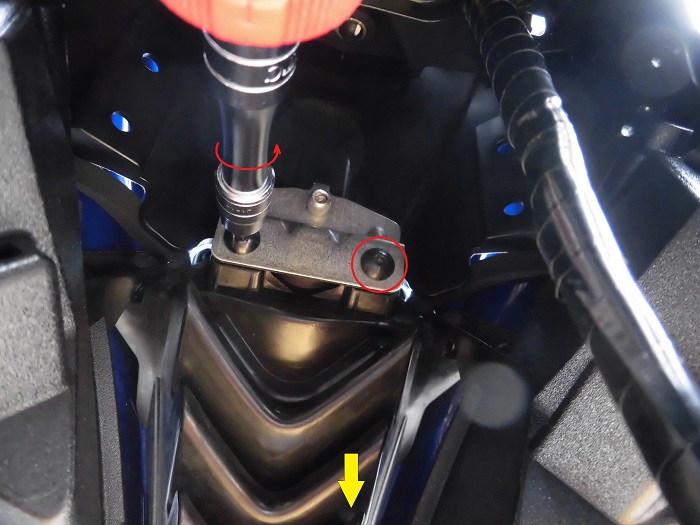
<Remove front cowl 1>
Using a ratchet wrench with a hexagon socket (4 mm) and extension bar (75 mm), remove the two bolts securing the front cowl and front stay.
Be careful not to hit the front forks or wings when moving the ratchet wrench.
I place a microfiber cloth on the fender before working on it.
I actually didn’t realize there were bolts here at first and forced myself to pull the front cowl off.
When it wouldn’t come off, I looked in the Haynes manual and it mentioned this bolt with a picture.
That’s Haynes.
Remove front cowl 2
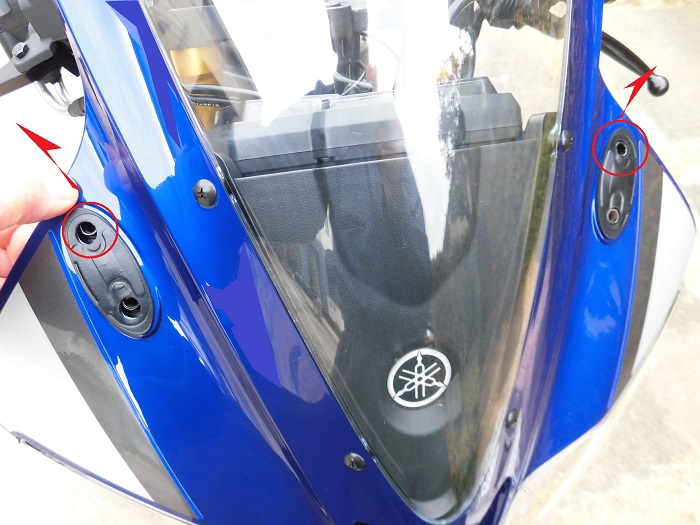
<Remove front cowl 2>
Gently lift the ○ part securing the mirror and remove it.
Remove front cowl 3
<Remove front cowl 3>
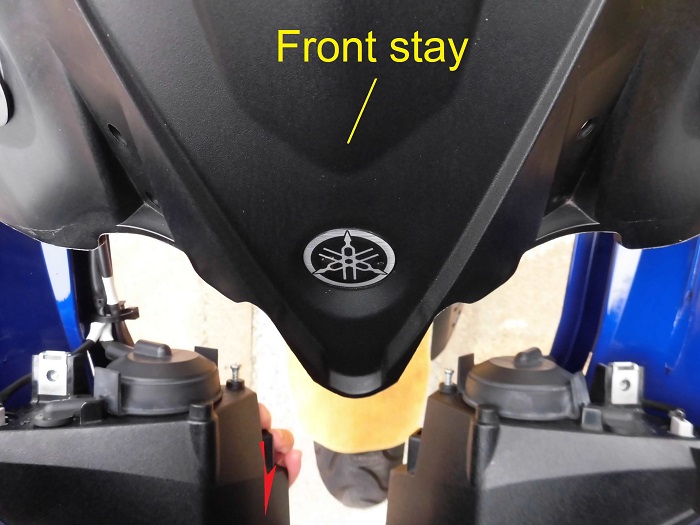
Then pull the front cowl downwards and forwards to release it from the front stay projection.
At this point, be careful not to lower the cowl too far or drop it so that it does not hit the front fender.
Inside of removed front cowl
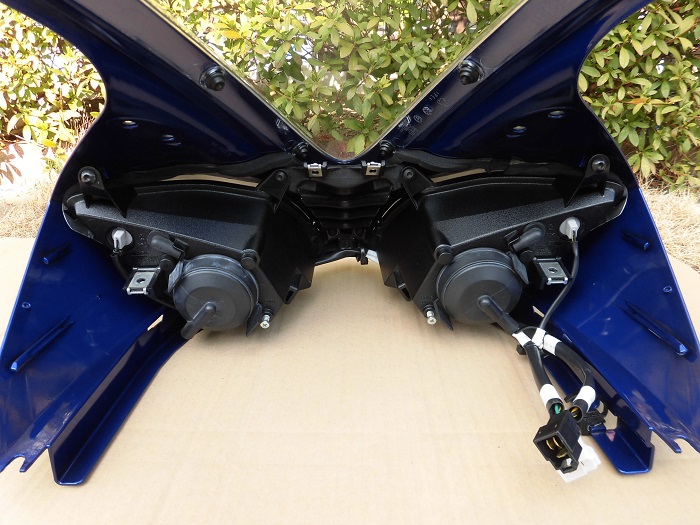
<Inside of removed front cowl>
That in this condition,
- Replacing the screen
- Replacing the headlight bulbs
can also be easily done.
Not many people remove the front cowl to change the headlight bulb.
However, once you have taken the time to check how the bulb is secured and tried out the removal and installation, you will be able to work reliably without having to remove the cowl in future.
Position of cable ties
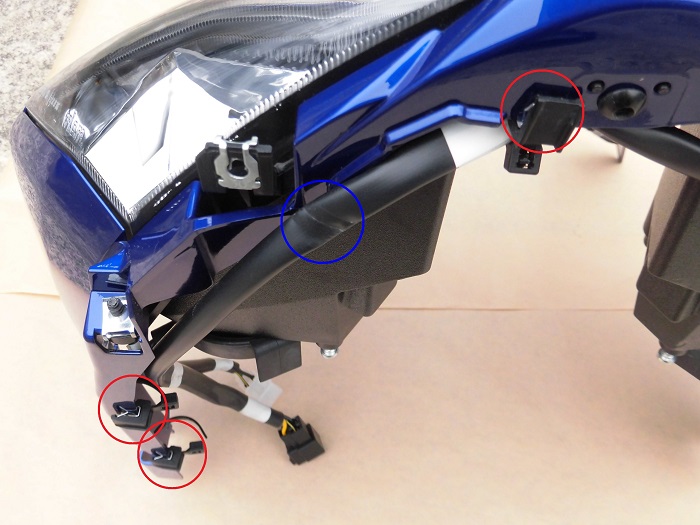
<Position of cable ties>
Summarize the position of the cable ties.
I wrote them in each STEP as wiring removal, but I think it was difficult to find the position.
○ (3 locations): cable ties with edge clips
○ (1 place): normal cable tie
Cable tie with edge clip
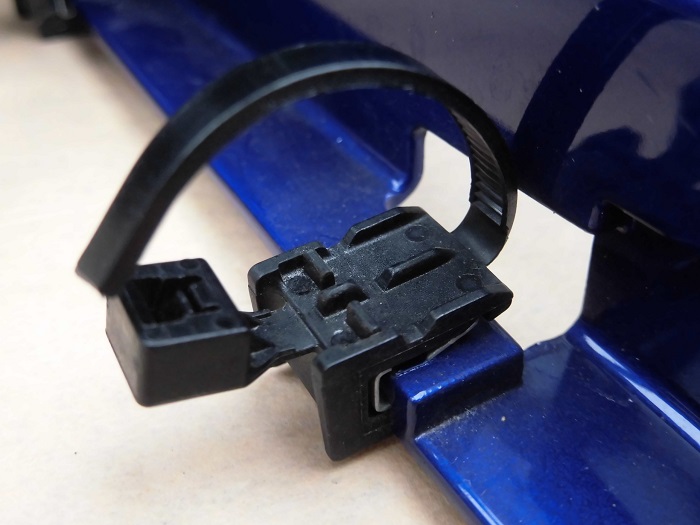
<Cable tie with edge clip>
It has this shape.
The direction of the head and serration is the opposite of that of a normal cable tie.
You can see that if you cut the cable ties, you can no longer use them.
Removed cowl etc.
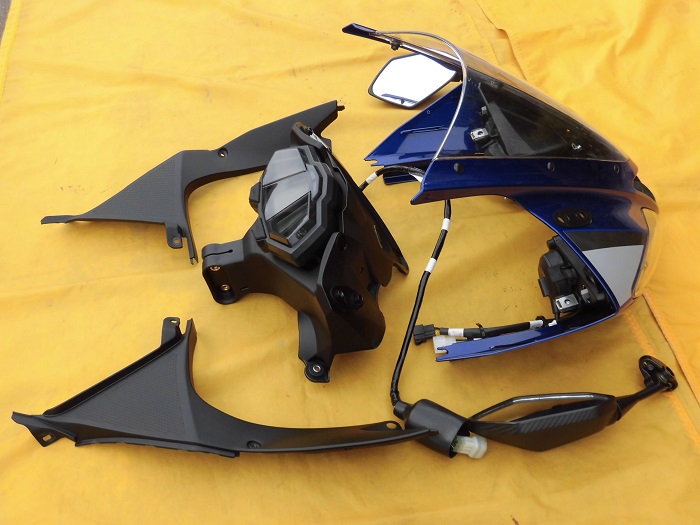
<Removed cowl etc.>
The front cowl, panel and others could be removed like this.
(The front stay will be removed in the next maintenance record, so please forgive me.)
Different from the side cowls and panels, the number of parts is quite normal.
Removed bolts etc.
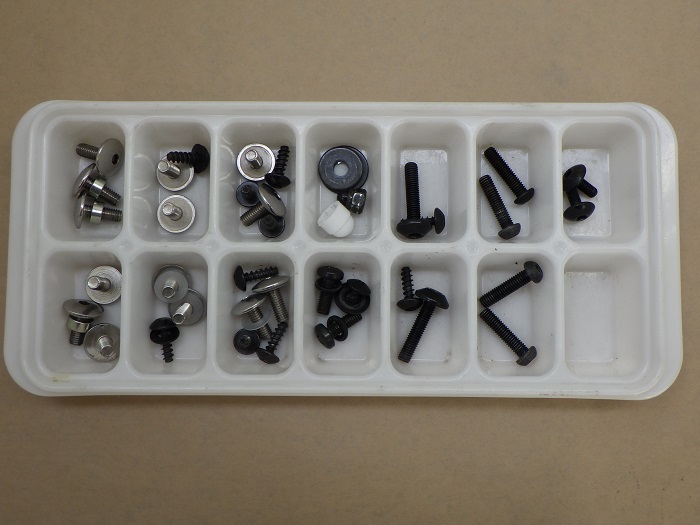
<Removed bolts etc.>
The bolts and other parts removed are placed in the parts tray in the order in which they were removed or by part as far as possible.
This time, there were 39 parts in total, including the side cowl and other parts.
The parts tray (ice tray) purchased at 100 yen are very easy to use and highly recommended.
They are useful because they have two rows, so they can be used separately on the left and right.
Condition of removed front cowl and panels
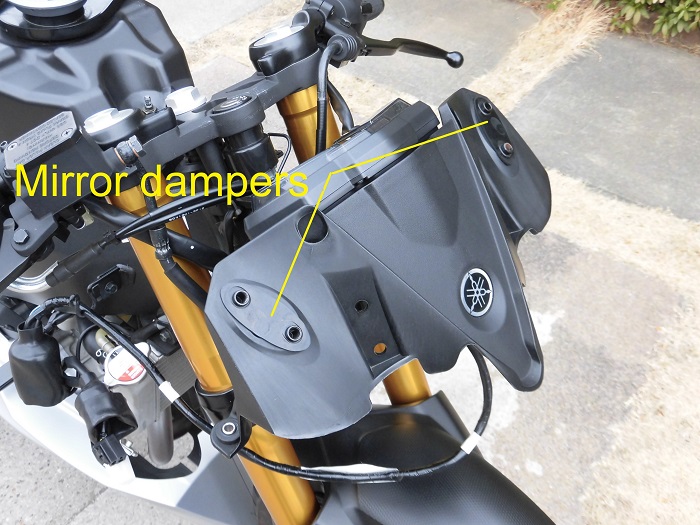
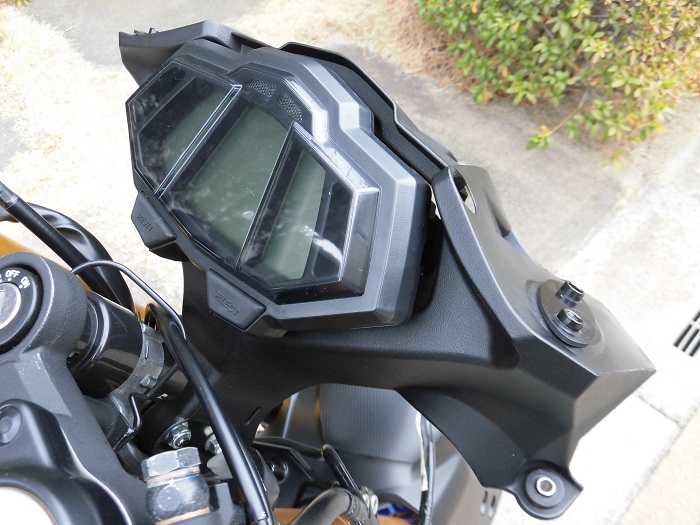
<Front stay part from front>
The mirror dampers are not only on the outside of the front cowl, but also on the front side of the front stays (inside the front cowl).
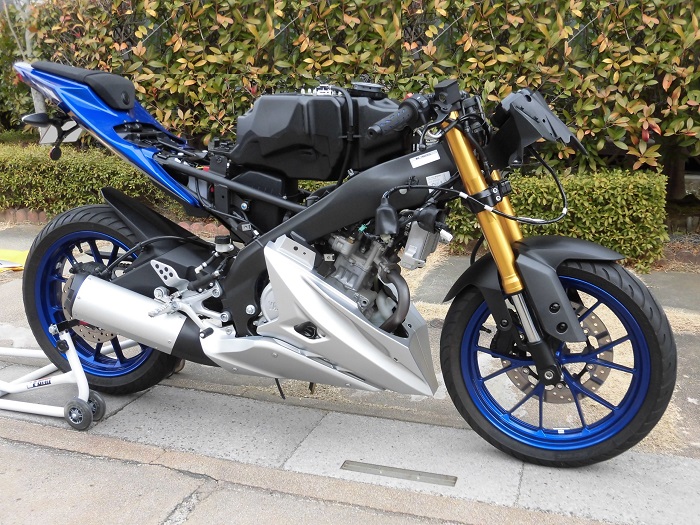
<Front stay part from behind>
The front stay is also very strong and support the front cowl.
<Entire moto from front>
The front forks are very visible.
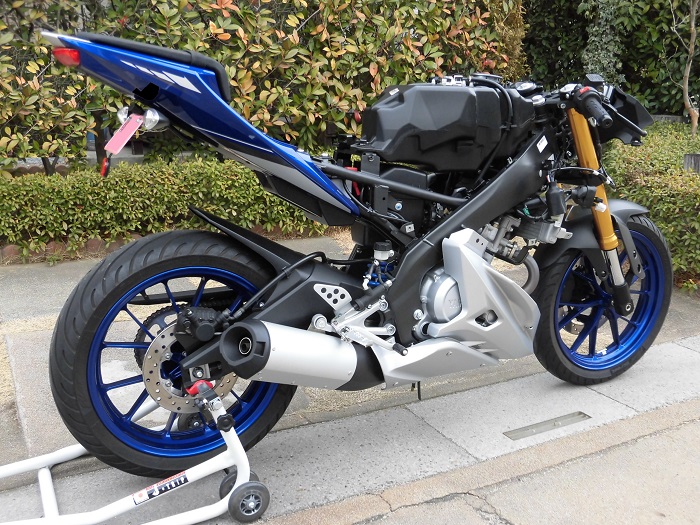
<Entire moto from behind>
The frame is steel, but beautifully shaped and made to look like aluminum.
3. Summary
I have shown you how to remove the front cowl and panels etc.
It takes a bit of work to remove the ties with edge clip and disconnect the wiring.
But it should be easier than you think.
Above all, you can clean the surface of the front stay, which are hidden by the screen.
So, please give it a try.
- Make sure that the bolts, screws and ties are in place when removing them.
- It is recommended not to cut the edge clip ties.
- It is recommended to prepare a parts tray to keep track of the removed bolts.
