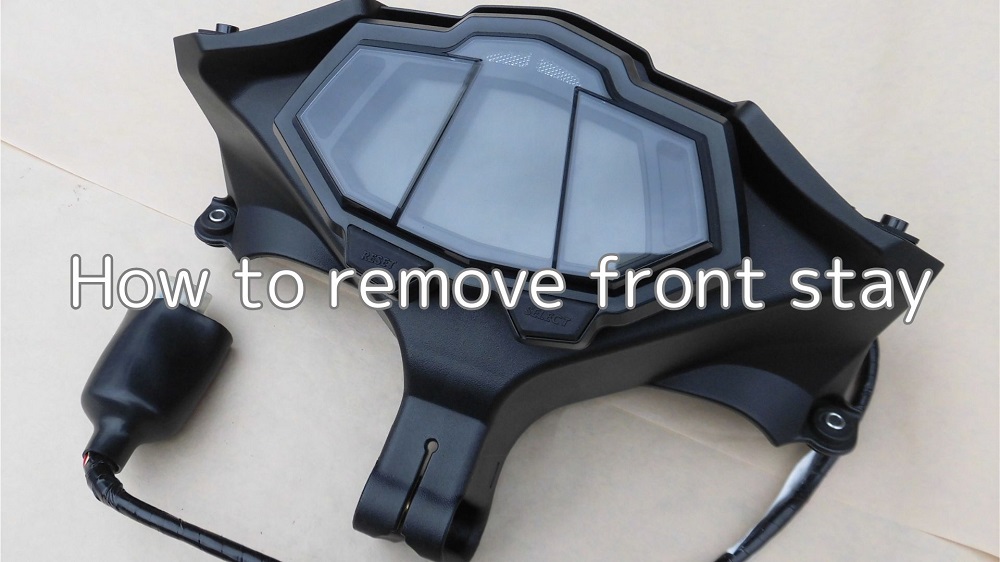
After the maintenance record ‘How to remove the front cowl and panels etc.’, the front stay (including the meter) was also removed.
So, this section summarizes how to remove them.
Removing the front stay makes it easier to carry out the following tasks.
- Checking the installation of electrical components around the meter (installation of anti-theft devices and shift indicators)
- Servicing the front forks
- Servicing the steering stem
From this article you can learn the following.
- How to remove connectors
- How to remove front stay
| Date | 23rd January 2022 |
| Subjects | Maintenance, Failure, Repair |
| Shop or DIY | DIY |
| Difficulty | |
| Working hours | 0.5 |
| Costs [Yen] | 0 (Use what I have) |
1. Goods to use
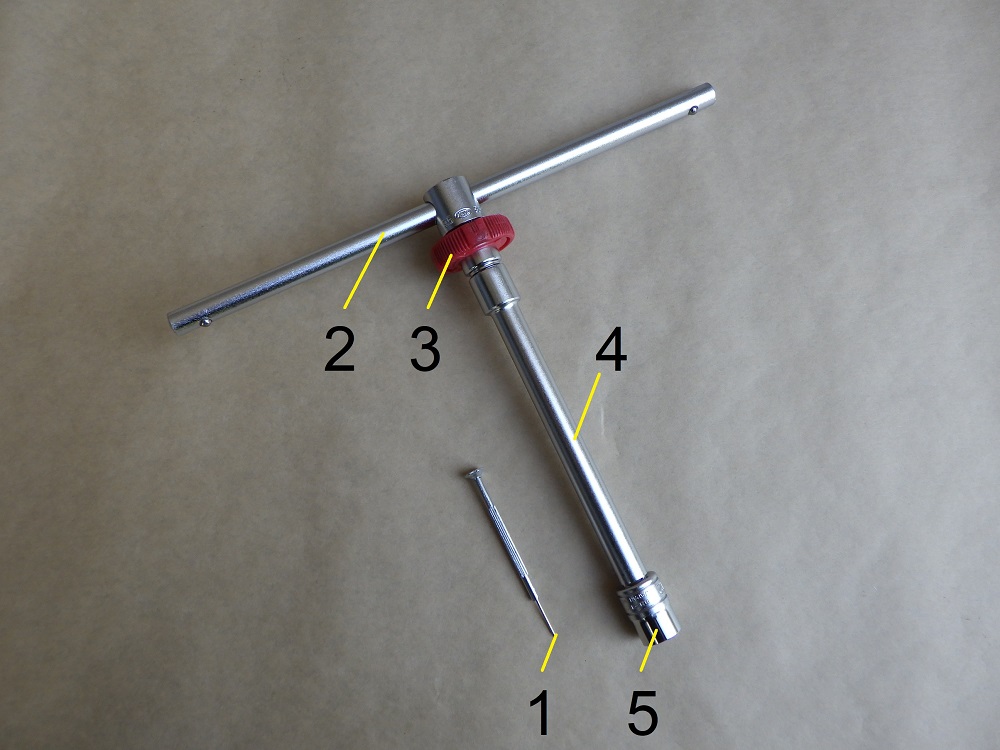
| No. | Products name | Manufacturer | Products number | Quantity | Amounts[Yen] |
| 1 | Precision screwdriver (Flathead) | DAISO | – | 1 | 110 |
| 2 | Slide head handle | KTC | BHM3 | 1 | 2,970 |
| 3 | Quick spinner | KTC | BE3-Q | 1 | 2,046 |
| 4 | Extension bar (150mm) | KTC | BE20-150 | 1 | (1,749) |
| 5 | Bit socket (12mm) | KTC | BT3-12 | 1 | 880 |
| 7,755 |
2. How to remove front stay (STEP 1-13)
Condition of front cowl removed
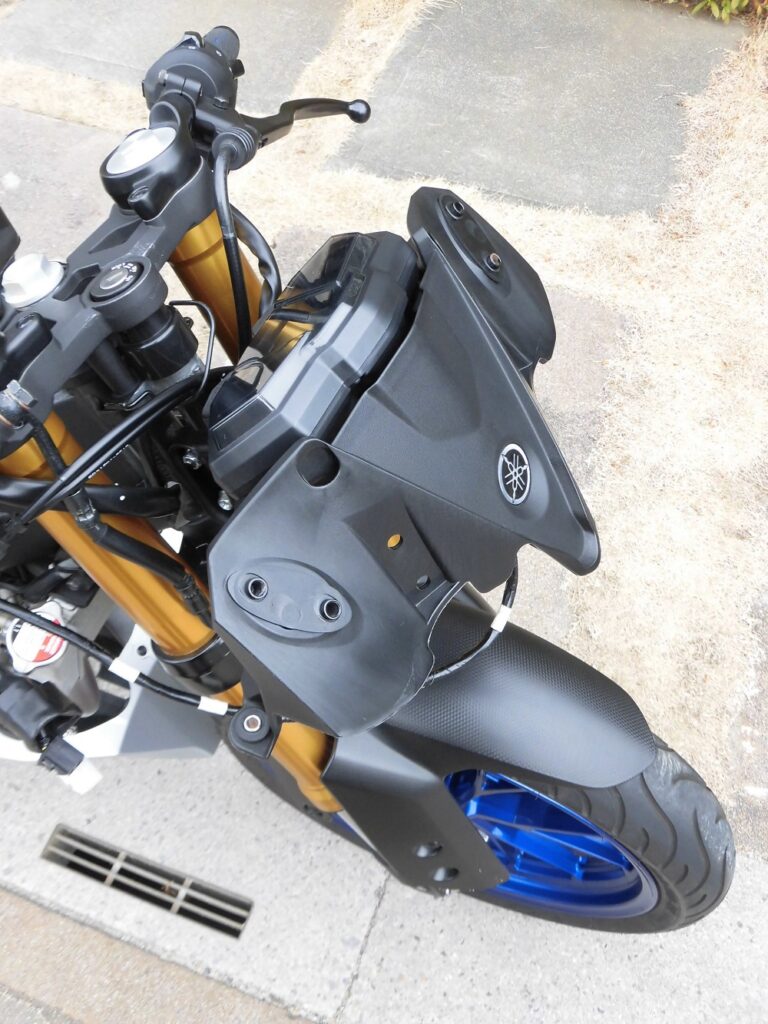
<Condition of front cowl removed>
First remove the front cowl.
For details, see maintenance record ‘How to remove front cowl and panels etc.’.
Condition of wirings
Disconnect the wires at the right front of the frame.
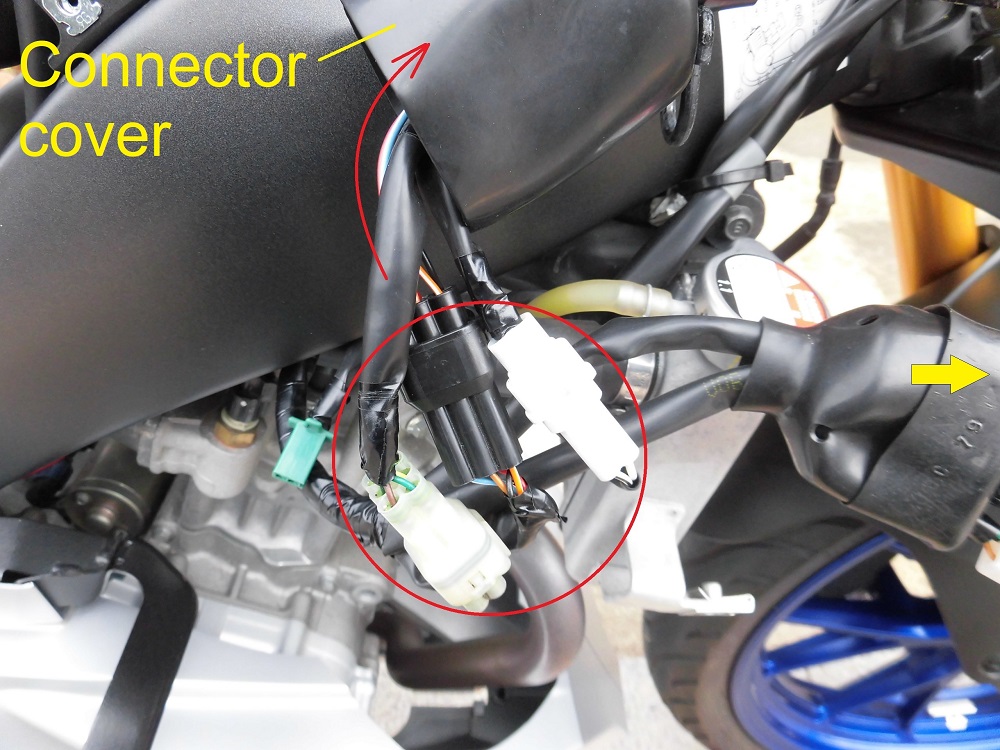
<Condition of wirings>
Move the connector cover to reveal three connectors for meter-related wiring.
Disconnect connector 1
First, disconnect the white connector.
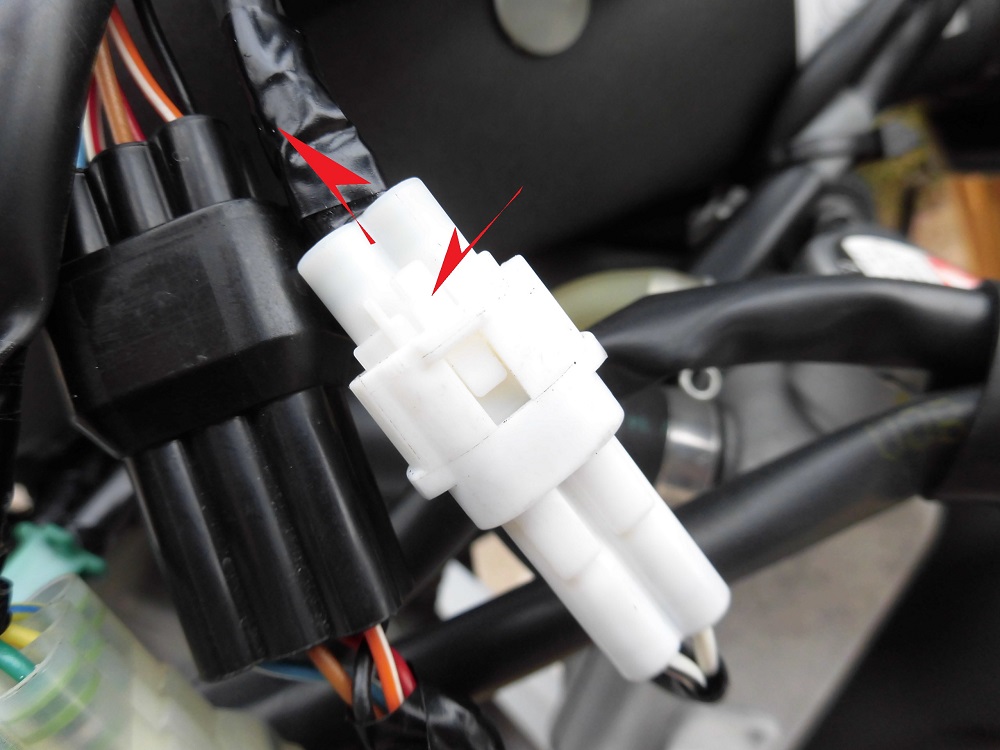
<Disconnect connector 1>
Press and pull on the connector claw to release the connector.
Disconnect connector 2
Then disconnect the natural-colored and black connectors.
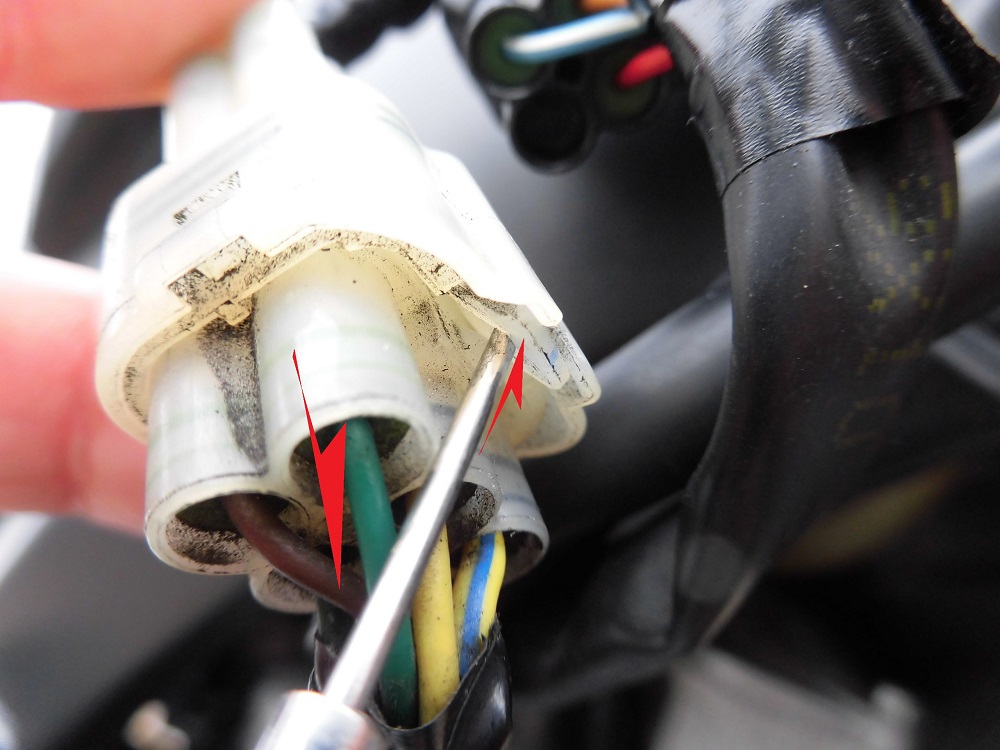
<Disconnect connector 2>
This connector can be disconnected by pulling while lifting the connector claw with a precision screwdriver.
The lean angle sensor had the same connector.
Now, you can disconnect the wiring from the moto body.
By the way, different from the wiring around the headlights, the wiring around the instrument panel uses waterproof connectors.
This means that it is an area where water cannot get in.
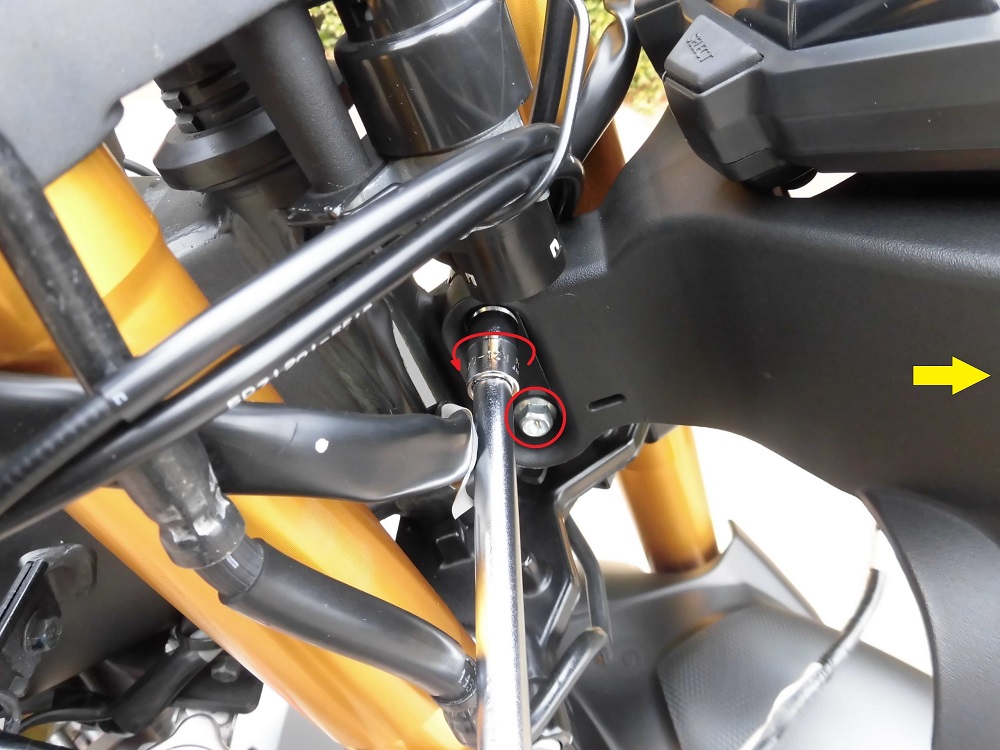
Remove plate 1
Now. remove the plate and other parts securing the frame and front stay.
First, turn the handlebars to the right.
<Remove plate 1>
Use a T-bar handle with a socket (12 mm) and extension bar (150 mm) to loosen the nut/bolt, located on the right side of the moto body.
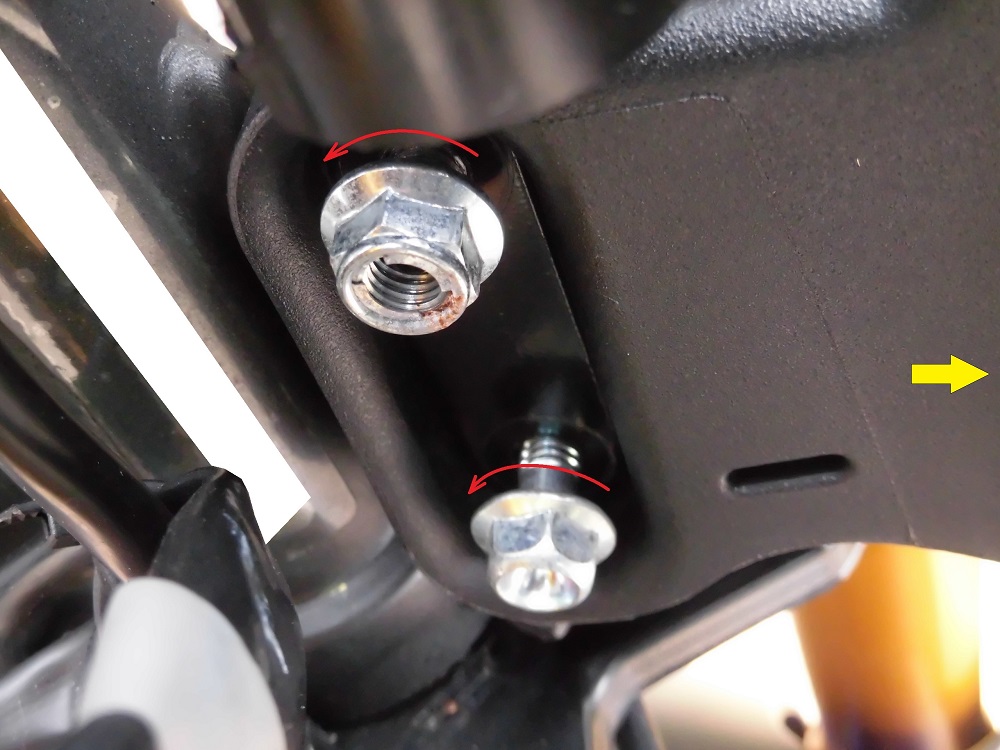
Upper: Nut
Lower: Bolt
Condition of nut and bolt loosened
<Condition of nut and bolt loosened>
Then, remove the nut and bolt.
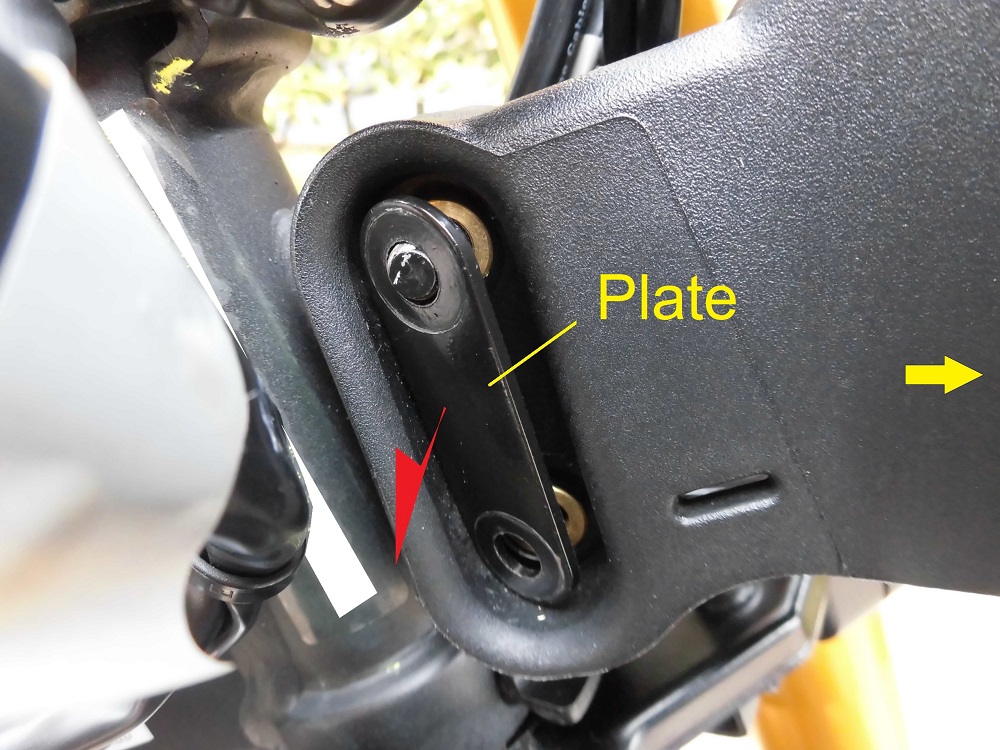
Remove plate 2
<Remove plate 2>
Remove the plate.
A magnetic picker or similar makes it easier to remove.
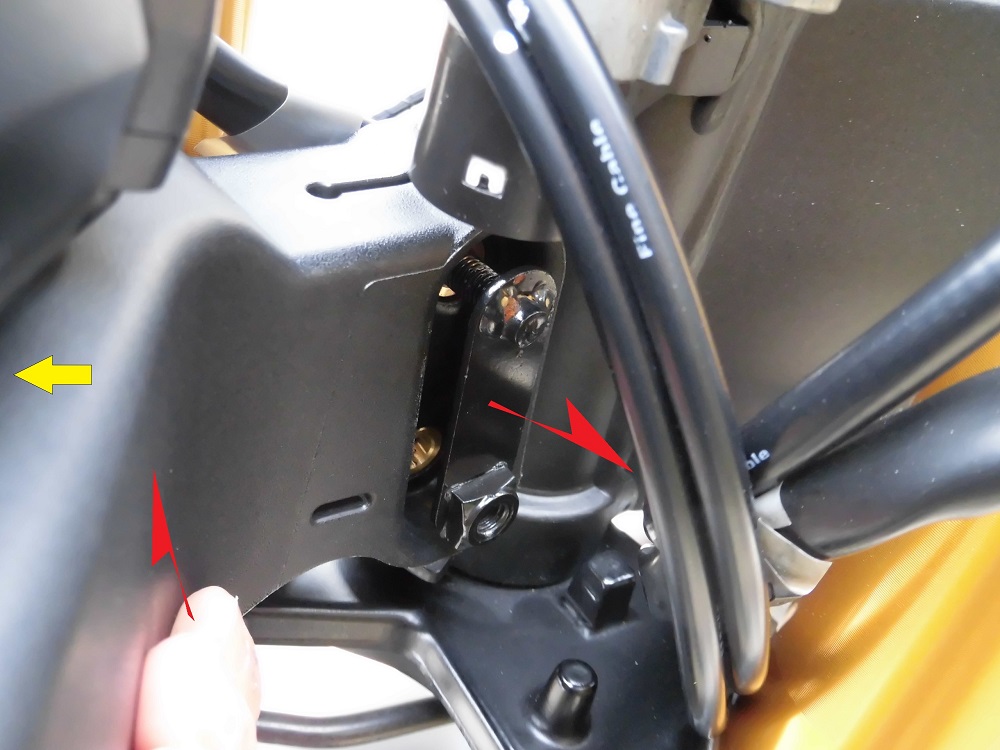
Remove plate 3
<Remove plate 3>
While lifting the front stay, remove the plate with bolt and nut on the left side of the moto body.
Remove front stay
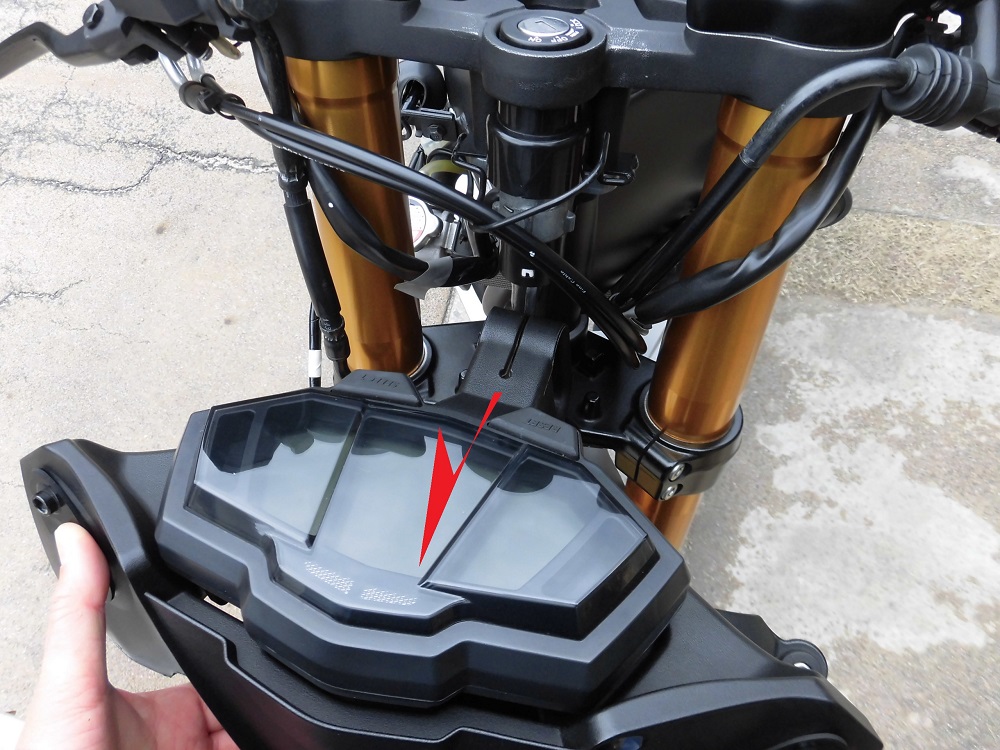
<Remove front stay>
Then, you can remove the front stay by pulling them forward.
I was holding the front stay with one hand when taking the photo and lost its balance and dropped it on the front fender.
The meter part is unexpectedly heavy and unbalanced, so be careful.
Removed front stay
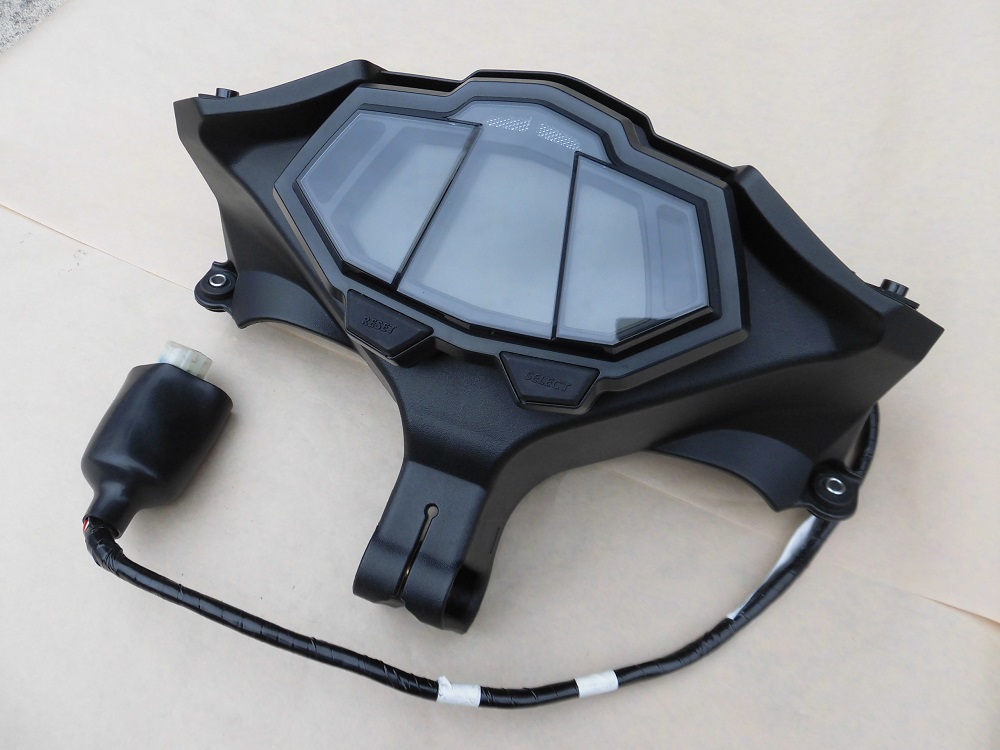
<Front side>
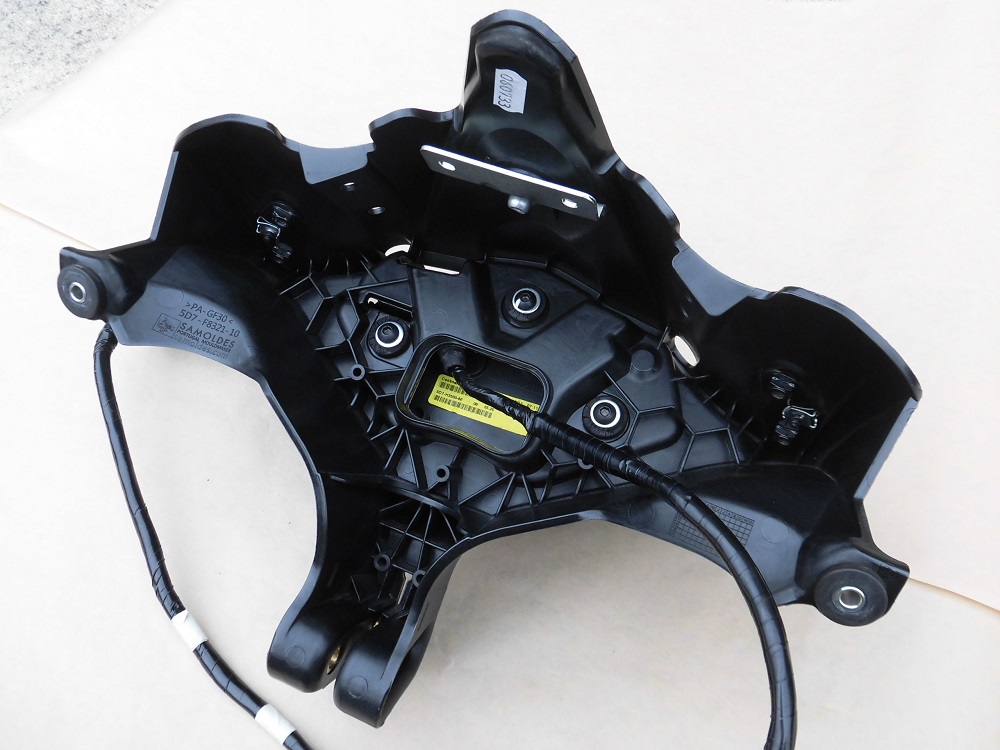
<Back side>
Meter wiring is taken forward through a hole in the stay.
Removed parts
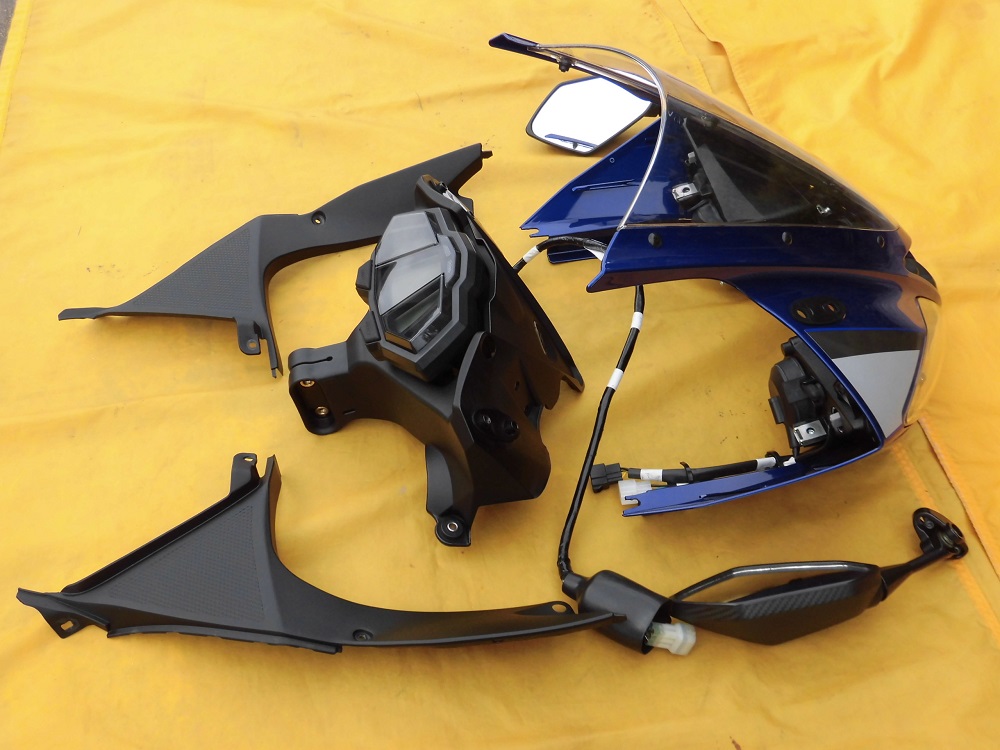
<Removed parts>
This time, the front cowl, panel, etc. were also removed.
Actually, you can remove the front cowl and front stay together by disconnecting the wiring connectors (5 places) and front stay.
This may be a better option when maintaining the front forks and stem bearings.
Condition of front stay removed 1
A photo was taken with the front stay removed.
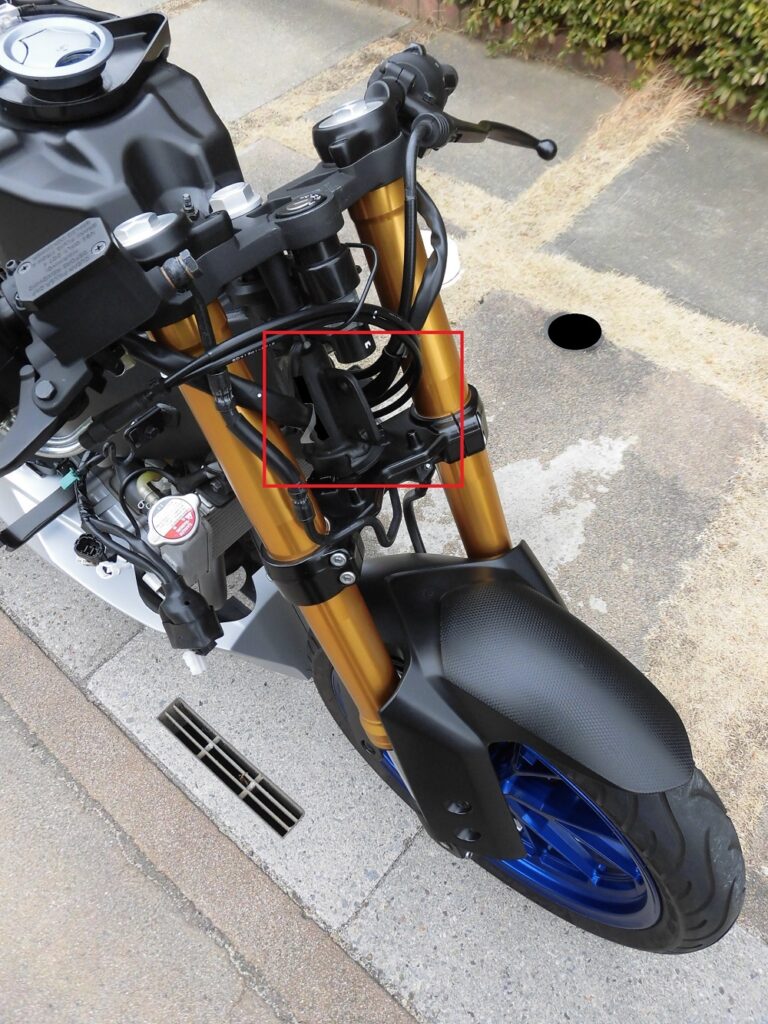
<From front>
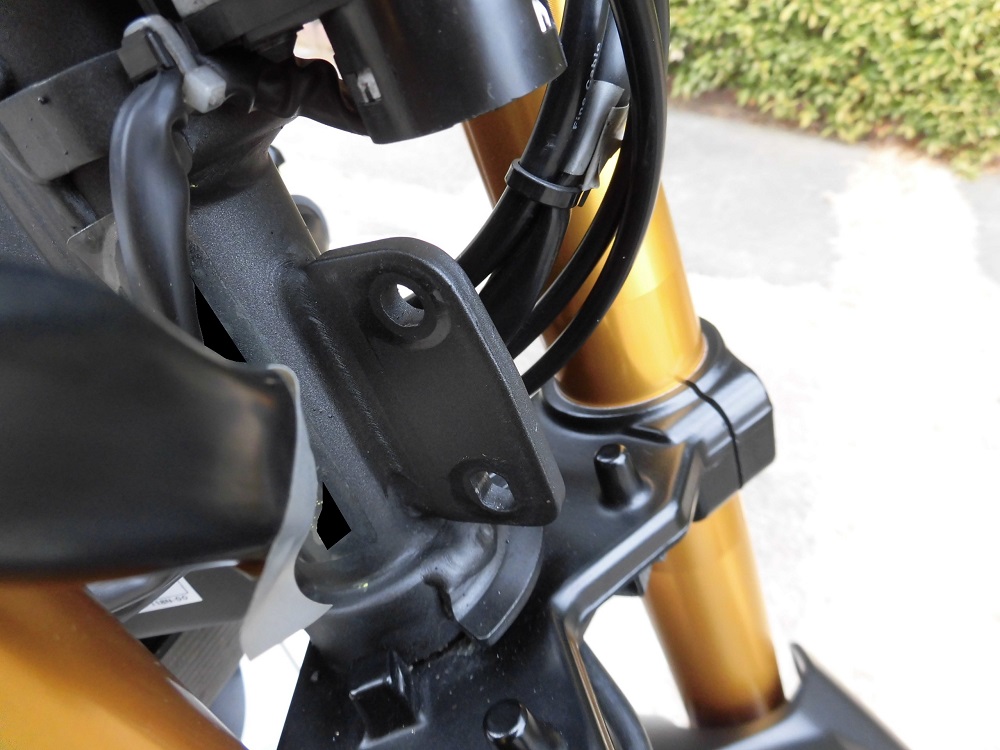
<Above □ section enlarged>
A steel plate, about 10 mm thick, protrudes from the end of the frame, like a horn.
This would hold the stay securely in place.
Condition of front stay removed 2
Photographs of the entire moto.
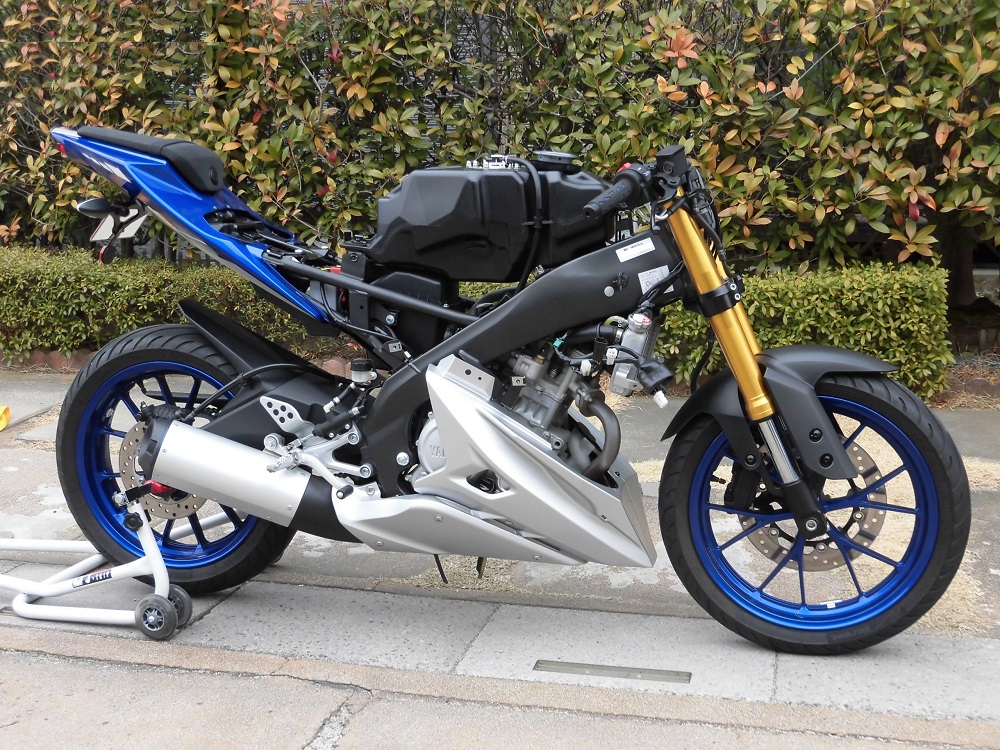
<From front>
If the front stand is hung in this position, it will be easier to service the front forks.
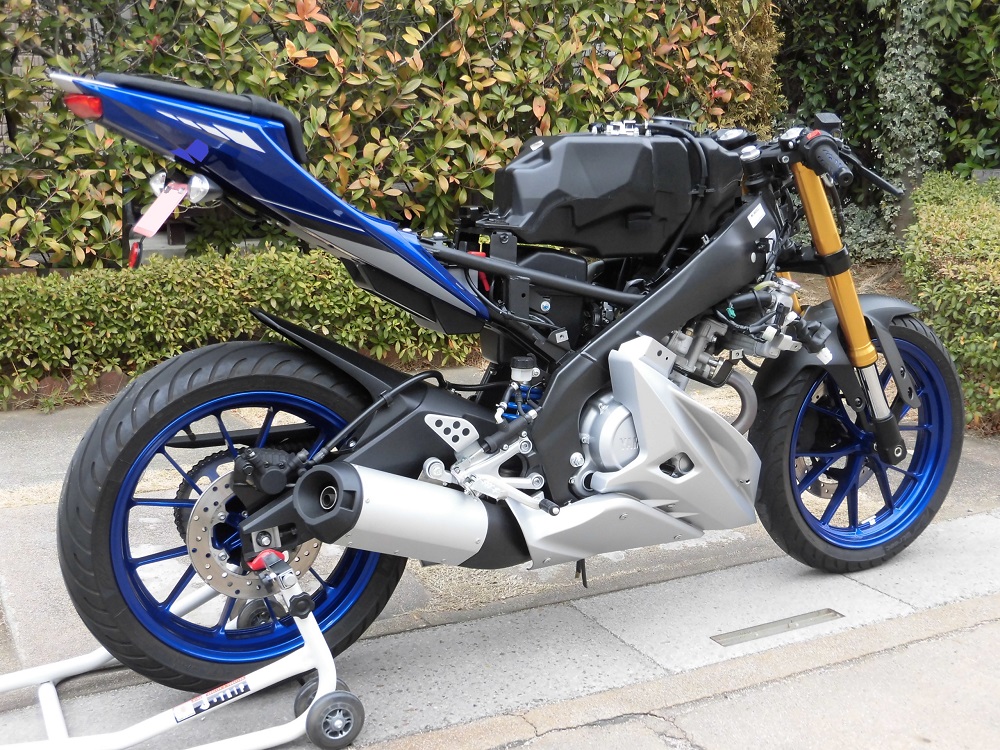
<From behind>
3. Summary
This section summarizes how to remove the front stay.
If you are careful not to drop the front stay when removing them, you should be able to work without problems.
- When removing the connector, be aware that the pressing points differ depending on the type of connector.
- The meter part is heavy and unbalanced, so be careful not to drop the stay on the front fender when removing it.
