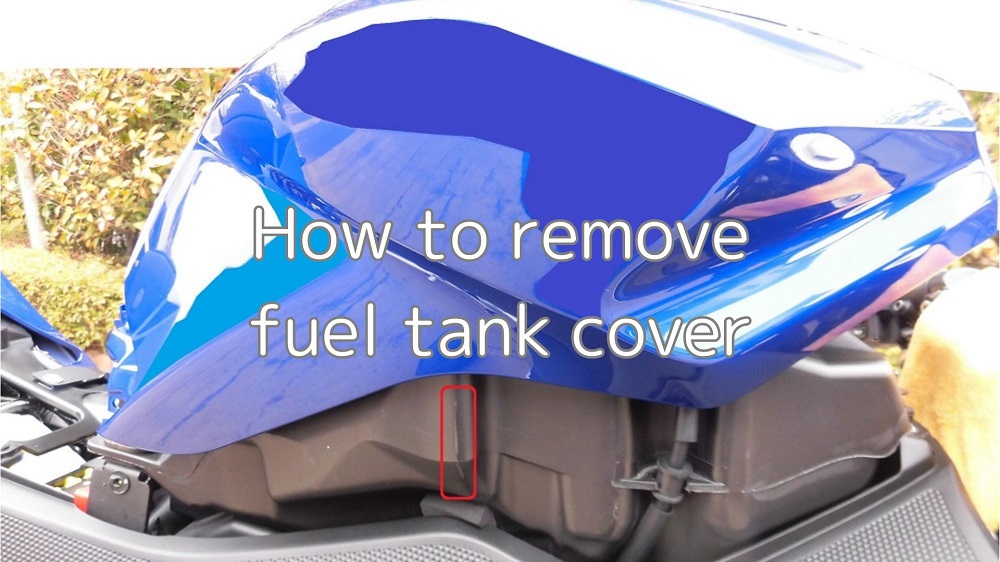
After some work, I repeated the removal and installation of the fuel tank cover, and I will summarize how I did it and what I noticed.
Actually, it was more difficult than I imagined removing it, and in the end, I had to do it by force.
I’m scared that the cover will break sooner or later.
So please be aware that this may be an inappropriate way to remove the cover this time!
The fuel tank cover needs to be removed in the first place when the following operations are carried out.
- Removing the fuel tank… replacing the air cleaner filter, cleaning the throttle body, etc.
- Removing the front panel (It is not necessary to remove the cover completely).
From this article you will know as follows.
- How to remove the fuel tank cover
- To avoid scratching the fuel tank cover when or after it is removed.
| Date | 23rd January 2022 |
| Subjects | Maintenance, Failure, Repair |
| Shop or DIY | DIY |
| Difficulty | |
| Working hours | 0.5 |
| Costs [Yen] | 0 (Use what I have) |
1. Goods to use
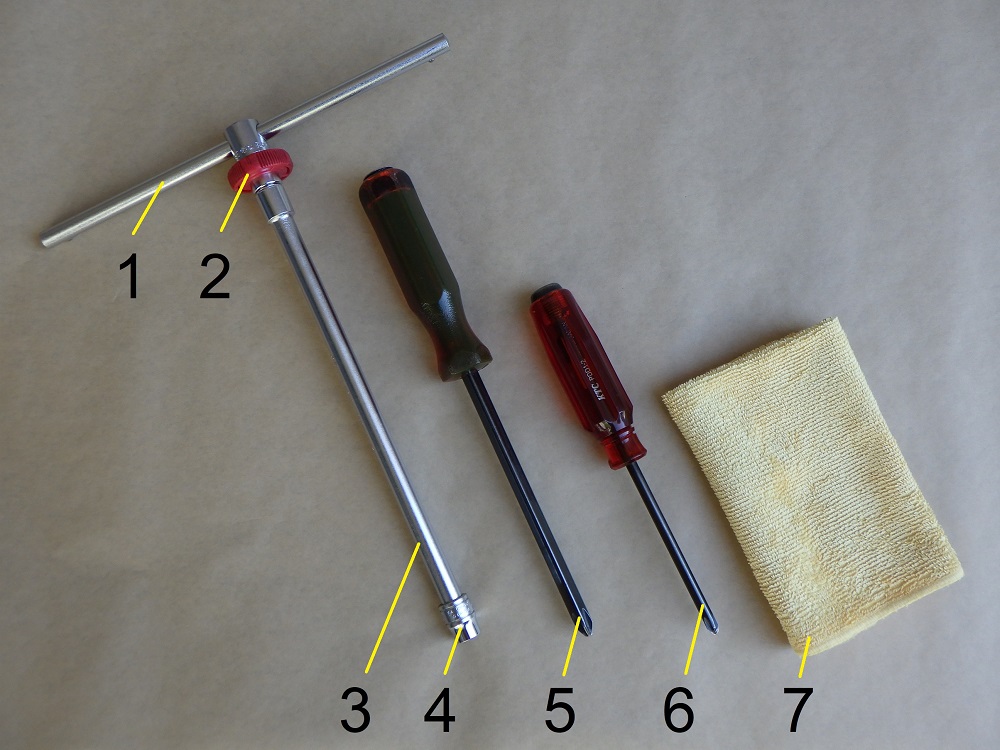
| No. | Name | Manufacturer | Parts number | Quantity | Amounts[Yen] |
| 1 | Slide head handle | KTC | BHM3 | 1 | 2,970 |
| 2 | Quick spinner | KTC | BE3-Q | 1 | 2,046 |
| 3 | Extension bar (250mm) | KTC | BE20-250 | 1 | (2,783) |
| 4 | Bit socket (10mm) | KTC | BT3-10 | 1 | 880 |
| 5 | Resin Pillips screwdriver (No.3) | KTC | DPD-3 | 1 | (2,233) |
| 6 | Resin Pillips screwdriver (No.2) | KTC | PDD1-2 | 1 | 1,562 |
| 7 | Microfiber cloth | – | – | 1 | (197) |
| 12,671 |
2. How to remove the fuel tank cover (STEP 1-16)
Remove seat
First, remove the seat.
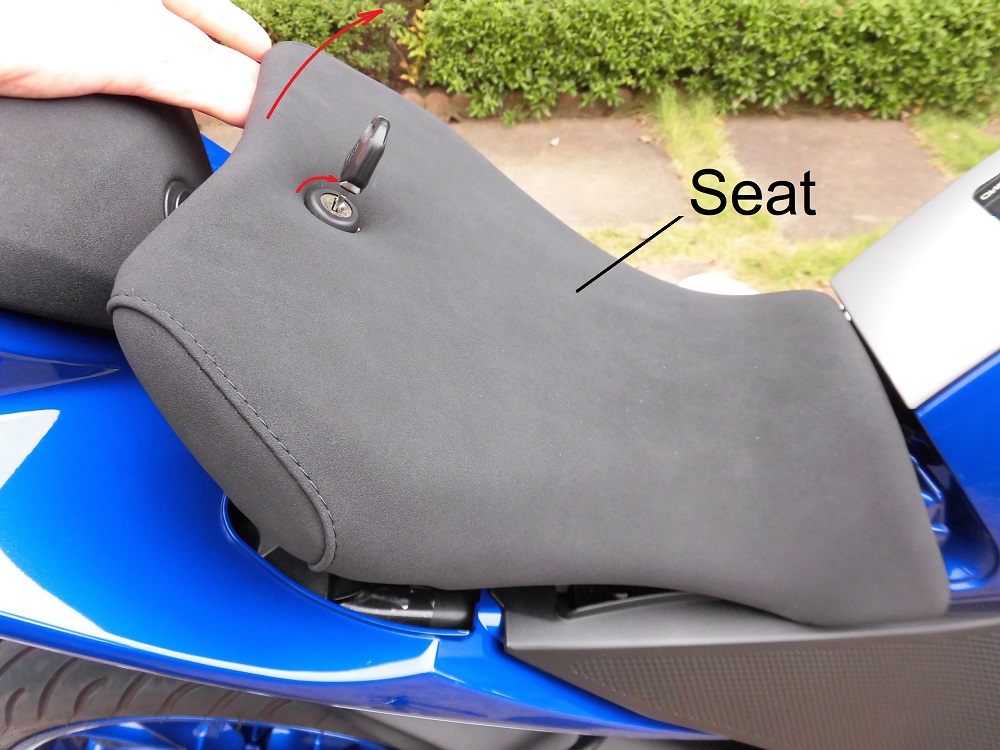
<Remove seat>
Insert the key into the keyhole in the seat and turn 90° clockwise to remove it.
Remove cap
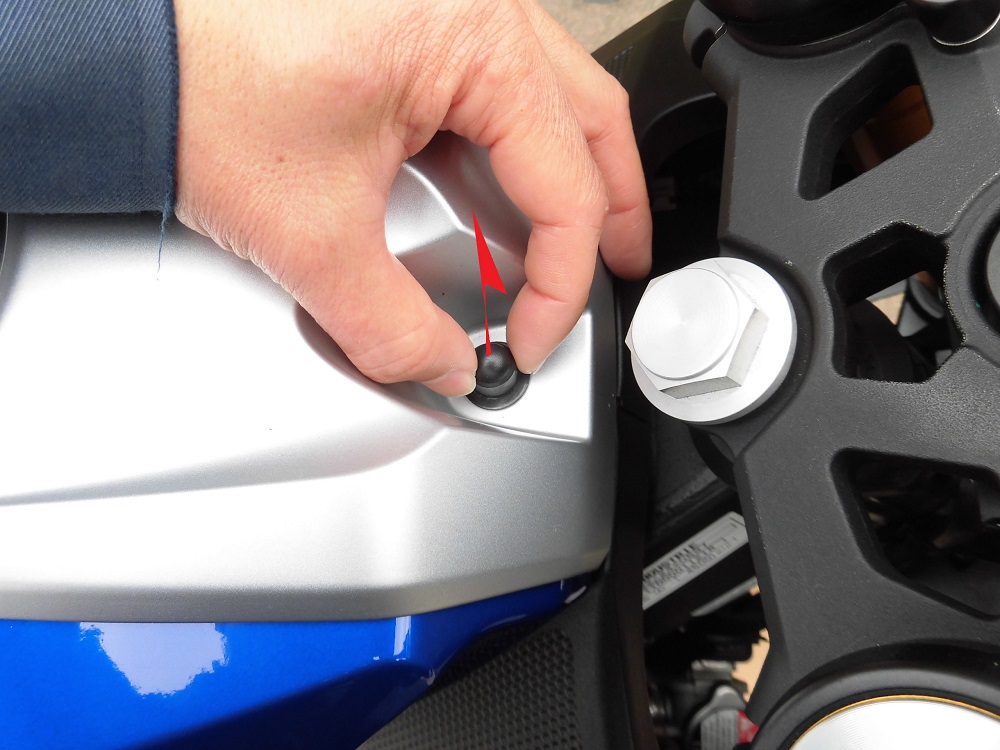
<Remove bolt cap>
Remove the cap at the top of cap nut on the steering side with fingers.
Unfortunately, the cap has a crack on the side and comes off easily.
Remove bolt and washer
The fuel tank cover is held in place by a cap nut and two screws.
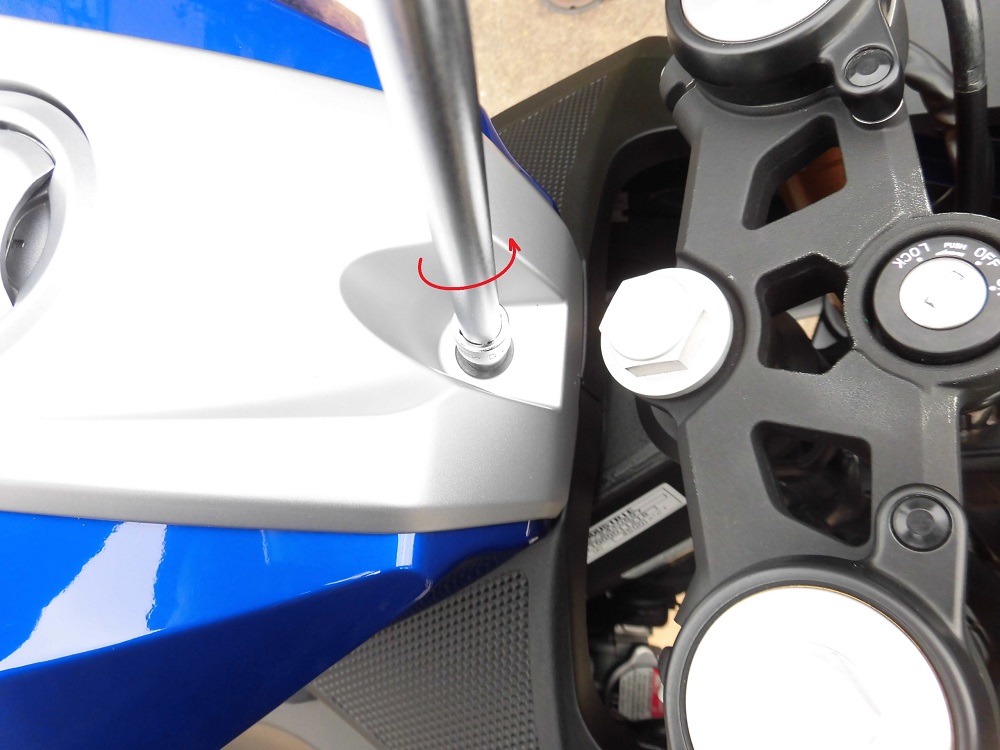
<Remove bolt and washer>
Using a T-bar handle with a socket (10 mm), remove the cap nut.
Then, also remove the washer underneath.
Remove screw 1
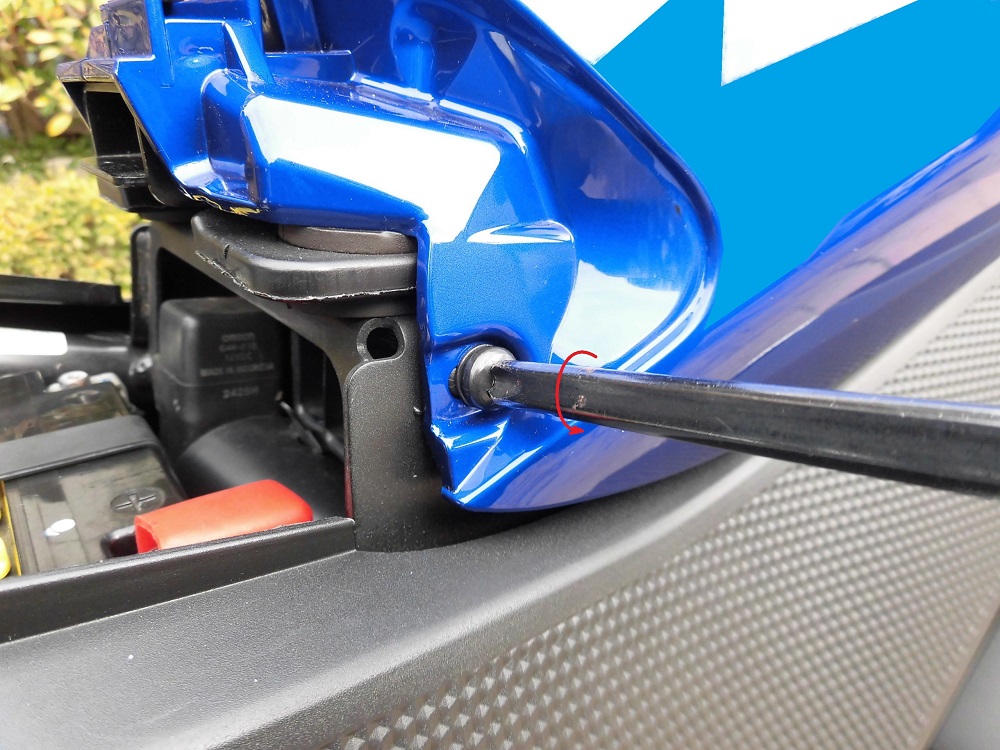
<Remove screw 1>
Using a Phillips screwdriver (No. 3), remove the left and right screws on the seat side.
Cure fuel tank cover
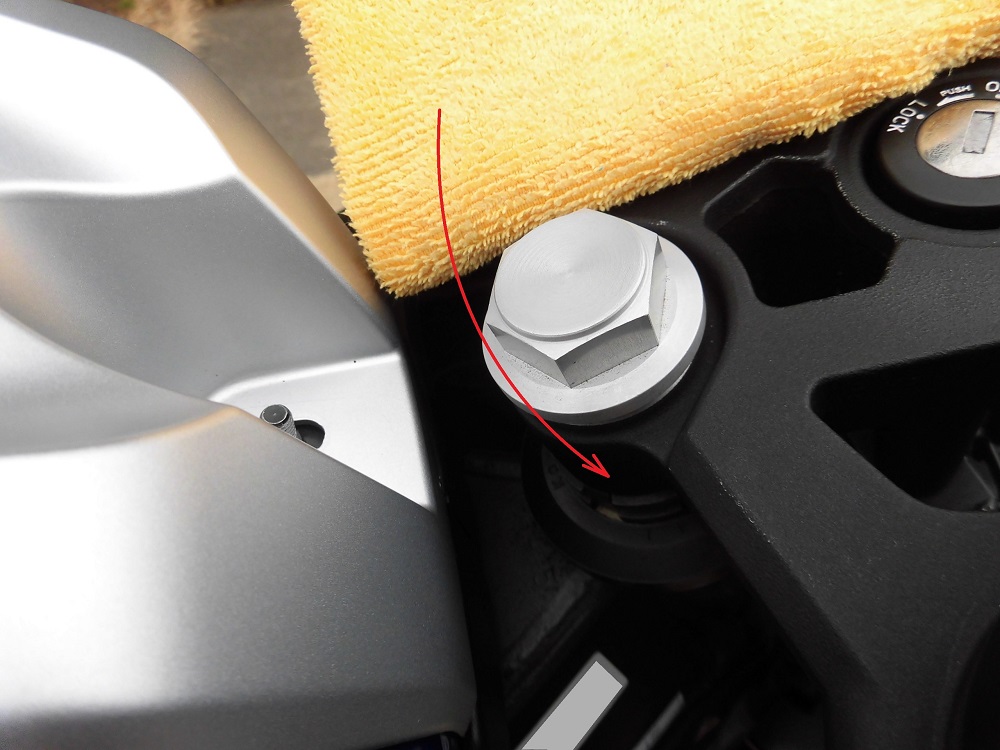
<Cure fuel tank cover>
Lay a microfiber cloth over the steering bolt area.
Scratched fuel tank cover 1

<Scratched fuel tank cover 1>
Because when I lifted the fuel tank cover, I hit the corner of the steering bolt and scratched it.
Remove fuel tank cap
Then, remove the fuel tank cap.
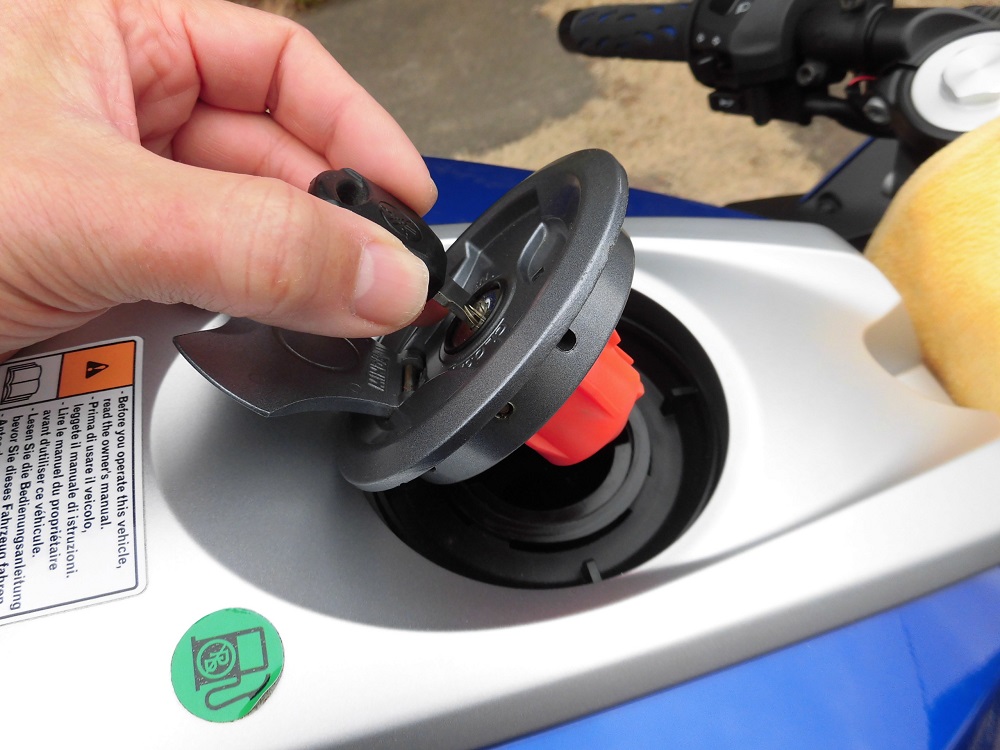
<Remove fuel tank cap>
Remove the fuel tank cover and close the cap as soon as possible, as fuel smells bad.
I thought it would come off.
I then thought it would be easy to lift the fuel tank cover off… but it won’t come off.
It seems that the sides of the cover are caught on the fuel tank.
If I lift it up too hard and the cover breaks…
Remove screw 2
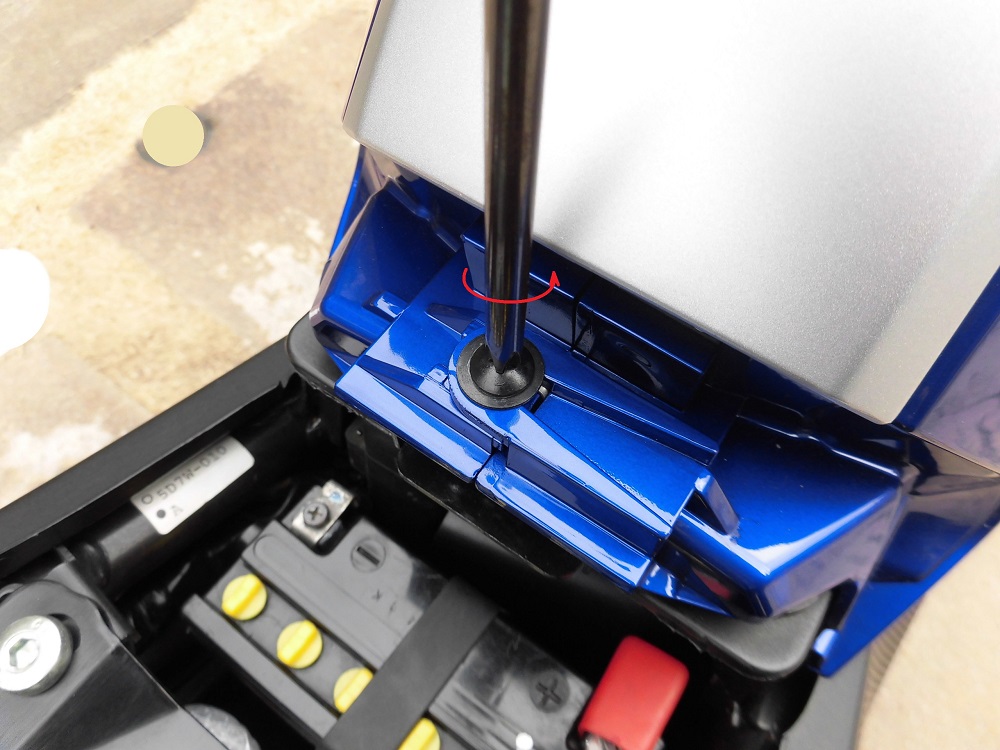
<Remove screw 2>
To allow the cover to spread out a little, a Phillips screwdriver (No. 2) was used to remove the screw that hold the left and right covers in place.
Remove fuel tank cover
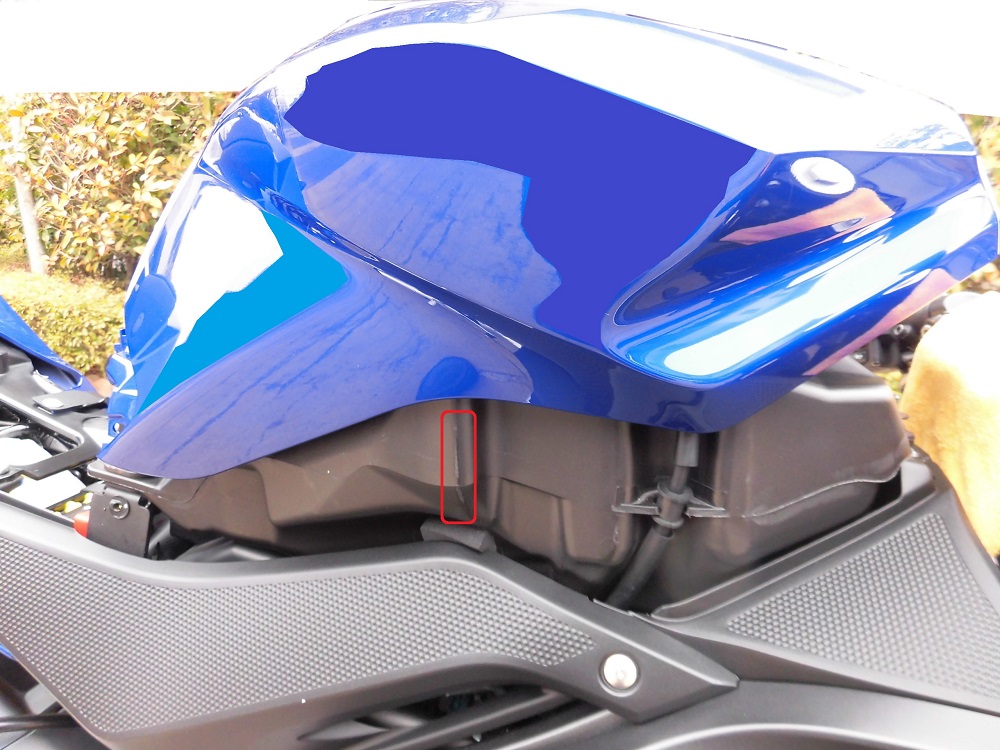
<Remove fuel tank cover>
This managed to lift the fuel tank cover.
However, the edges of the cover have hit the tank, and the sides of the tank are rubbed and damaged.
Condition of fuel tank cover
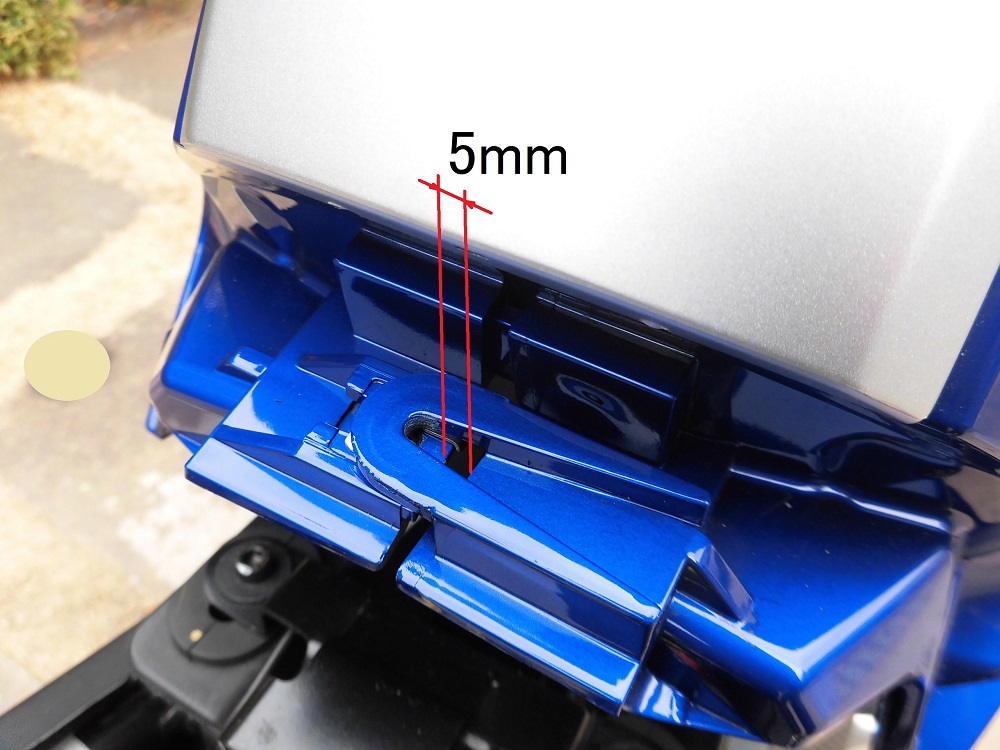
<Condition of fuel tank cover>
When in the state shown in the picture above, the gap between the left and right covers opens up by more than 5 mm.
Quite a lot of strain is being put on the covers…
Install fuel tank cap
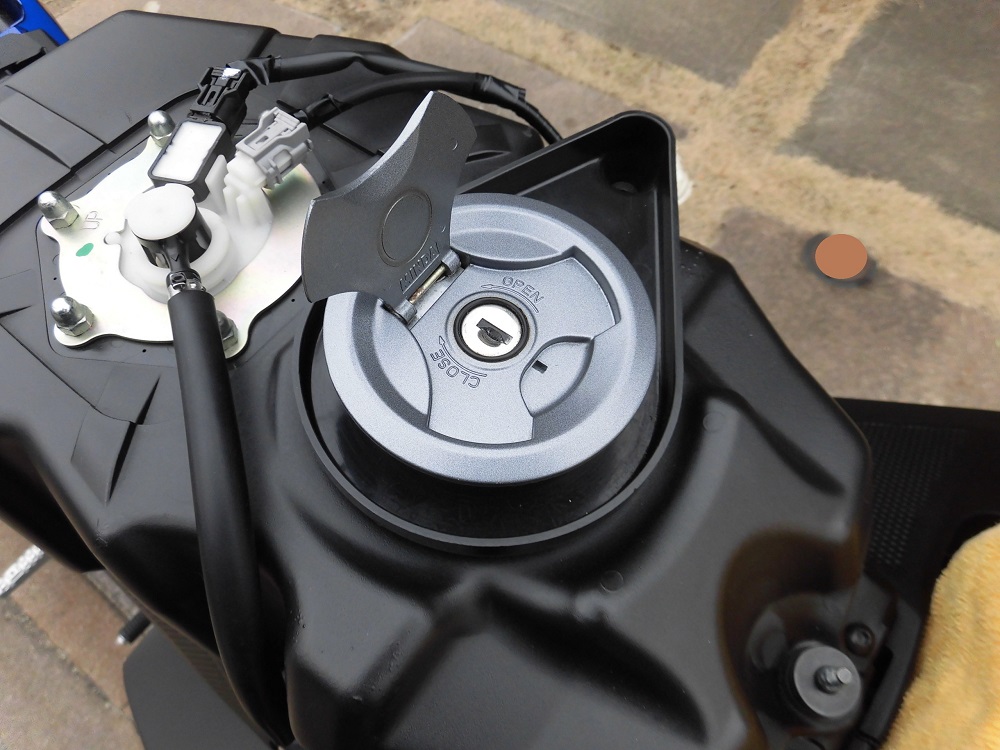
<Install fuel tank cap>
Once the fuel tank cover is off, quickly fit the fuel tank cap.
The cap seems to be floating, which is strange.
Remove washer
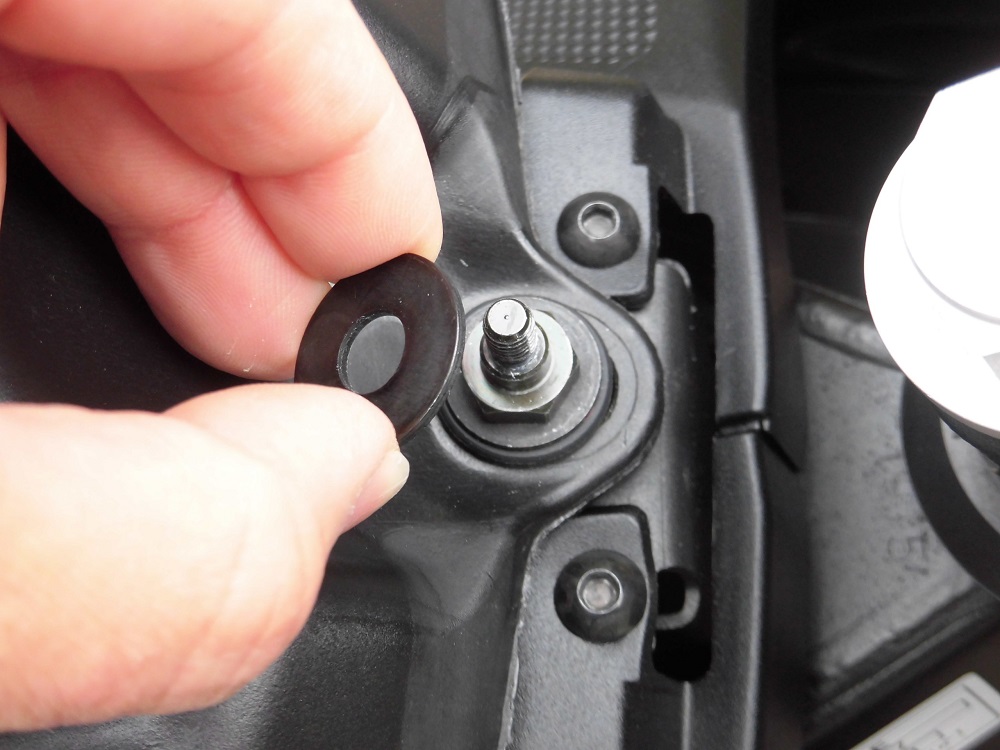
<Remove washer>
Remove the remaining washer on the steering side.
Leave it attached and be sad if I could lose it.
How to place the fuel tank cover
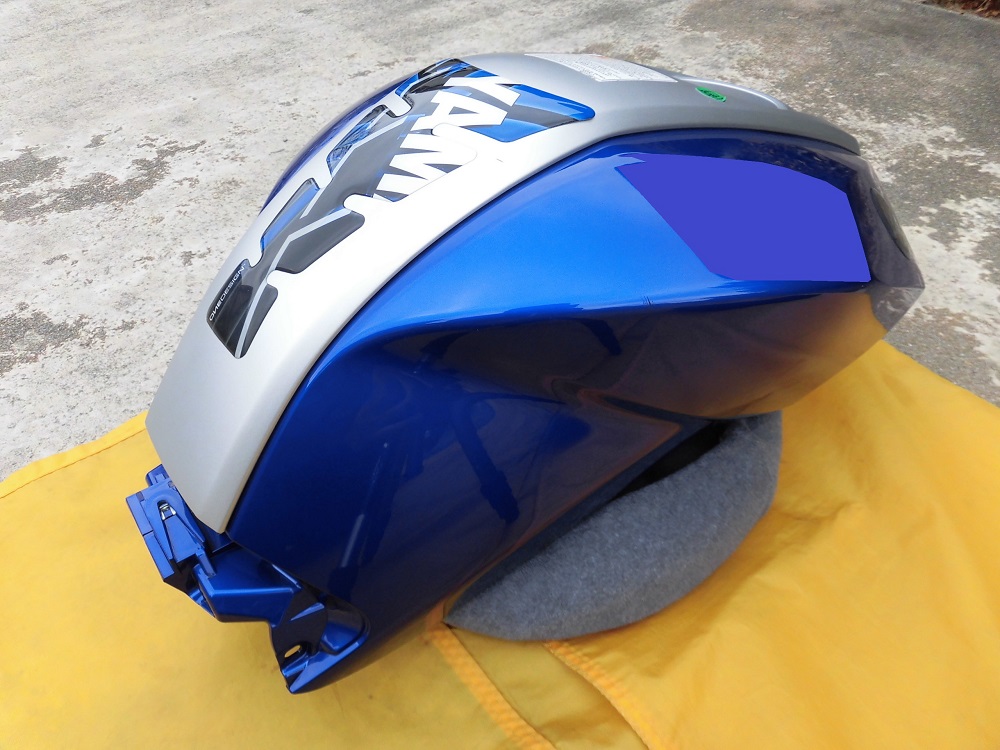
<How to place the fuel tank cover>
A little care is also needed in the placement, with a cushion before placing the fuel tank cover.
Scratched fuel tank cover 2
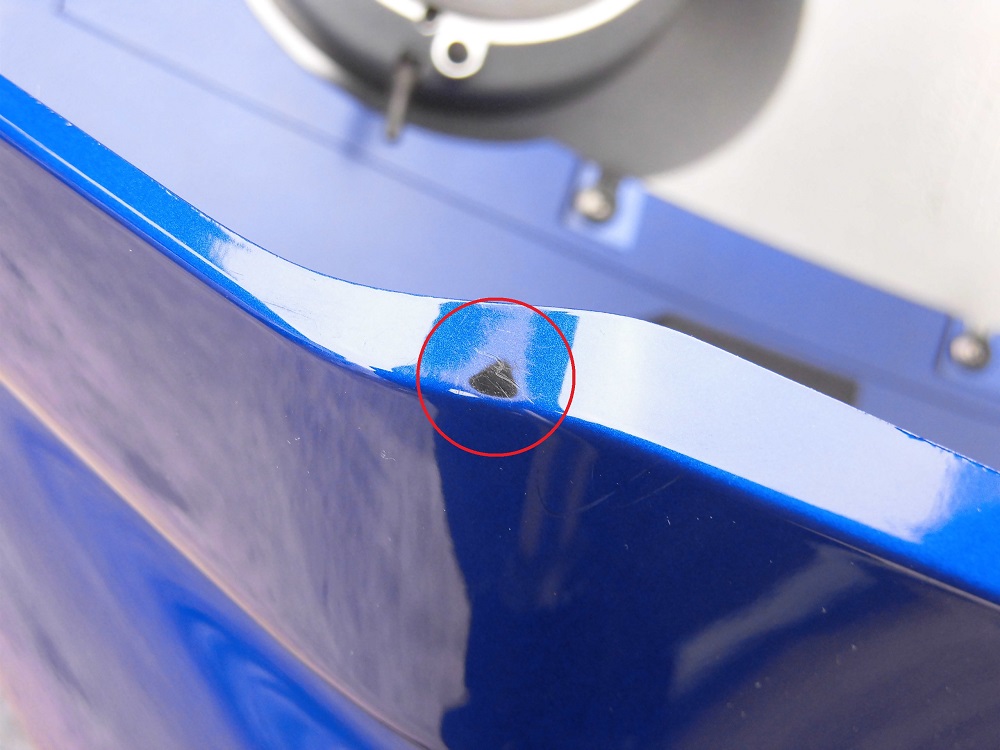
<Scratched fuel tank cover 2>
In fact, when it was placed directly on the table, the part that touched it rubbed, and the undercoat came out.
Neither the scratches on the STEP 6 nor these scratches are directly visible, but I am still disappointed.
Condition of fuel tank
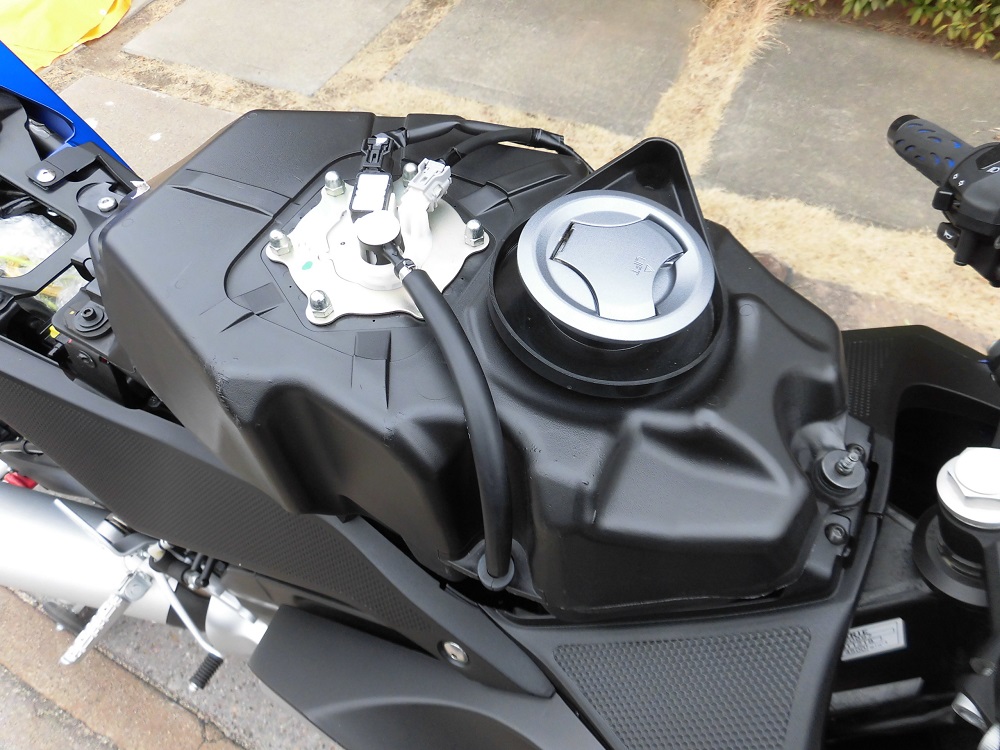
<From right front>
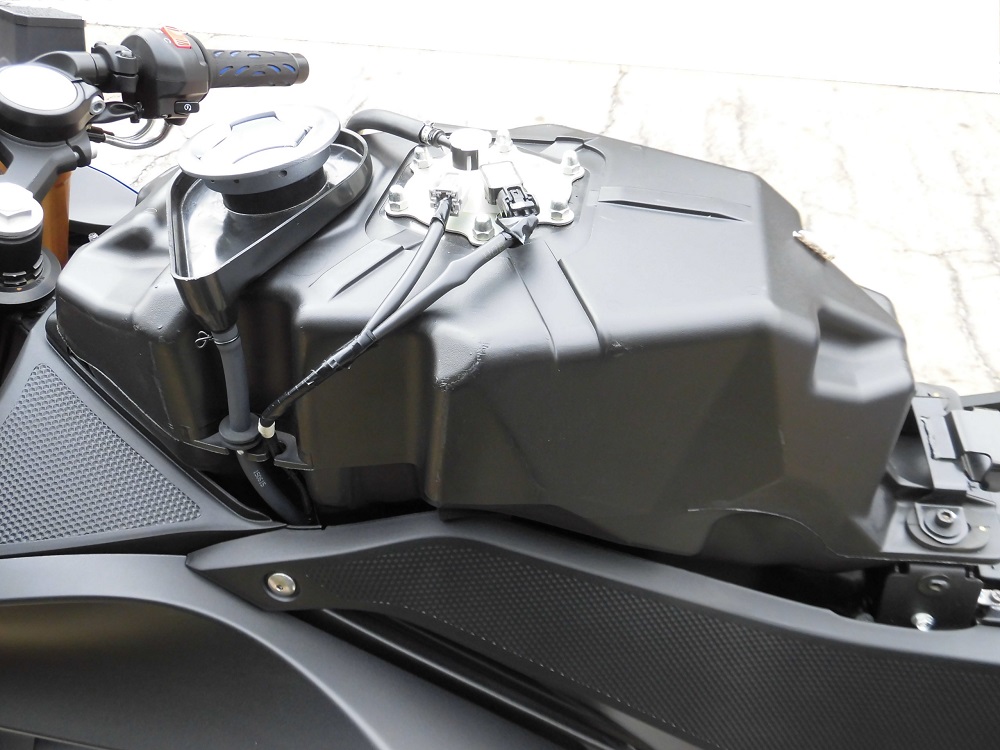
<From left rear>
Compared to the photo of the fuel tank of the earlier 5D7 model, the later model seems to have a different shape.
I had read in the article that the tank capacity was smaller, but the shape is quite different too.
3. Summary
I have shown you how to remove the fuel tank cover.
There is a little resistance as the force is applied in the direction of widening the cover, but it has been repeated more than 10 times and so far, it has not cracked.
- When removing the cover, remove not only the bolts and nuts that secure it to the vehicle body side, but also the screws that secure the left and right sides.
- When removing the cover, spread it slightly to the left and right.
To avoid scratching the cover, - Protect the steering head bolt with a microfiber cloth or similar.
- Place the removed cover on a cushion or similar.
