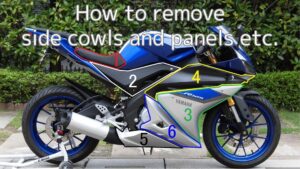
Following the maintenance record ‘How to remove and install side cowls, panels, etc.’, this section summarizes ‘How to remove and install rear cowls, panel, etc.’.
If you could remove the rear cowl panel, it can be useful when carrying out the following tasks.
- Installation of a tail tidy
- Replacing rear turn signals (e.g. with LEDs)
- Installation of a theft alarm or drive recorder unit
- Replacing damaged cowl/panel
Working with the rear cowl/panel removed allows the wiring to be routed freely, making it look like a genuine part.
From this article you will know as follows.
- How to remove rear cowls, panel, etc.
- How to remove and attach push rivets
- How to avoid losing removed bolts etc.
| Date | 12th June 2021 |
| Subjects | Maintenance, Failure, Repair |
| Shop or DIY | DIY |
| Difficulty | |
| Working hours | 0.5 |
| Costs | 0 Yen (Use what I have) |
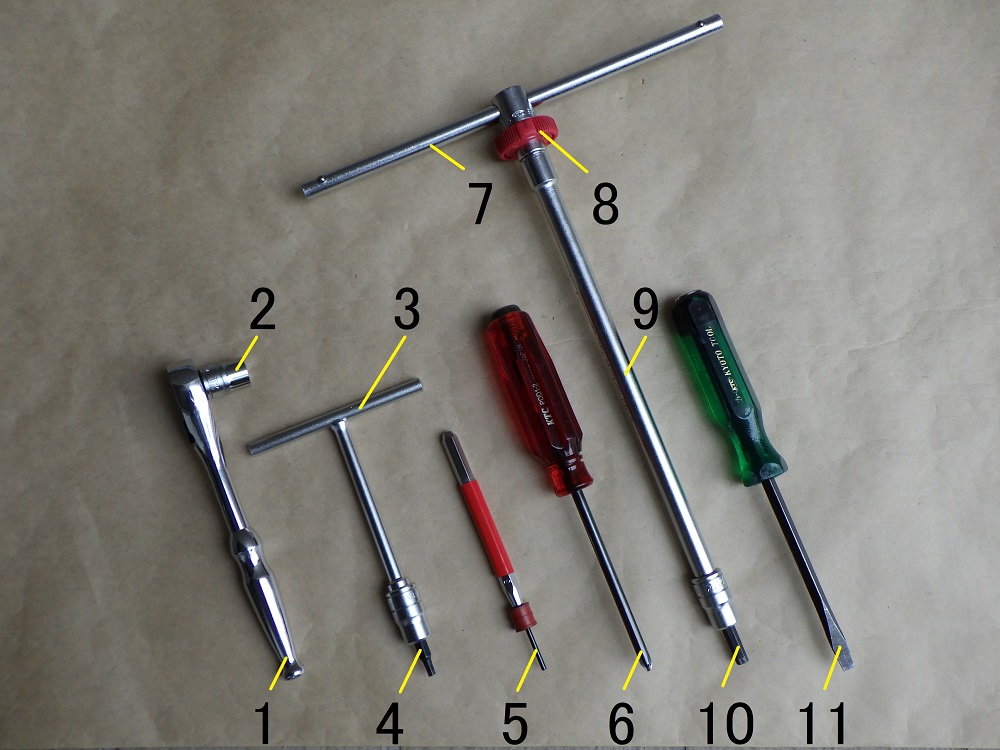
1. Goods to use
| No. | Name | Manufacturer | Products number | Quantity | Amounts[Yen] |
| 1 | Ratchet wrench | KTC | BR3E | 1 | 6,182 |
| 2 | Bit socket (12mm) | KTC | BT3-12 | 1 | 880 |
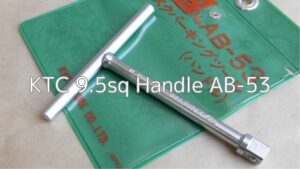
| 3 | Handle | KTC | AB-53 | 1 | 1,430 |
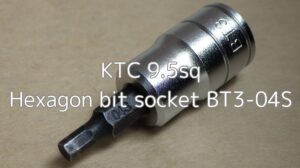
| 4 | Hexagon bit socket (4mm) | KTC | BT3-04S | 1 | 1,012 |
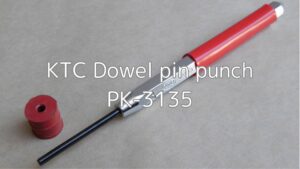
| 5 | Dowel pin punch (3mm) | KTC | PK-3135 | 1 | 1,173 |
| 6 | Screwdriver (No.2 Phillips) | KTC | PDD1-2 | 1 | 1,562 |
| 7 | Slide head handle | KTC | BHM3 | 1 | 2,970 |
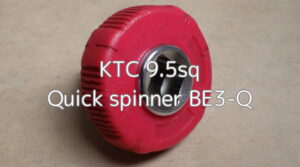
| 8 | Quick spinner | KTC | BE3-Q | 1 | 2,046 |
| 9 | Extension bar (250mm) | KTC | BE20-250 | 1 | (2,783) |
| 10 | Hexagon bit socket (6mm) | KTC | BT3-06S | 1 | 1,012 |
| 11 | Screwdriver (6mm flat head) | KTC | MDM-150 | 1 | (1,529) |
| 22,579 |
*If you have a hexagonal spanner and a pin punch substitute (such as a pencil), you can remove everything except the box.
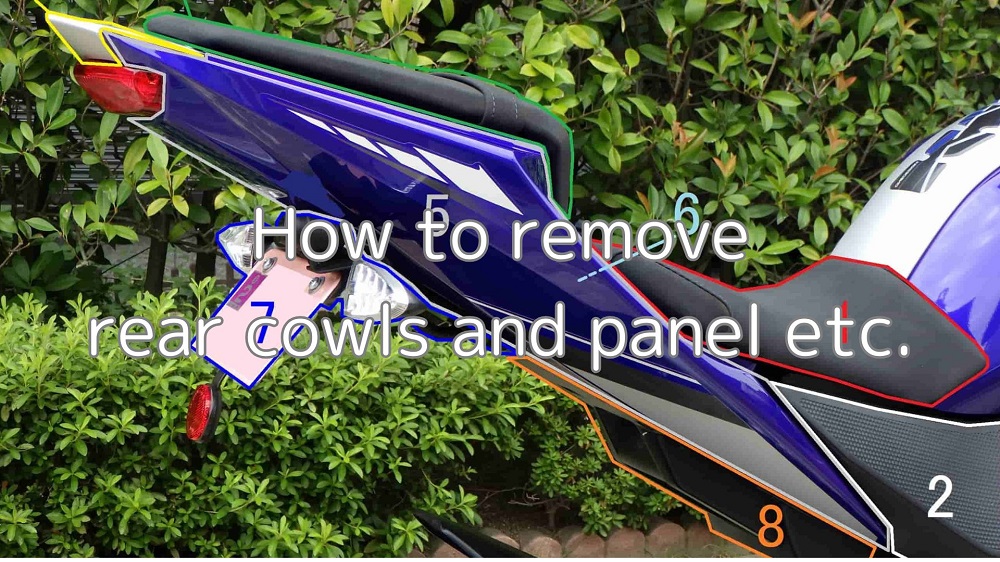
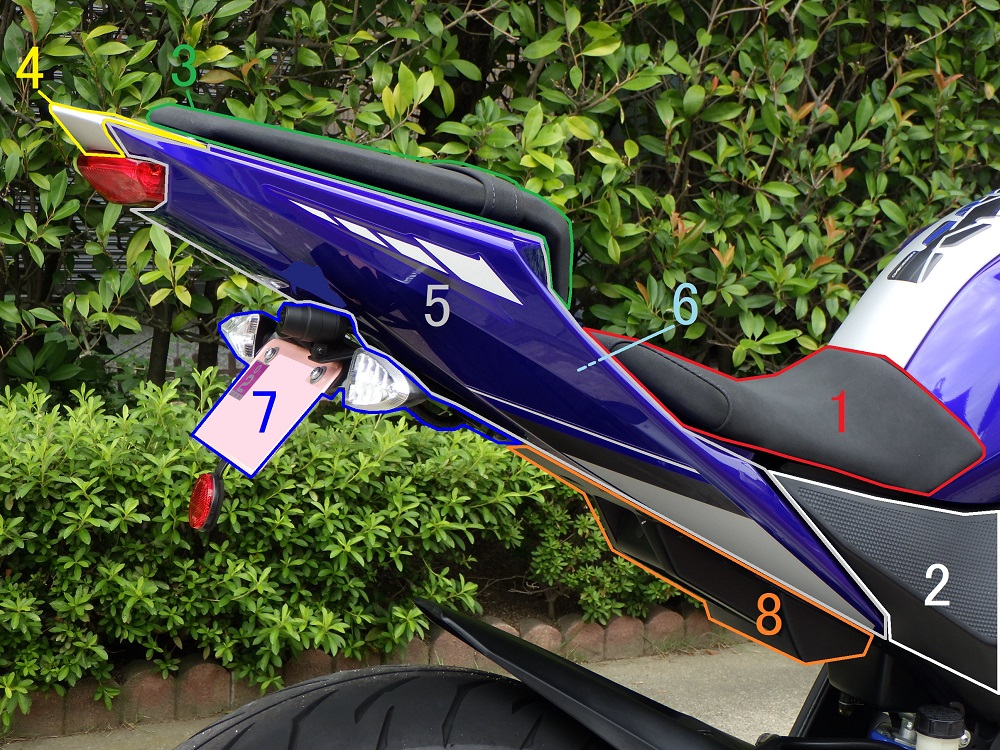
2. How to remove rear cowls and panel etc. (STEP 1-30)
Removal and installation sequence
Before starting work, the sequence of removal and installation is described.
I always remove and install in the following sequence, roughly in reverse sequence.
<Right side>
- Seat
- Side panel
- Passenger seat
- Rear panel
- Rear cowls
- Box (Internal)*1
- Original flap guard or tail tidy*2
- Mudguard
*1 It is easier to remove the mudguard if the box is removed.
*2 The photo shows the tail tidy.
Remove seat and side panels
Now let’s start the work.
First, remove the seat and side panels.
(For more information, see STEP 2-4 in the maintenance record ‘How to remove side cowls and panels etc.’).
Remove passenger seat 1
The passenger seat is secured by a nut.
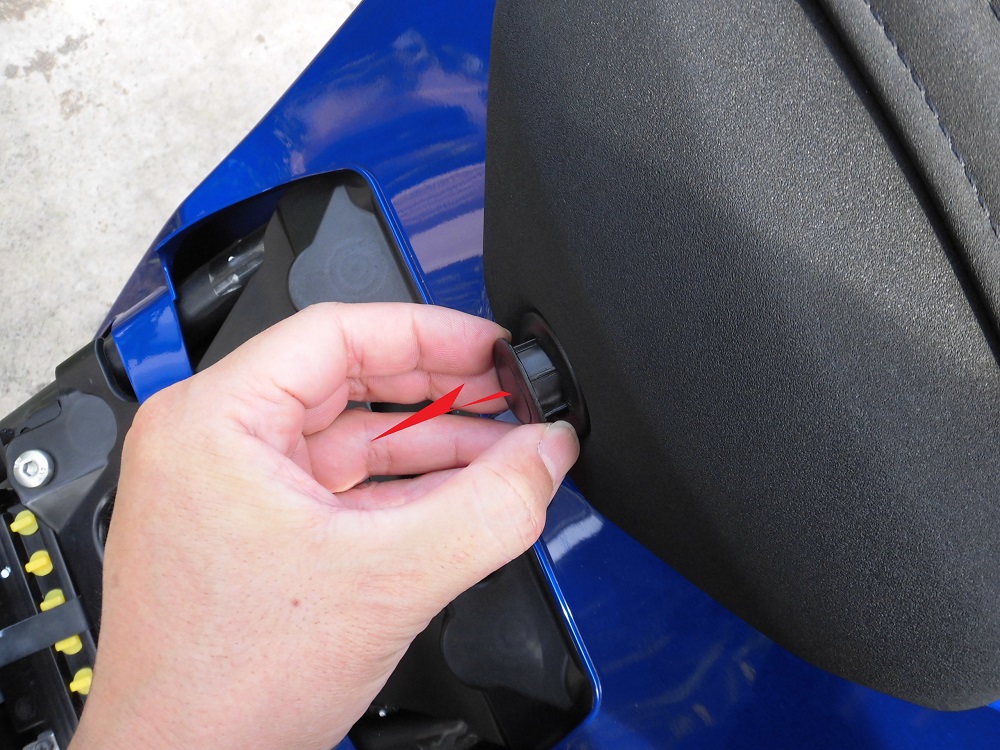
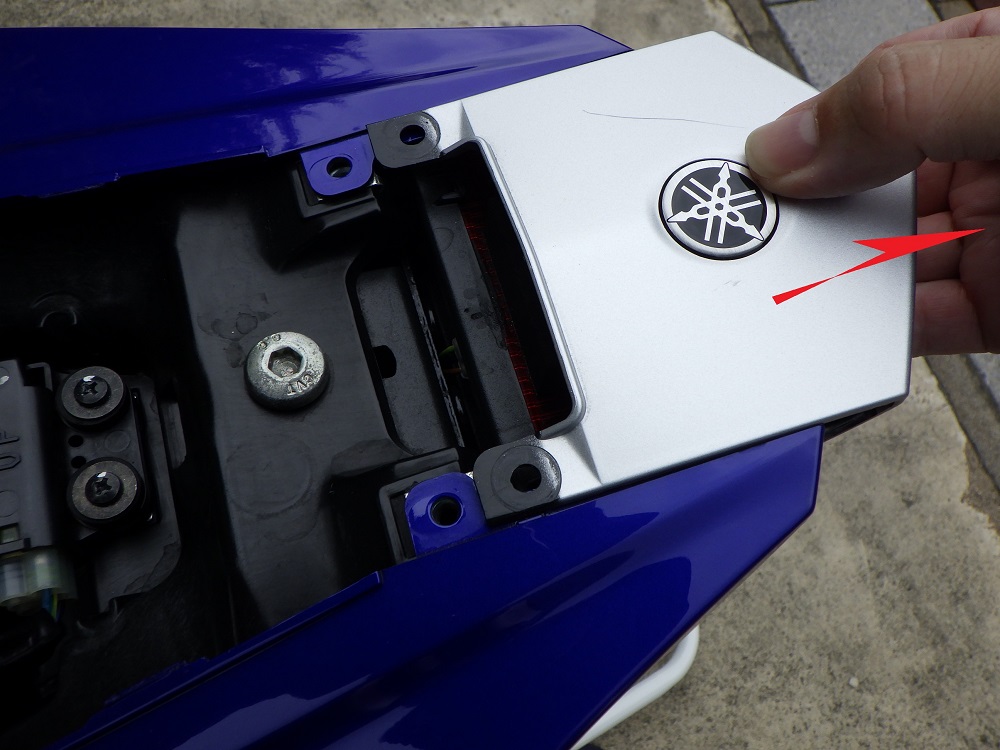
<Remove passenger seat 1>
Remove the cover with my fingers.
It came off surprisingly easily, so I’m a bit worried that I might lose it.
Remove passenger seat 2
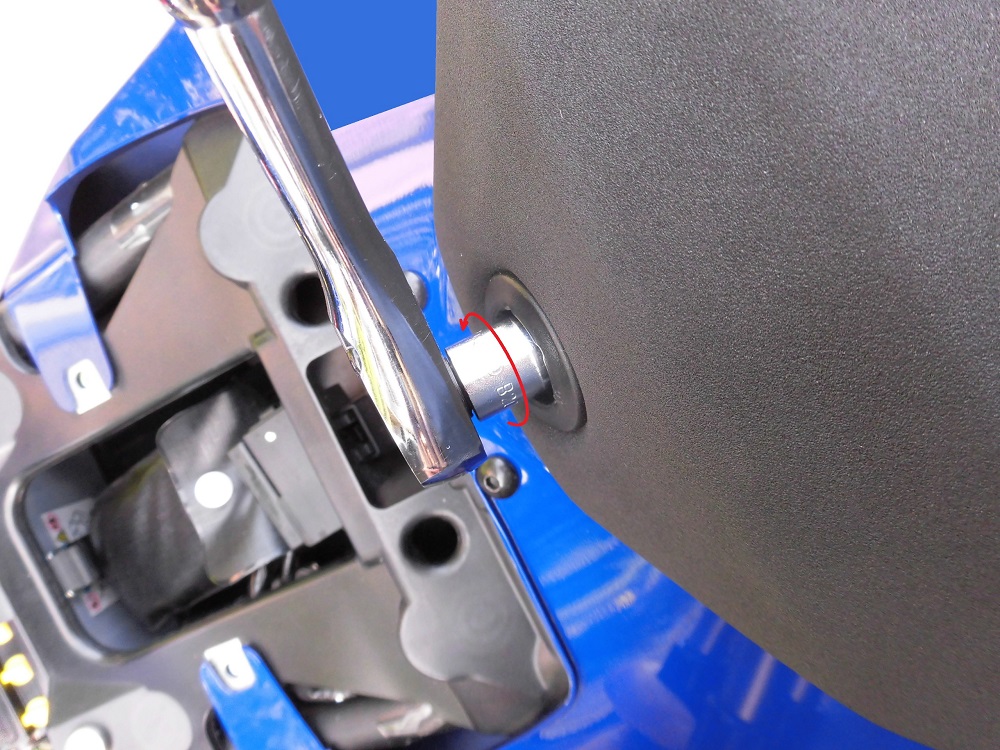
<Remove passenger seat 2>
Using a ratchet wrench with a socket (12 mm), remove the nut securing the passenger seat.
Remove passenger seat 3
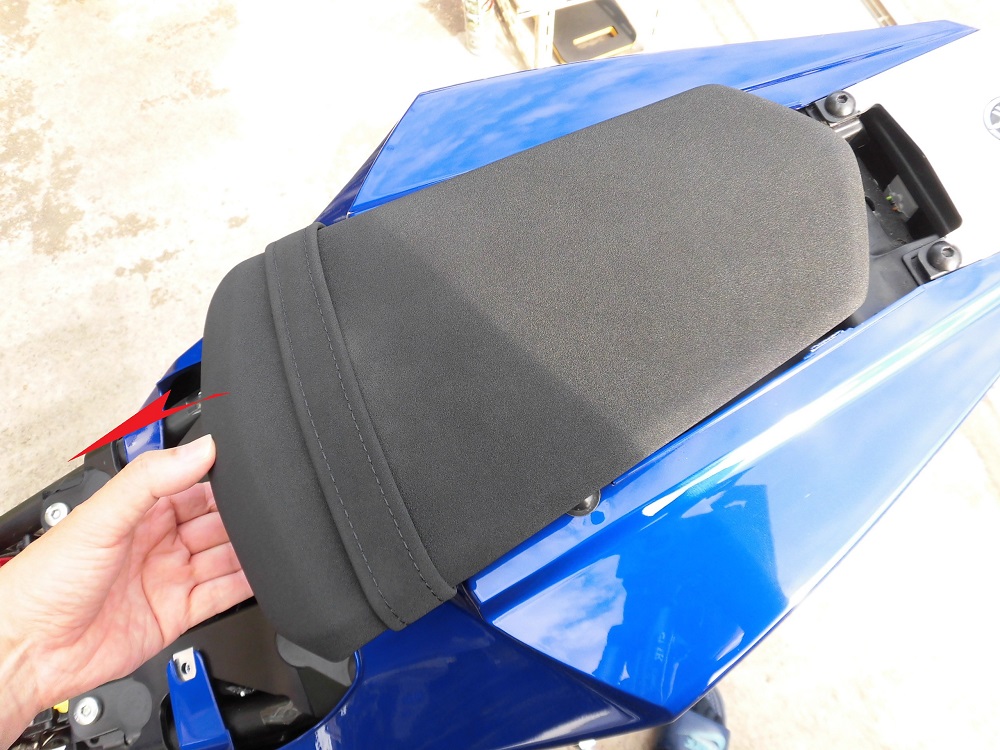
<Remove passenger seat 3>
The passenger seat can then be removed by pulling it forward.
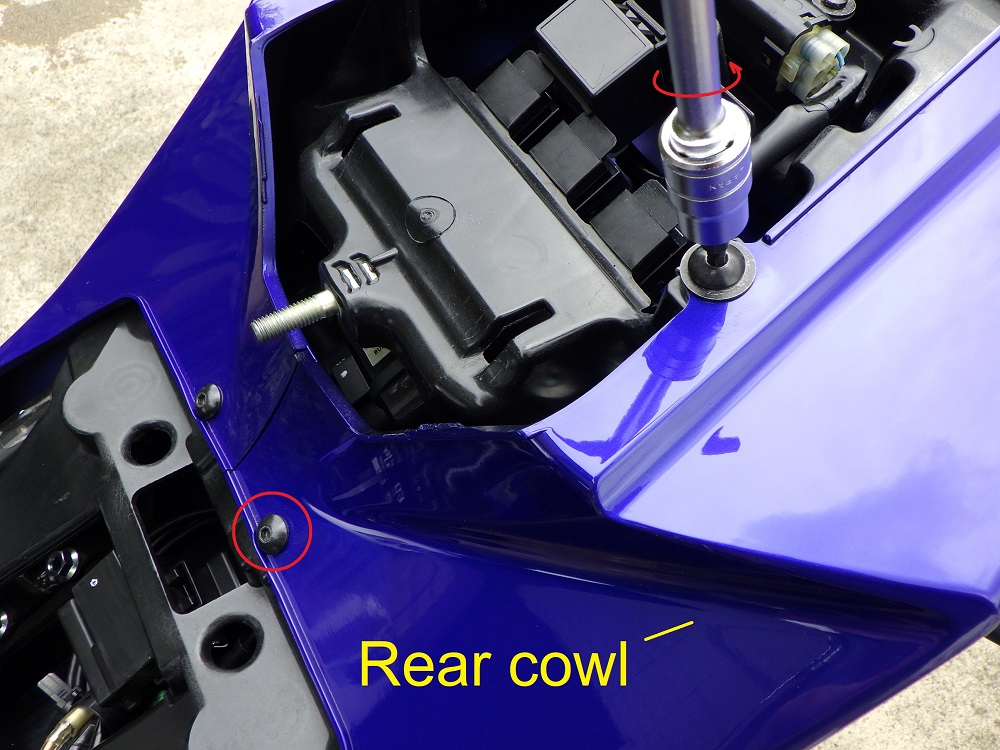
Remove rear panel 1
Next, remove the rear panel.
The rear panel is held in place with the rear cowl by two bolts.
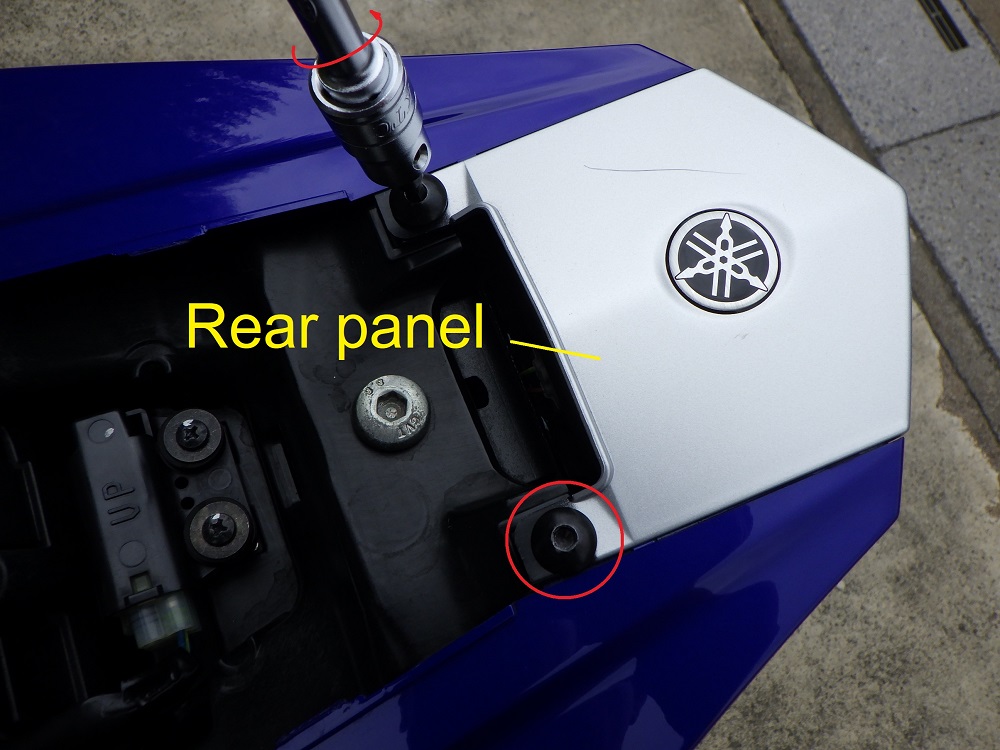
<Remove rear panel 1>
Using a handle fitted with a hexagon socket (4 mm), remove the two bolts securing the rear panel.
Remove rear panel 2
<Remove rear panel 2>
Remove the rear panel by pulling it slightly backwards.
Rear panel protrusions
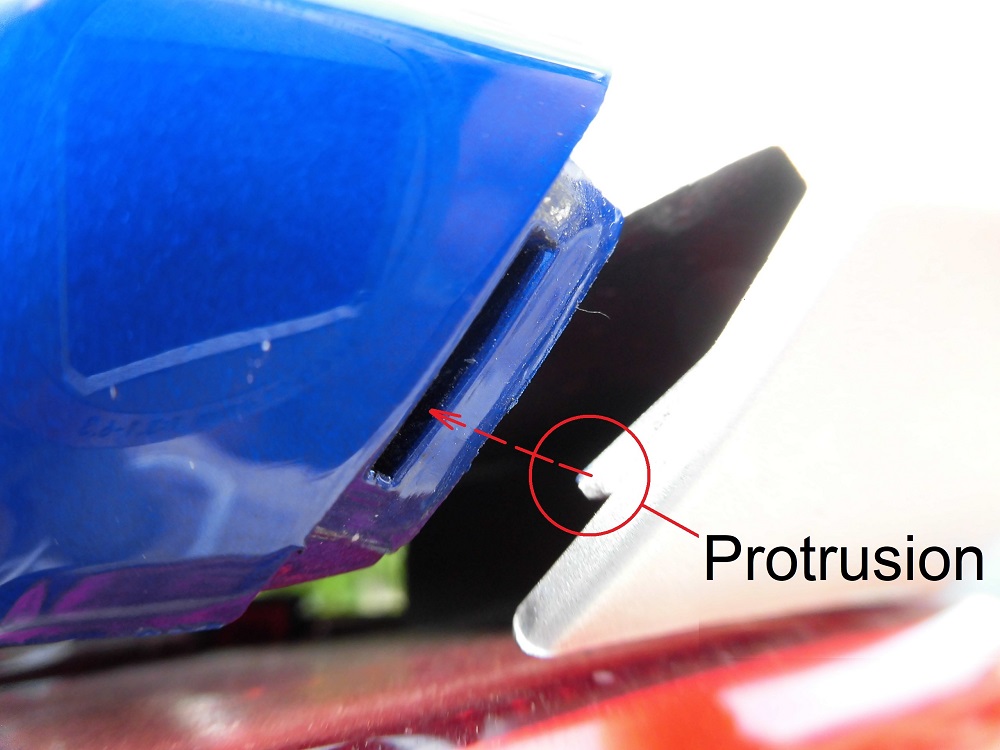
<Rear panel protrusions>
Remove the rear panel first because of the protrusions.
If the side cowl is removed first, take care not to damage the rear panel protrusions.
Remove rear cowl 1
Next, remove the rear cowl.
The rear cowl (left) is held in place by three bolts, a tapping screw and three push rivets.
<Remove rear cowl 1>
Using a handle with a hexagon socket (4 mm), remove the bolts (remaining two) securing the rear cowl (left).
Remove rear cowl 2
<Remove rear cowl 2>
With a pin punch (3 mm), remove the two push rivets securing the rear cowl (left) to the mudguard.
The push rivets can be removed by pushing in the middle part.
Structure of push rivets
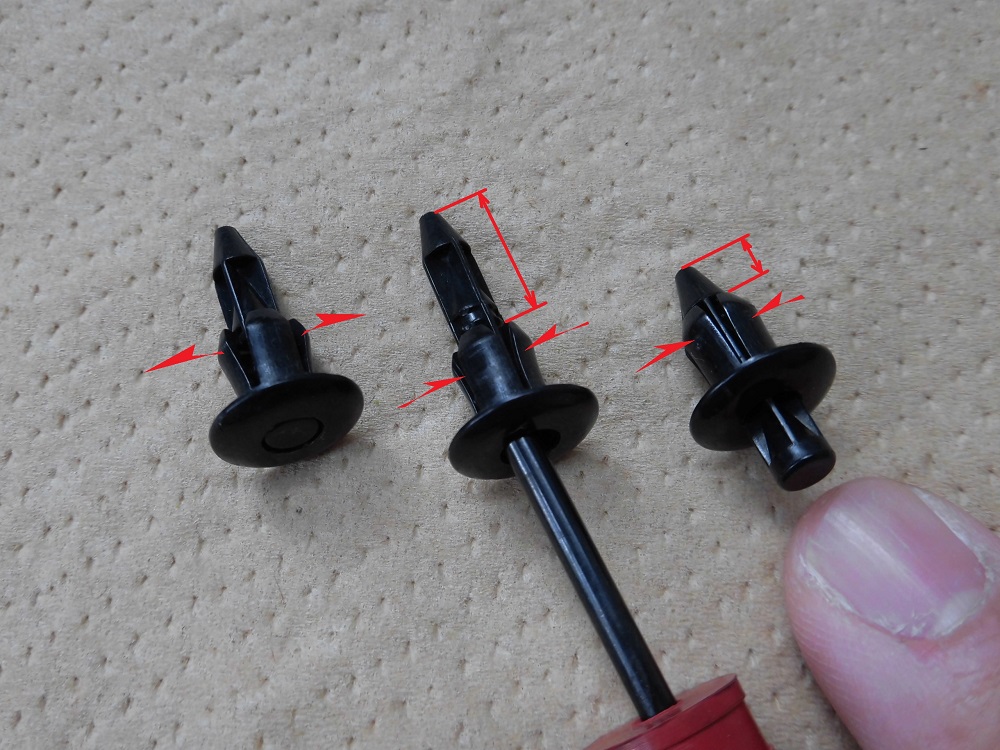
<Structure of push rivets>
The following is a summary of how to remove and install the push rivets.
Left: Installed… Wedge works and cannot be removed.
Middle: When removing … Push in the pin and then remove the rivet.
Right: When installing … Push the pin after the rivet has been installed.
Remove rear cowl 3
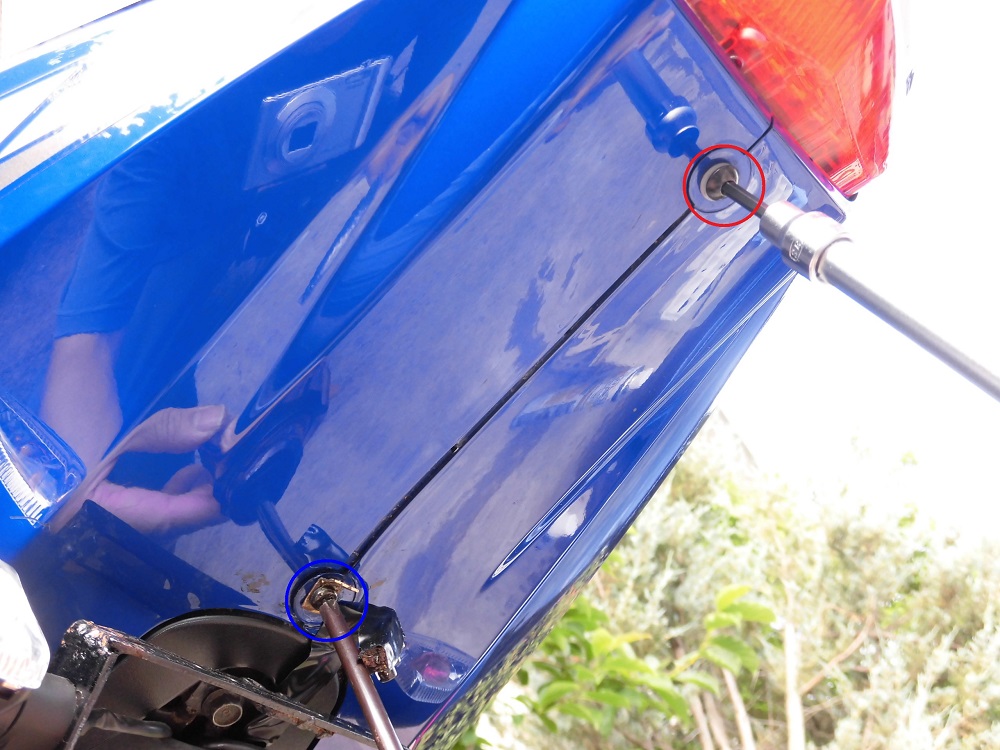
<Remove rear cowl 3>
Remove the two screws at the bottom of the rear cowl that hold the left and right sides together.
○: Remove with a handle with a 4 mm hexagon socket.
○: Remove with a Phillips screwdriver*.
*
At the time of purchase, a one-off tail tidy was fitted and bolted in place.
A push rivet is originally provided.
Remove rear cowl 4
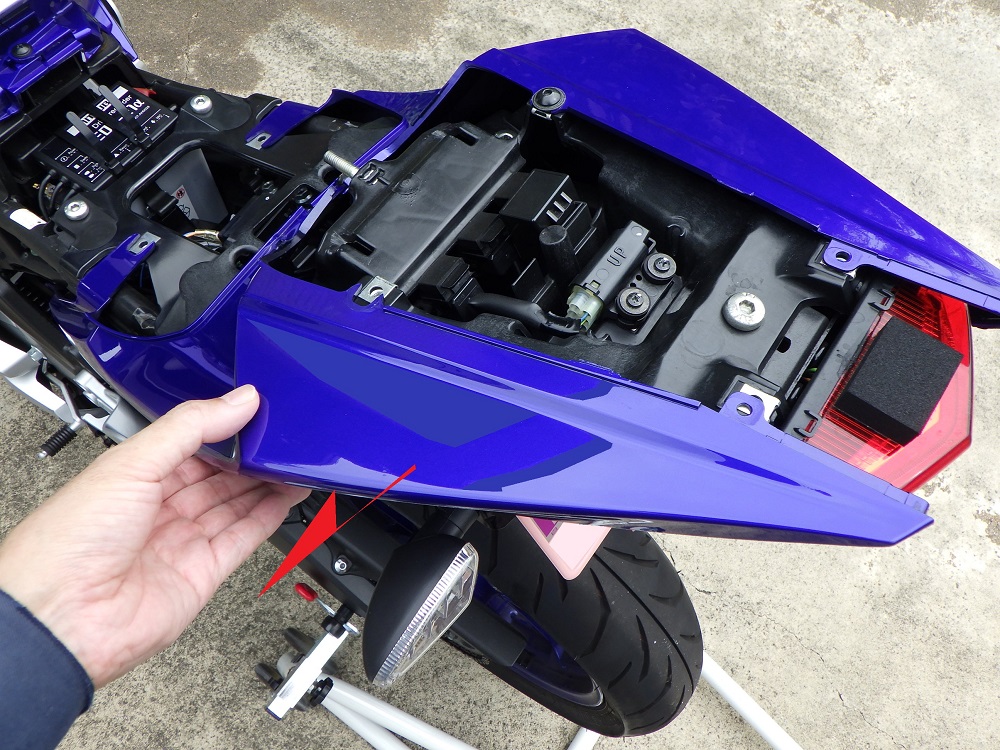
<Remove rear cowl 4>
It can then be removed by pulling it to the side.
Removed rear cowl bolts
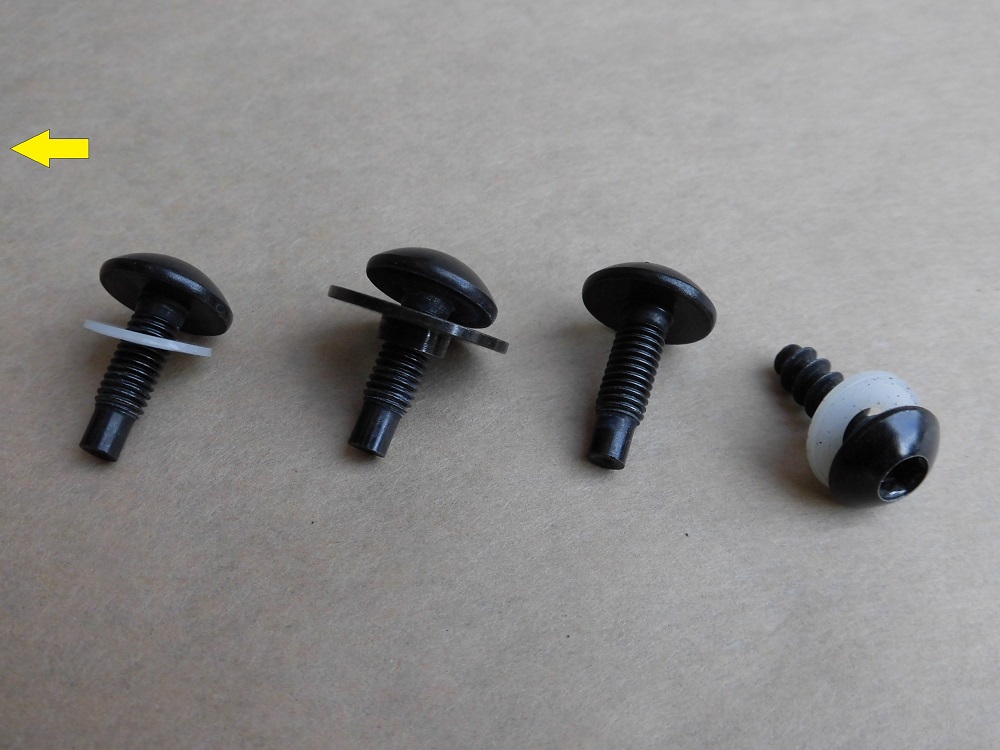
<Removed rear cowl bolts>
The left side is the forward side.
The three bolts on the upper side of the cowl are the same, but with or without washers.
The one on the lower side of the cowl is a tapping screw.
Remove the rear cowl (right) in the same way.
Condition of removed rear cowls and panel
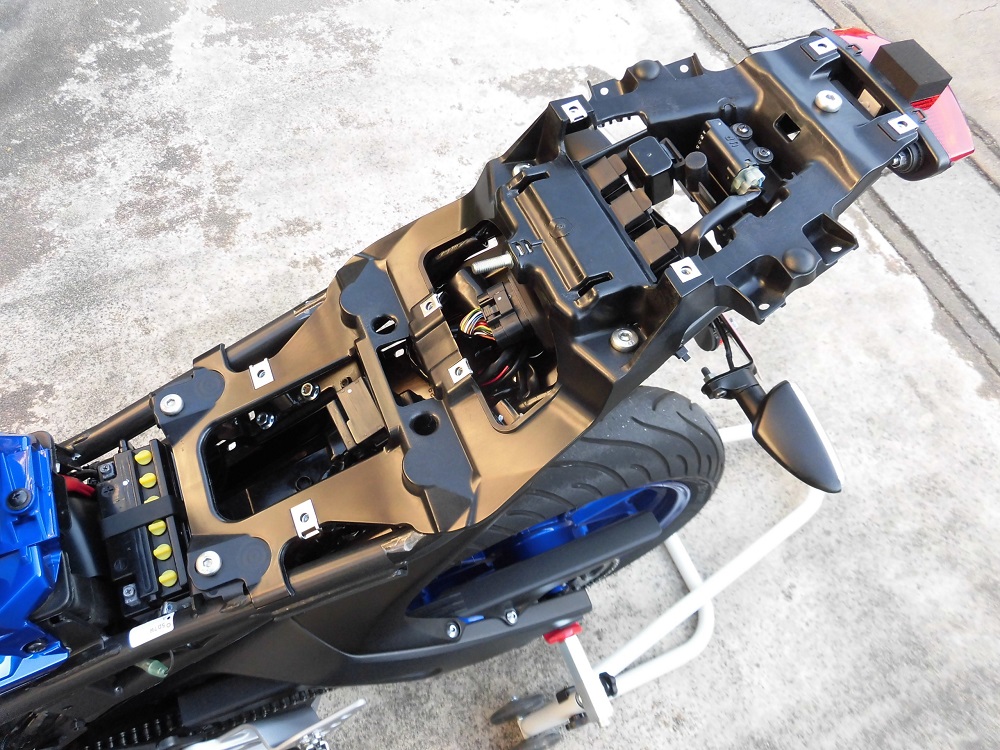
<Condition of removed rear cowls and panel>
It looks like this.
Remove battery
In addition, remove the box and mudguard.
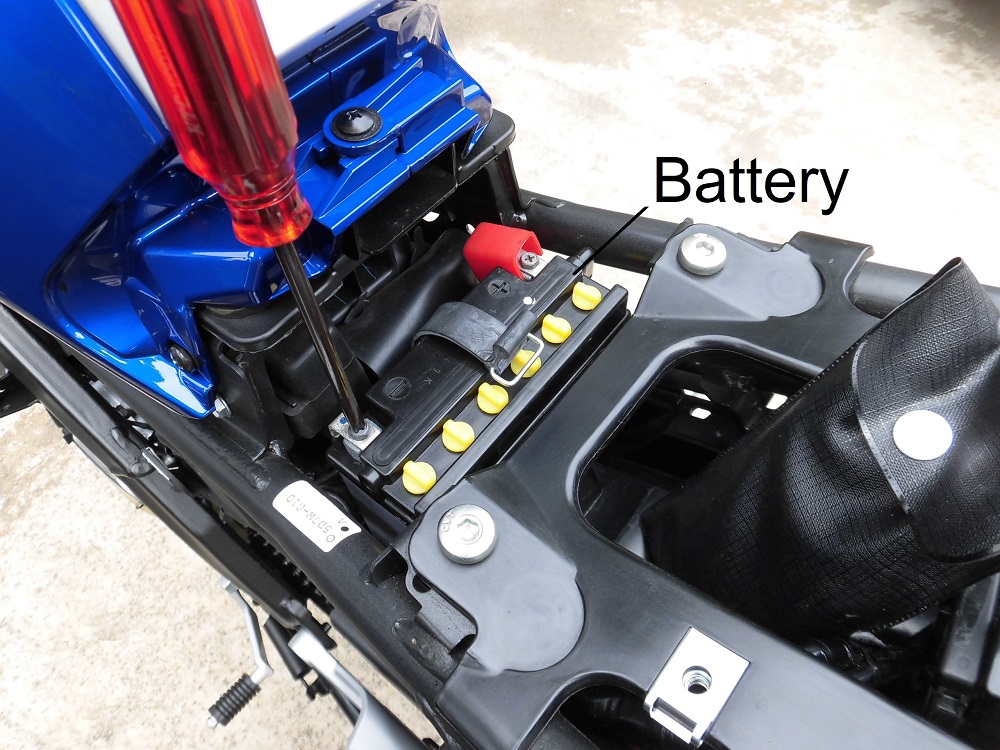
<Remove battery>
Move the on-board tools and disconnect the battery.
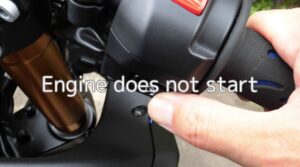
(For information on how to disconnect the battery, see STEPs 6 to 10 in the maintenance record ‘Engine does not start’).
Remove relays
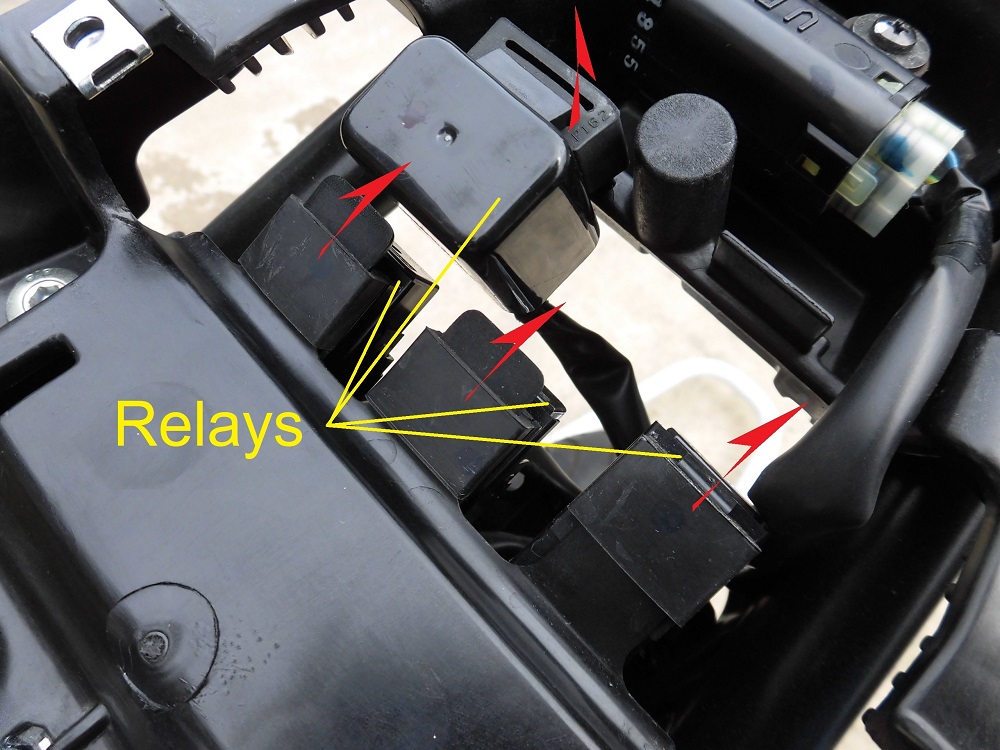
<Remove relays>
Remove four relays at the rear of the box by hand.
The rubber is inserted into a thin plate-like projection.
Remove lean angle sensor
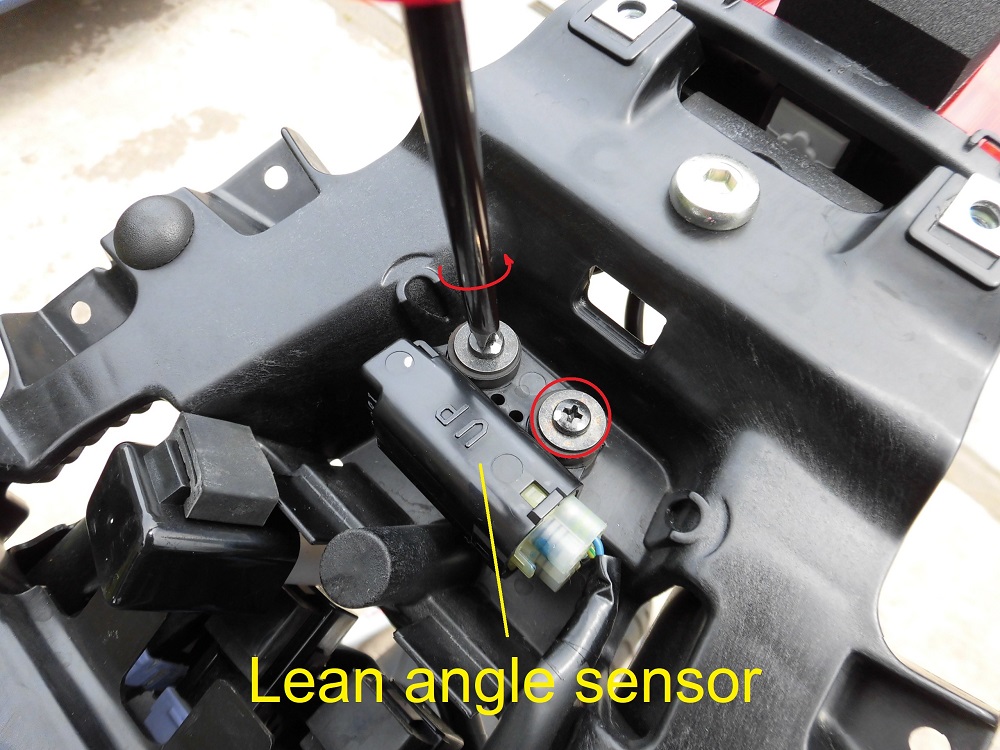
<Remove lean angle sensor>
Use a Phillips screwdriver (No. 2) to remove two screws securing the lean angle sensor.
I can disconnect the connector, but this time I removed the entire lean angle sensor in order to wash the box.
I am a little worried that the sensor setting might shift.
Remove box 1
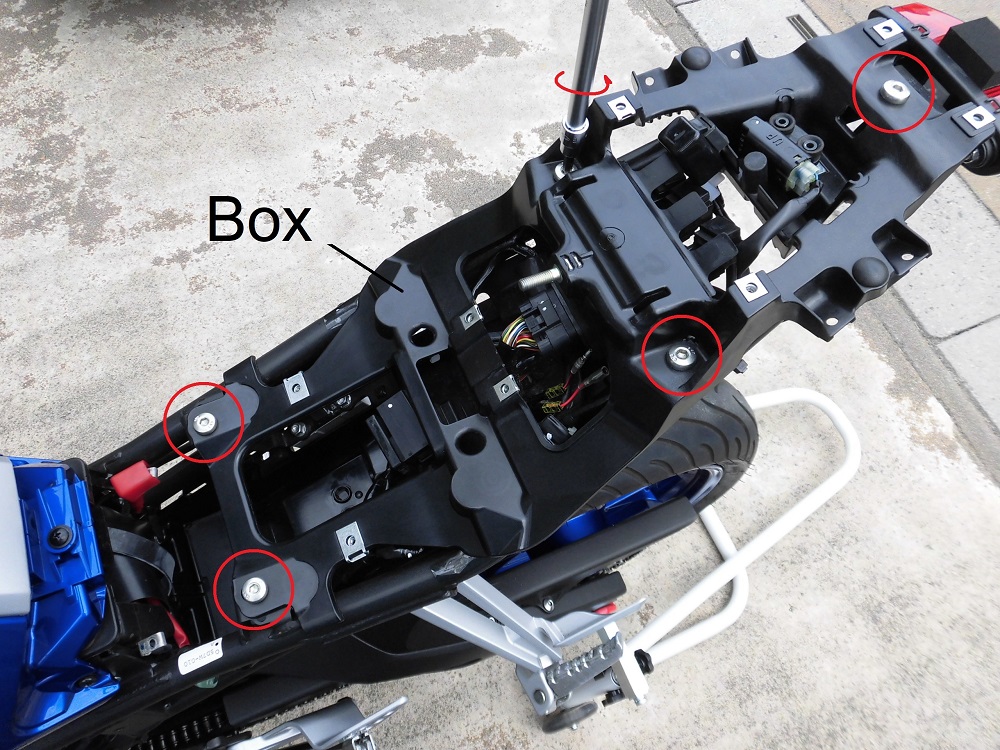
<Remove box 1>
Using a T-bar handle with a hexagon socket (6 mm), remove five bolts securing the box.
They are quite hard as they have a high-strength thread locker.
I slightly regret removing them.
Remove box 2
<Remove box 2>
The box can then be removed by passing a set of relays through the holes in the box.
The box is made of plastic (PA), but it is heavy and quite sturdy.
The early 5D7 does not seem to have one, so is this a measure to make room for the ABS actuator?
Or is it a measure to reduce the number of welding points and cut costs?
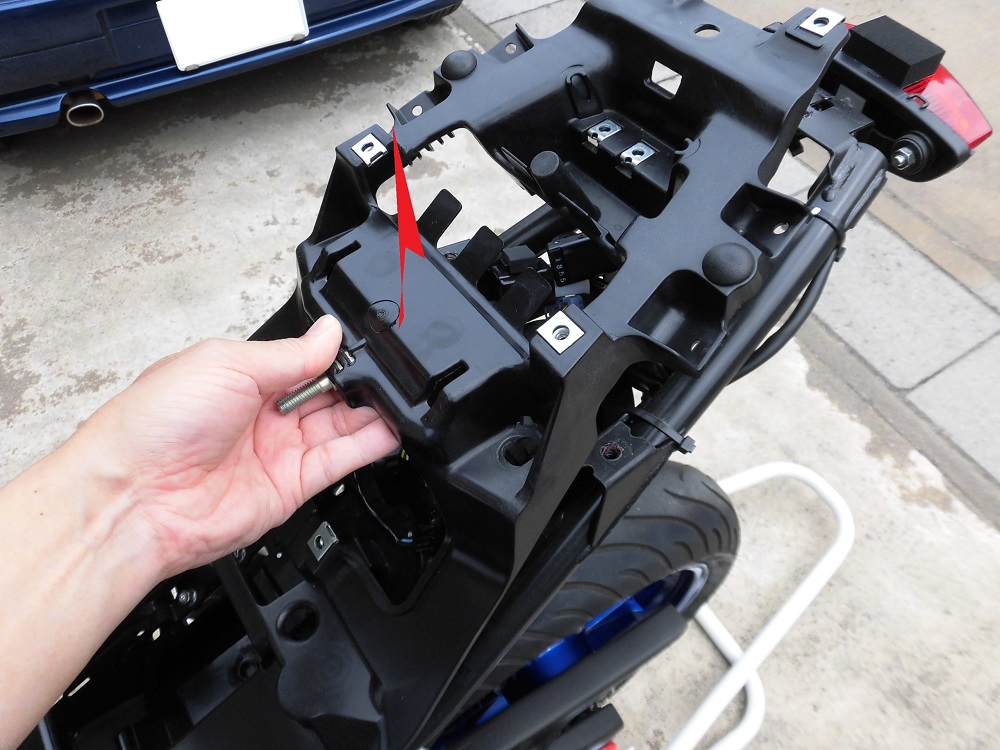
Condition of removed box
<Condition of removed box>
In this condition, the passenger step bolts are easy to remove.
(For more information, see the maintenance record ‘Removing passenger brackets and footrests’, to be described at a later date.)
Repairing electrical tape
I noticed that the electrical tape wrapped around the base of the wires connected to the relay had come off.
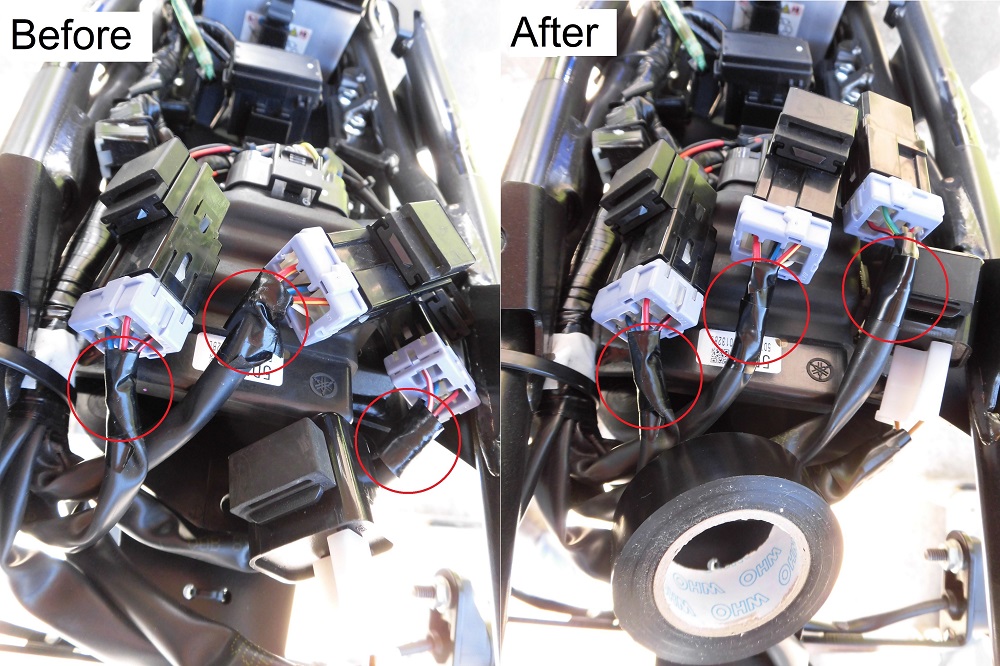
<Before and After comparison>
I took the opportunity to rewind it.
Before removing the mudguard
In addition, the mudguard must be removed.
But first the original flap guard or tail tidy must be removed.
(For more information, see maintenance record ‘Change tail tidy’, which will be described at a later date.)
Remove fuse box
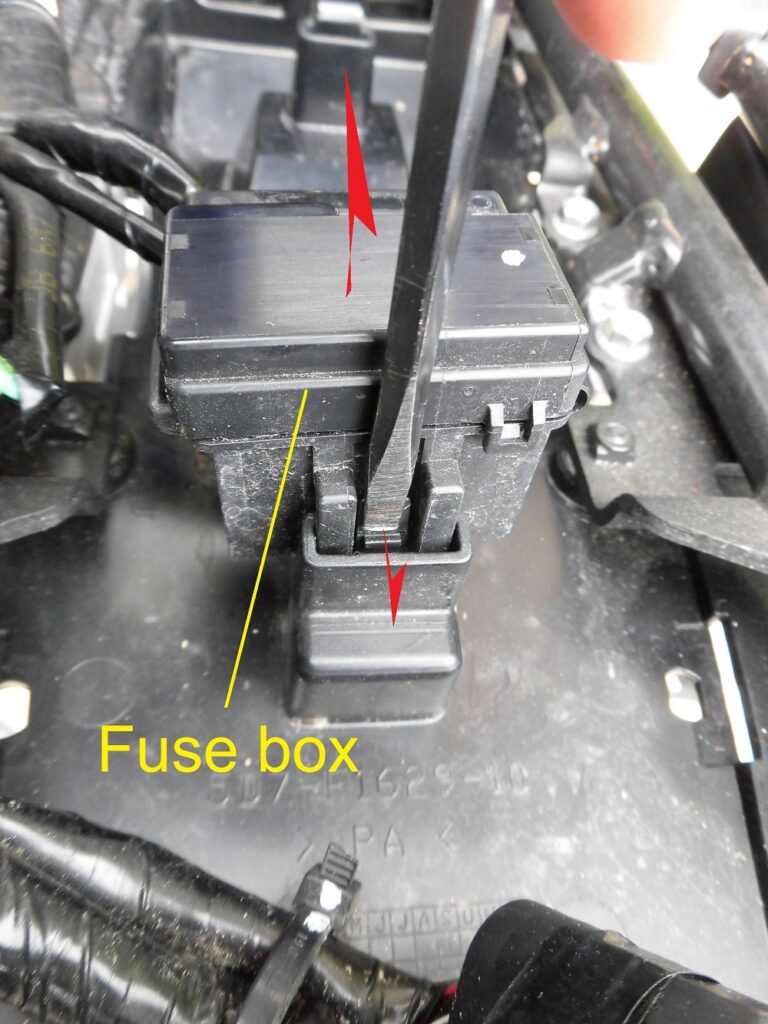
<Remove fuse box>
Remove the fuse box fixed to the mudguard.
Use a flat head screwdriver to push the claw and lift it off.
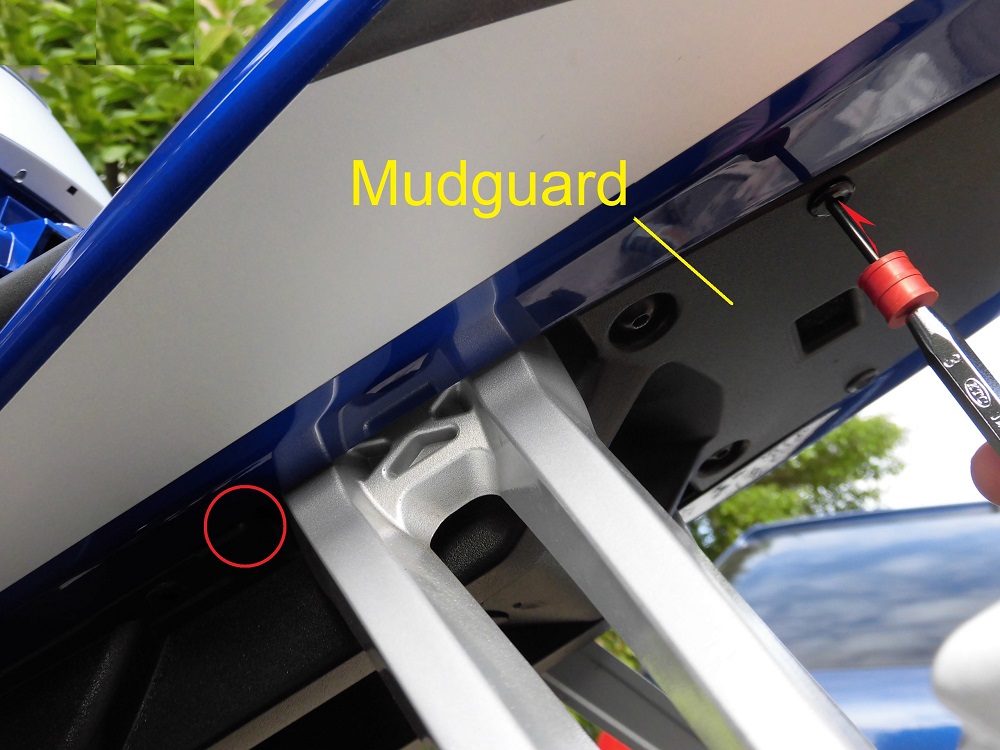
Remove mudguard 1
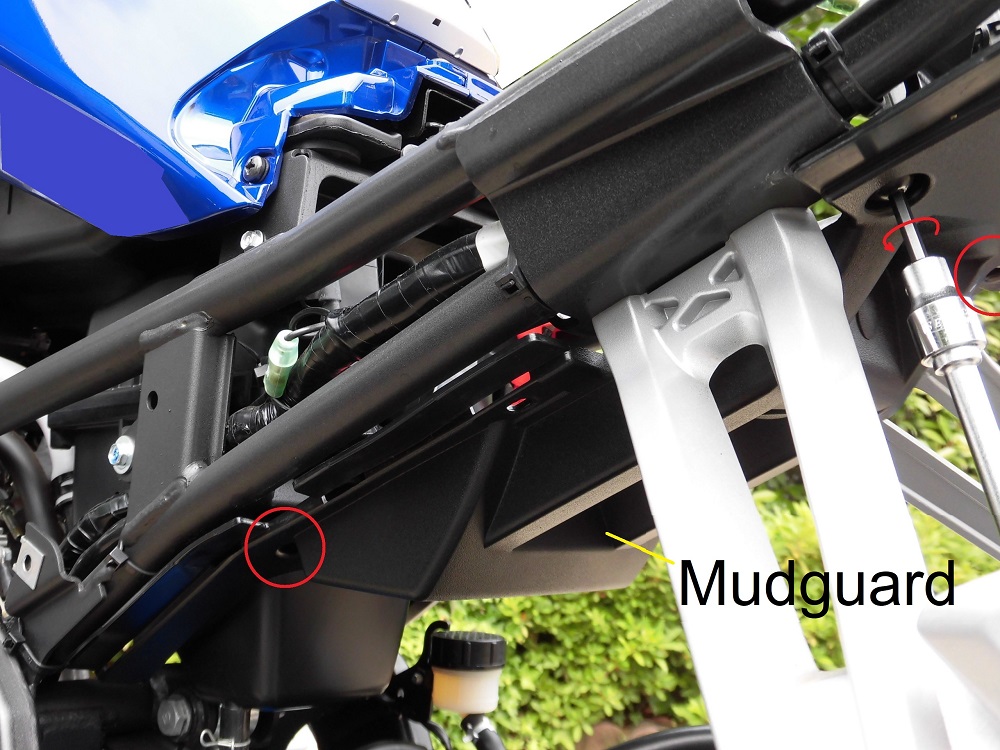
<Remove mudguard 1>
Using a handle fitted with a hexagon socket (4 mm), remove four bolts securing the mudguard.
Remove mudguard 2
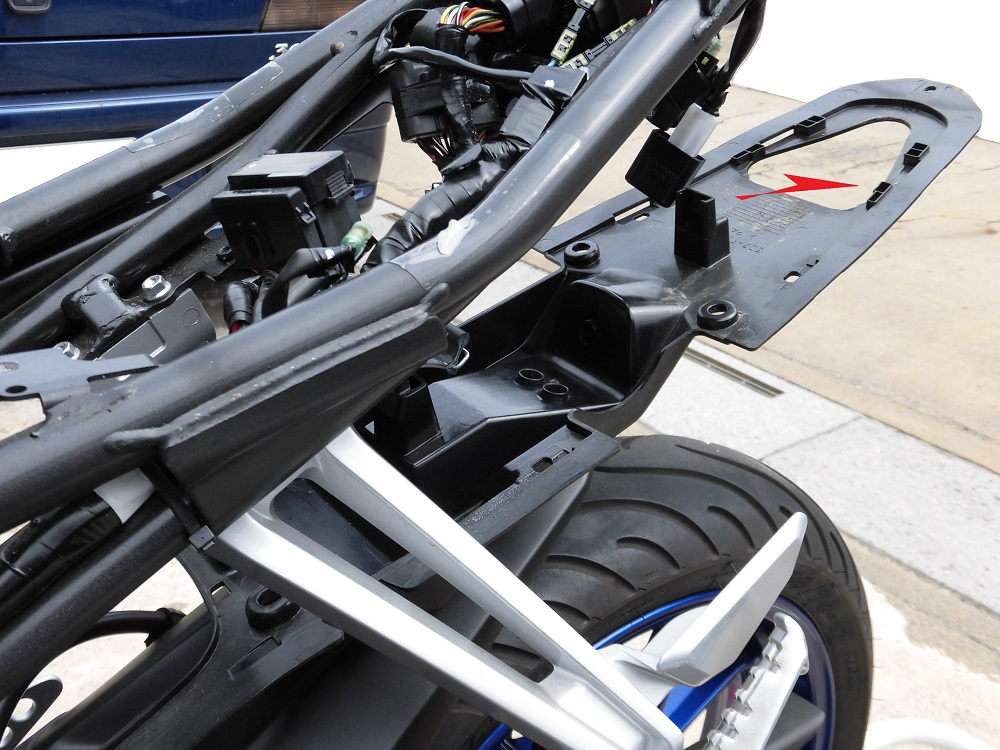
<Remove mudguard 2>
Now remove the mudguard backwards.
Take care not to drop the band securing the battery and the rubber plate laying on the bottom of the battery.
Removed cowl etc.
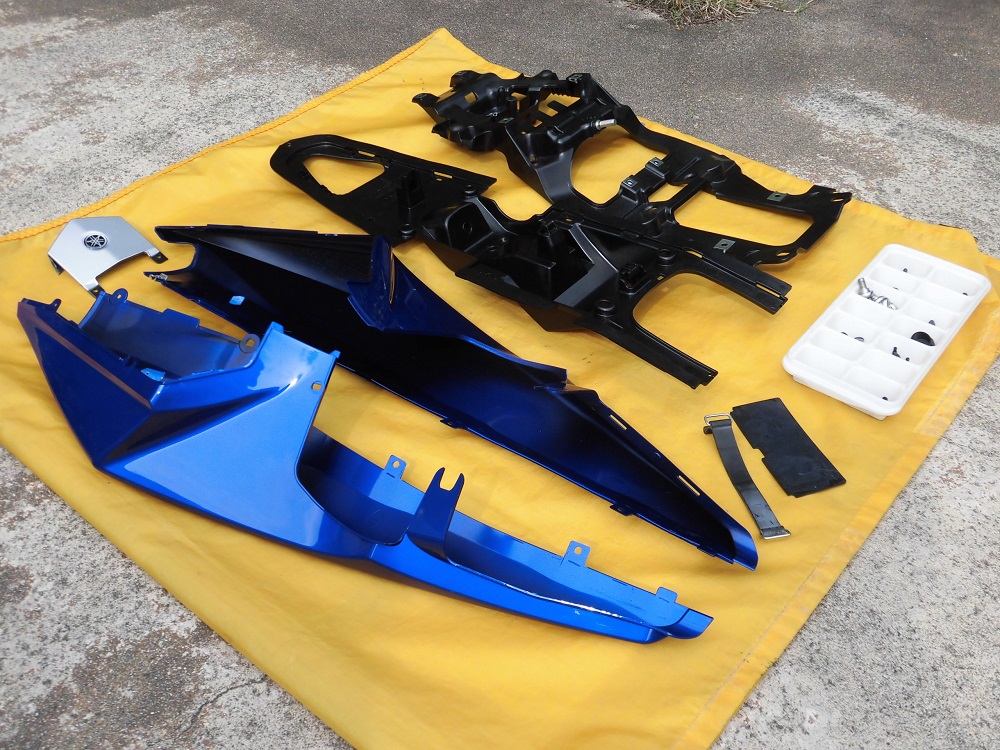
<Removed cowl etc.>
This is how the rear cowls, panel and others were removed.
Compared to the side cowls and panels, this one has the same number of parts, apart from the box.
By the way, in the 90s, the underside of the rear cowl was a bit scruffy.
It’s so cool that the R125 has a mudguard in addition to the rear wing, just like a racer with aerodynamics in mind.
Removed bolts etc.
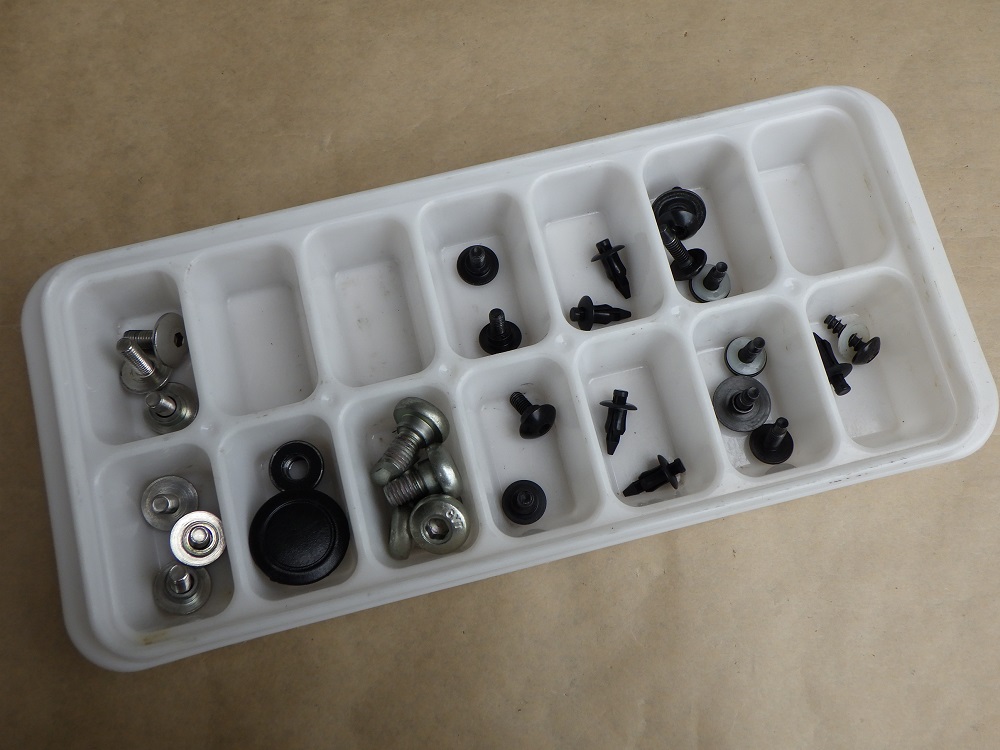
<Removed bolts etc.>
The bolts and other parts that have been removed are placed in the parts tray in the sequence in which they were removed or by part as far as possible.
This time, there were 29 in total. (Not including the lean angle sensor bolts).
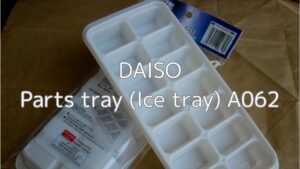
This parts tray is actually an ice tray purchased from a 100 yen store, but I recommend it because it is very easy to use.
It has two rows, so it can be used separately on the left and right side.
Condition of removed cowls and panel etc. 1
<Condition of removed cowls and panel etc. 1>
Full strip on the rear side.
There may be few opportunities to remove this much in normal maintenance.
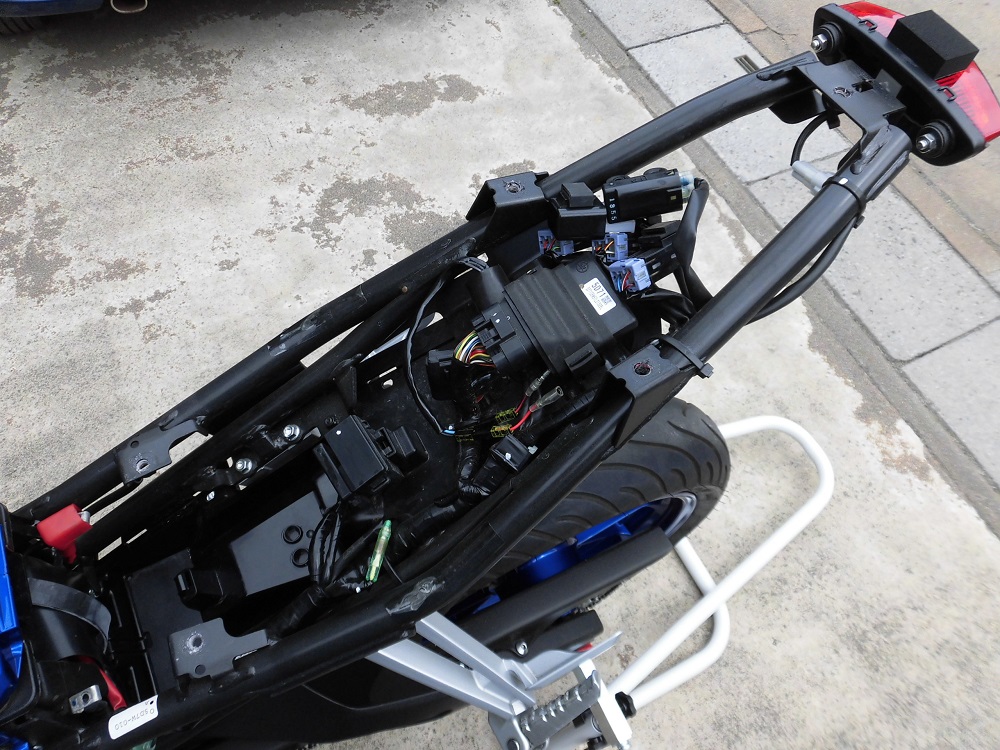
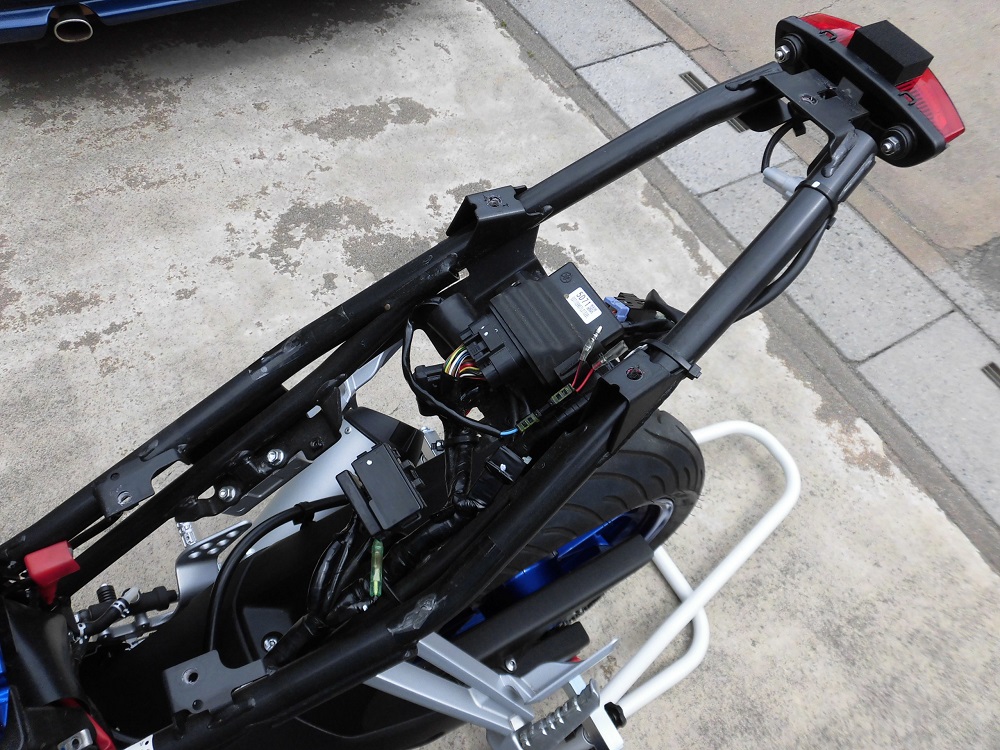
Condition of removed cowls and panel etc. 2
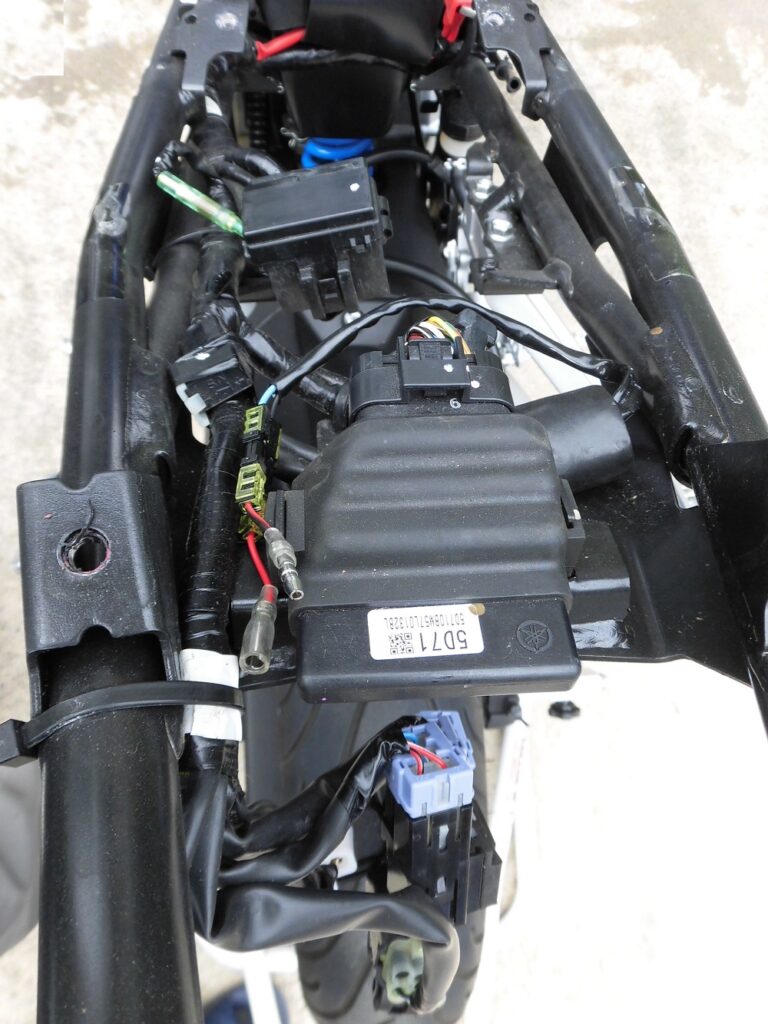
<Condition of removed cowls and panel etc. 2>
The mudguard has been removed, so the relay and fuses will hang down though,
- Wiring is fixed to the left seat rail.
- The computer is mounted on a bracket between the seat rails.
So, it won’t fall off.
3. Summary
We showed you how to remove the rear cowls and panel, etc.
I set the working time at 30 minutes, but if you only need to remove the rear cowl/panel, it will take less than 15 minutes.
So, why not remove it and wash it once?
- Make sure bolts, washers and screws are in place when removing.
- The mudguard can be removed without removing the box.
- It is recommended to prepare a parts tray to keep track of the removed bolts.


