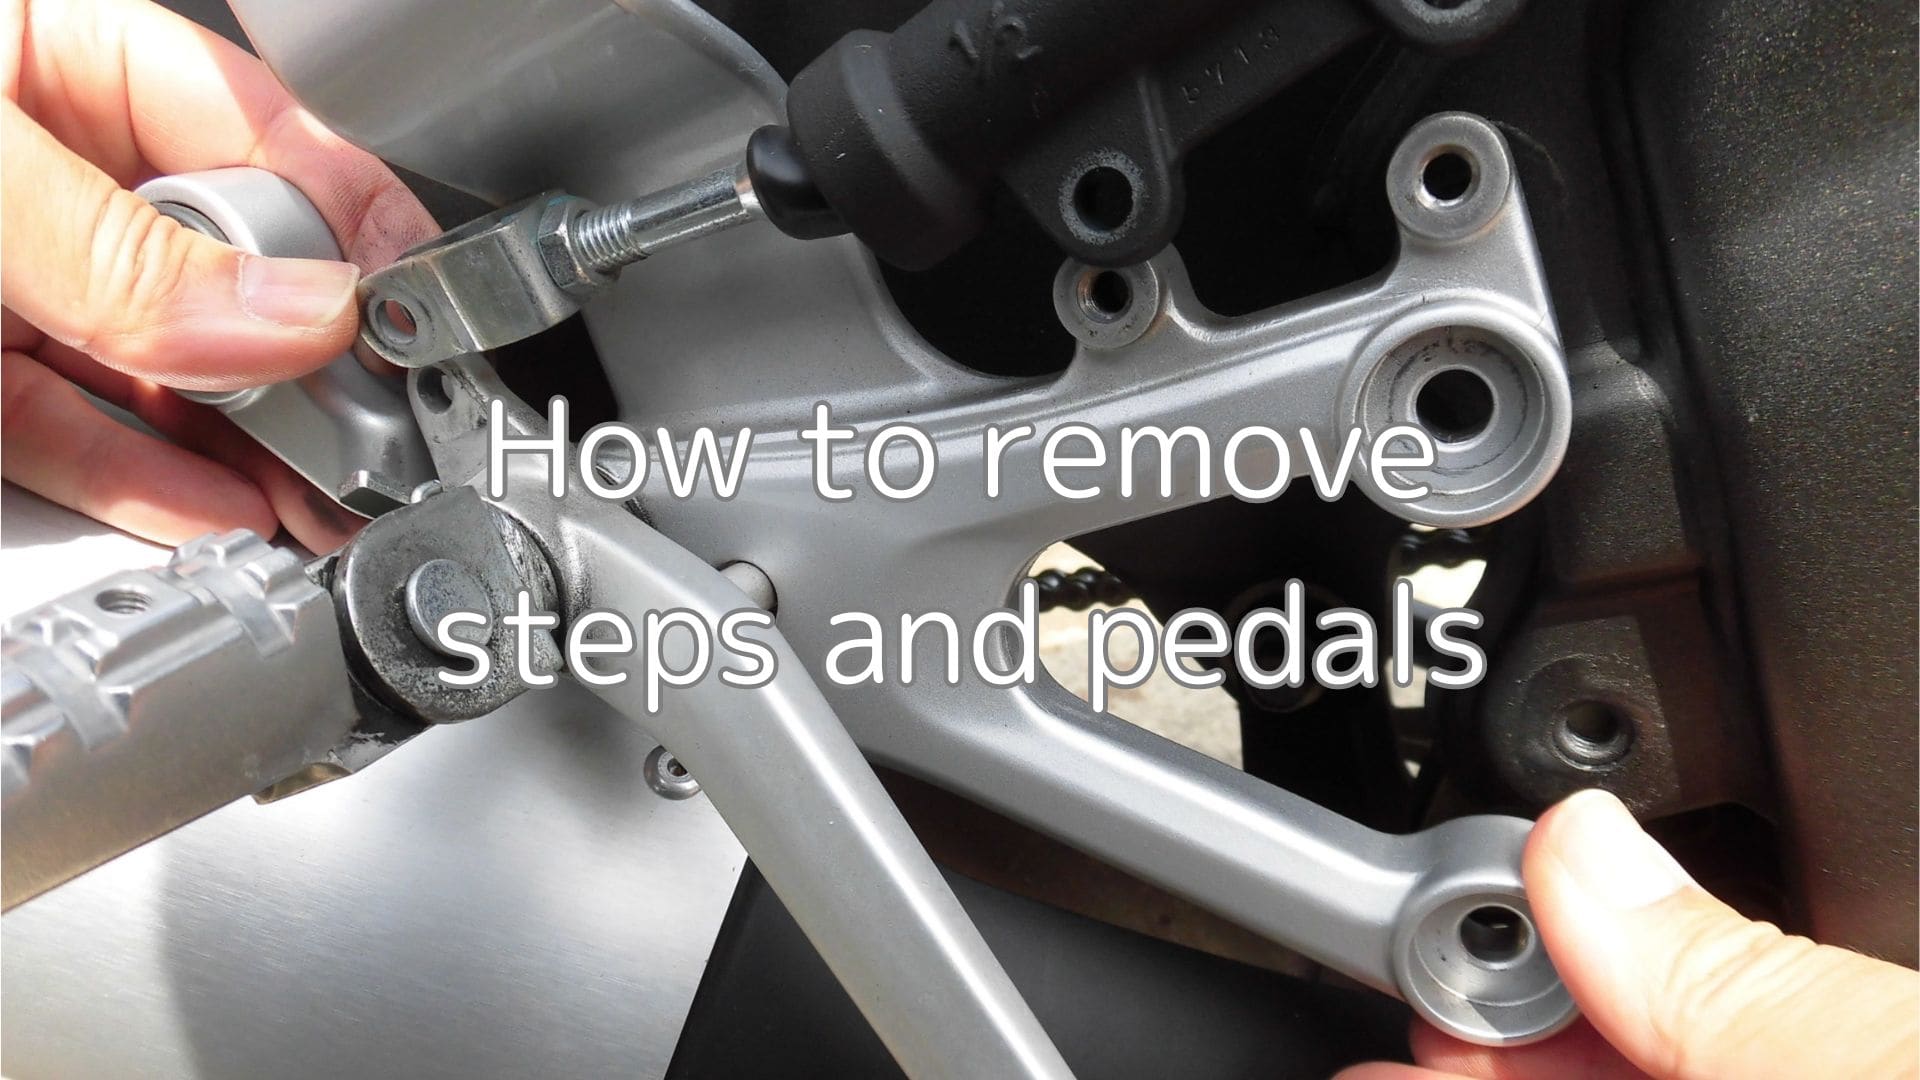
1. Remove steps and pedals for cleaning
When I was hanging up the bike cover, I suddenly found it on the steps and pedals area.
“There’s quite a bit of grease on them…”
If I put the bike cover on like this, the inside of the cover is going to get dirty.
So, I decide to remove the parts and clean them.
From this article you will learn below.
- How to remove steps and pedals
When you know how to remove the steps, you will be able to replace parts.
- Replacing a third party’s step
- Replace parts that have been damaged in a fall or other accident.
| Date | 29th May 2021 |
| Subjects | Maintenance, Failure, Repair |
| Shop or DIY | DIY |
| Difficulty | |
| Working hours | 0.5 |
| Costs | 0 Yen (Use what I have) |
Good to use:
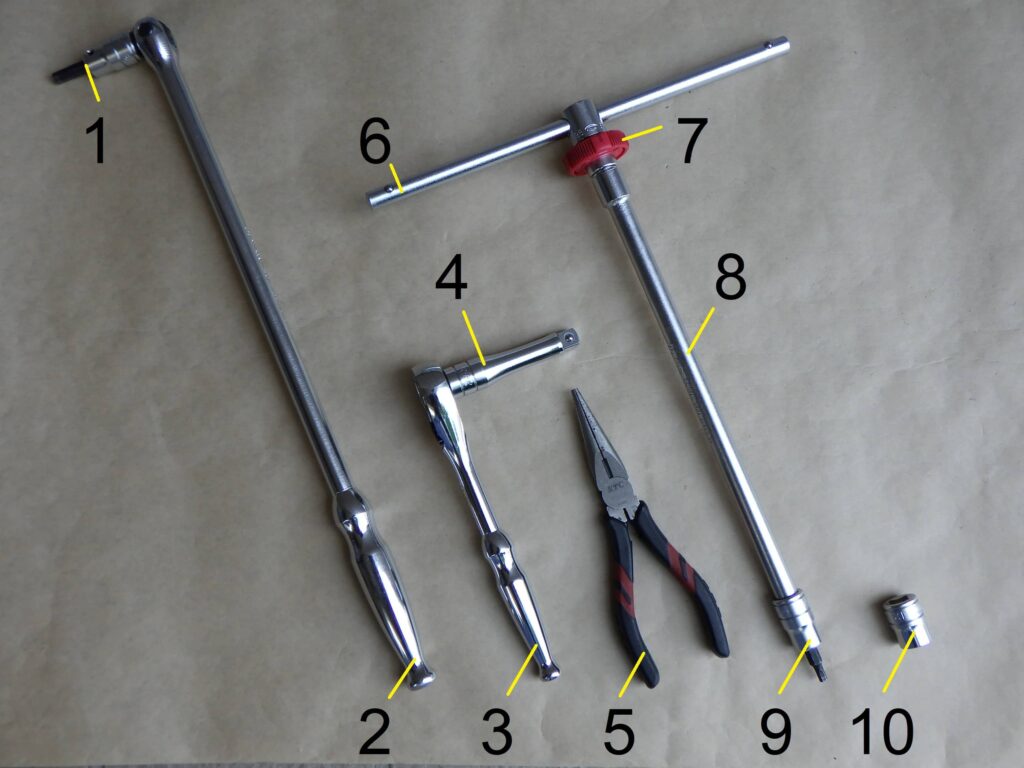
| No. | Name | Manufacturer | Part number | Quantity | Amounts[Yen] |
| 1 | Hexagon bit socket (6mm) | KTC | BT3-06S | 1 | 1,012 |
| 2 | Long spinner handle | KTC | BS3L | 1 | 5,907 |
| 3 | Ratchet wrench | KTC | BR3E | 1 | 6,182 |
| 4 | Extension bar (75mm) | KTC | BE3-075 | 1 | 1,529 |
| 5 | Pliers | KTC | PSL-150 | 1 | 4,323 |
| 6 | Slide head handle | KTC | BHM3 | 1 | 2,970 |
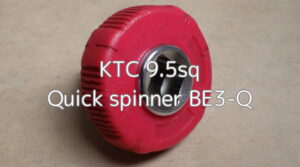
| 7 | Quick spinner | KTC | BE3-Q | 1 | 2,046 |
| 8 | Extension bar (250mm) | KTC | BE20-250 | 1 | (2,783) |
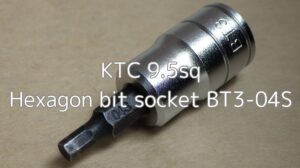
| 9 | Hexagon bit socket (4mm) | KTC | BT3-04S | 1 | 1,012 |
| 10 | Socket wrench (12mm) | KTC | BT3-12 | 1 | 880 |
| 28,644 |
2. How to remove the steps and pedals (STEP 1-15)
Remove side cowls and panels, etc.
First, remove the left-hand lower side cowl in order to remove the shift pedal.
To remove the lower side cowl, it is unfortunately necessary to remove all the left side cowls and panels etc.
(For more information, see maintenance record “How to remove side cowls and panels etc.”)

Remove left bracket 1
Now, let’s start the work.
<Remove left bracket 1>
Using a spinner handle with a hexagon socket (6 mm), loosen the two bolts securing the left bracket.
Remove left bracket 2
<Remove left bracket 2>
Hold the bracket by hand and remove the bolts.
This is all that is required to remove the left side.
Condition of left bracket removed
<Condition of left bracket removed>
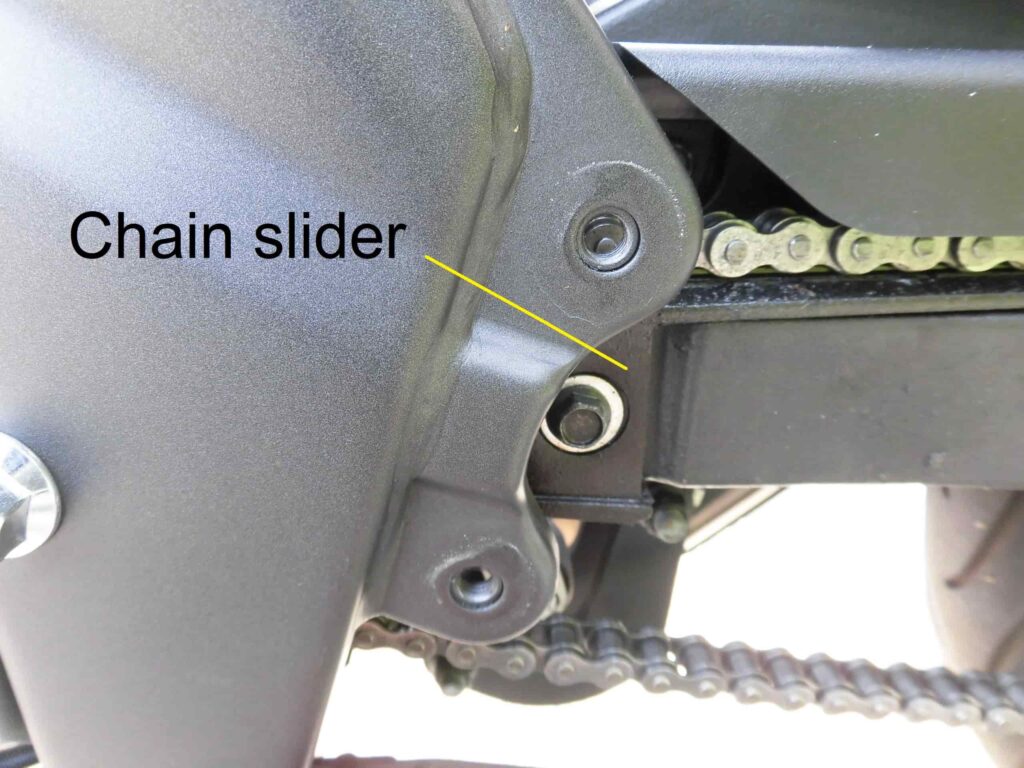
Good, with no rust.
The left bracket can be removed for easier access to the chain slider.
Remove shift pedal 1
Next, remove the shift pedal.
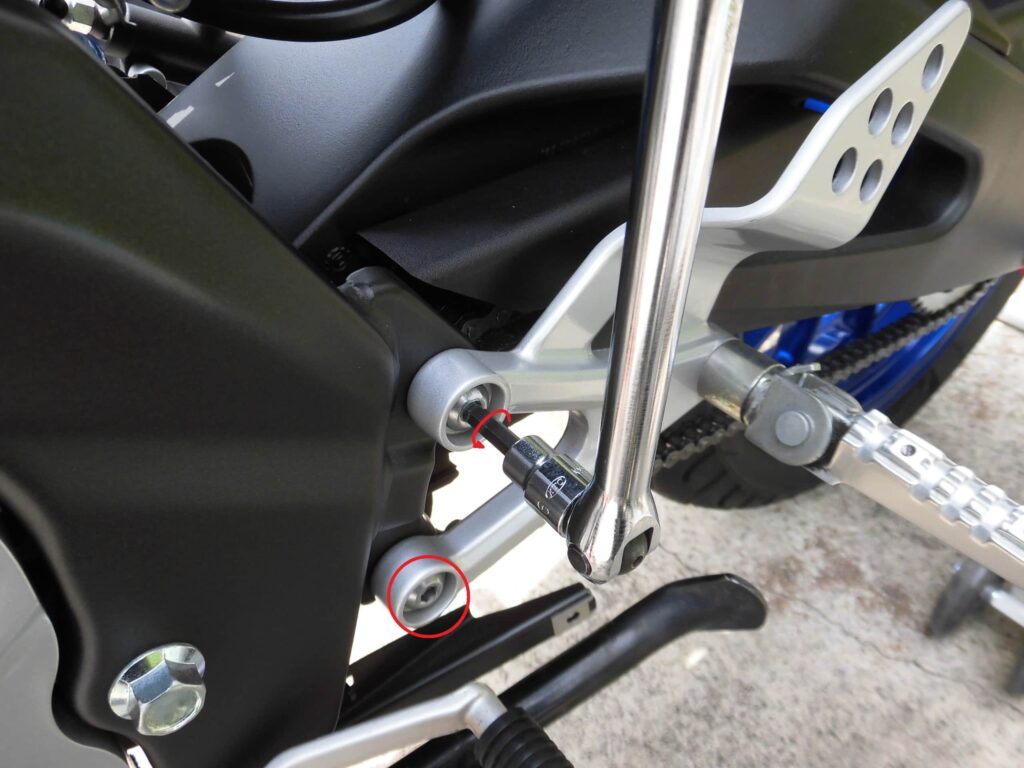
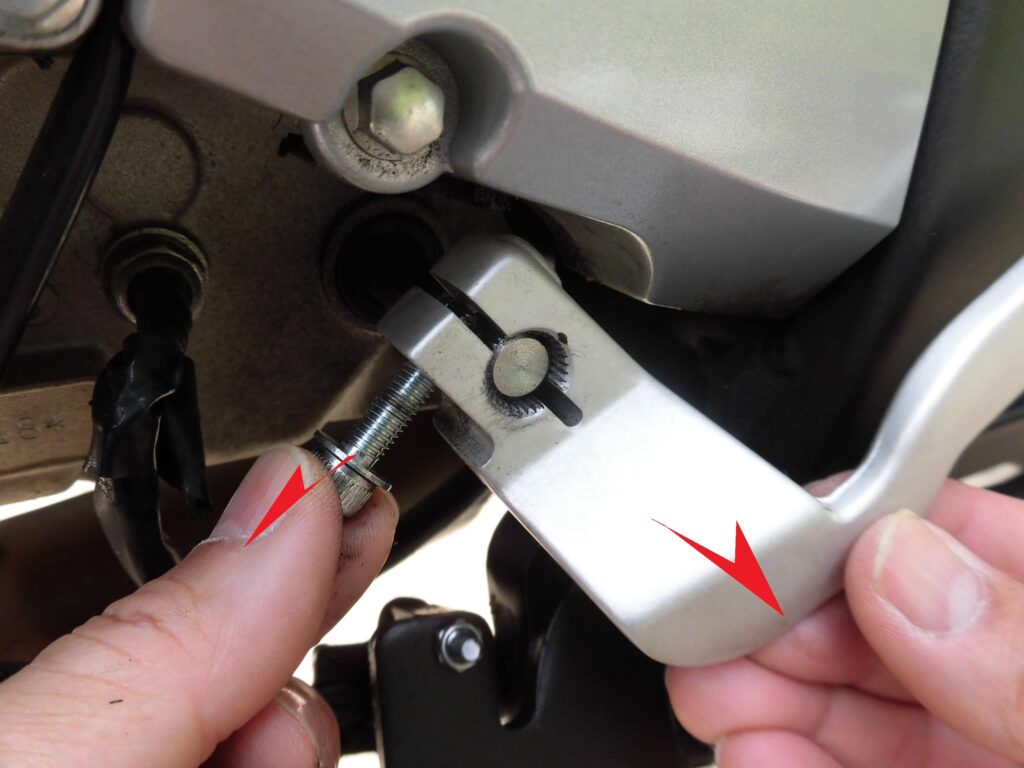
<Remove shift pedal 1>
- To be sure, put a black dot on the alignment so that you can see the position of the shaft and pedal.
- Using a ratchet wrench with a hexagon socket (6 mm) and extension bar (75 mm), loosen the bolt securing the shift pedal
By the way, the bolt in 2. may have been replaced.
This is because the figure in the parts list shows a hexagonal bolt, but it was a hexagon socket bolt.
Remove shift pedal 2
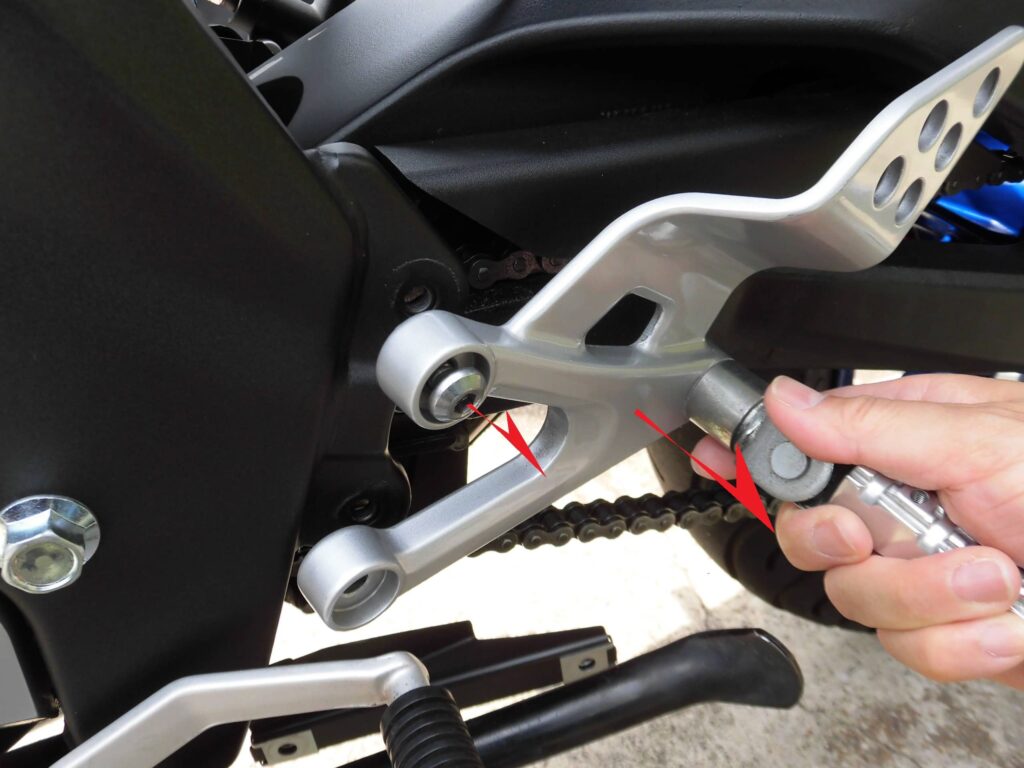
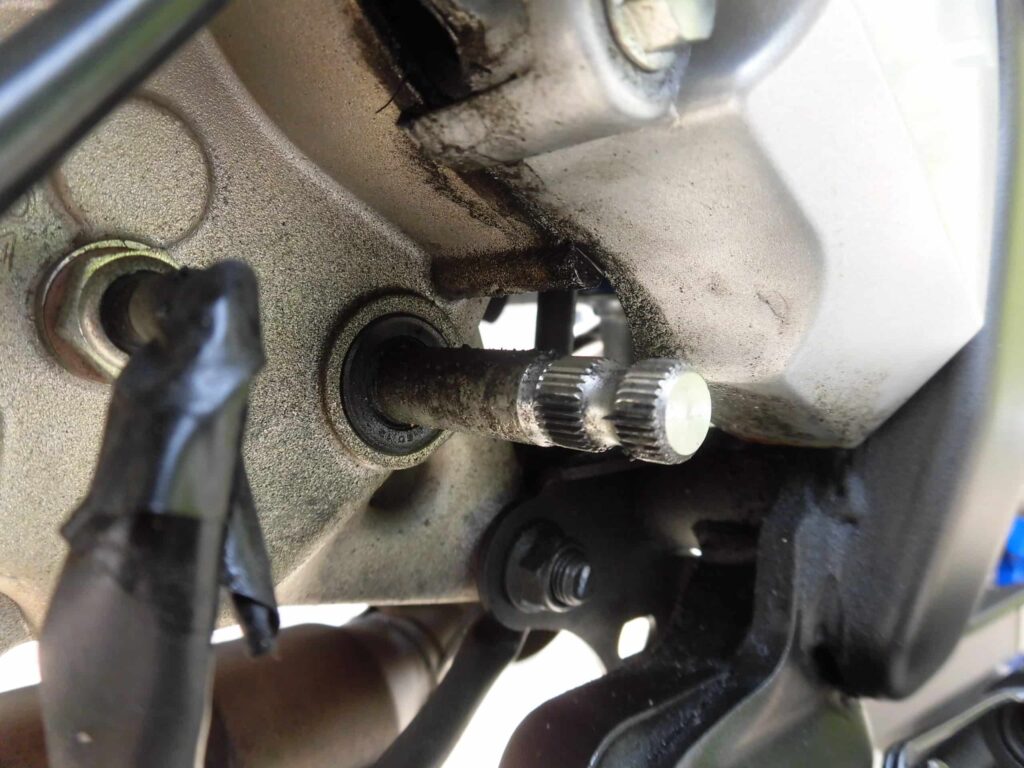
<Remove shift pedal 2>
Remove the bolt and pull the pedal along the shaft splines to release it.
Condition of shift pedal removed
<Condition of shift pedal removed>
There is quite a lot of chain grease, probably from the gaps in the sprocket cover.
This dirt was cleaned in the maintenance record “Drive sprocket inspection and cleaning”, which was carried out on the same day.
Remove push rod 1
Now let’s get on to the right bracket.
First, remove the rear brake components from the right bracket.
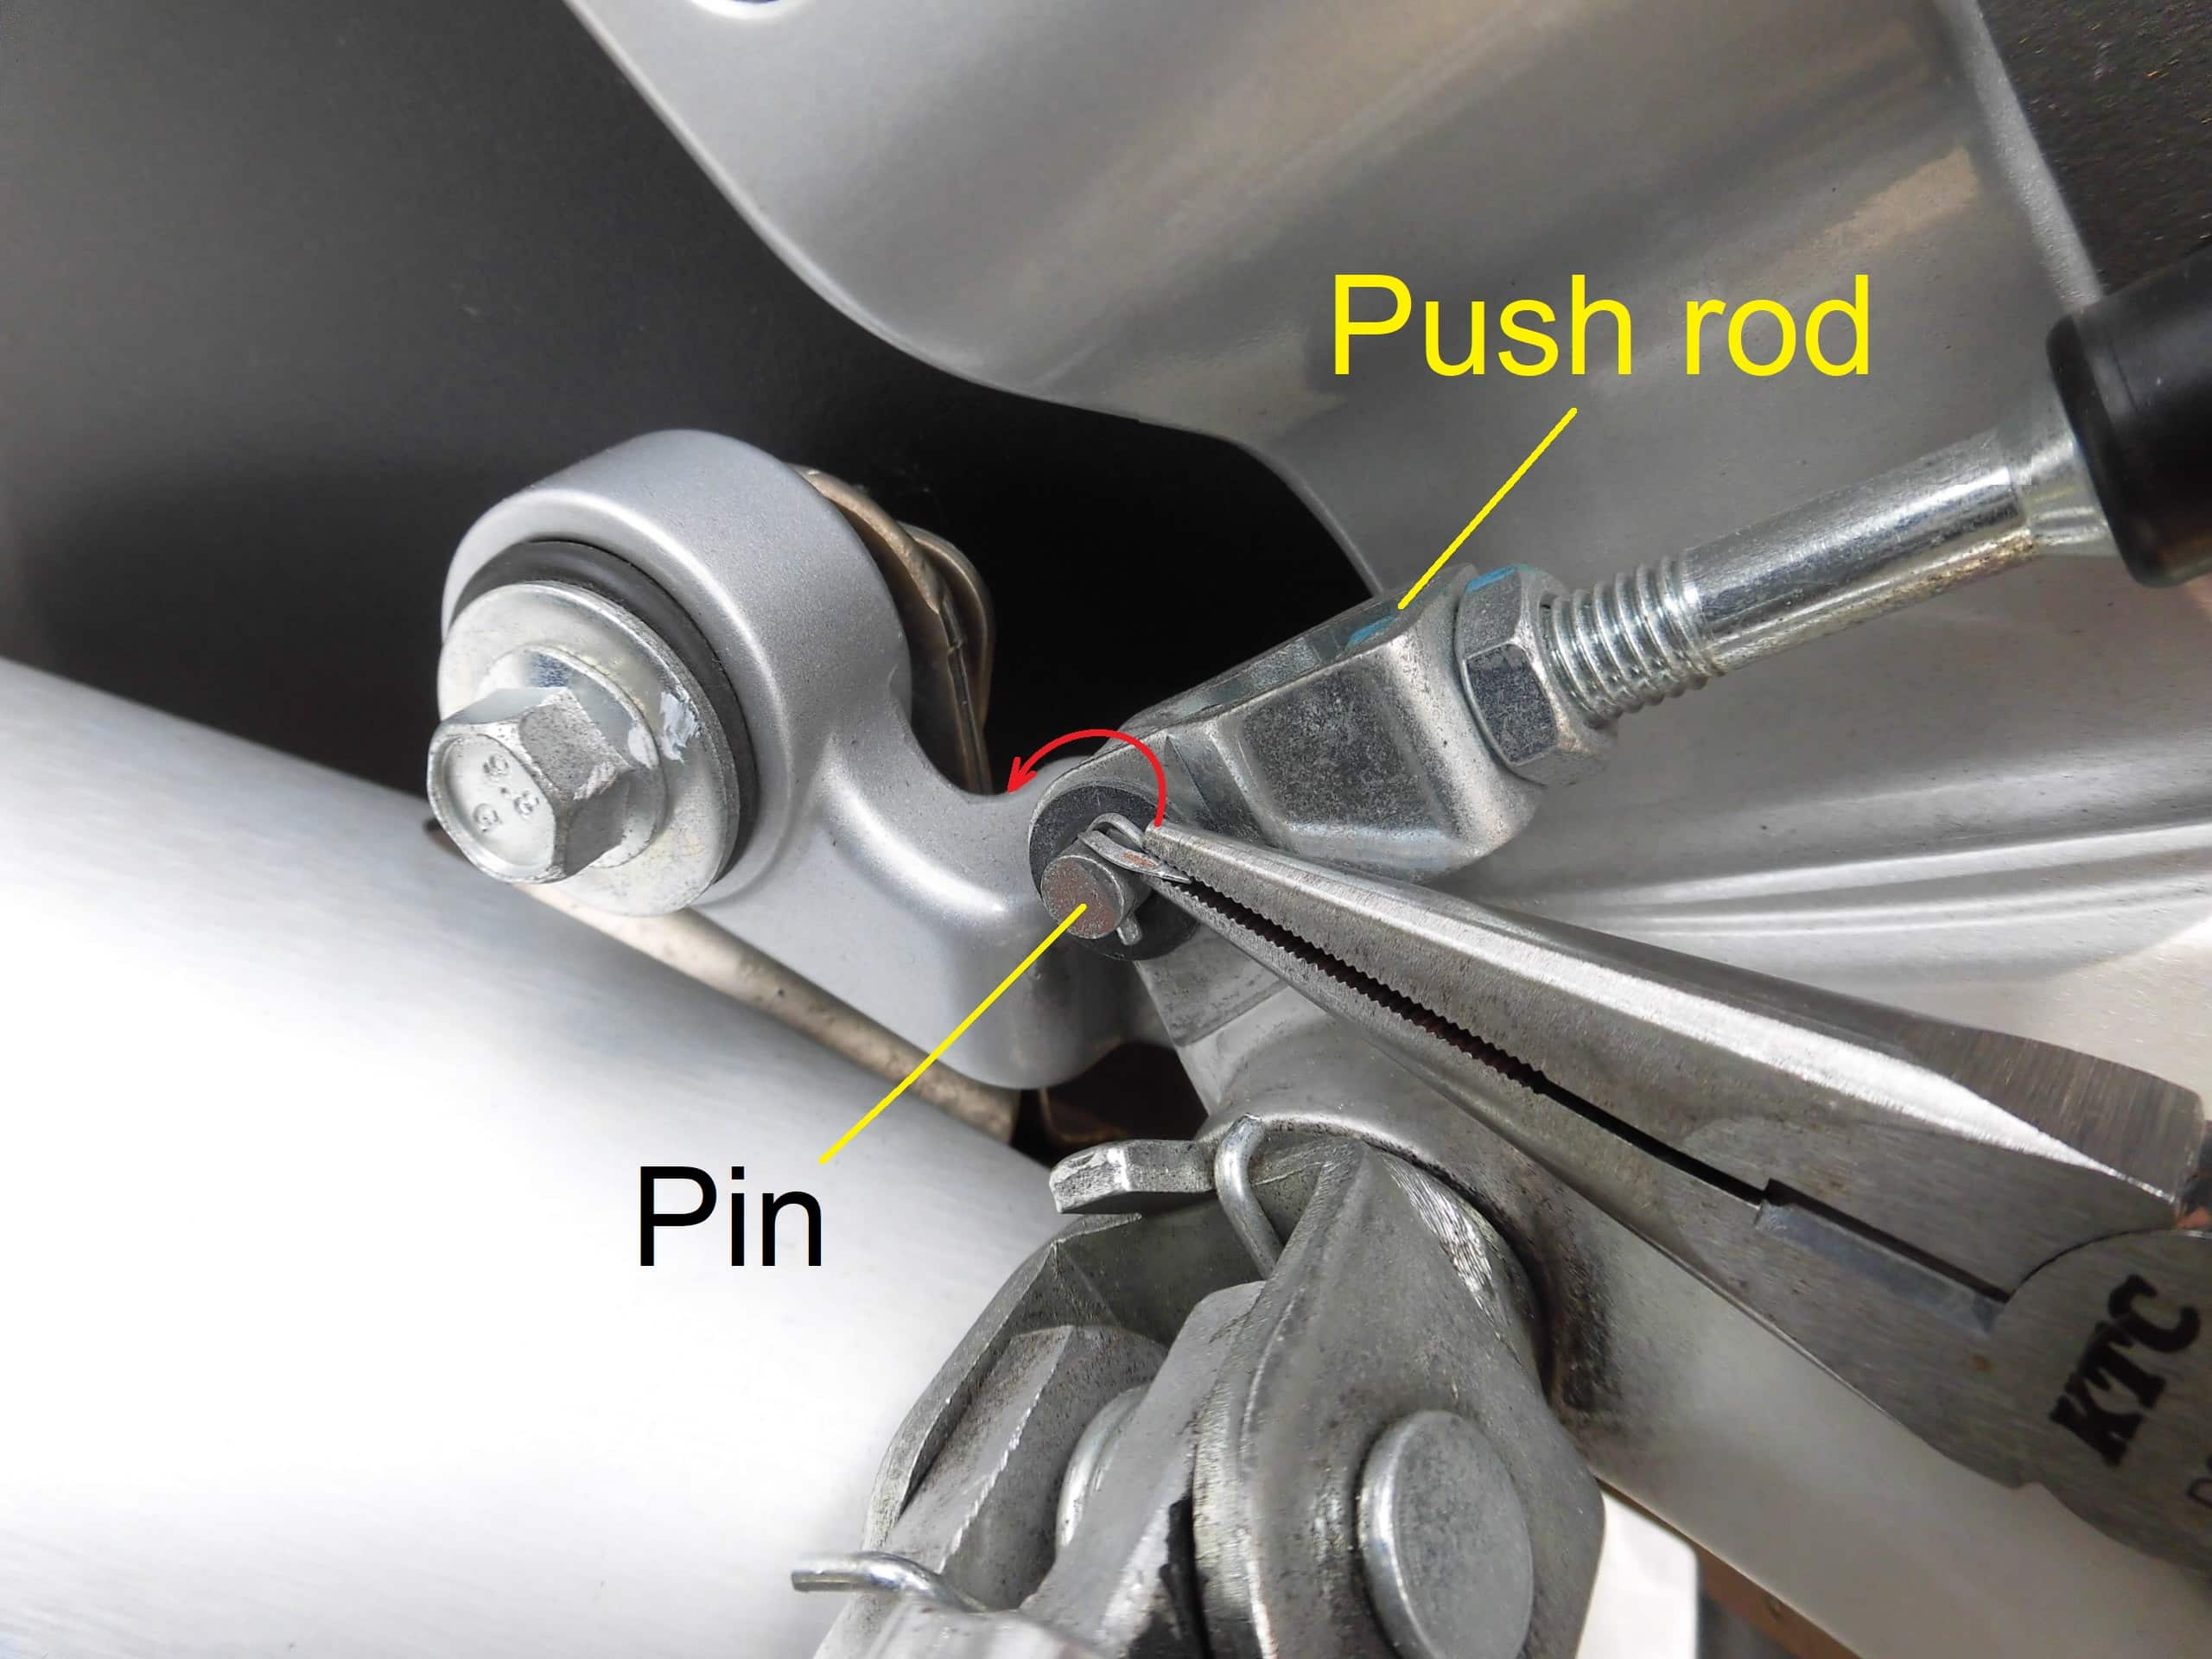
<Remove push rod 1>
The push rod and brake pedal are held in place by a pin.
Using pliers, remove the split pin that holds the pin in place.
Straighten the split pin as far as possible and then pull it out.
Note that the split pin is not to be reused.
Remove push rod 2
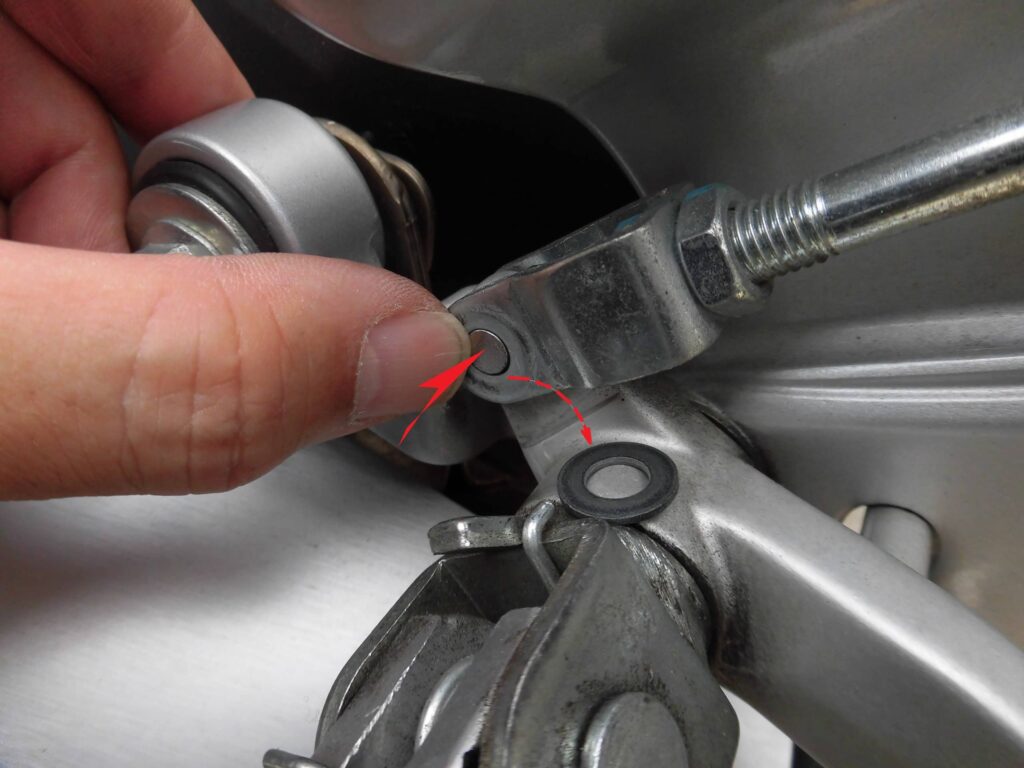
<Remove push rod 2>
Push the pin in and remove it.
The washer in the front fell off and rolled to the front wheel.
Be careful not to lose it.
Remove master cylinder
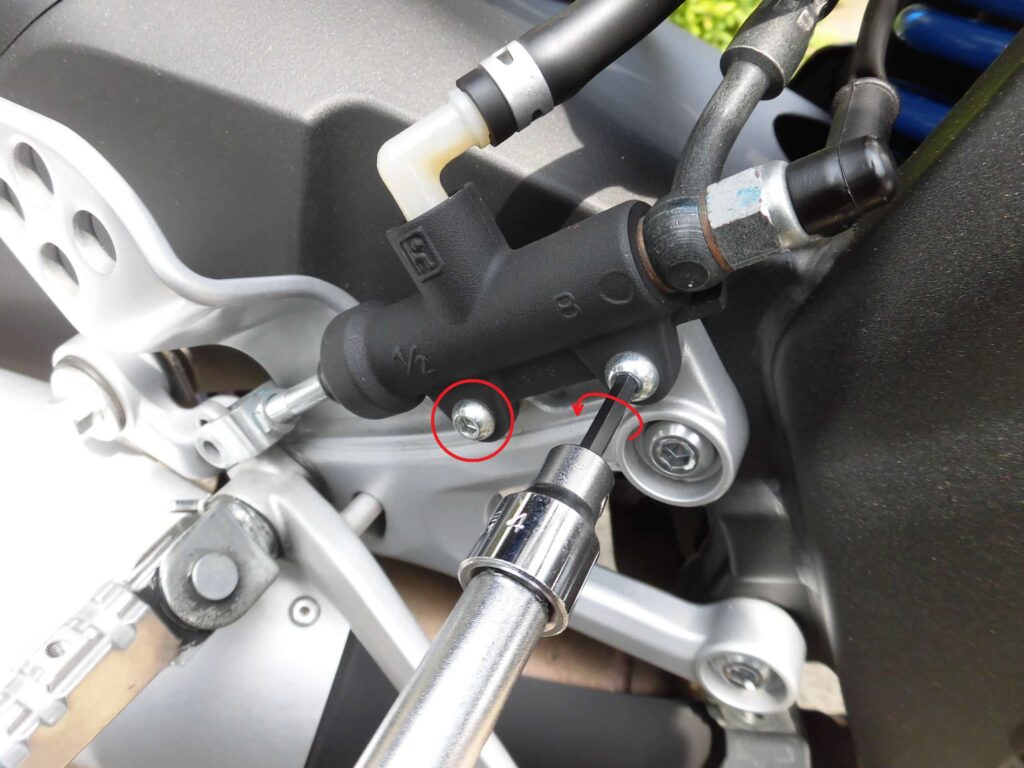
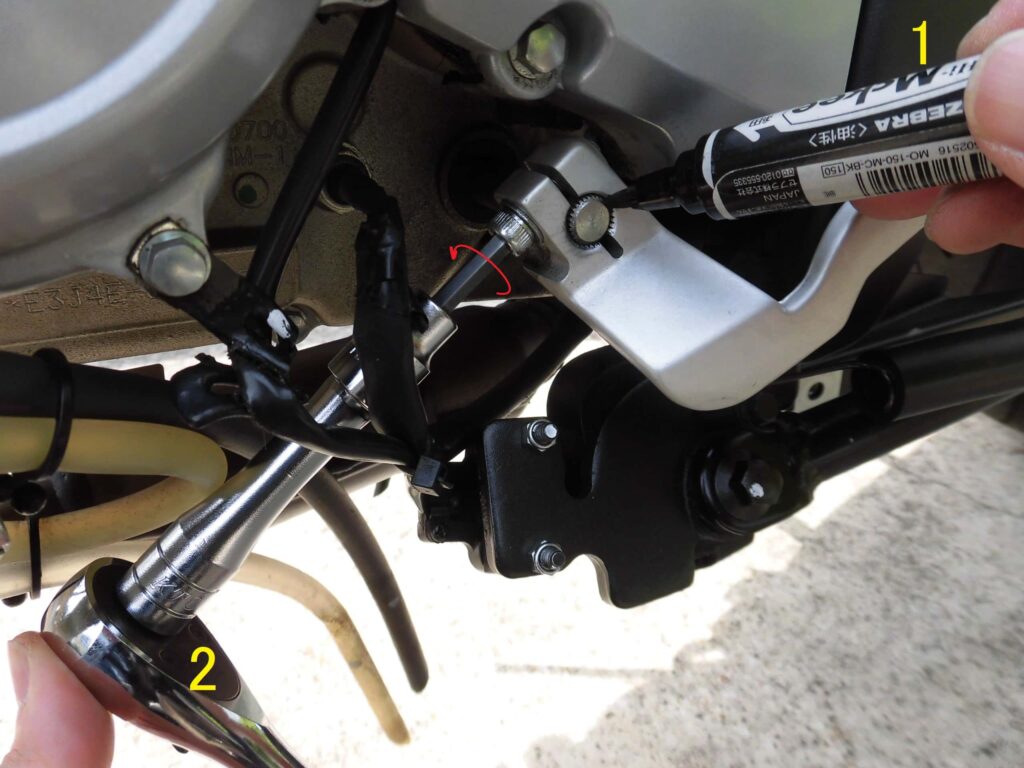
<Remove master cylinder>
Using a T-bar handle fitted with a hexagon socket (4 mm), remove the two bolts securing the master cylinder.
Remove muffler bolt
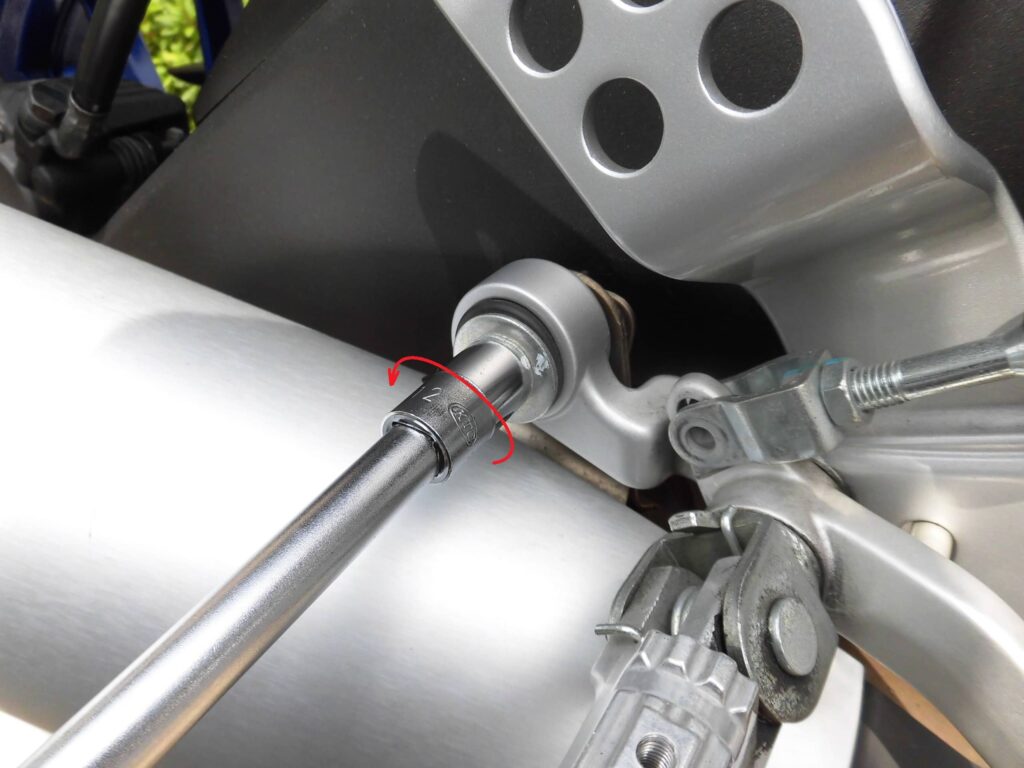
<Remove muffler bolt>
Using a T-bar handle with a socket (12 mm), remove the bolt securing the muffler.
Remove right bracket 1
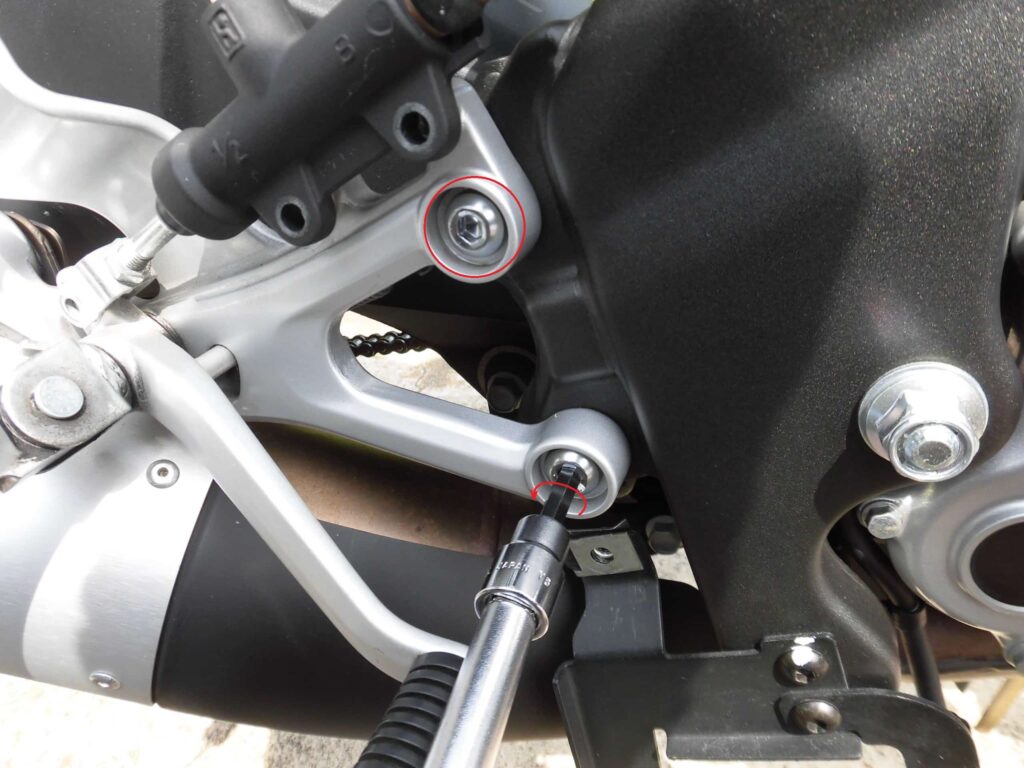
<Remove right bracket 1>
Using a T-bar handle with a hexagon socket (6 mm), loosen the two bolts securing the right bracket.
Remove right bracket 2
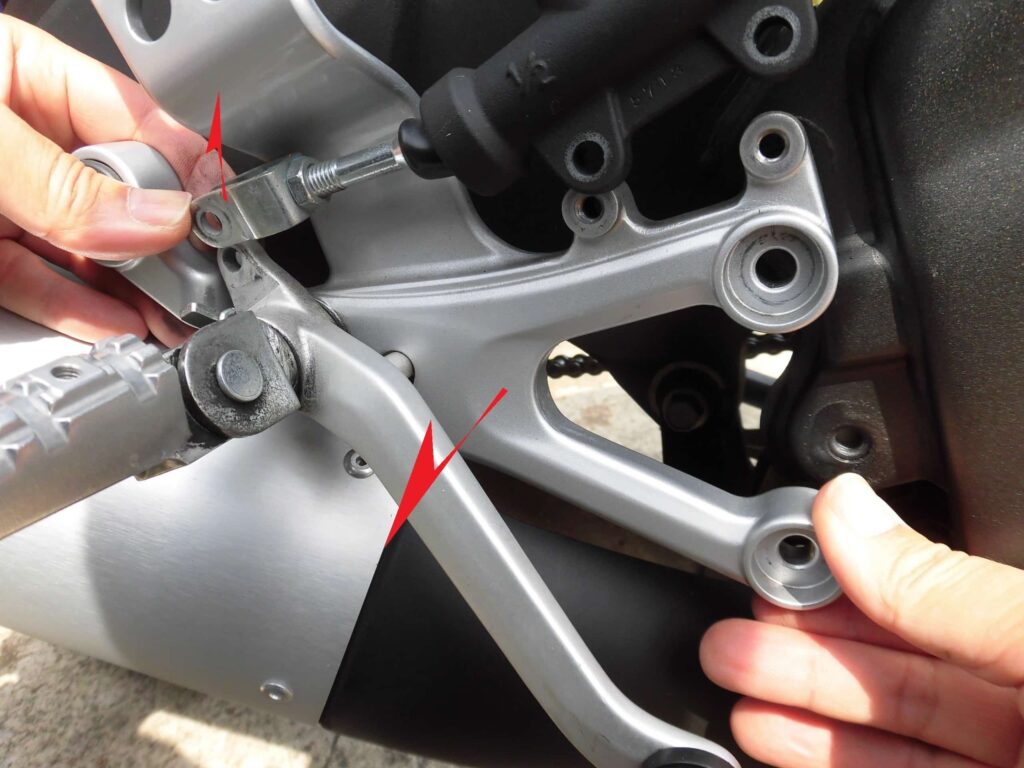
<Remove right bracket 2>
Remove the bracket by hand while lifting the rear brake pushrod.
Condition of right bracket removed
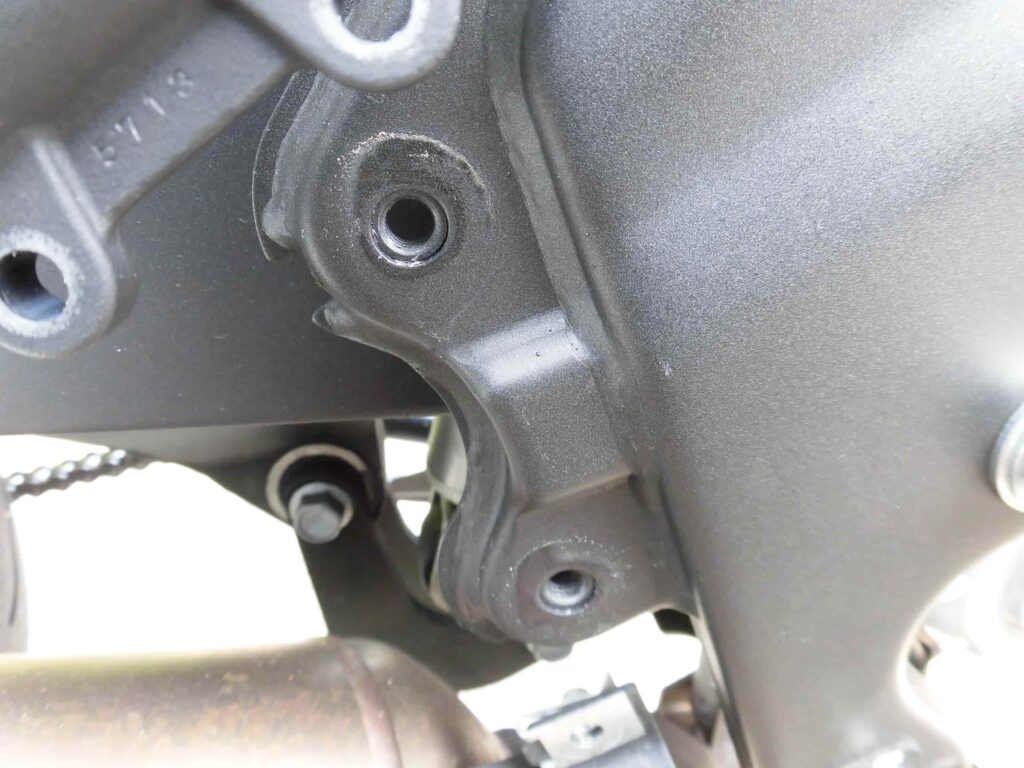
<Condition of right bracket removed>
Like the left side, it is good and rust-free.
Removed brackets and pedals
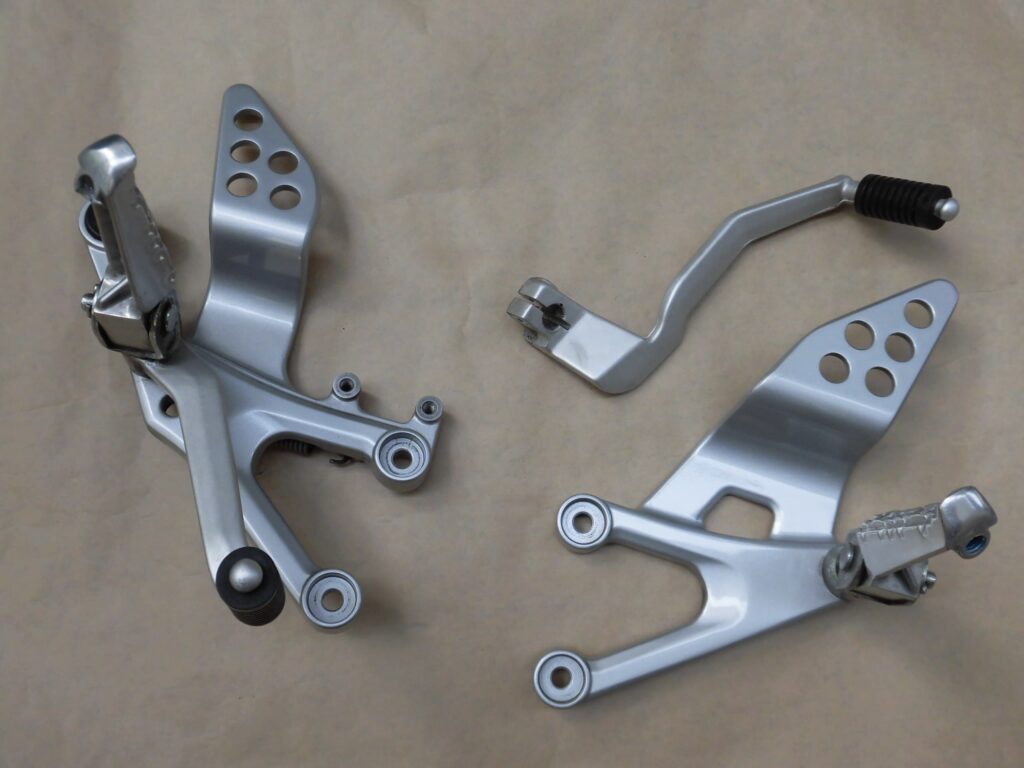
<Removed brackets and pedals>
I was able to remove it like this.
Note that the sliders (bolts) under the steps had not been attached since purchase, perhaps removed by the previous owner.
(Continue with maintenance record “Check and Clean steps and pedals”.)
3. Summary
The brackets and pedals removal can be done with general purpose tools.
Also, I forgot to take a photo, but I put the removed parts in a parts tray and put them by part and order so as not to lose them.
By the way, the structure of the left step differs between the early and late 5D7 models.
5D7 early: Connected by a link
5D7 late: Shift pedal and step are separated.
For your information.
- Before removing the shift pedal, put a black dot between the shaft and the pedal.
- Be careful not to drop or lose small washers.


