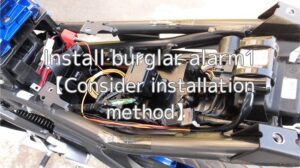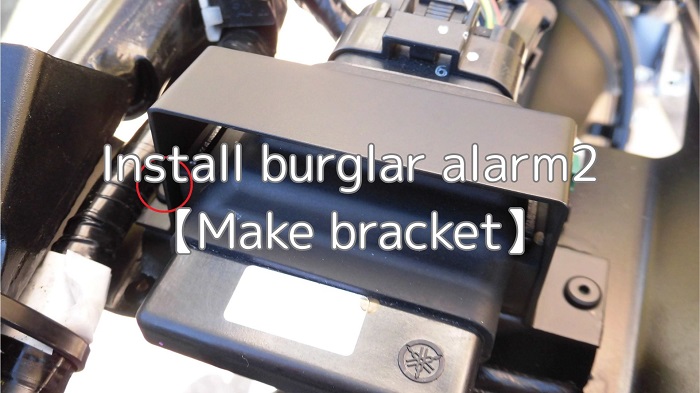
In this second installment, I will fabricate a bracket for the main body of the burglar alarm.
The bracket is placed across the engine control unit, and the main body is placed on top of it.
Making the bracket is a bit time-consuming, but it is easy for the following reasons.
- Use commercially available aluminum sheets.
- The plate is thin, cutting, bending, and drilling are easy.
It is easier said than done, so why not give it a try?
From this article, you can learn the following
- How to make a bracket for the main body of the burglar alarm
- How to process the screw on the frame
| Date | 12th December 2021 |
| Subjects | Tuning, Customizing |
| Shop or DIY | DIY |
| Difficulty | |
| Working hours | 6 |
| Costs [Yen] | 506 |
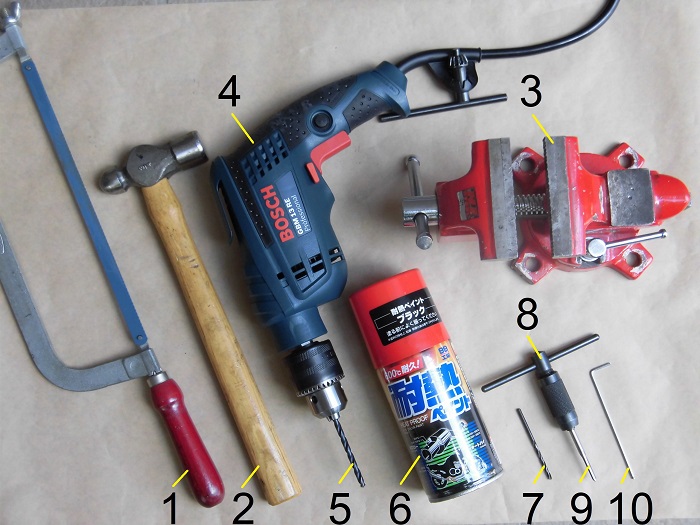
1. Goods to use
| No. | Product name | Manufacturer | Product number | Quantity | Amounts[Yen] | Purchase this time |
| ST1 | Aluminum sheet 1.2mm | HIKARI | HA1213 | 1 | 322 | ○ |
| 1 | Hand saw | – | – | 1 | 670 | |
| 2 | Hammer | – | – | 1 | 1,648 | |
| 3 | Vice 90mm | Fujiwara Industrial | 220915 | 1 | (4,398) | |
| 4 | Power drill | Bosch | GBM13RE | 1 | 22,880 | |
| 5 | Drill (5mm) | – | – | 1 | 153 | |
| 6 | Heatproof paint Black | SOFT99 | 08020 | 1 | 1,538 | |
| ST7 | Low head bolts (M4, 6mm) | YAHATANEJI | 572 | 1 | 184 | ○ |
| 7 | Drill (3mm) | – | – | 1 | 86 | |
| 8 | Tap holder #89 | Light seiki | – | 1 | (1,318) | |
| 9 | Tap (M4×0.7) | – | – | 1 | 384 | |
| 10 | Long hex key (2mm) | KTC | HLD250-2 | 1 | 1,089 | |
| 34,670 | 506 |
2. Install burglar alarm2【Make bracket】(STEP 1-15)
Cut aluminum sheet
Since this is not a place where anything will collide, I will prioritize workability over strength and use an aluminum sheet (thickness: 1.2 mm, 100 x 300 mm).
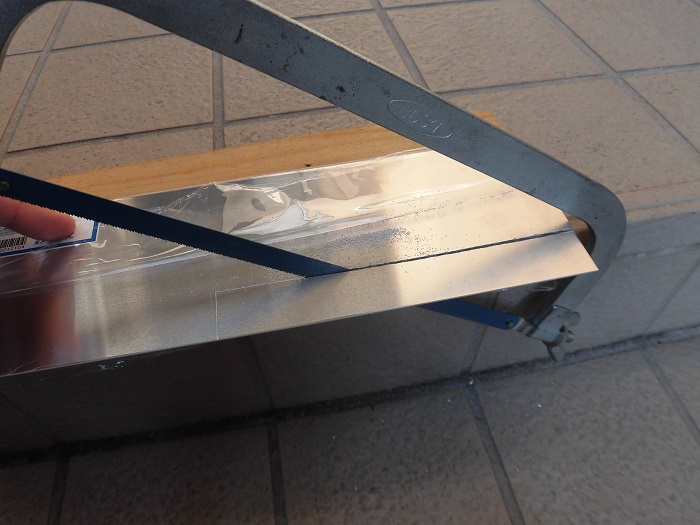
<Cut aluminum sheet>
Using a hand saw, cut out the piece.
The cut was zigzagged, so water-resistant paper (No. 300) was used to flatten it.
bend aluminum sheet
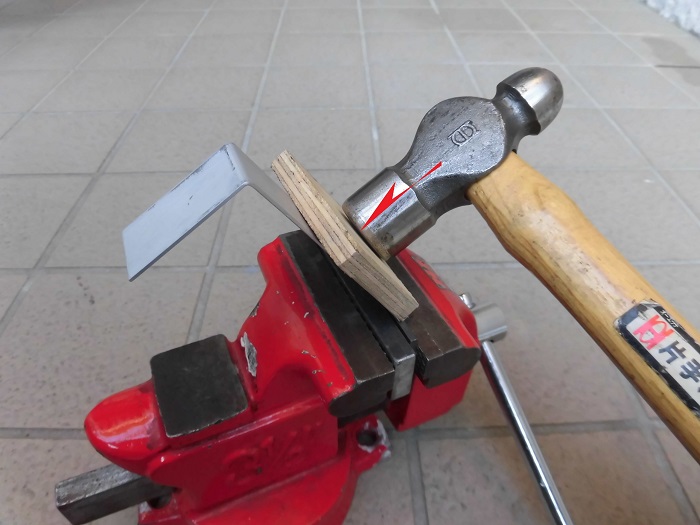
<bend aluminum sheet>
An aluminum plate is placed between the vices and bent by hitting it with a hammer.
Drilling of aluminum plate
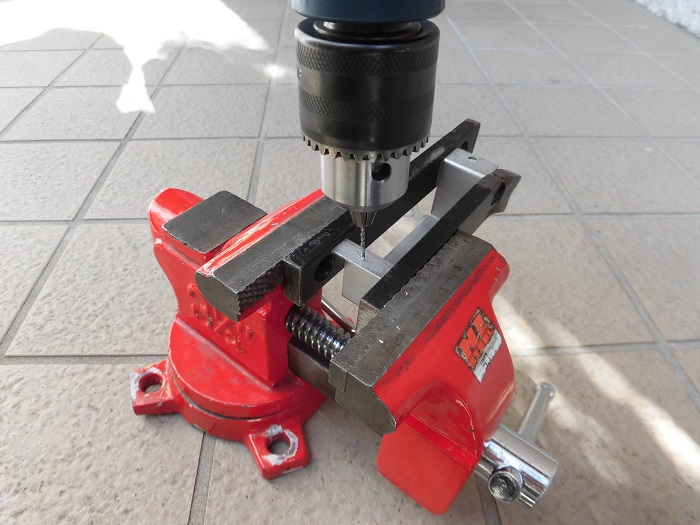
<Drilling of aluminum plate>
Drill two 5mm holes.
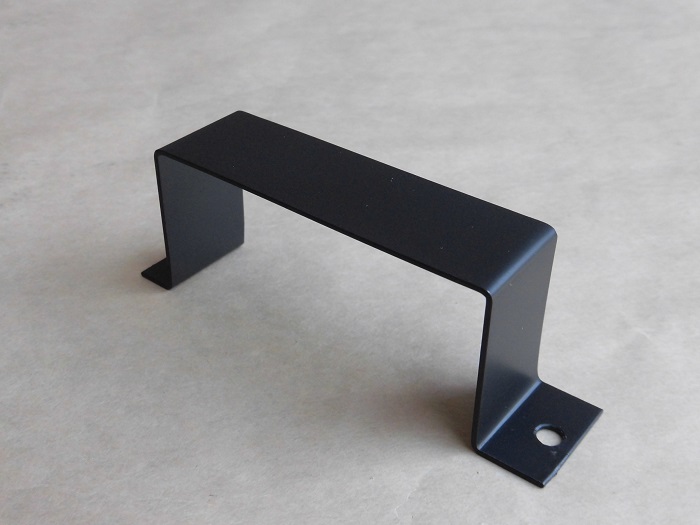
Machined bracket
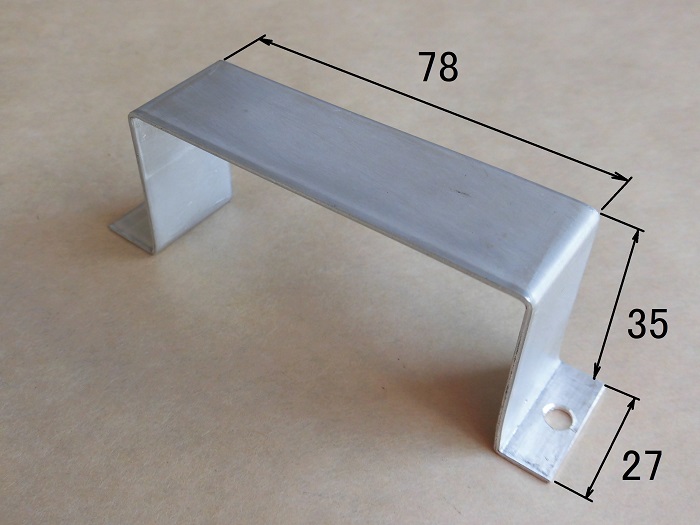
<Front side>
The finished product looks like this.
*78mm is the inside diameter.
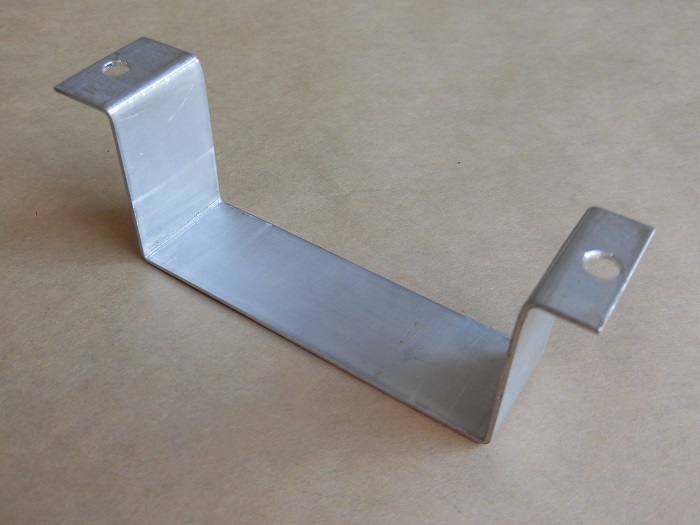
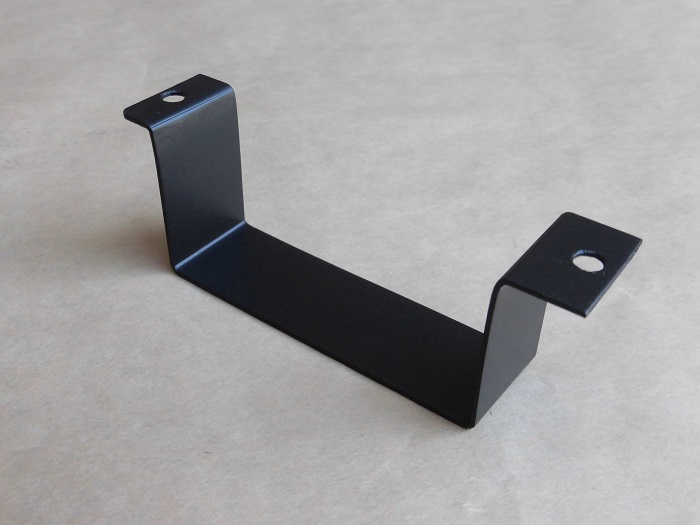
<Back side>
The engine control unit fits between these two sides.
Paint bracket
<Paint bracket>
The rest is to be painted and finished.
It would have been nice to leave it as is, but the parts around the frame are black. So, I will give it a uniform look.
The paint job is very horny.
Painted bracket
<Front side>
This is how it turned out.
<Back side>
In fact, the paint is baked on. So, even if the paint finish is a little uneven, it will not be noticeable after it dries.
Bracket and screws
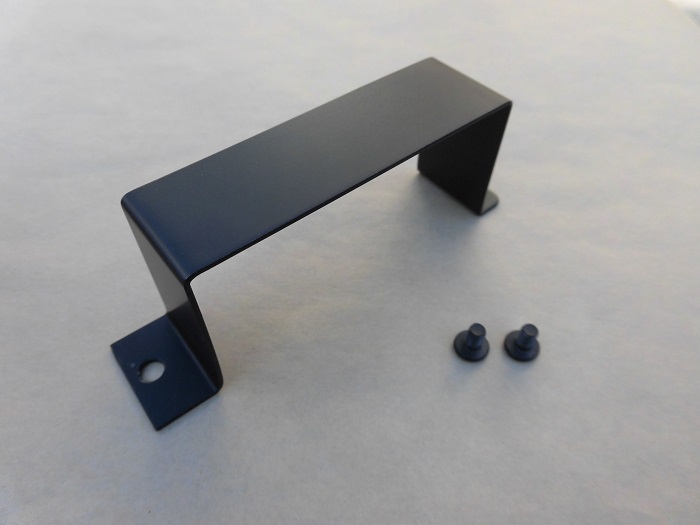
<Bracket and screws>
The screws that hold the bracket in place were also painted to match the bracket.
Total: 16g
The same type of screws used to secure the tandem hole covers rusted quickly.
So, I painted them from the beginning.
Remove rear cowls etc.
Next, machine the screws on the body side in order to install the bracket.
First, remove the rear cowl, panel, box, and mudguard.
(For details, please refer to the maintenance record “How to remove rear cowls and panel etc.”)

Drilling of moto body
Remove the engine control unit from the frame.
Then, place the bracket and mark the position where the holes should be drilled.
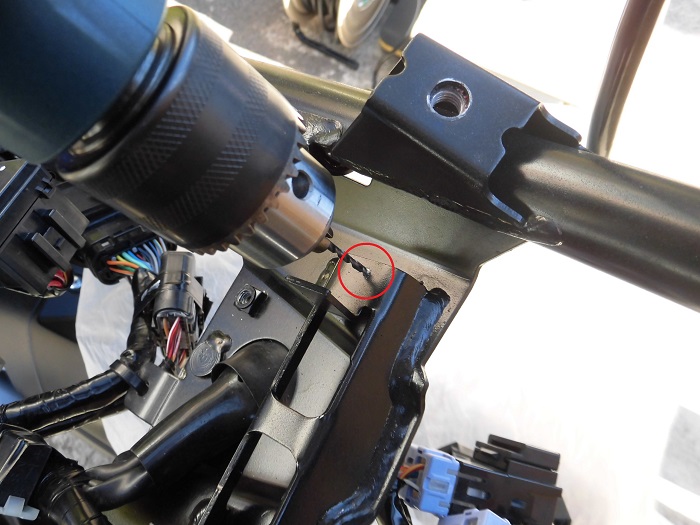
<Drilling of moto body>
Drill two 3 mm holes in the marked areas with a drill.
As always, it is not pleasant to drill holes in a moto body.
Maybe it actually lowers the value of the moto as well.
Machining screws on moto body
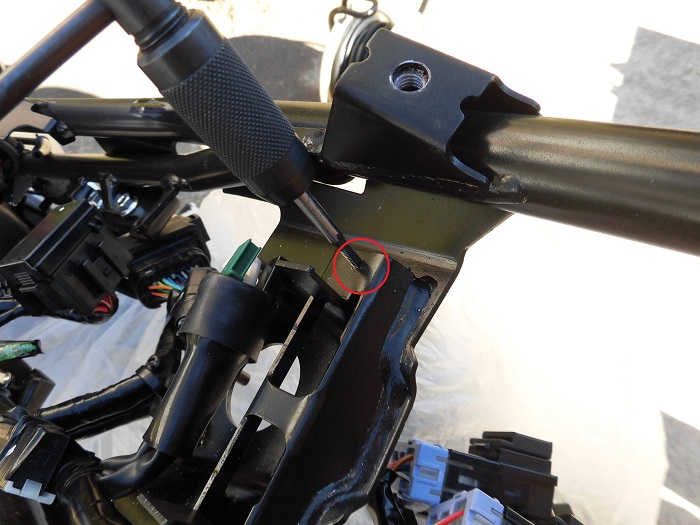
<Machining screws on moto body>
Using an M4 tap, machine two screws in the drilled holes.
After machining, chips are cleaned up with an air gun.
Install engine control unit
First, the engine control unit is installed on the frame.
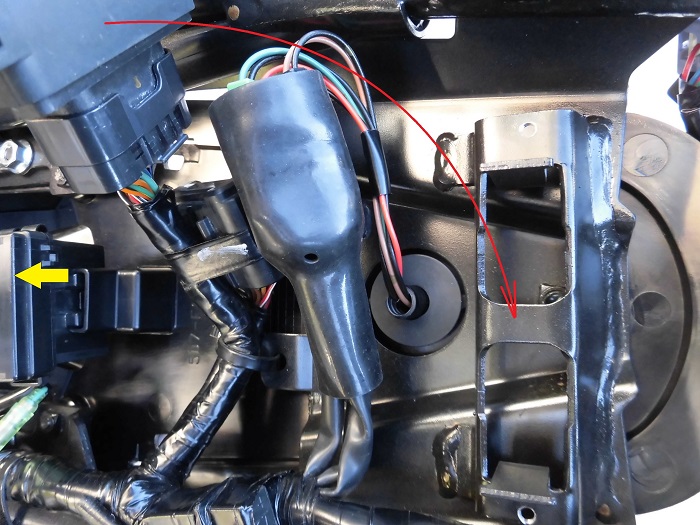
<Install engine control unit>
Pass the protrusion on the frame through the groove in the rubber that holds the engine control unit in place.
Condition of engine control unit installed
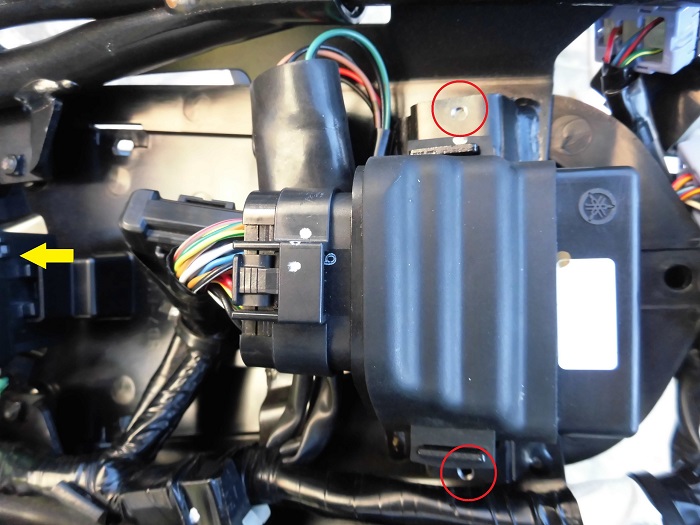
<Condition of engine control unit installed>
The holes visible on both sides of the engine control unit are the screws that hold the bracket in place.
Install bracket
Now, install the bracket.
<Install bracket>
Place the bracket on the frame and tighten the low-head screws using a hexagonal wrench (2 mm).
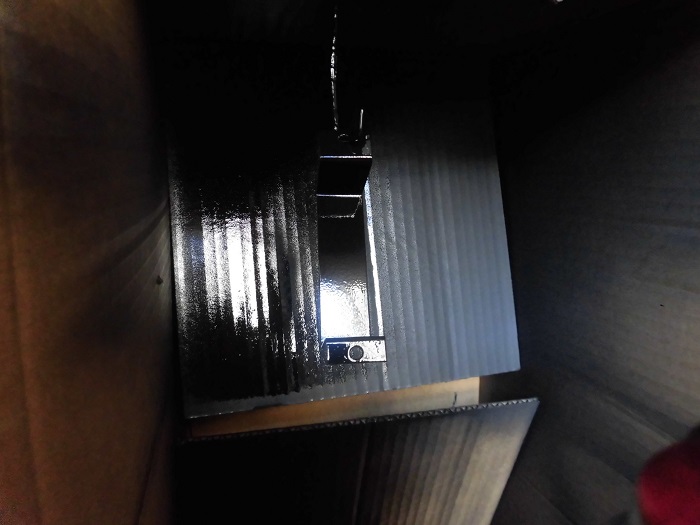
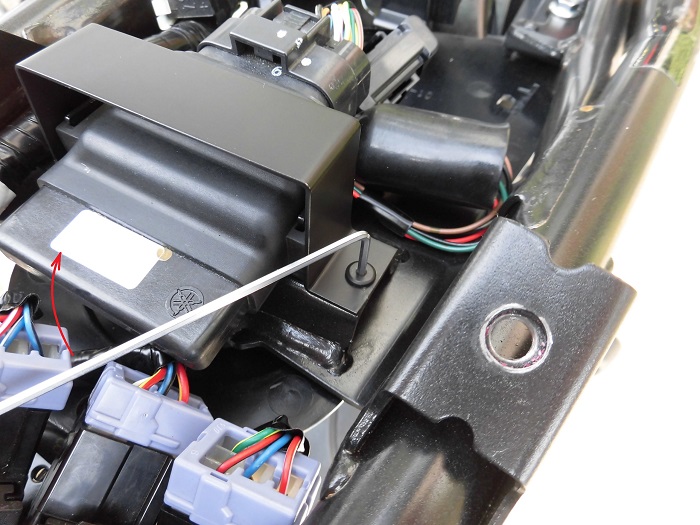
Installed bracket
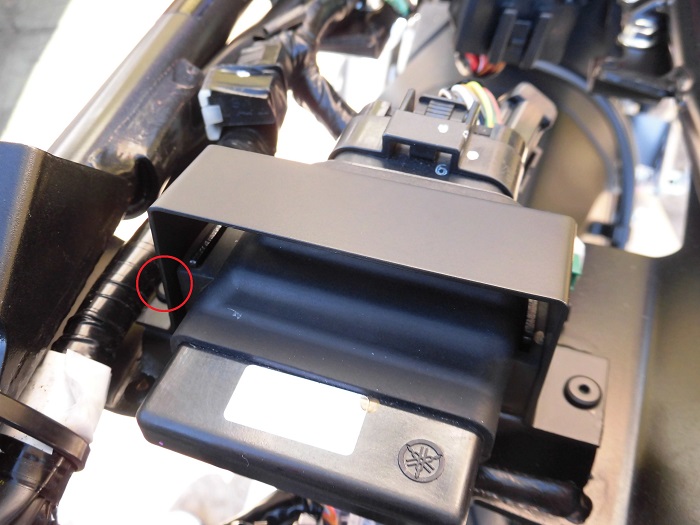
<Installed bracket>
I was able to make it so that it does not hit the engine control unit.
By the way, the reason I used low head screws is because the moto wiring rides on top of the screw.
I thought that if I used hexagon socket head bolts or hex bolts, they would rub against the vibration and damage the wiring.
Installed burglar alarm
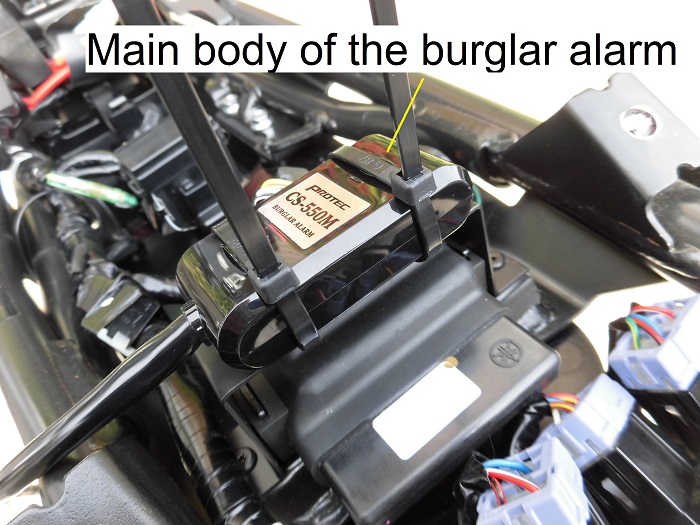
<Installed burglar alarm>
Fasten the main body of the burglar alarm to the bracket with double-sided tape and cable ties.
(For details on bracket installation, see Maintenance Record “Install burglar Alarm4 【Installation】.”)
3. Summary
In this issue, I summarize the fabrication of a bracket for a burglar alarm.
You will need tools to process the aluminum sheet, but the work itself is not too difficult.
Once you have the tools, you can make a variety of things.
- Thin aluminum sheet is used, giving priority to workability.
- Baking paint can be used to cover up unevenness of the paint a little.
- Low-head screws are used for fastening the brackets to prevent damage to the wiring.