This guide covers how I went about installing the Mitsuba Sankowa dual-channel motorcycle dash cam (model EDR-21A).
Whether you’re:
- Thinking about tackling the installation yourself
- Unsure where to place the cameras or switch
- Had a shop install it but aren’t satisfied with the wiring or placement
- Worried the camera rubs against your bike cover
- Finding the switch hard to press or the camera keeps shifting
I hope you’ll find this article helpful.
Since I ended up fabricating the brackets myself, this turned into a nine-part series:
1: Planning the installation
2–4: Bracket fabrication
5–8: Mounting procedures
9: Final adjustments
In this first entry, I’ll walk through how I planned the installation method.
From this post, you’ll learn:
- How to check that the motorcycle dash cam is functioning correctly
- Installation guidelines for the main unit, cameras, and switch
- Example mounting positions for each component
| Date | 14th November 2021 |
| Subjects | Tuning, Customizing |
| Shop or DIY | DIY |
| Difficulty | |
| Working hours | 3 |
| Costs [Yen] | 25.491 |
1. Goods to use
| No. | Product name | Manufacturer | Product number | Quantity | Amounts[Yen] | Purchase this time |
| ST1 | Dual-channel motorcycle dash cam | Mitsuba Sankowa | EDR-21A | 1 | 25,491 | ○ |
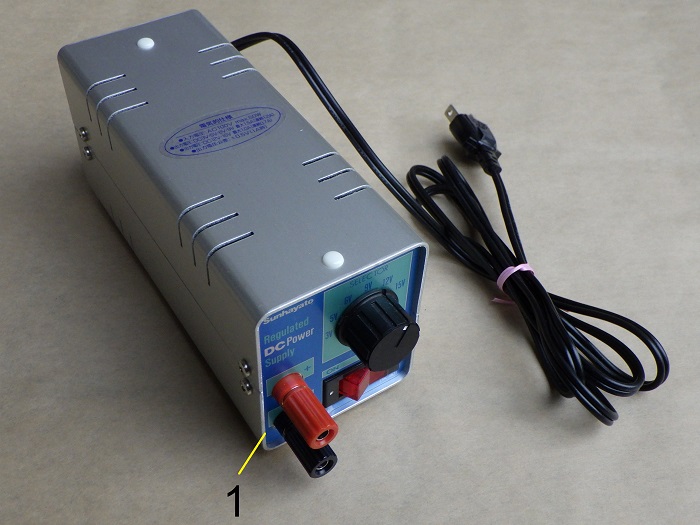
| 1 | Regulated power supply | SANHAYATO | DK-811 | 1 | (21,978) | |
| 47,469 | 25,491 |
2. Motorcycle Dash Cam Installation Part 1 – Planning the Setup (STEP 1–20)
Motorcycle dash cam
Let’s kick off the installation.
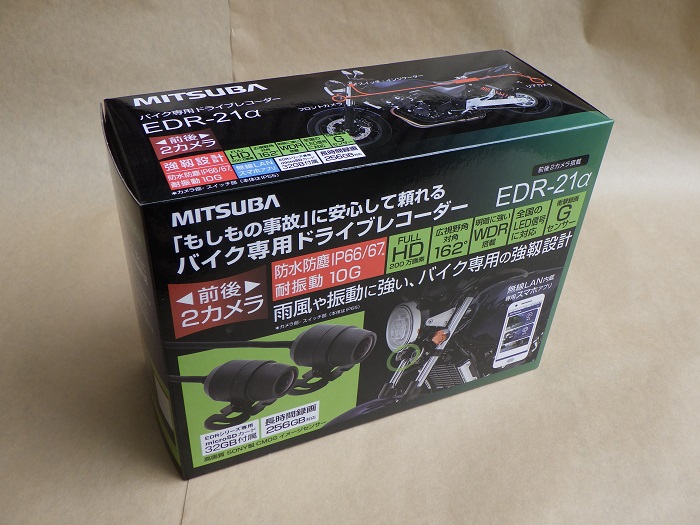
<Motorcycle dash cam>
The dual-channel motorcycle dash cam I’m using is the Mitsuba Sankowa EDR-21A.
Installing the App
First, download the dedicated app to your smartphone.
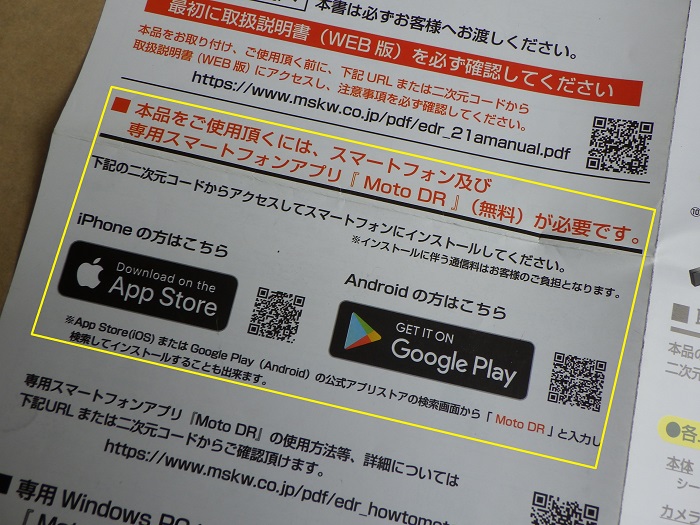
<Installing the App>
Install “Moto DR” and use it to configure the system.
Inserting the SD Card (Part 1)
Now let’s check if the motorcycle dash cam powers on.
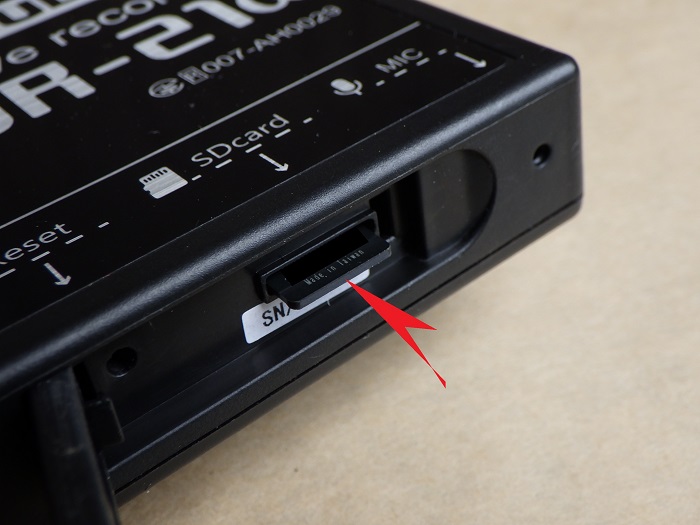
<Inserting the SD Card (Part 1)>
Insert a microSD card into the main unit.
Inserting the SD Card (Part 2)
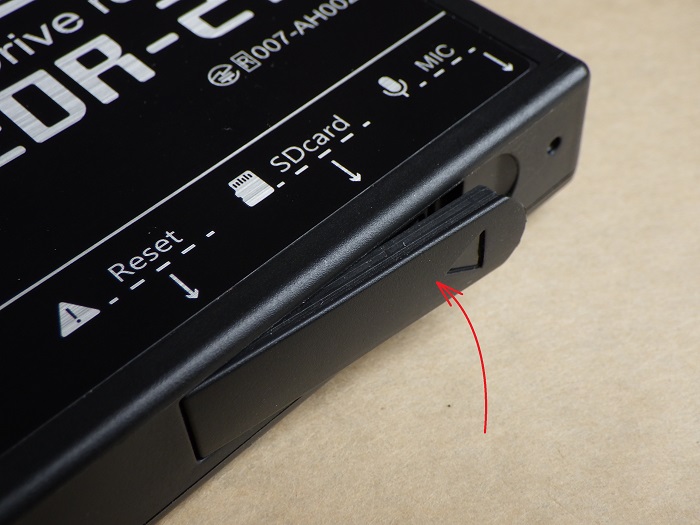
<Inserting the SD Card (Part 2)>
When closing the side cap, make sure the orientation is correct.
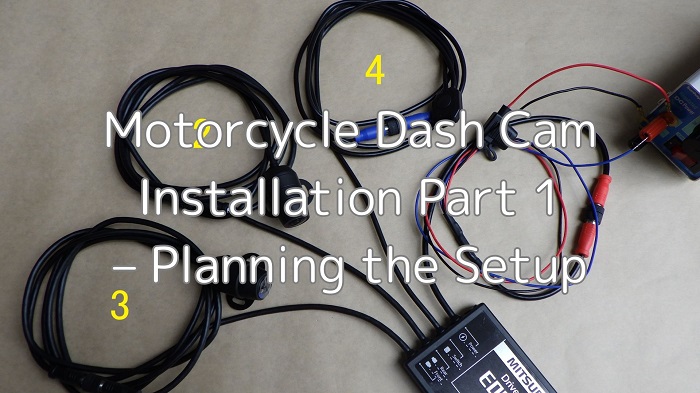
Wiring Connection
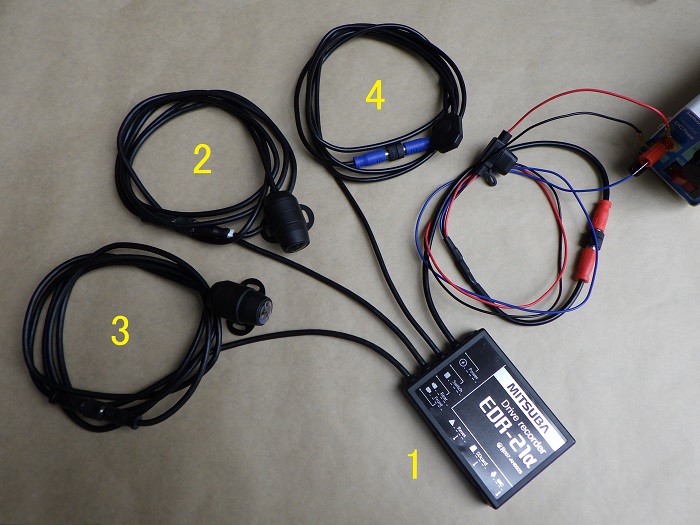
<Wiring Connection>
The motorcycle dash cam setup includes:
- Main unit
- Rear camera
- Front camera
- Control switch
Use a regulated power supply to provide 12V.
The blue wire detects ignition ON/OFF, so connect it to the positive terminal to activate the unit when the bike is powered on.
System Setup
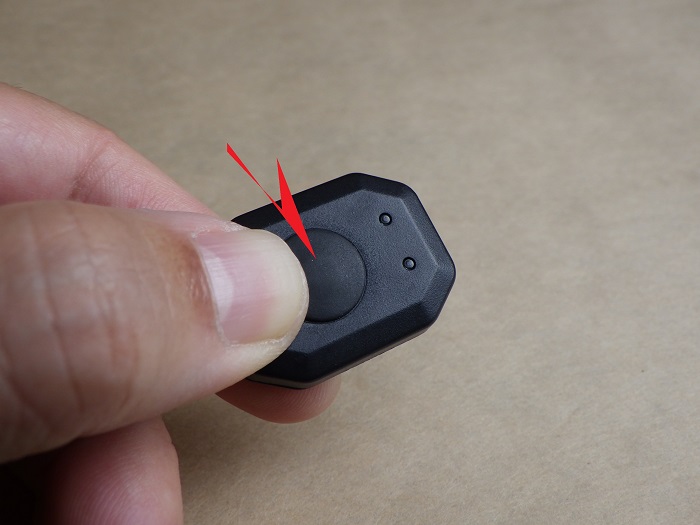
<System Setup>
Press and hold the control switch for over 3 seconds to start the initial setup.
(Refer to Mitsuba Sankowa’s website for detailed settings.)
Connect your smartphone to the main unit via Wi-Fi.
Both front and rear cameras displayed images successfully—no issues so far.
Choosing Mounting Locations
Next, I considered where to mount each component.
Installation guidelines from the manual:
- Main unit: Mount under the seat with access to the SD card
- Cameras: Install in low-vibration zones, away from moving parts
- Switch: Secure around the handlebars without interfering with control
Let’s go hunt for good spots that meet these conditions.
Main Unit Mounting – Option 1
The first candidate is behind the battery under the seat.
When it comes to accessing the SD card, under the seat is definitely the leading candidate—but space down there is seriously limited.
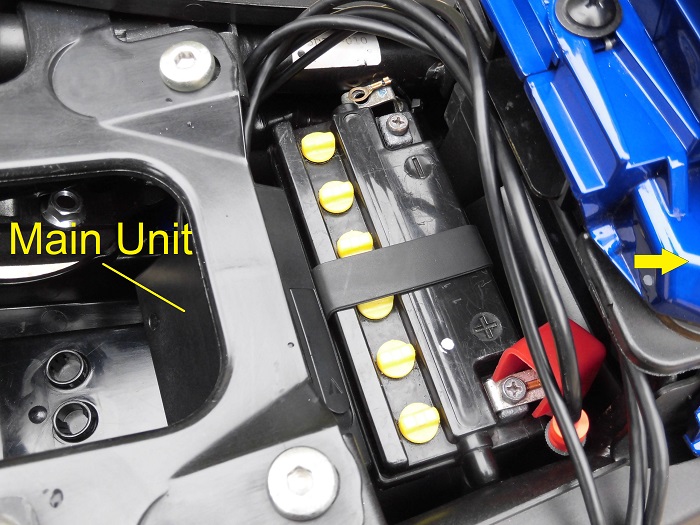
<Main Unit Mounting – Option 1>
First idea: Behind the battery under the seat
Since my bike doesn’t have ABS, the ABS actuator space is free—but still tight.
The fit wasn’t great and it interfered with the onboard tool kit. So, this one’s out.
Main Unit Mounting – Option 2
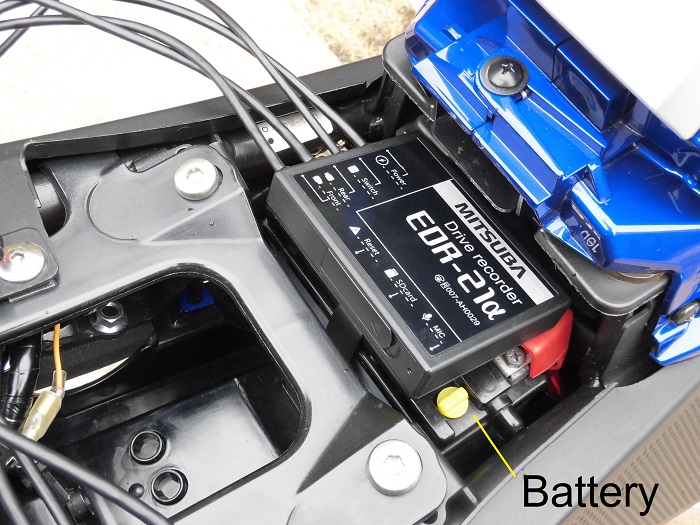
<Main Unit Mounting – Option 2>
Second idea: Right on top of the battery
Honestly, I couldn’t think of anything else…
I was a little worried about potential electrical noise here.
I decided to make a bracket for better fitment.
Since footage is viewable via Wi-Fi, I figured it’s fine to hide the unit deeper inside the seat cowl and only access the SD card for replacement.
Rear Camera Mounting – Option 1
Researching online, it seems that mounting above the OEM flap guard (mudguard) offers great visibility.
But I’ve installed an R&G tail tidy—so that spot’s unavailable.
<Rear Camera Mounting – Option 1>
First idea: On top of the rear cover
Visibility’s great, but it might clash with the seat back.
Actually, knowing me, I’m bound to kick it every time I get on.
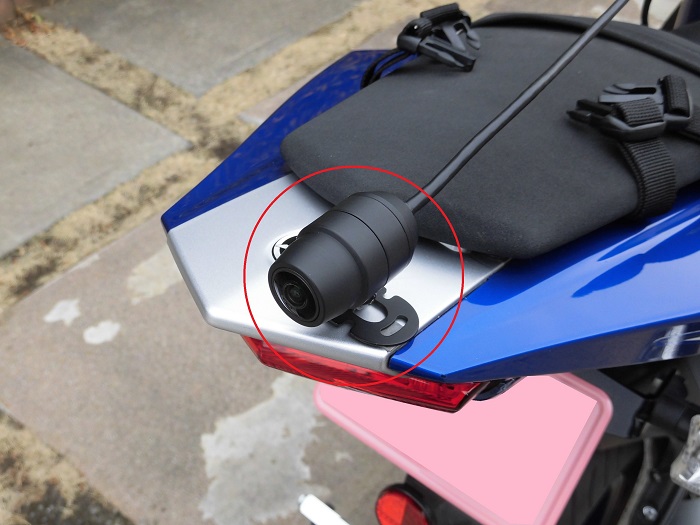
Rear Camera Mounting – Option 2
<Rear Camera Mounting – Option 2>
Second idea: Beside the tail tidy
It feels like a smart location.
I’m aiming for something similar to the PLOT DRS011 mount style (top-right corner of license plate).
Why the right side?
- Since I normally ride on the left, I want to capture the right-rear view—especially if someone tries a risky overtake
- When the side stand is down, the right side sits higher, which helps keep water from dripping onto the camera
Front Camera Mounting – Option 1
Next up, I’m figuring out where to mount the front camera.
I did some digging online, and surprisingly, bikes with fairings don’t offer many good spots—it’s more limited than I expected.
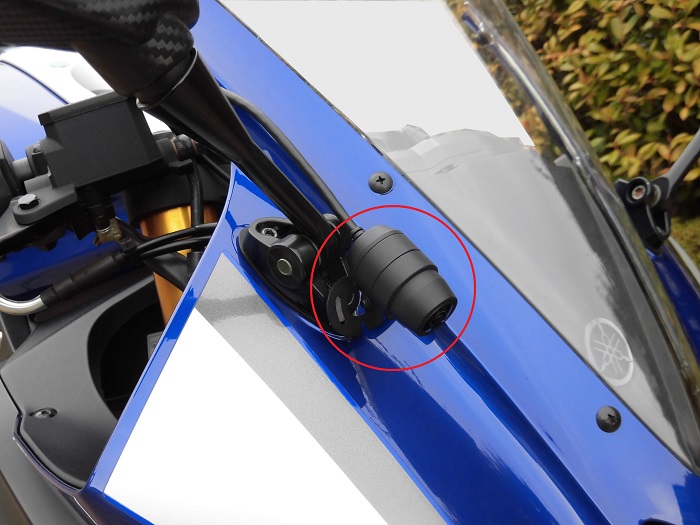
<Front Camera Mounting – Option 1>
First idea: Near the base of the right mirror.
Would be really clean if I can use a standard aftermarket bracket.
Cable Routing for Option 1
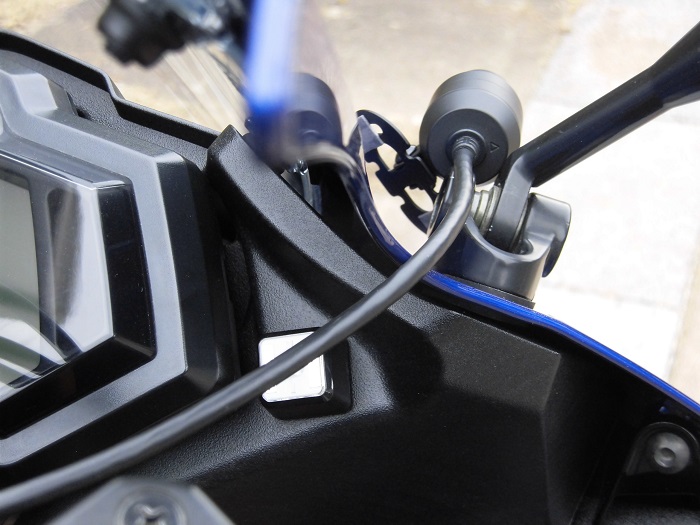
<Cable Routing for Option 1>
But the wiring would be pretty visible, and honestly, I could see myself getting annoyed if I hit it while cleaning the front cowl.
Front Camera Mounting – Option 2
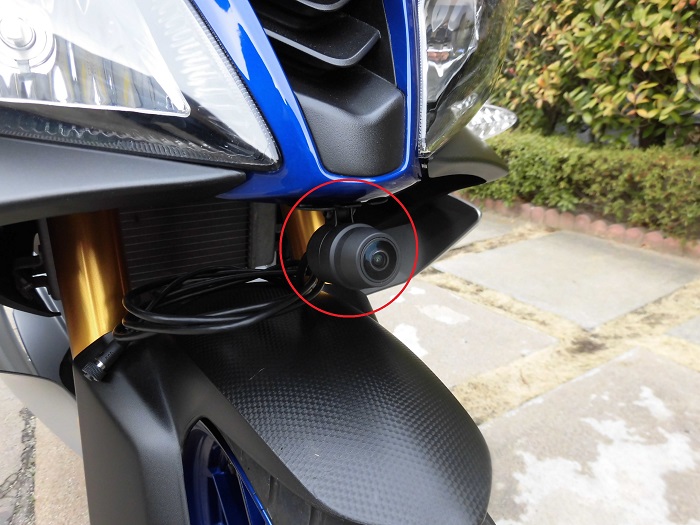
<Front Camera Mounting – Option 2>
Second idea: Tip of the front cowl
Install would be super easy—but when the front fork bottoms out, it looks like the camera could get squished between the fender and the cowl. Not good.
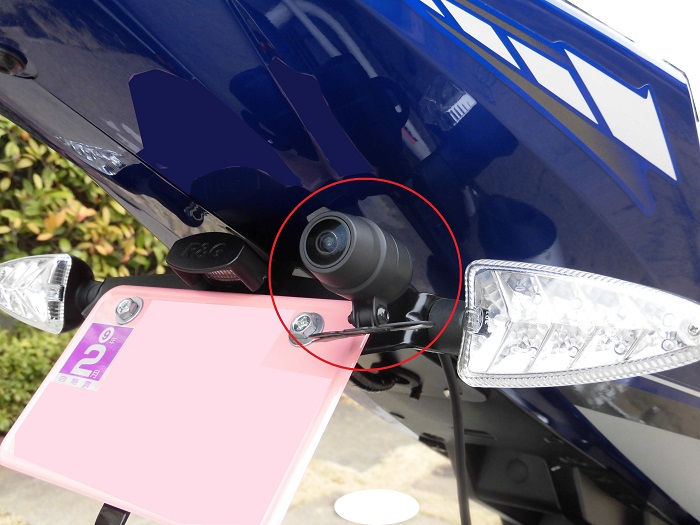
Front Camera Mounting – Option 3
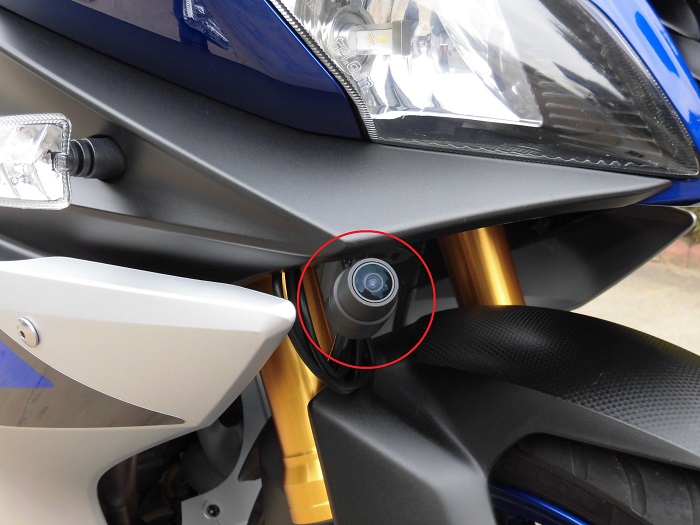
<Front Camera Mounting – Option 3>
Third idea: Right side of the front cowl
It avoids contact with the front fender.
The camera is just temporarily mounted and facing off in the wrong direction, but I’ll adjust that later.
Chose the right side again for the same reason as the rear camera—and because I wasn’t sure the wiring would reach.
Extension cables are available, but I’d rather keep everything tight and short.
Switch Mounting – Option 1
Time to choose where to mount the control switch.
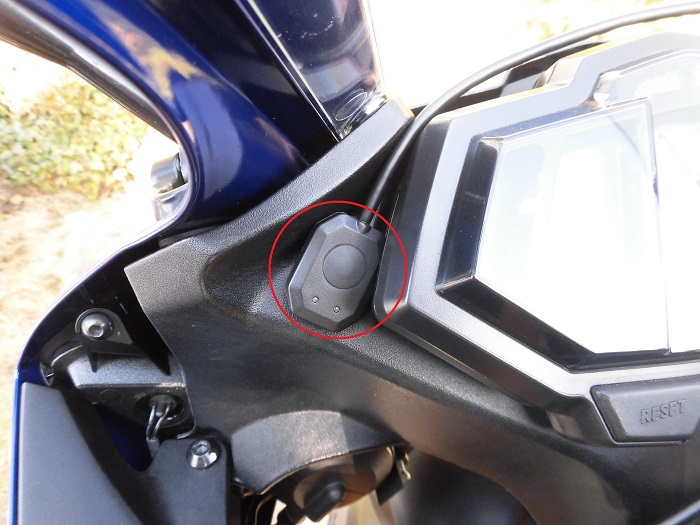
<Switch Mounting – Option 1>
First idea: Left side of the meter cluster
Looked nice and balanced compared to the theft alarm indicator.
But… would I really be able to press it quickly while riding?
And the wiring couldn’t reach anyway.
Switch Mounting – Option 2
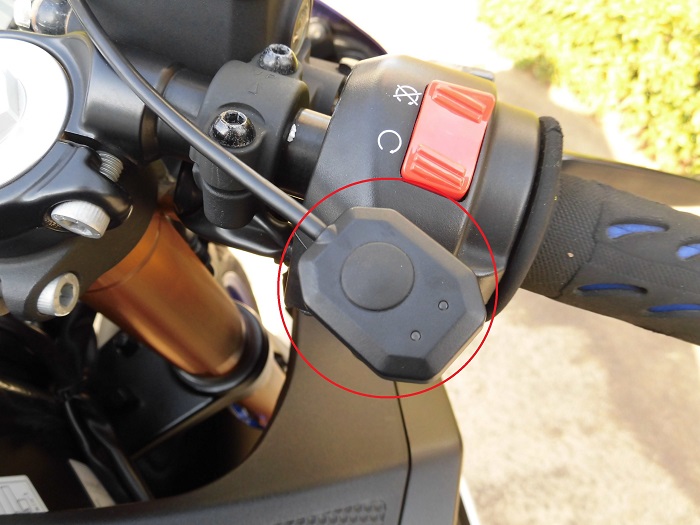
<Switch Mounting – Option 2>
Second idea: On top of the right handlebar switch.
Saw a few folks online who went this route.
Thumb is easy to reach—even while gripping the brake lever.
Switch Mounting for Option 2
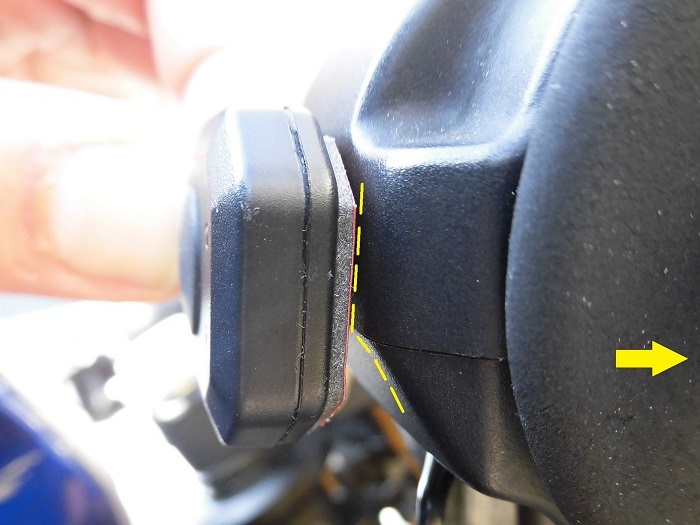
<Switch Mounting for Option 2>
But the surface is curved.
If I don’t fill the gap properly, the switch could pop right off.
Pretty high difficulty here.
Switch Mounting – Option 3
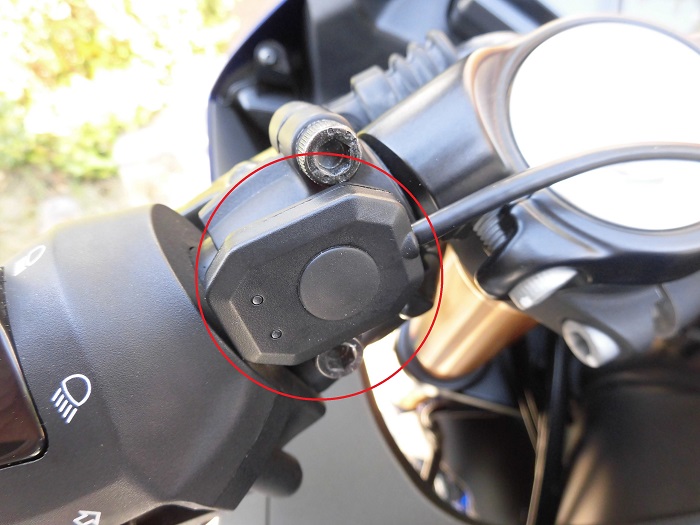
<Switch Mounting – Option 3>
Third idea: Clamp area on the left handlebar
Originally, I was leaning toward Option 2. But then I saw the motorcycle dash cam setup on the Eliminator bike at the Osaka Motorcycle Show 2023.
This location looked great for a custom bracket—so, I changed plans.
Wiring Strategy
Except for the power cable, I didn’t cut or splice anything.
According to Mitsuba Sankowa’s website:
- EDR-series connectors are custom-made for top-level waterproofing
- Cables are shielded to minimize noise generated by the bike
So I simply coiled up the extra wiring and left it untouched.
Up next: Motorcycle Dash Cam Installation Part 2 – Crafting the Main Unit Bracket.
3. Summary
In this session, I focused on planning the installation method for my motorcycle dash cam.
Once I started looking at actual mounting locations, I realized there were more limitations than expected—it was surprisingly tough to find satisfying spots. Mounting the main unit under the seat was especially tricky due to limited space.
As for the cameras, although using off-the-shelf brackets is the norm, I wanted a setup that matched my own preferences—so I decided to fabricate the brackets myself.
On a positive note, the cable lengths were more than sufficient, so I didn’t need to prepare any extension leads.
- The ideal position for the main unit is under the seat to allow SD card access, but space is tight
- Fabricating your own camera brackets gives more freedom with placement
- For switch positioning, the Eliminator’s layout provides a helpful reference


