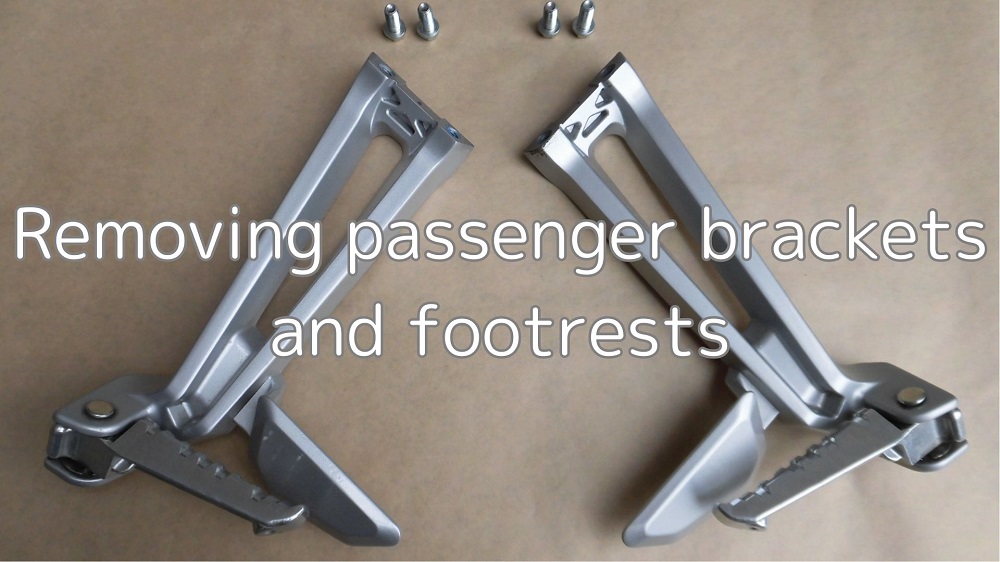
I never ride with two people.
So, I decided to remove the passenger brackets and steps, which I never use.
Removing the passenger brackets simplifies the area around the rear cowl and accentuates the sharpness of the R125.
On the other hand, I felt that if I left it off, water would get inside the mudguards when riding in the rain or washing the moto.
So, in this article, we have summarized not only the process of removing them, but also what to do with them afterwards.
From this article you will know as follow.
- How to remove the passenger brackets
- What to do after removing the passenger brackets (making the passenger bracket hole cover)
- Condition of removing the passenger brackets
| Date | 20th June 2021 |
| Subjects | Tuning, Customize |
| Shop or DIY | DIY |
| Difficulty | |
| Working hours | 2 |
| Costs [Yen] | 716 |
1. Good to use
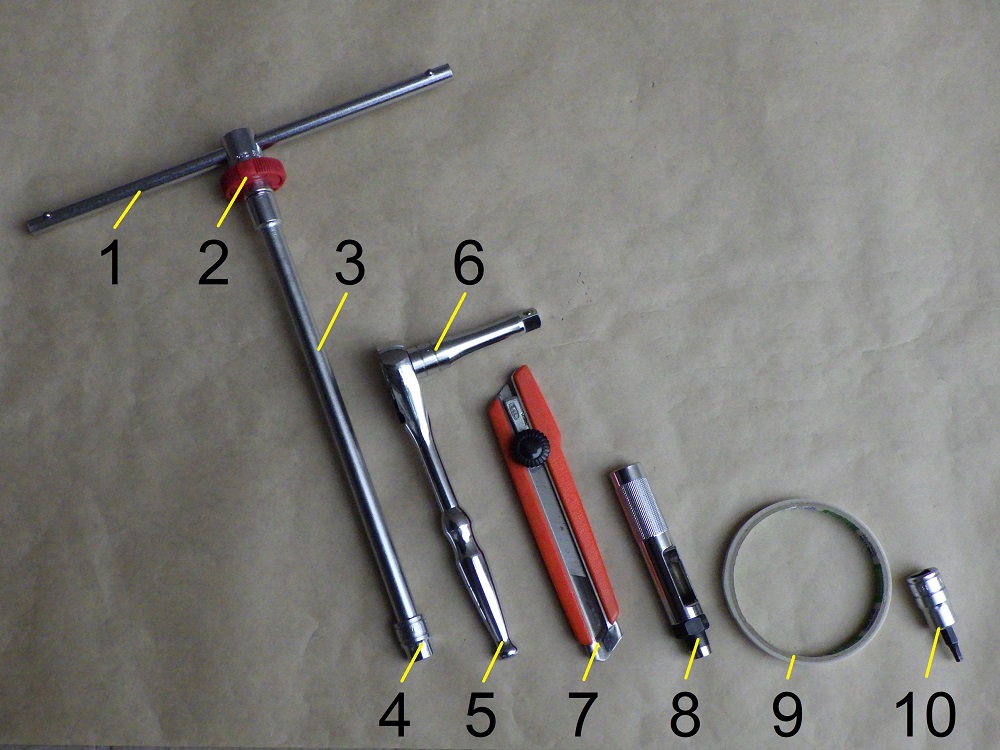
| No. | Name | Manufacturer | Product number | Quantity | Amounts[Yen] | Purchasing this time |
| 1 | Slide head handle | KTC | BHM3 | 1 | 2,970 | |
| 2 | Quick spinner | KTC | BE3-Q | 1 | 2,046 | |
| 3 | Extension bar (250mm) | KTC | BE20-250 | 1 | (2,783) | |
| 4 | Bit socket (10mm) | KTC | B3-10 | 1 | 880 | |
| 5 | Rachet wrench | KTC | BR3E | 1 | 6,182 | |
| 6 | Extension bar (75mm) | KTC | BE3-075 | 1 | 1,529 | |
| ST6 | EPDM sponge | iteck | KSEP-1011 | 1 | 158 | ○ |
| ST6 | Low head bolt M8×1.25, 20mm | YAHATA NEJI | 671 | 2 | 396 | ○ |
| ST6 | Sleeve for M8, Outer diameterφ10 | YAHATA NEJI | 481 | 1 | 98 | ○ |
| ST6 | Flange nut M8 | – | – | 4 | 64 | ○ |
| 7 | Cutter | – | – | 1 | (500) | |
| 8 | Punch (10mm) | STRAIGHT | 19-569 | 1 | 3,950 | |
| 9 | Double-sided tape (Width 10mm) | DAISO | – | 1 | (110) | |
| 10 | Hexagon bit socket (4mm) | KTC | BT3-04S | 1 | 1,012 | |
| 22,678 | 716 |
2. Remove passenger brackets (STEP 1-14)
With rear cowls and other parts removed
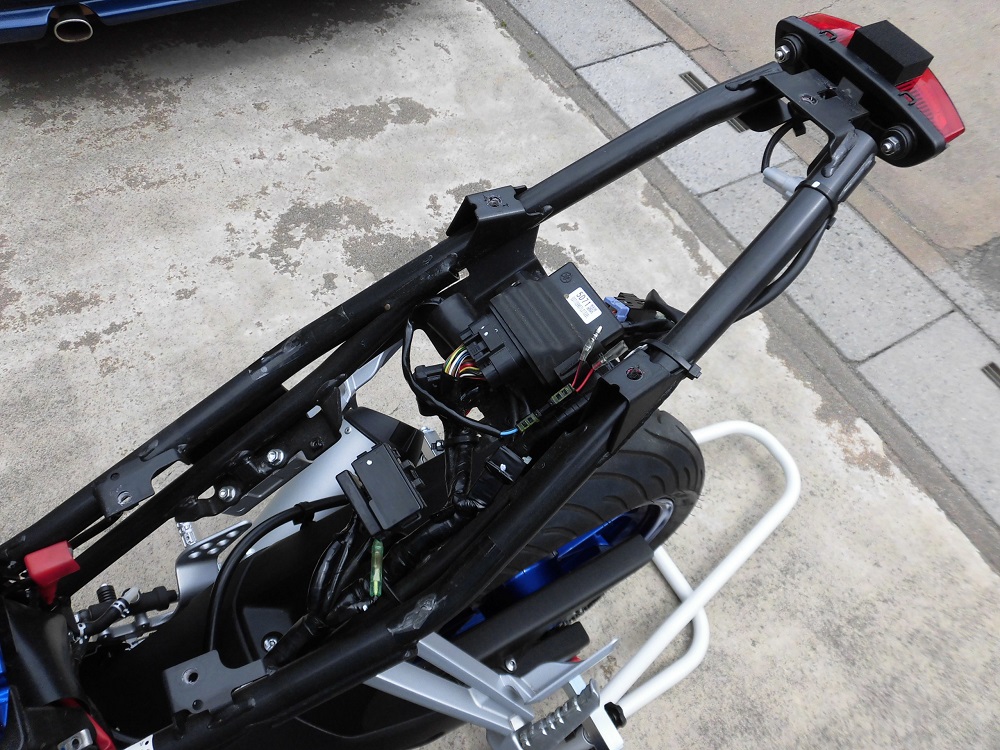
<With rear cowl and other parts removed>
First, remove the rear cowls, rear panel, box and mudguard.
For information on how to remove each part, please refer to the maintenance record ‘How to remove the rear cowls and panel etc.’.
You can remove the passenger brackets without removing the box.
But it is very difficult to work with.
On the other hand, you can work without removing the mudguard.
But for ease of workflow and photography, they are removed.
Remove passenger bracket 1
Unless otherwise stated, the following will be the right-hand passenger bracket.
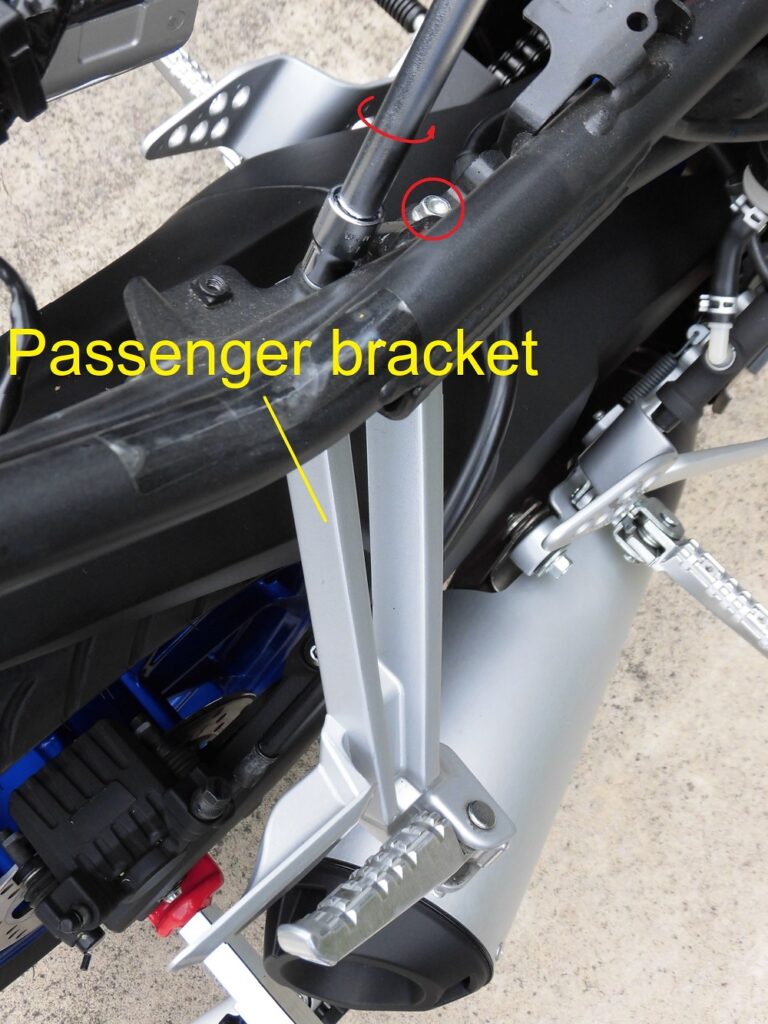
<Remove passenger bracket 1>
Using a T-bar handle with a socket (10 mm), remove the two bolts securing the step.
They are quite hard because of the thread-locking agent.
It is still recommended to remove the box.
Remove passenger bracket 2
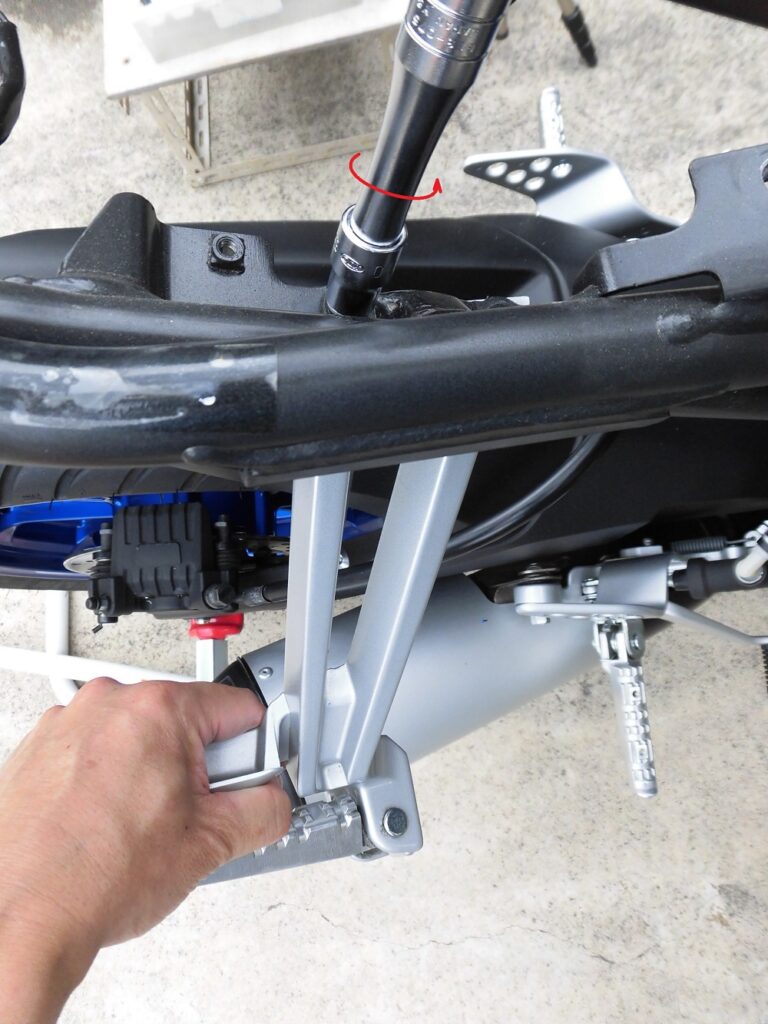
<Remove passenger bracket 2>
It has a thread-locking agent and will remain stiff until the bolt is removed.
After a certain amount of loosening, the passenger bracket will start to play, so hold it down with your hand while loosening it.
If you don’t hold it down, it may fall onto the muffler at the end.
Removed passenger bracket and bolts 1
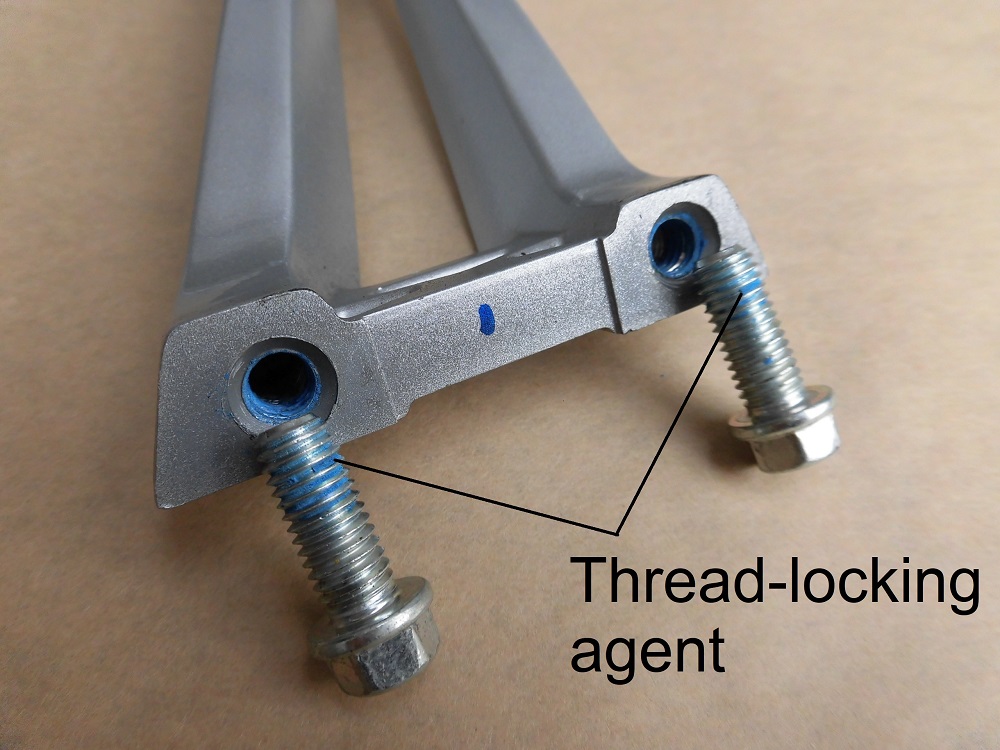
<Removed passenger bracket and bolts 1>
The blue thread-locking agent was firmly attached to the threads.
No wonder it is always hard.
Remove the left side in the same way.
Removed passenger bracket and bolts 2
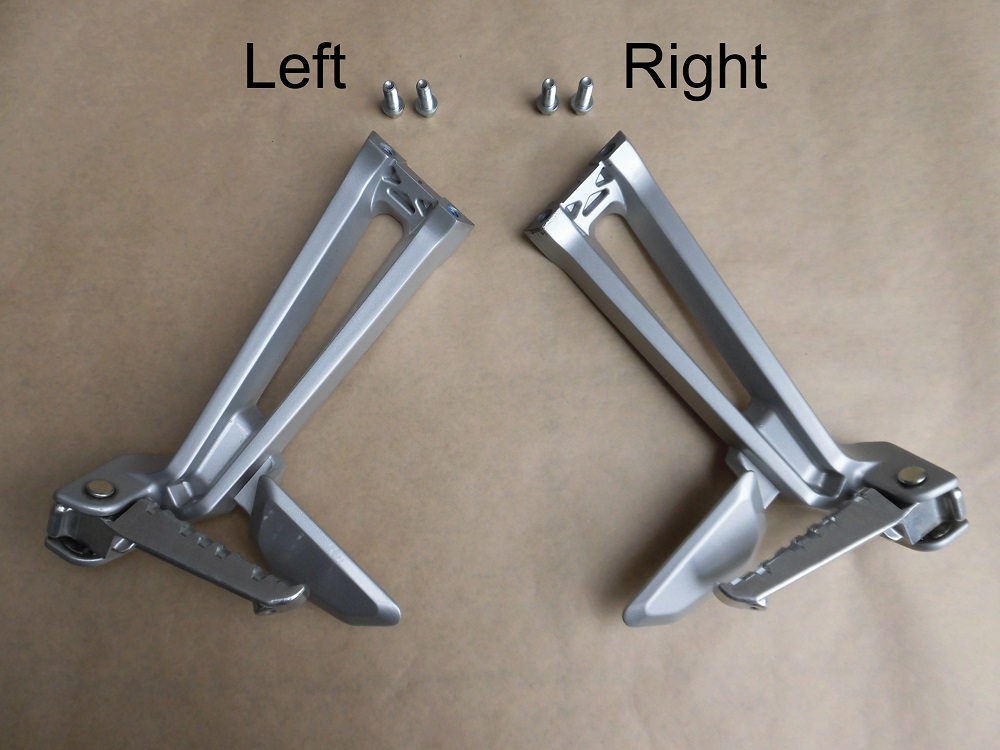
<Removed passenger bracket and bolts 2>
It came off like this.
588g per side, so it was 1,176g in total.
As it is made of aluminum, it is lighter than I expected.
Prepared materials
When the passenger brackets are removed, a gap is created in that area.
So, I will use EPDM sponge to make a passenger bracket hole cover to fill it.
If I just stick it on with double-sided tape, it is likely to come off and lose it while riding.
So, I use bolts, sleeves and nuts to fix it in place.
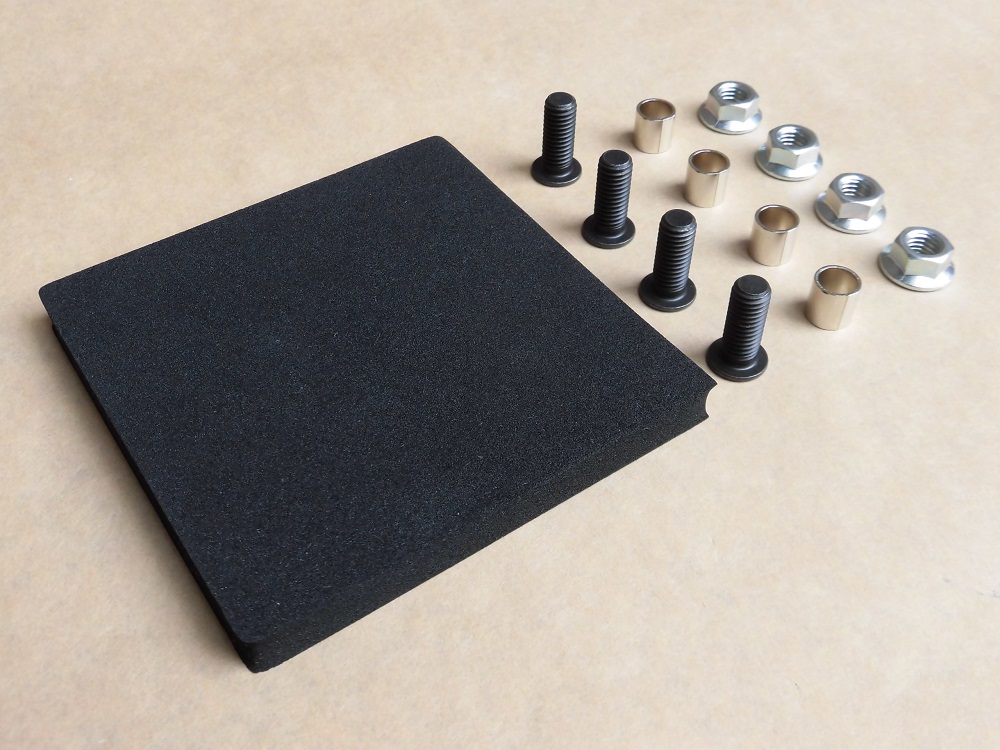
<Prepared materials>
Photo from left is as follow.
- EPDM sponge…1 piece
- Low head bolt M8 x 1.25, 20 mm…4 pieces
- Sleeve for M8, outer diameter ø10…4 pieces
- Flange nut M8…4 pieces
Cut sponge
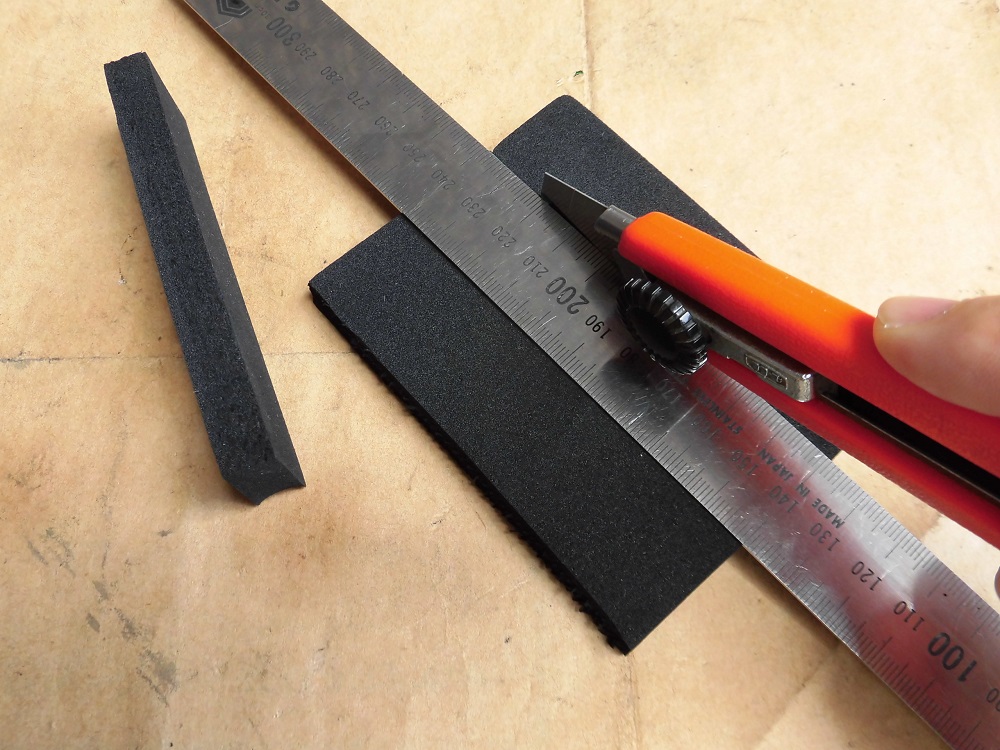
<Cut sponge>
Cut out with a cutter to fit the gap in the mudguard.
The product description said that EPDM shrinks as it deteriorates.
So, I cut it 1 to 2 mm larger.
Size: 91 x 25 x 10 mm (length x width x sponge thickness)
The cutter had a blade spillage, and the cut surface was ragged.
But even after replacing the blade, it didn’t cut very cleanly…
Punch sponge
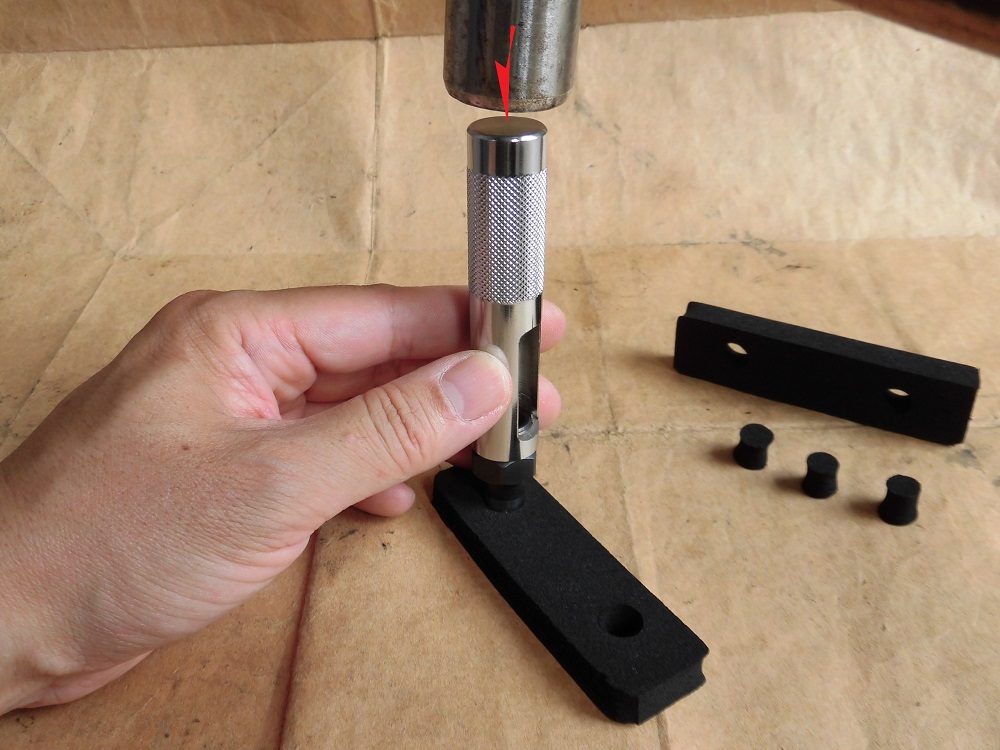
<Punch sponge>
The holes are drilled with a punch (10 mm) after checking the position of the holes in the frame with an actual piece.
The holes are soft and can be drilled into a drum-like shape when punched through with the punch.
Passenger bracket hole cover
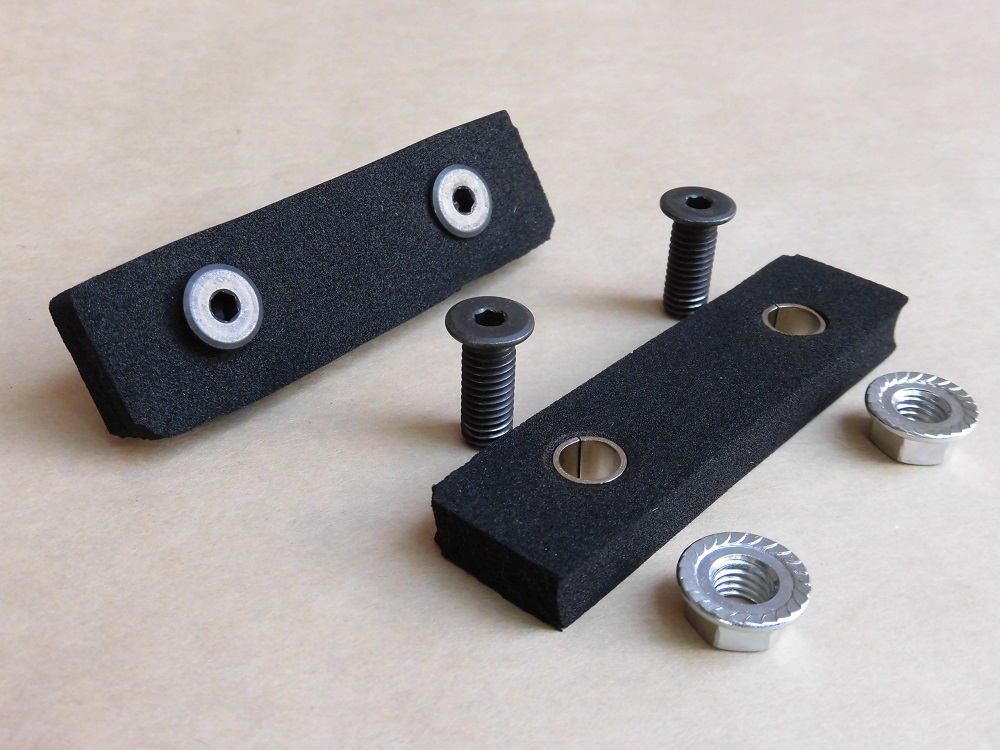
<Passenger bracket hole cover>
I made it like this.
Actually, the gap in the mudguard is larger on the right.
So, it is made about 1 mm larger.
Mount sponge 1
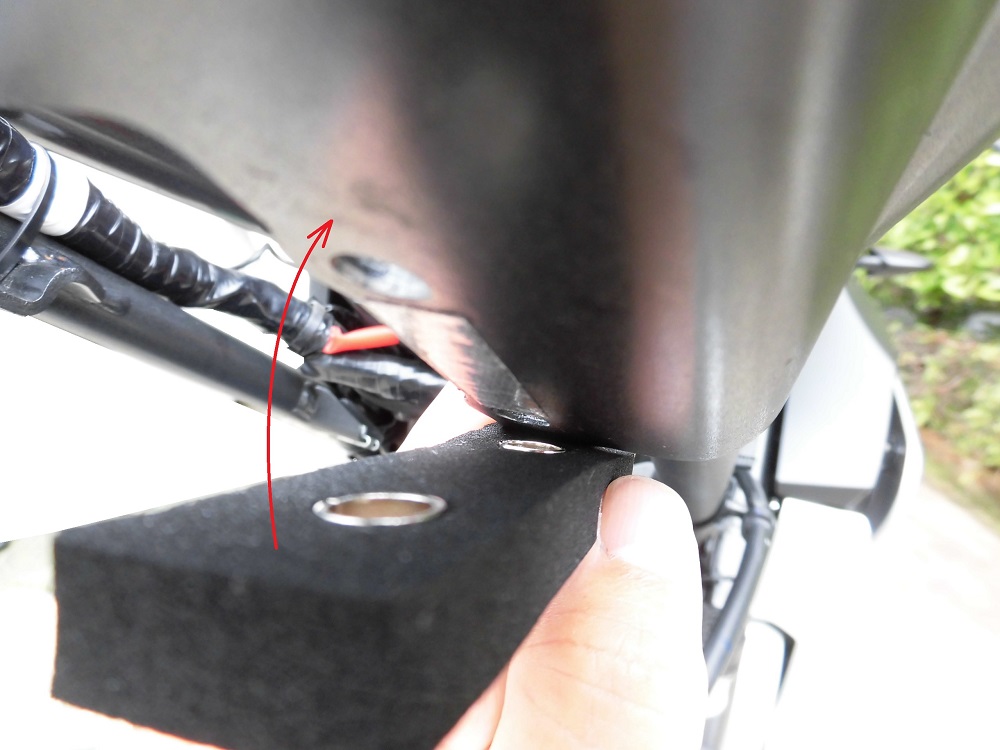
<Mount sponge 1>
Stick the double-sided tape to the vehicle body, aligning it with the holes in the frame.
Mount sponge 2
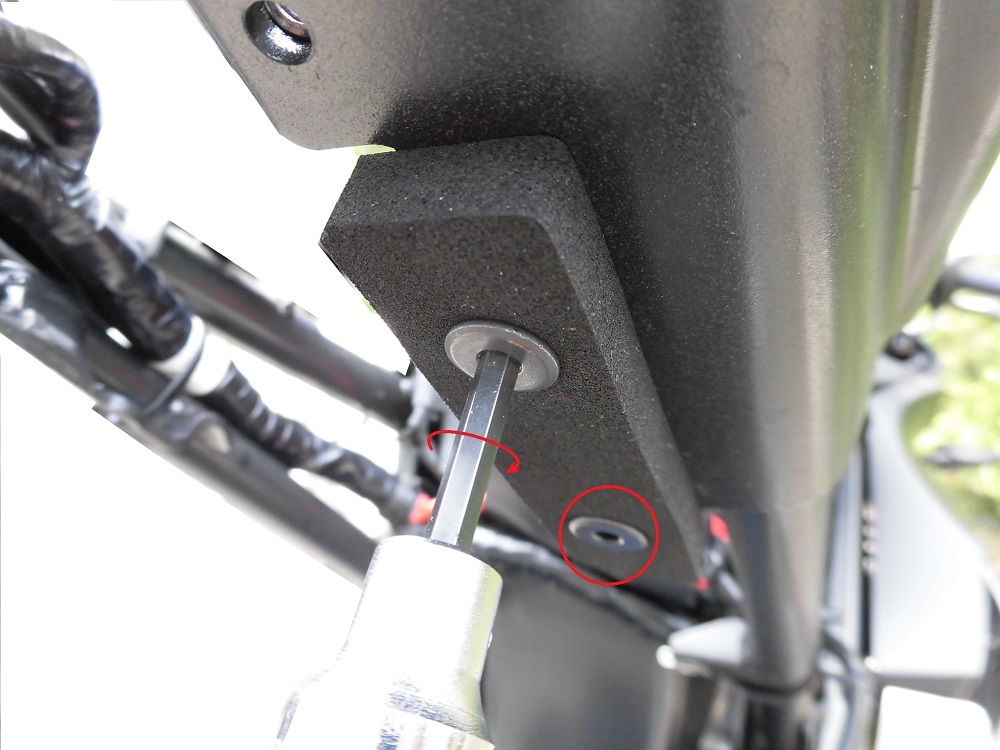
<Mount sponge 2>
Next, hold the flange nut with a socket (12 mm) and tighten the low-head bolt with a hexagon socket (4 mm).
Install mudguards and others
Then, install the mudguard, box, rear cowls and rear panel.
(For more information, see the maintenance record ‘How to install rear cowls and panel, etc.’, which will be described at a later date.)
With sponge mounted
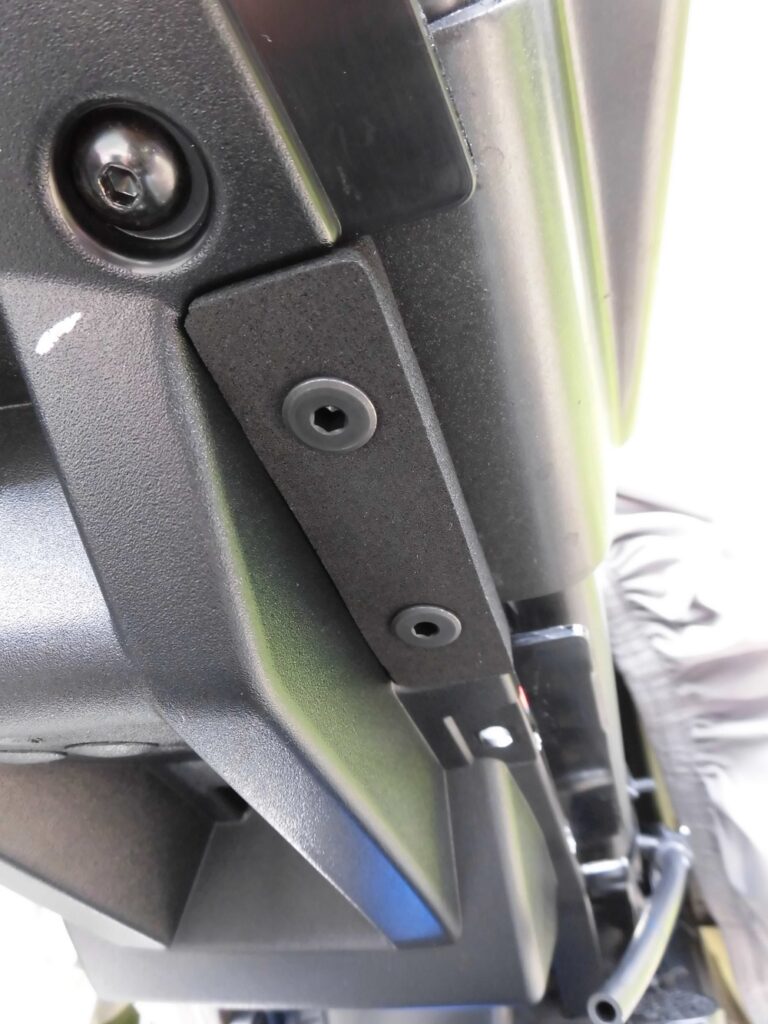
<Before installing the rear cowl>
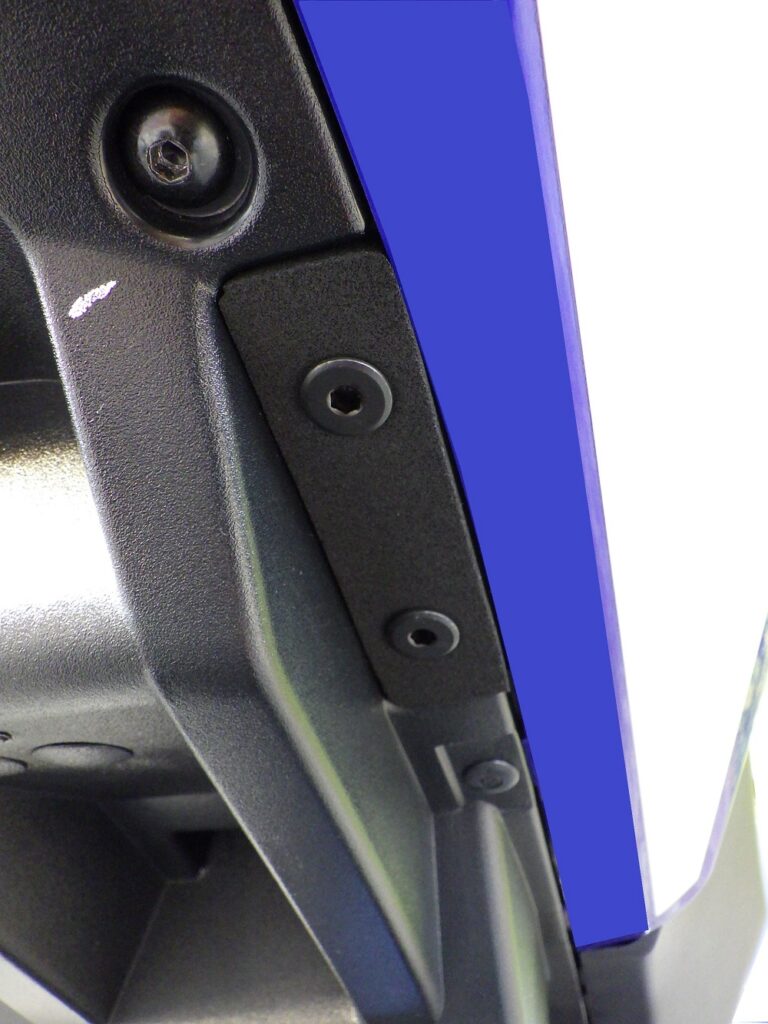
<After installing the rear cowl>
It turned out like this.
It would have been perfect if the sponge was a little less than 1 mm thick.
I’m afraid that I don’t have the skill to cut it thinner…
I’m sure the sponge will shrink in time, and it will be just, right?
After removal of passenger brackets
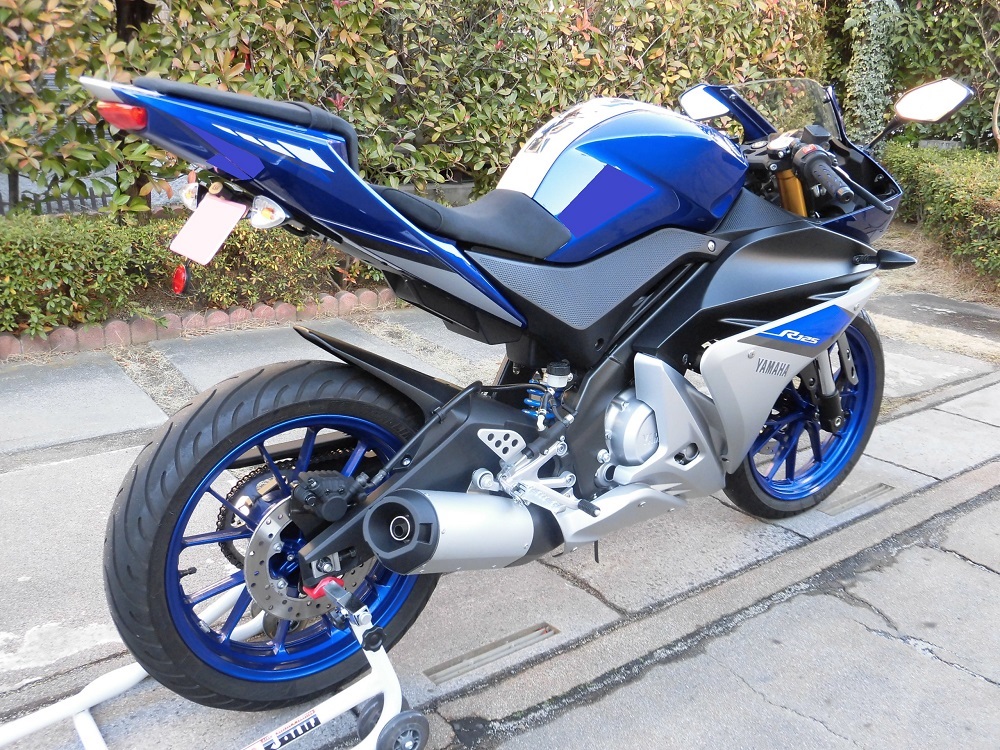
<After removal of passenger brackets>
With the tail tidy fitted, it has a much cleaner appearance.
Although the sponge sticks out slightly from the rear cowl, at such a distance you can’t tell at all.
3. Summary
This time, the passenger brackets were removed, and passenger bracket hole covers were made and fitted at the same time.
I introduced a small improvement made from parts you can buy at a home improvement center.
Not only did it look nicer, but it actually made the moto lighter.
The total weight of the sponges, bolts etc. is 33g per side, 66g in total.
Subtracted from the weight of the passenger brackets/steps plus the removed bolts, the weight was reduced by 1,110g.
However, the bolts used to fix the 5g sponge were a bit exaggerated.
- When removing passenger brackets, it is recommended to remove the box
- Passenger bracket hole cover can be made from commercially available parts
When passenger brackets are removed, - The moto has a cleaner appearance and more closely resembles a racer’s image.
- Weight reduction of 1,110g.
