When I was taking my moto out of the parking lot, I unexpectedly hit my front right blinker and broke it.
I would like to replace the whole blinker, but due to the cost, I decided to repair it.
I found on the Internet that there are various repair methods, but this time, I will introduce the method using a pipe.
By the way, it is well known in the YZF-R125 (5D7) social networking circles that the blinker breaks.
It depends on the environment in which it is run, but it seems to break in a relatively short time.
If you are considering repairing it, please take a look at this article.
From this article you can learn the following.
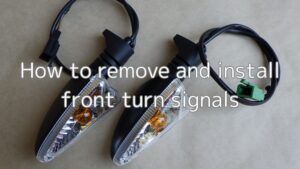
- Temporary repairs for broken turn signal
- Structure of an LED turn signal
- How to repair a broken turn signal
| Date | 21st May 2023 |
| Subjects | Maintenance, Failure, Repair |
| Shop or DIY | DIY |
| Difficulty | |
| Working hours | 1 |
| Costs [Yen] | 128 |
1. Goods to use
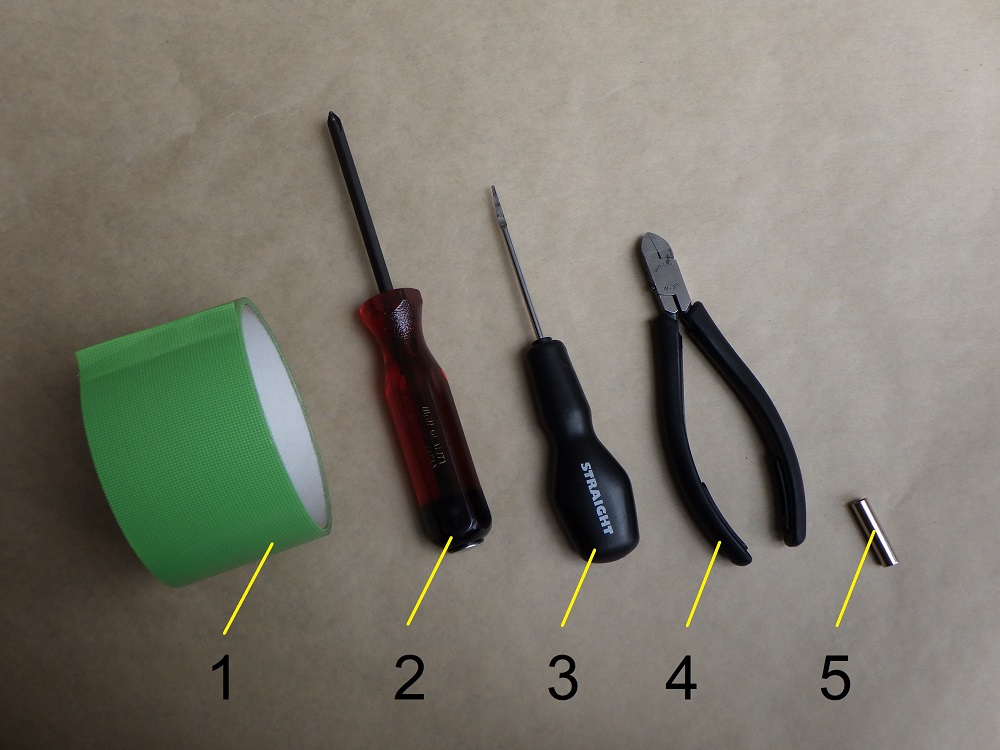
| No. | Products name | Manufacturer | Products number | Quantity | Amounts[Yen] | Purchase this time |
| ST1 | LED turn signals (Length 36mm) | SAVAGE | – | 1 | 2,453 | |
| 1 | Curing tape | – | – | 1 | 252 | |
| 2 | Resin Pillips screwdriver (No.1) | KTC | DPD-1 | 1 | (1,353) | |
| 3 | Connector tools | STRAIGHT | 19-456 | 1 | (2,770) | |
| 4 | Miniature nipper | HOZAN | N-35 | 1 | 3,465 | |
| 5 | Spacer 5×25 | YAHATA NEJI | 412 | 1 | 128 | ○ |
| 10,421 | 128 |
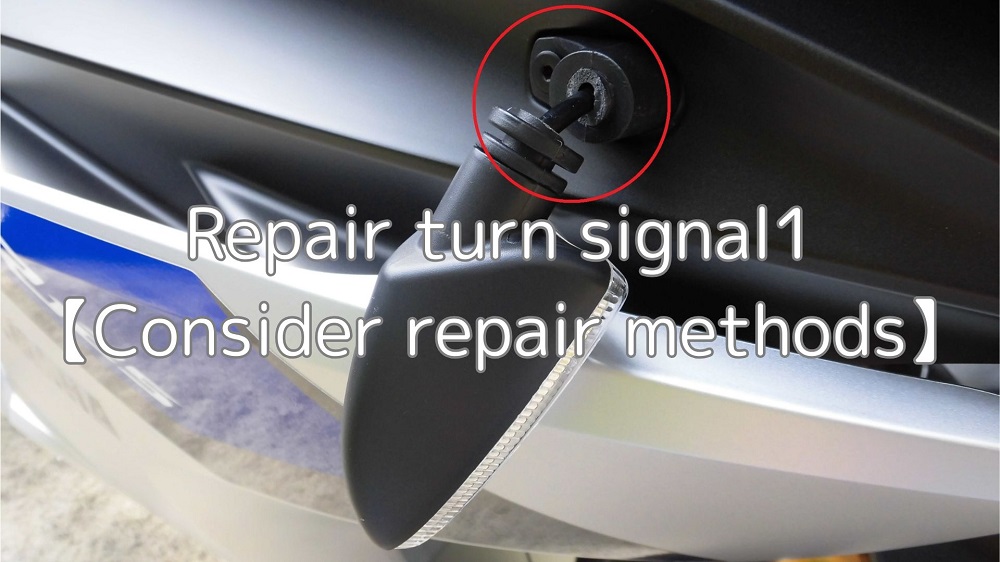
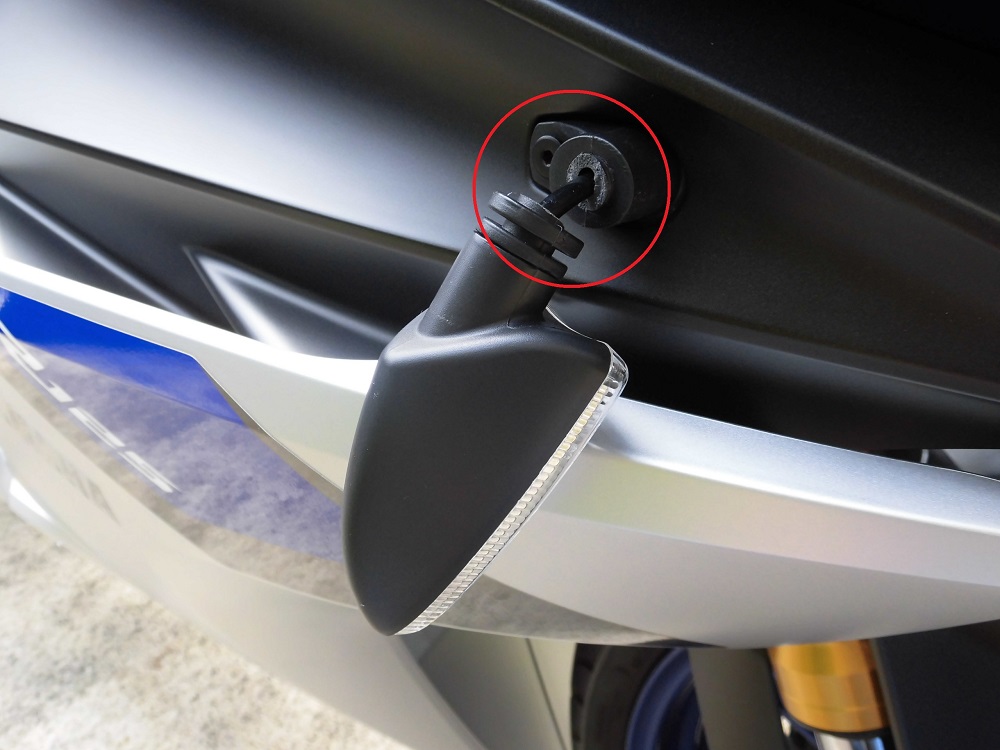
2. Repair turn signal1【Consider repair methods】(STEP 1-21)
Collision Situation
When I was backing my R125 out of the bike parking lot one morning, I was distracted by a noise behind me.
The moment I turned my head back…
<Collision Situation>
“Crash!”
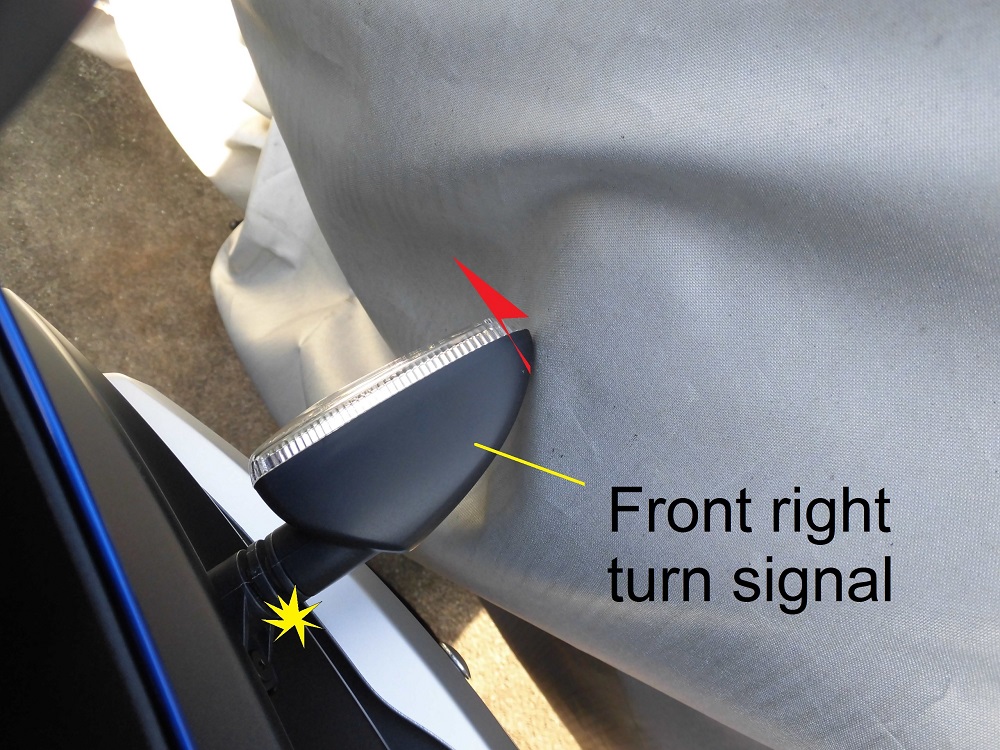
I took my eyes off the road and caught my front right turn signal on the bike parked next to me.
Broken LED turn signal 1
<Broken LED turn signal 1>
It was broken from the root.
“I don’t know what I’m doing…”
It’s too sad to say anything.
Temporary repairs
I was just about to go to work, so I hastily fixed it with curing tape.
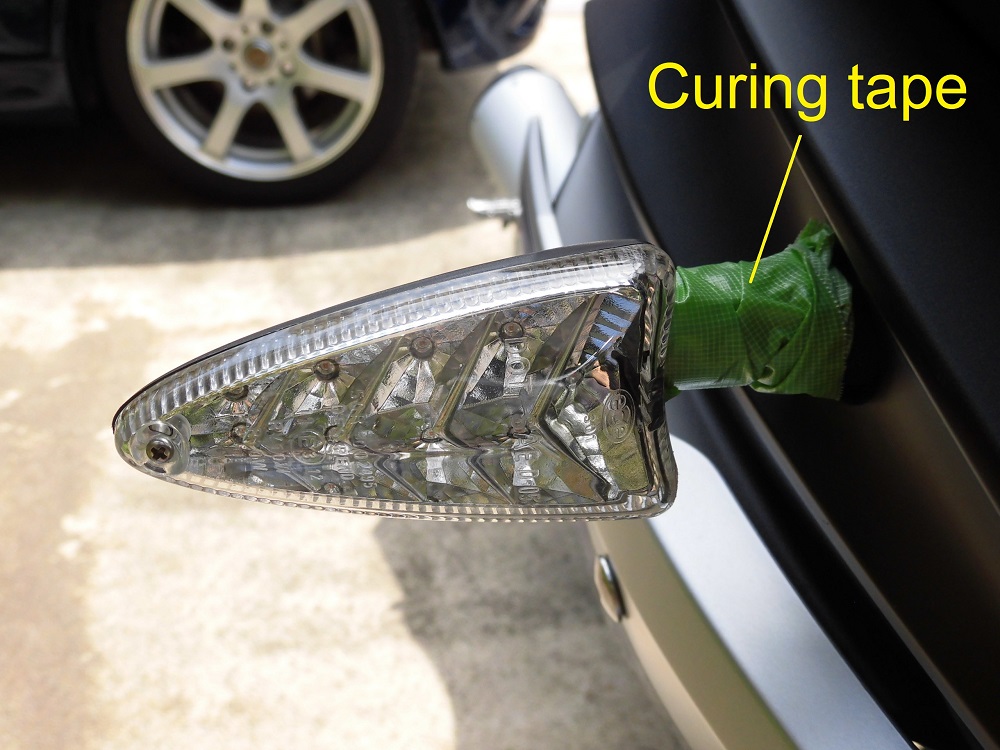
<Temporary repairs>
What an appalling sight.
By the time I got home, it was hanging down about 45 degrees, which was even sadder.
But fortunately, the following was okay.
- The turn signal came off and didn’t hit the side cowl
- The turn signal was working fine (no wires were cut)
Remove front right turn signal
As it is not possible to ride the car as it is, I will replace the turn signal for now.
Since the work was done outdoors, I removed it after sunset with the work lights on. Then I installed the genuine turn signal early in the morning with the morning sun.
(For information on how to remove the front turn signals, please refer to the maintenance record “How to remove and install front turn signals”)
Replaced genuine turn signal
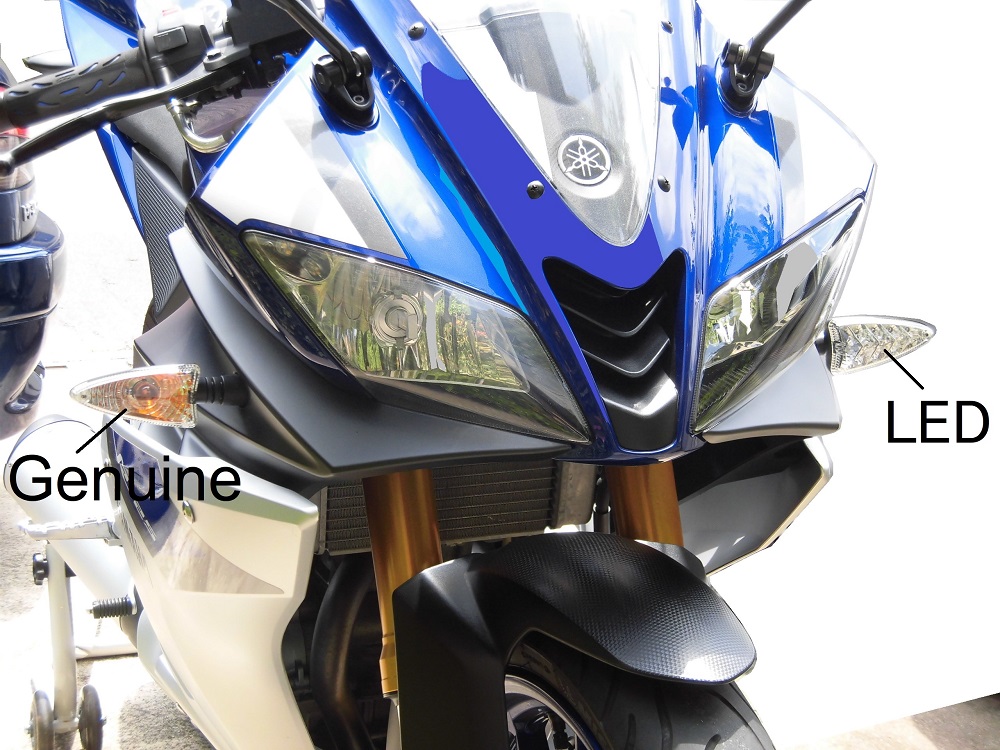
<Replaced genuine turn signal>
Three of the places are LED turn signals and only one is a genuine turn signal.
Fortunately, the LED-compatible turn signal relay works fine even when both are mixed together, so that helped.
Broken LED turn signal 2
Over the weekend, I checked the broken LED turn signal.
<Broken LED turn signal 2>
It is broken from the root really beautifully.
Consider repair methods
I checked the internet. And it seems that gluing alone will cause it to break again soon.
Therefore, the method that lasts long is considered.
Idea 1: Insert wire rod
I thought of inserting two wire rods of about 1.5mm on the upper side and one on the lower side into the broken section.
It would be feasible since it would only require drilling holes.
Idea 2: Insert a pipe.
The diameter of the hole through which the wires are routed is about 6mm.
A pipe about 6mm in diameter is relatively easy to obtain and has great strength.
Since idea 2 seems easier, I think I will go ahead with this one.
Remove lens 1
First, remove the circuit board and wiring from the broken mounting section and the body.
<Remove lens 1>
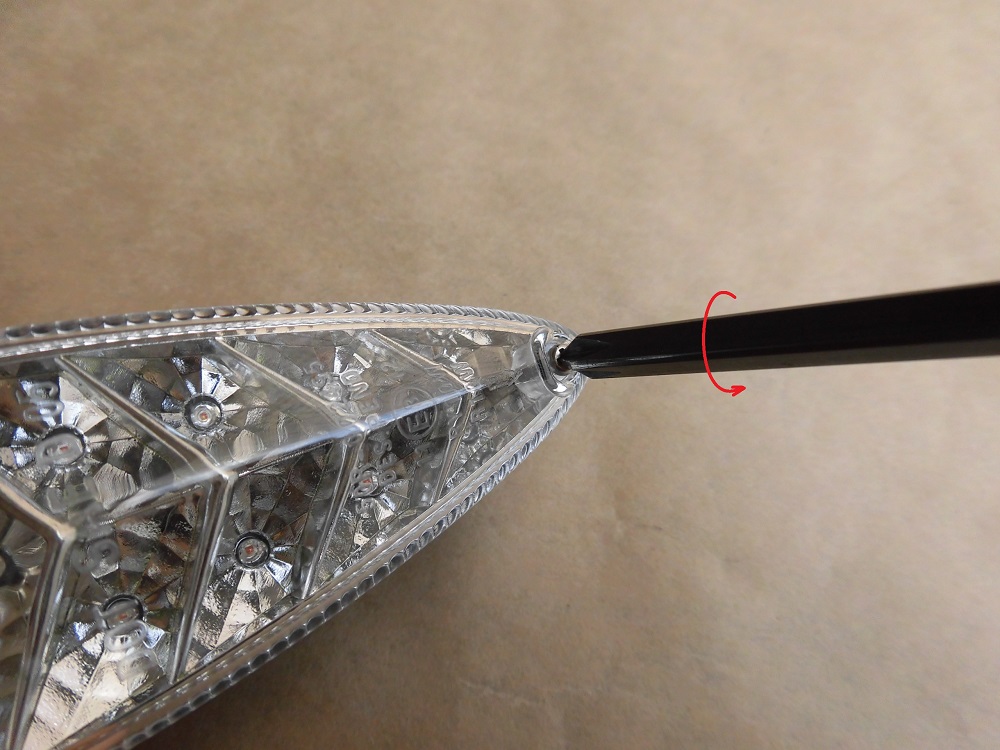
Using a Phillips screwdriver (No. 1), remove the screw that hold the lens in place.
Remove lens 2
<Remove lens 2>
Lift the lens from the screw side and remove it.
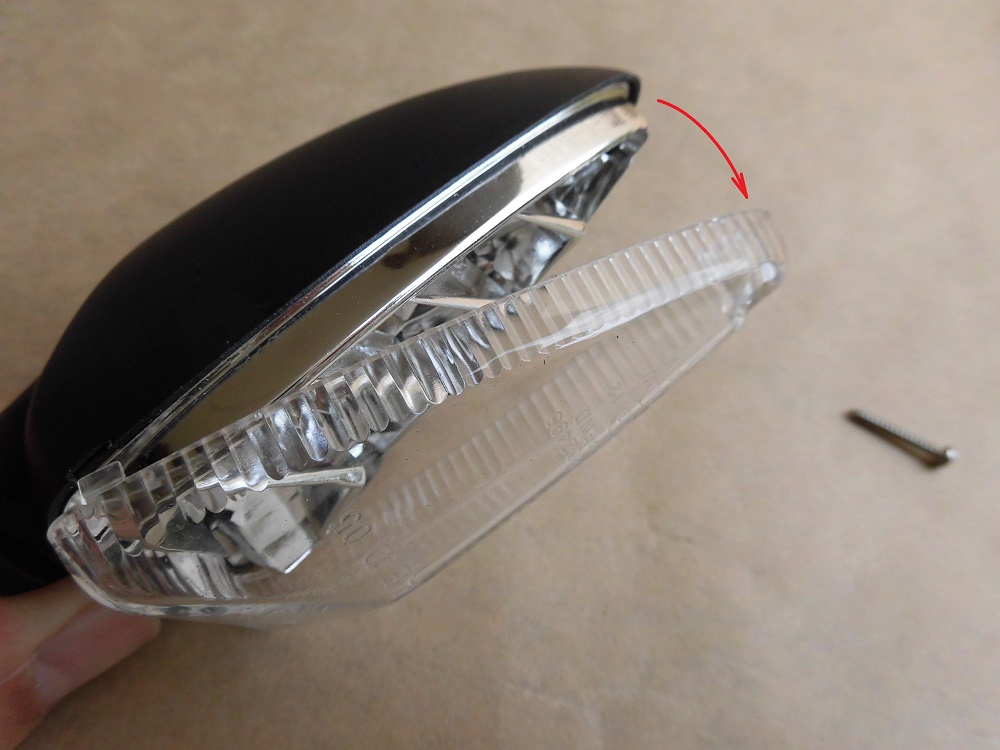
Remove circuit board

<Remove circuit board>
While feeding the wires into the body, pinch the reflector section and lift it up.
Circuit board condition
Since I removed it at an angle, I will check the inside of the LED turn signal.
<Circuit board condition>
The reflector seems to be held in place by two screws, so it could be removed.
As long as I know the type of LED, I may be able to replace only the parts in case of failure.
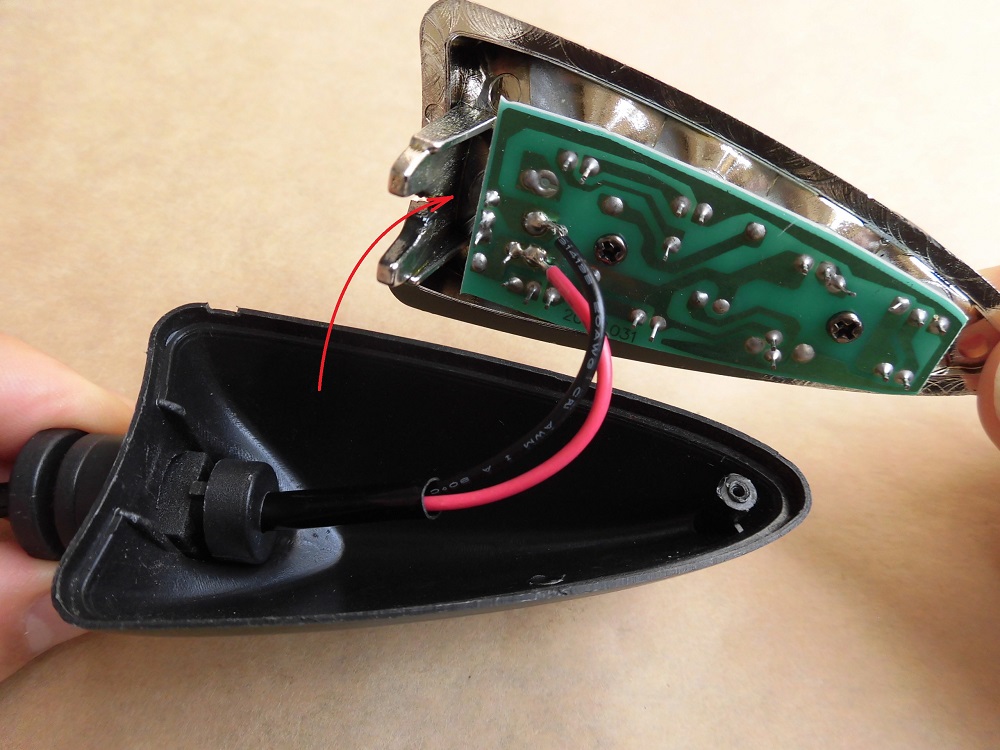
Remove connector
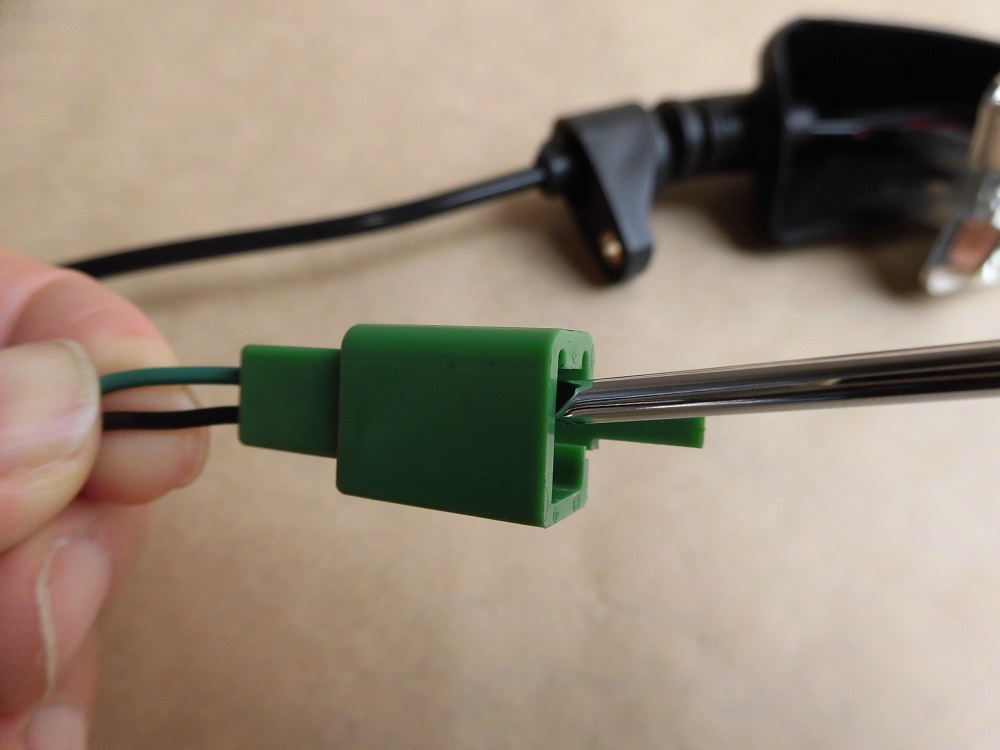
<Remove connector>
Without delay, use the connector tool to disconnect the connector.
(For details, please refer to STEP 4 and 5 of the maintenance record “Replace to LED turn signals2【Assemble and install front turn signals】”)

Cut cable tie
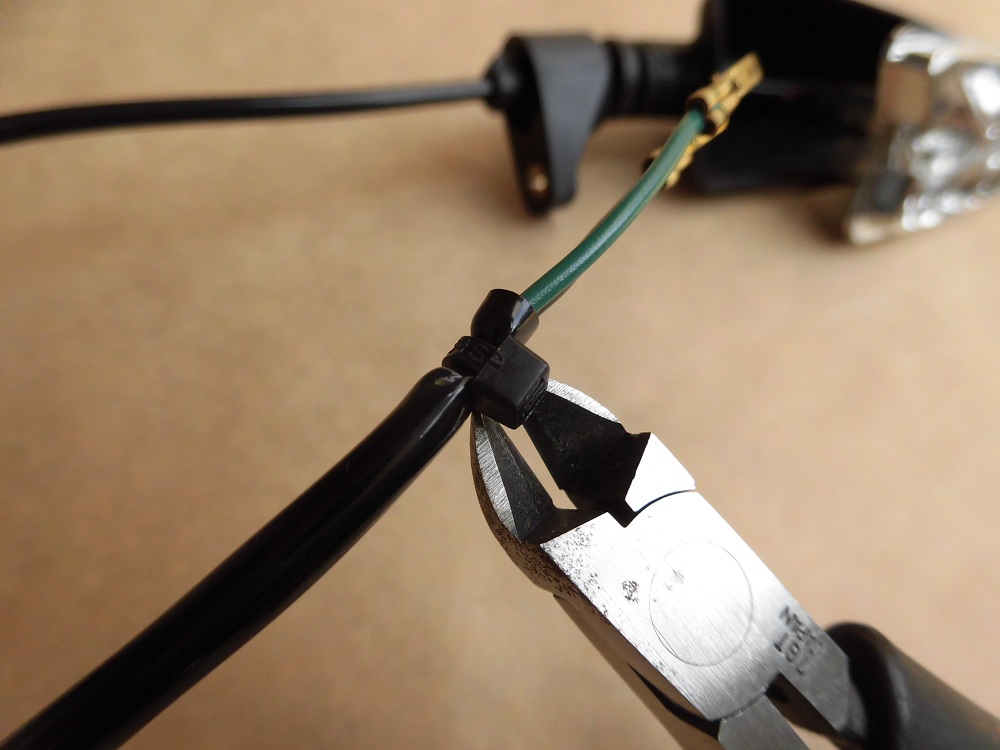
<Cut cable tie>
Using nippers, cut the tie holding the harness tube.
Remove wiring
<Remove wiring>
All that remains is to pull the wire to the body and unplug them.
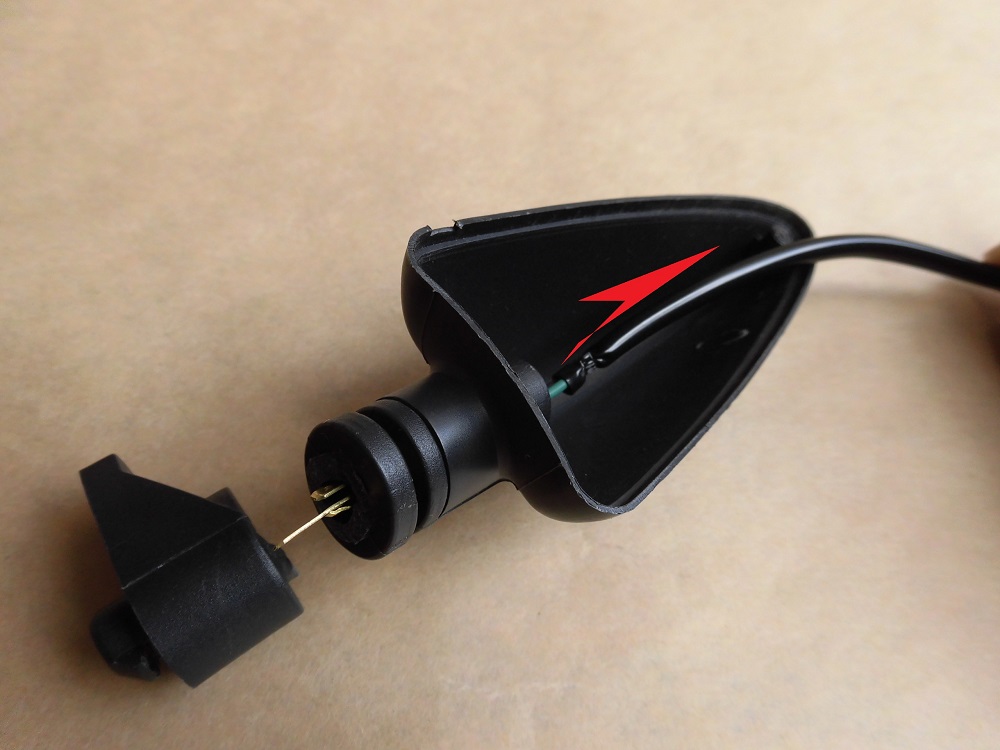
Removed mounting part and body
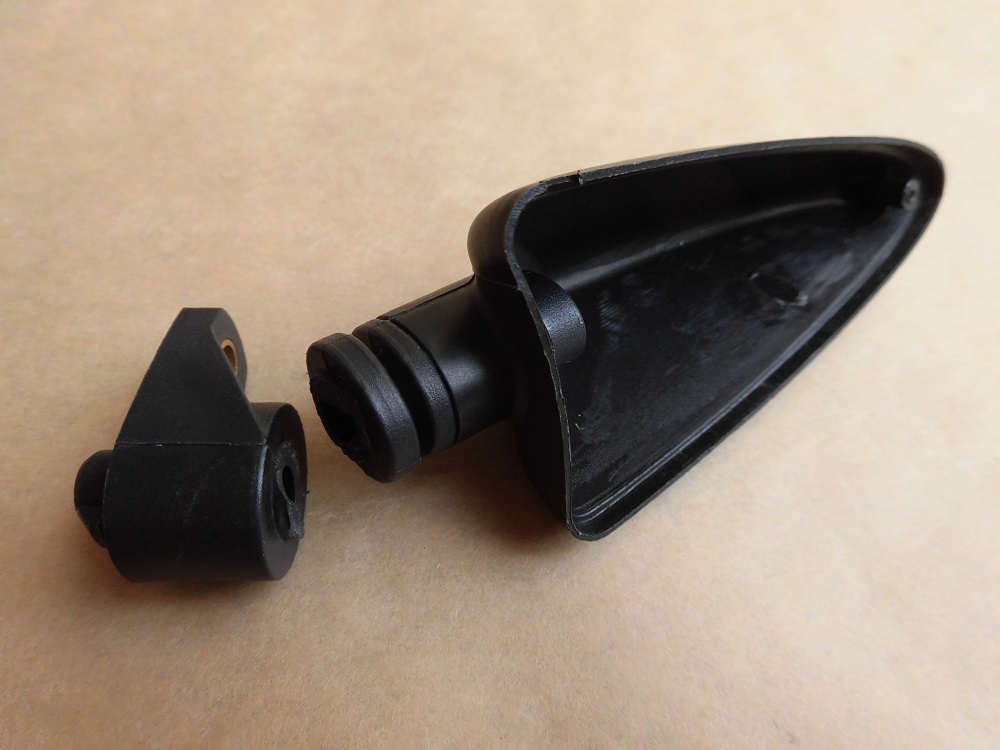
<Removed mounting part and body>
If they would only sell this part, the repair would be less expensive…
Also, I found out later that the mounting part and the main unit can be detached.
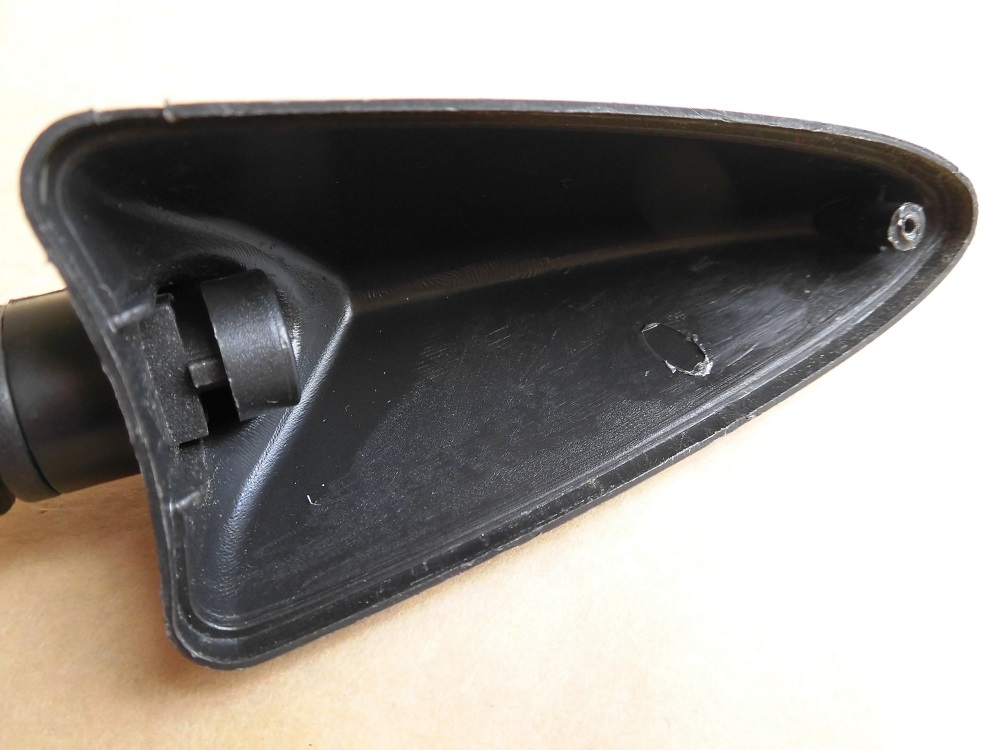
Inside the body of the genuine turn signal
Before processing and gluing, make sure the body is made of the right material.
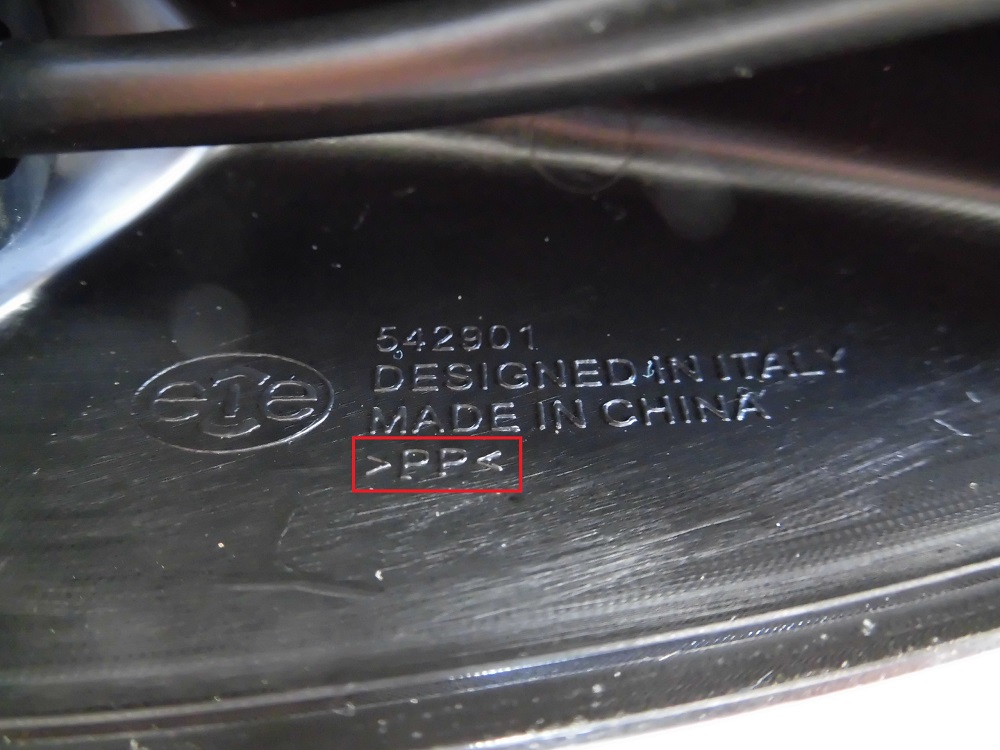
<Inside the body of the genuine turn signal>
The genuine turn signals were labeled PP (polypropylene).
It also states that it is designed by Italy, and it is made by China.
Inside the body of LED turn signal
<Inside the body of LED turn signal>
On the other hand, there is no indication on the LED turn signal.
Since the material may be PP, use an adhesive that can be used for PP.
Pipe purchase consideration
Next, I went to a local home improvement store to buy a pipe.
- The hole diameter in the body was about 6mm -> outer diameter 6mm
- I wanted 5mm to pass through the crimped terminal -> inner diameter 5mm
- I wanted a light, not too hard material -> aluminum
I wanted a pipe that meets the above requirements, but unfortunately, they only had aluminum pipes with 4mm inner diameter.
I’ll have to pay for shipping even if I arrange it through MONOTARO. So, I’m wondering if I have any good ideas.
Spacer
To put it in perspective, I looked for one with an inner diameter of 5 mm.
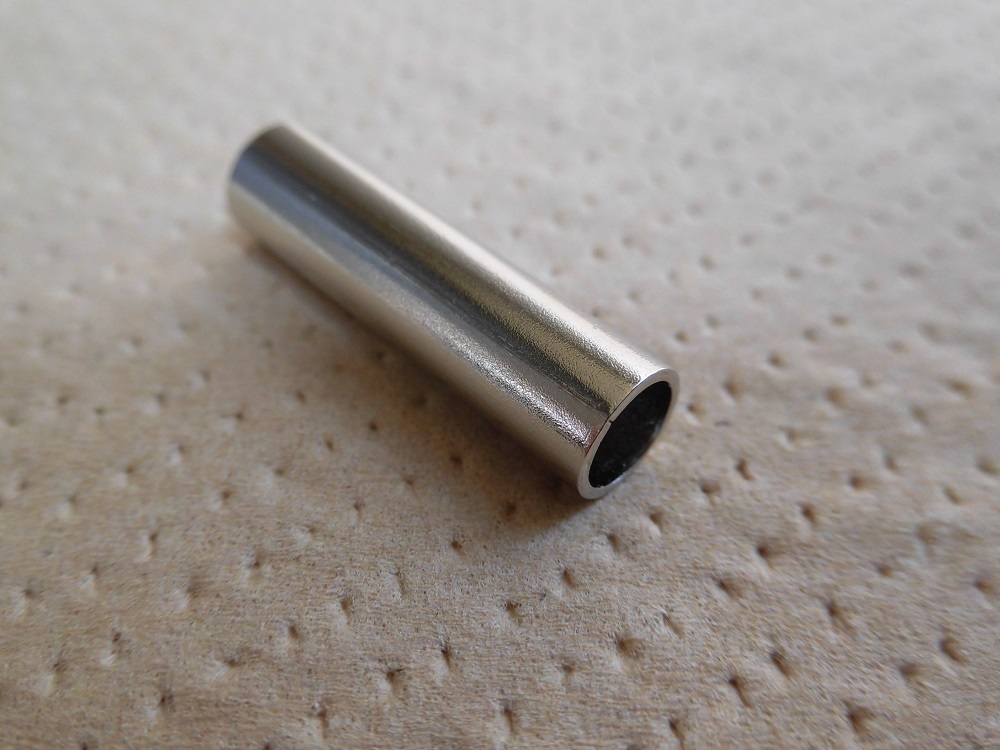
<Spacer>
There it is, the spacer.
The outside diameter was about 6.3 mm, and it was amazingly cheap. (I was blinded by the cheapness…)
I decided to use a 6.5mm drill I had on hand and widen the hole by about 0.5mm.
Inside the hole in the body
By the way, even though the spacer has slits on the sides, it is made of steel.
If the mounting part and the body are fastened tightly, the upper side cowl might break when the turn signal is bumped.
My feeling is that the turn signal should be able to break when bumped.
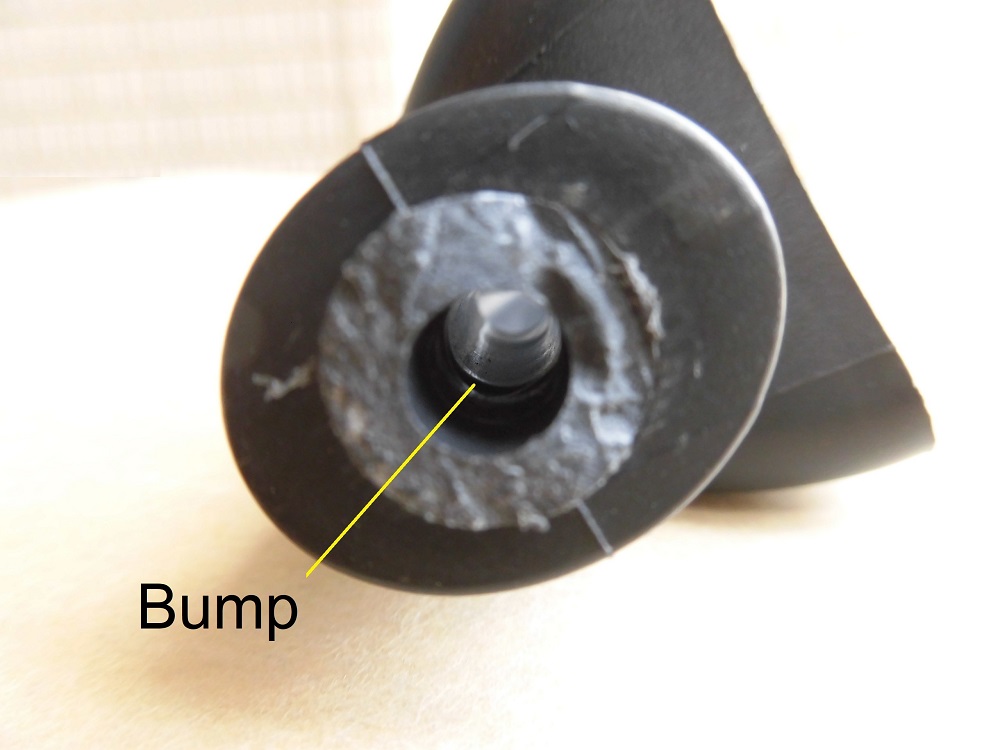
<Inside the hole in the body>
I look inside the hole in the body and see a bump. So, I decided to insert the spacer until I get to the front of this bump.
I hope that when I hit it, it will break at this bump.
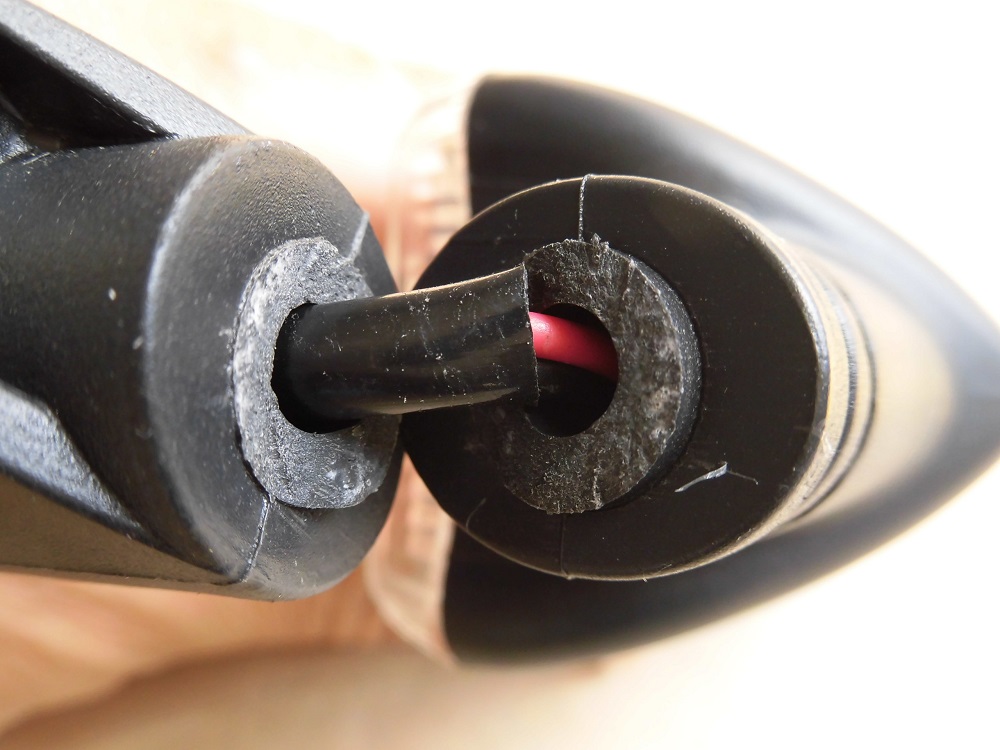
Temporary installation of spacer
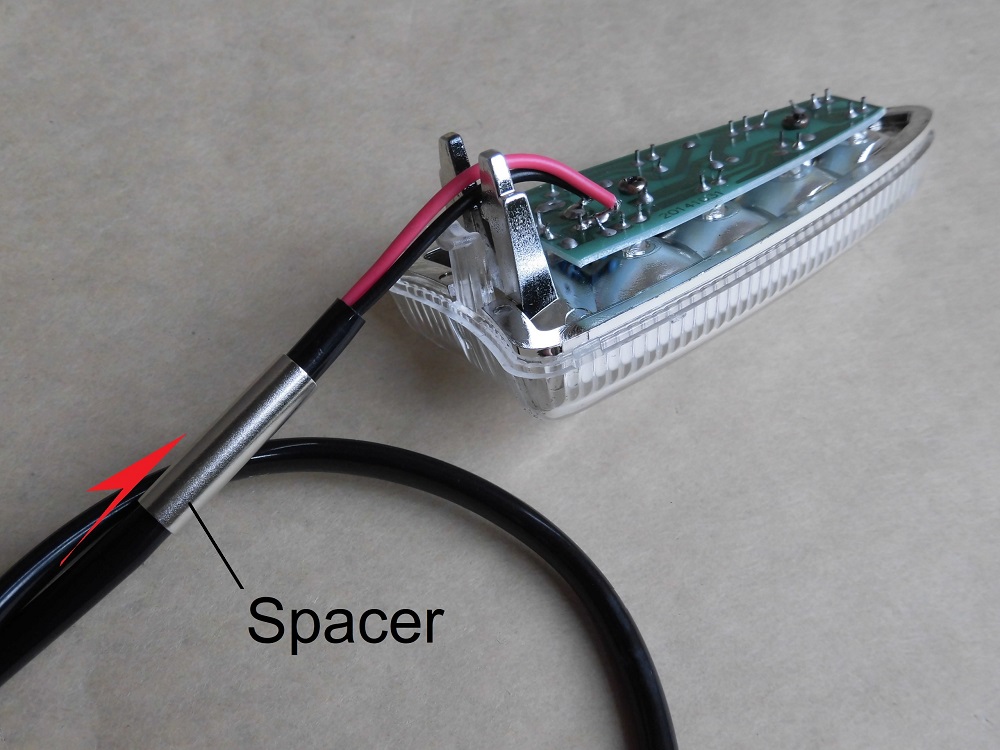
<Temporary installation of spacer>
I managed to pass the wiring through the spacer with an inner diameter of 5mm, although just barely.
(With a pipe of 6mm outer diameter, I might not have been able to pass it through.)
Continue to “Repair turn signal2【Processing and adhering】.
3. Summary
This is a summary of the temporary repairs and repair procedure for the broken front right LED turn signal.
I was lucky enough to find an inexpensive spacer, which may drop the cost of the repair.
- Be careful when handling the moto, it’s surprisingly easy to break a turn signal if you bump it
- For short periods of time, you can use curing tape to hold it in place
- Spacer may work. (More details in the next maintenance log)


