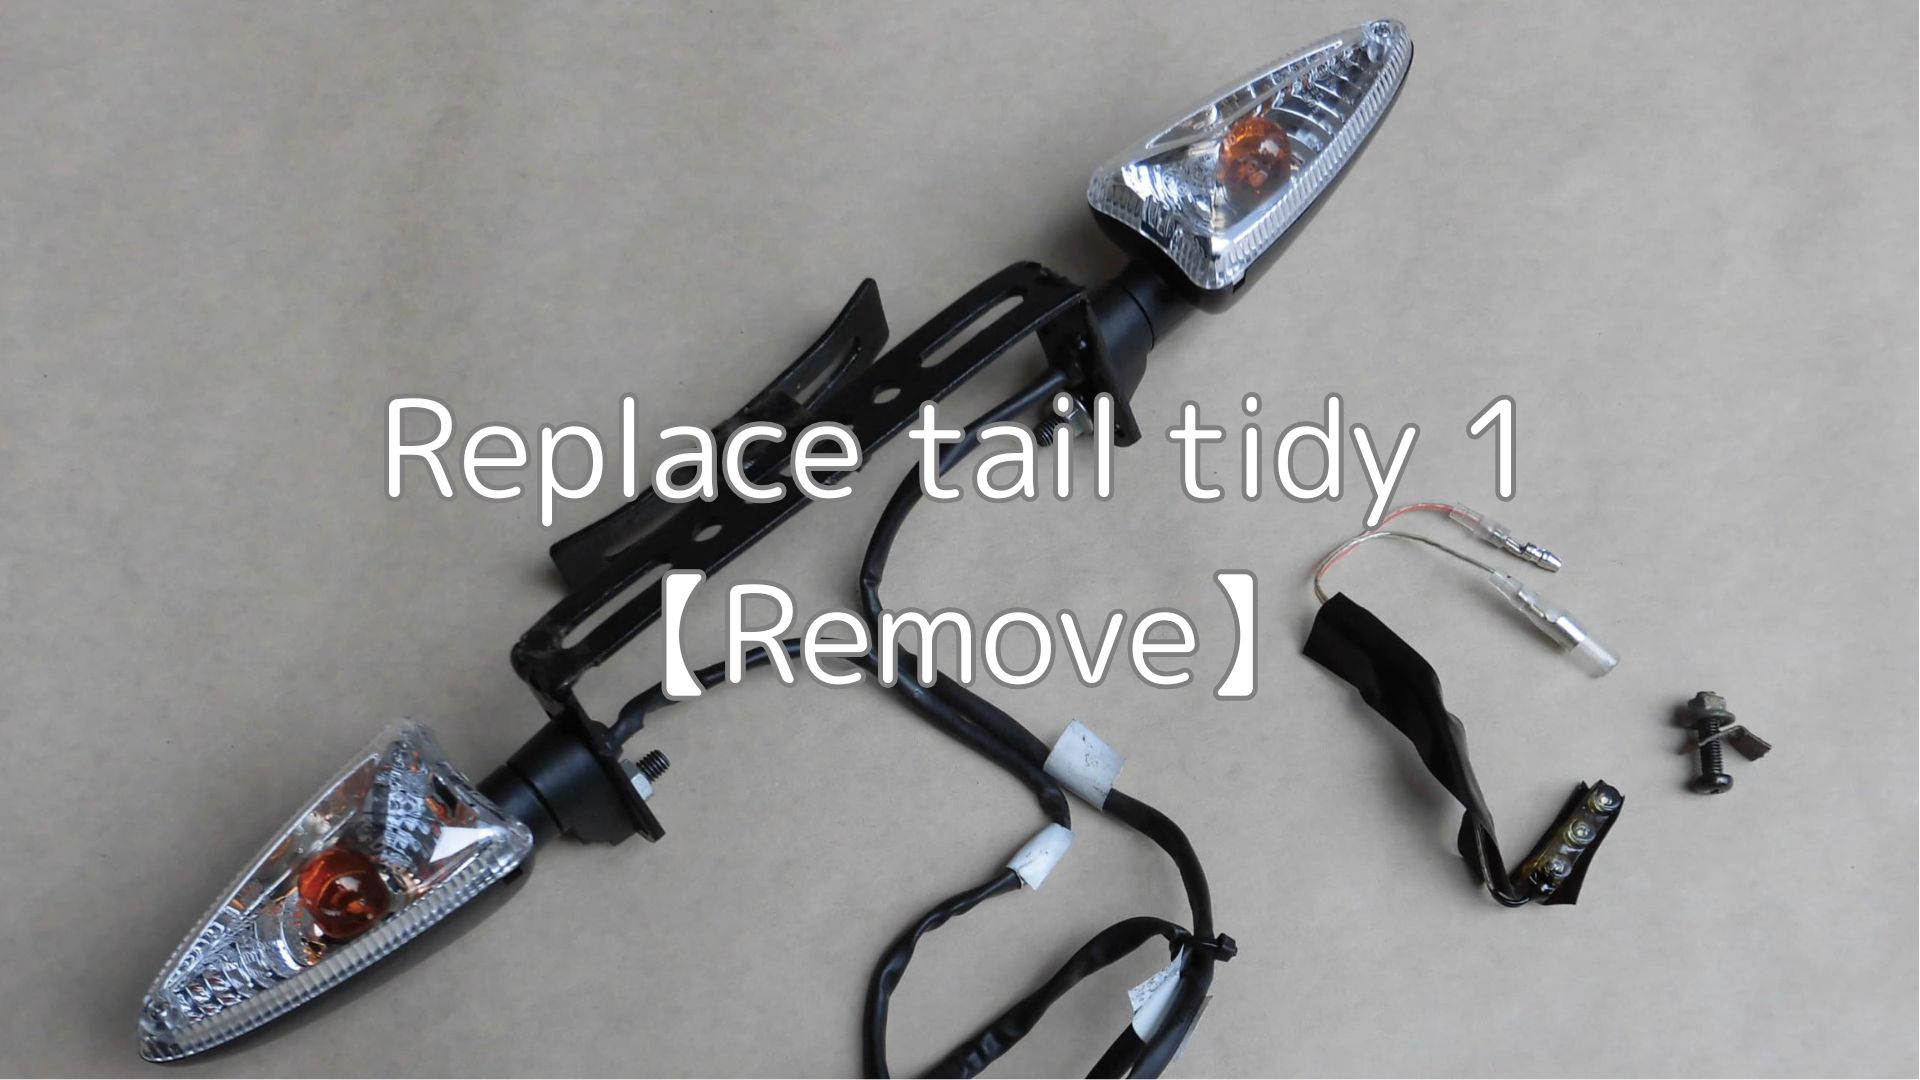
At the time of purchase, the moto came with a one-off tail tidy fitted by the previous owner.
This also included LED number lights and reflectors, which worked perfectly, but had the following problems.
- Number plate is improperly fitted.
- The number light is glued to the head of a screw and cannot be easily removed from the rear cowl.
So, I decided to replace it with a commercial product.
So, over the next four articles, I will summarize the replacement process.
In this first article, I will start with the removal of the one-off tail tidy.
I really wanted to tell you about the removal of the genuine flap guards, but unfortunately, I couldn’t do so.
From this article you will learn the following.
- How to disconnect the turn signal wires
Note that the tail tidy was replaced in accordance with the maintenance record ‘How to remove and install rear cowls and panel etc.’.
| Date | 12th June 2021 |
| Subjects | Tuning, Customize |
| Shop or DIY | DIY |
| Difficulty | |
| Working hours | 1 |
| Costs [Yen] | 0 (Use what I have) |
1. Goods to use
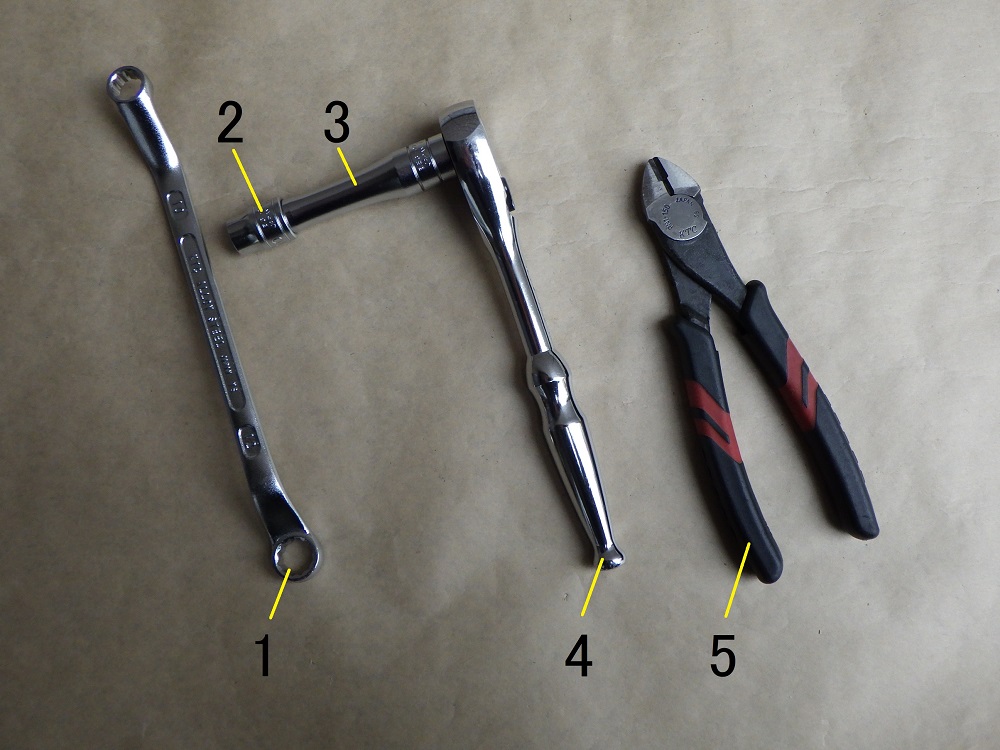
| No. | Name | Manufacturer | Product number | Quantity | Amounts[Yen] |
| 1 | Box wrench (10mm) | KTC | M5-1012 | 1 | 1,936 |
| 2 | Bit socket (10mm) | KTC | B3-10 | 1 | 880 |
| 3 | Extension bar (75mm) | KTC | BE3-075 | 1 | 1,529 |
| 4 | Ratchet wrench | KTC | BR3E | 1 | 6,182 |
| 5 | Cutting pliers | KTC | PN1-150 | 1 | 4,499 |
| 15,026 |
2. Remove tail tidy (STEP 1-17)
Remove license plate
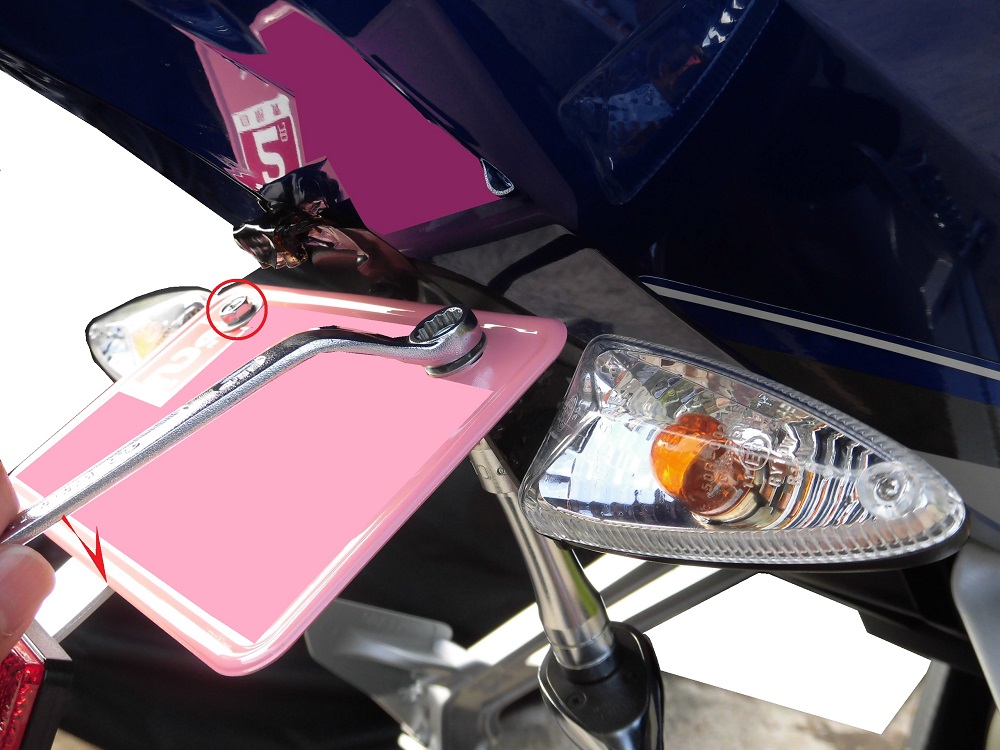
<Remove license plate>
From the license plate side, hold the bolt with a box wrench (10 mm).
Then use a ratchet with a socket (10 mm) and extension bar (75 mm) to remove the two nuts on the back side.
Construction of the tail tidy that came with it
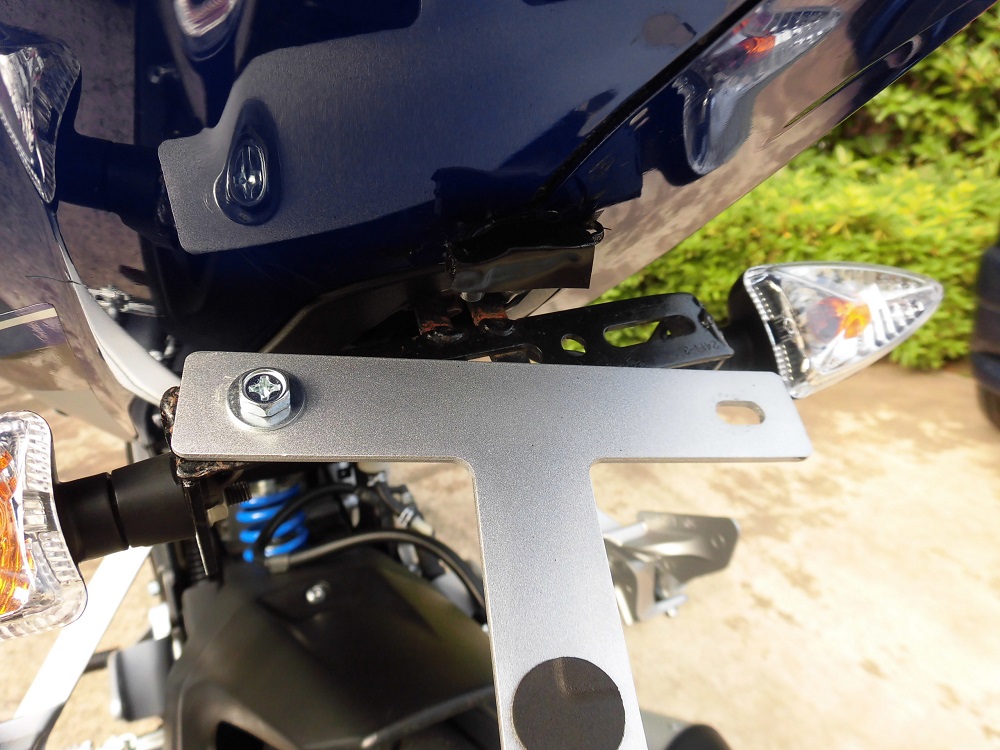
<Construction of the tail tidy that came with it>
A T-shaped bracket was tucked under the number plate.
The T-shaped bracket is probably an after-market item from the following conditions.
- The sponge pad is attached to the part that receives the number plate.
- Neatly bent where the reflector attaches
The reflectors were fixed with nuts.
Remove license plate light
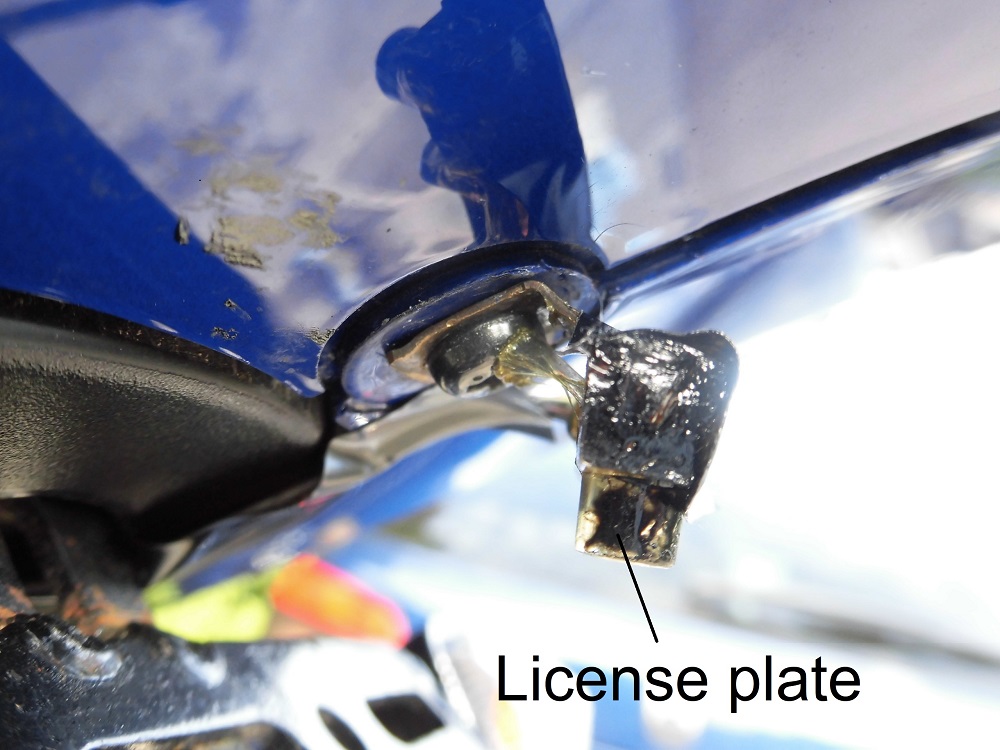
<Remove license plate light>
The LED license plate light was glued to the head of the screw like this.
So, I removed the screw after removing the adhesive.
In order to illuminate the number plate evenly, the head of the screw must have been used to gain height.
The parts list shows that this part originally has a push rivet.
Condition of removing license plate light and screw
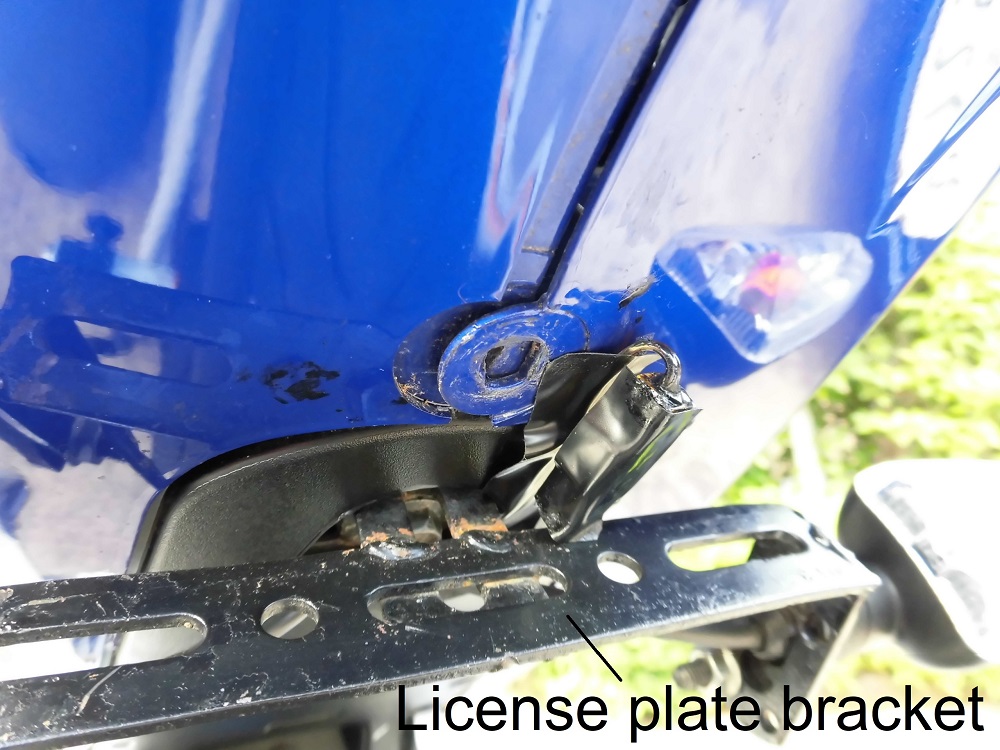
<Condition of removing license plate light and screw>
The part where the screw was tightened was quite dirty and damaged.
This time this area was also washed clean.
(For details, see maintenance record ‘Apply ceramic coating on rear cowls and panel etc.’, paragraphs 4-6).

Remove rear cowls and panel etc.
Next, remove the rear cowls and panel in order to disconnect the wiring connections.
(For details, see maintenance record ‘How to remove rear cowls and panel etc.’, paragraphs 2 to 15).
Wiring fixed to the tail tidy
The following three wires are fixed to the tail tidy.
- Turn signal right (2 pins)
- License plate light (2 pins)
- Turn signal left (2 pins)
Disconnect these.
Remove wiring of license plate light 1
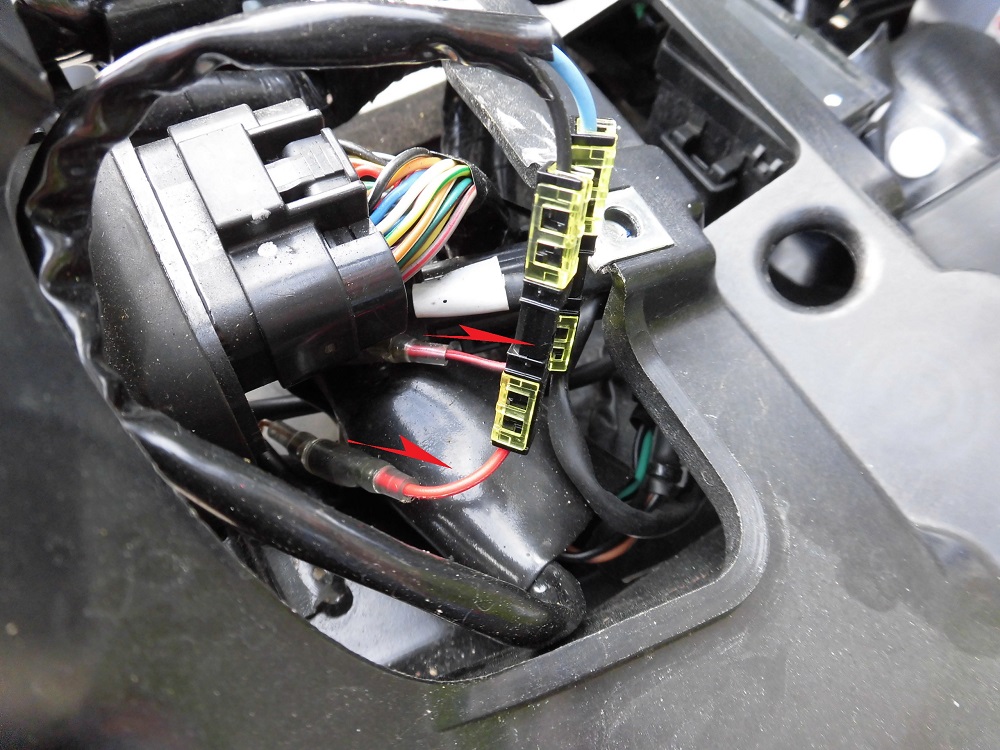
<Remove wiring of license plate light 1>
The vehicle side wiring was disconnected in the middle, connected to a general-purpose connector and then converted to bullet terminals.
Pull and remove the bullet terminals.
Wiring on vehicle side is as follow.
Light blue: +
Black: –
Remove wiring of license plate light 2
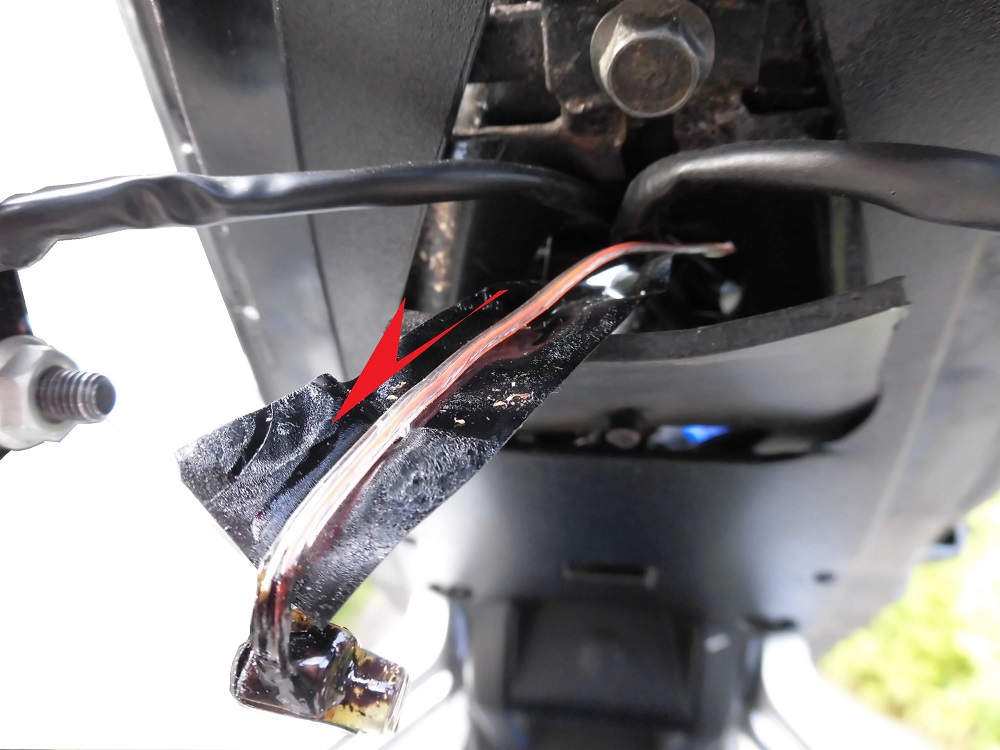
<Remove wiring of license plate light 2>
Now, pull the license plate light wires through the triangular hole in the mudguard.
Wirings
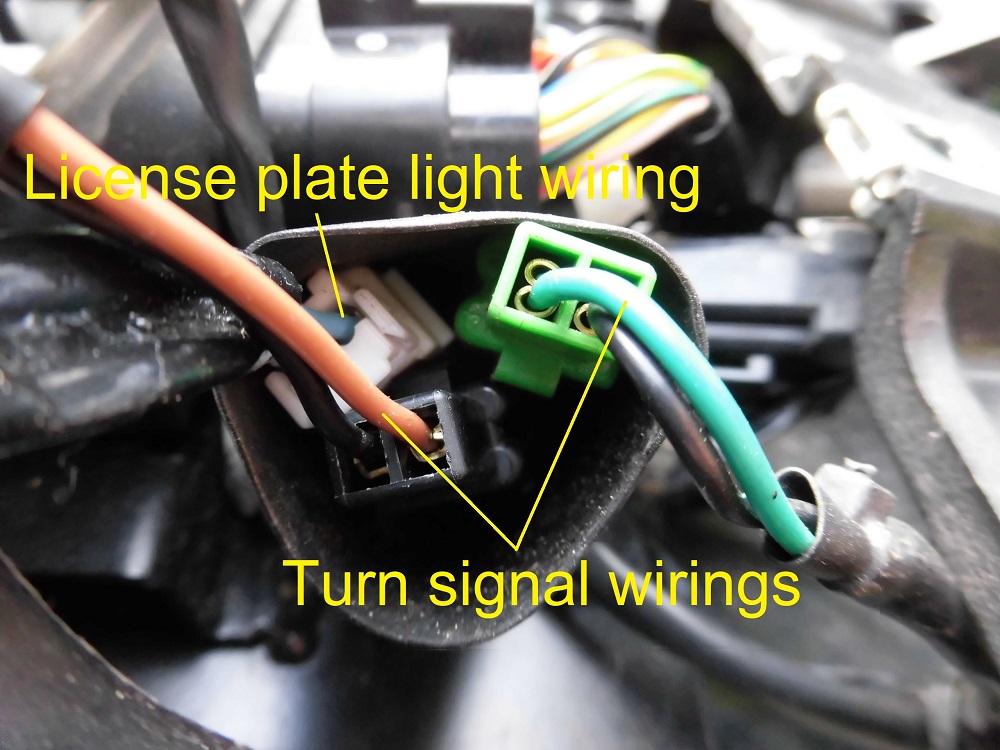
<Wirings>
The wiring for the turn signals remained the same as the original wiring. (Lucky!)
The genuine flap guard was long and the wiring for the turn signals was also long.
So, they were rounded and housed in the body of the moto.
Remove turn signal wirings
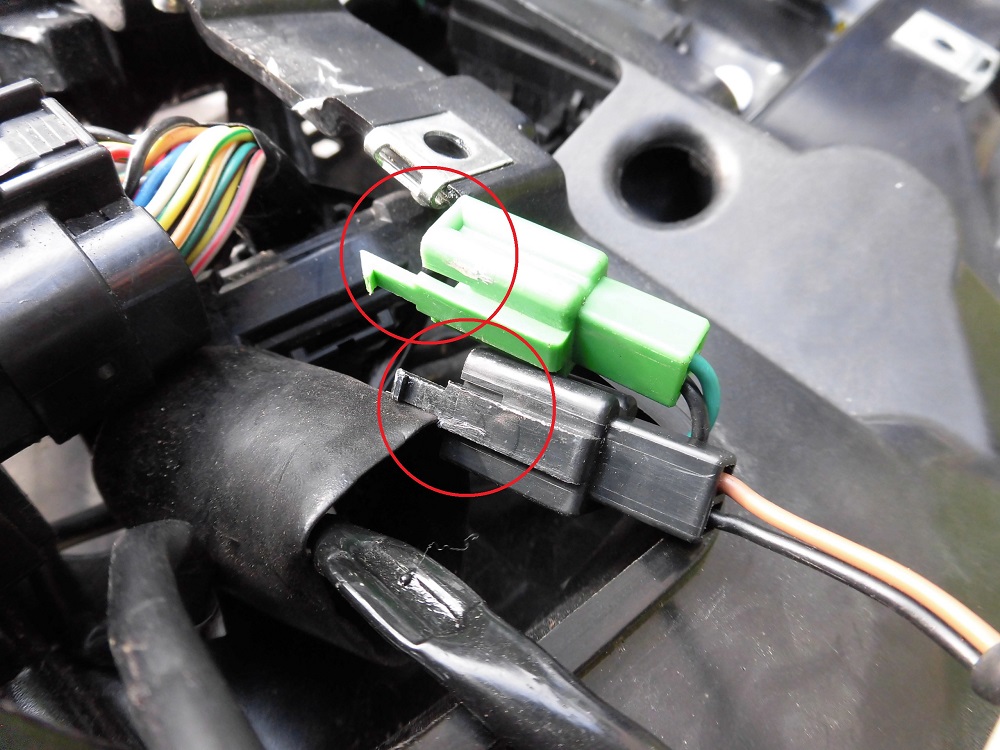
<Remove turn signal wirings>
While pressing down on the claw, pull on the turn signal connector to disconnect it.
Remove tail tidy
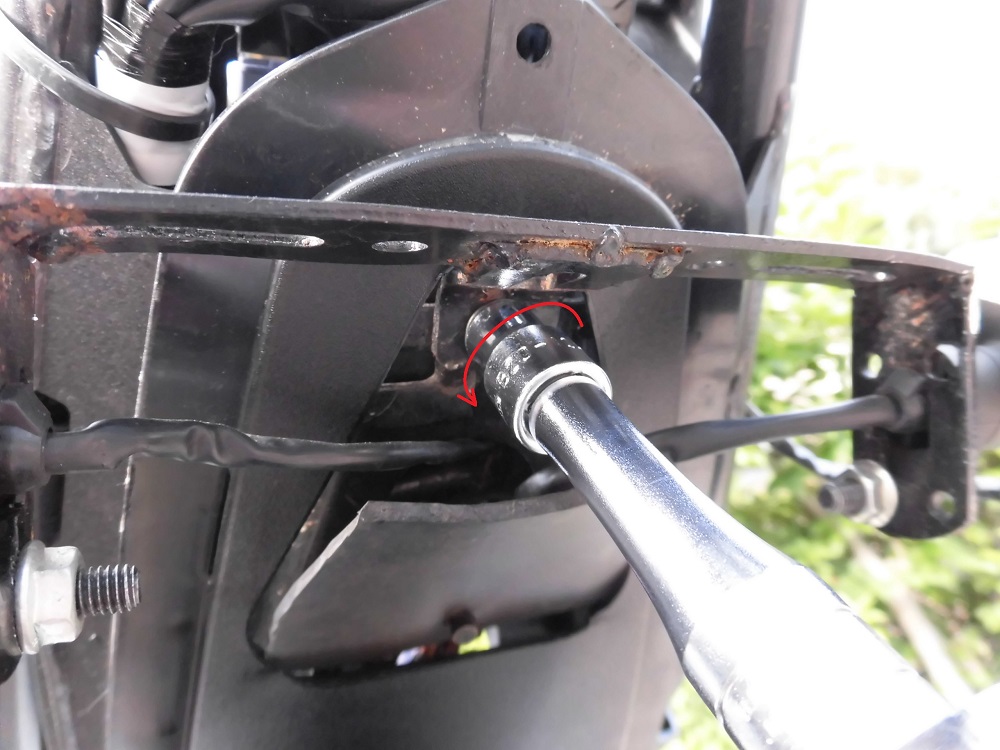
<Remove tail tidy>
Next, use a ratchet with a socket (10 mm) and extension bar (75 mm) to remove the bolts securing the tail tidy.
Now, pull the turn signal wirings out of the triangular hole in the mudguard.
Removed tail tidy and license plate light
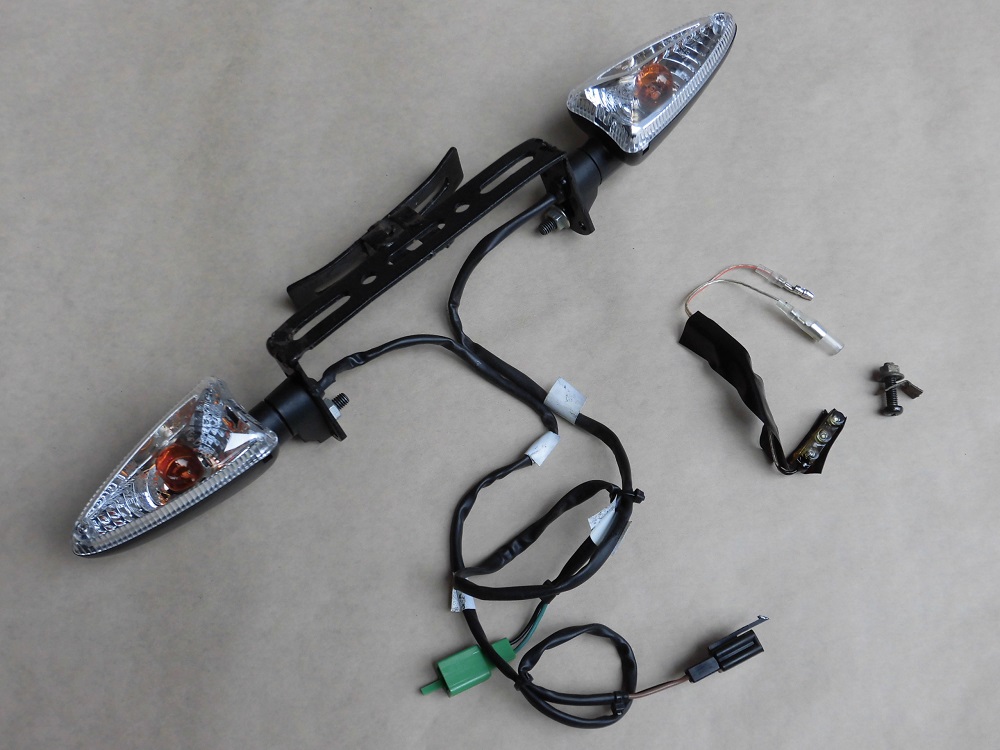
<Removed tail tidy and license plate light>
It came off like this.
Check turn signal internal 1
I removed the left and right turn signals from the bracket and removed the lenses for cleaning.
Then…
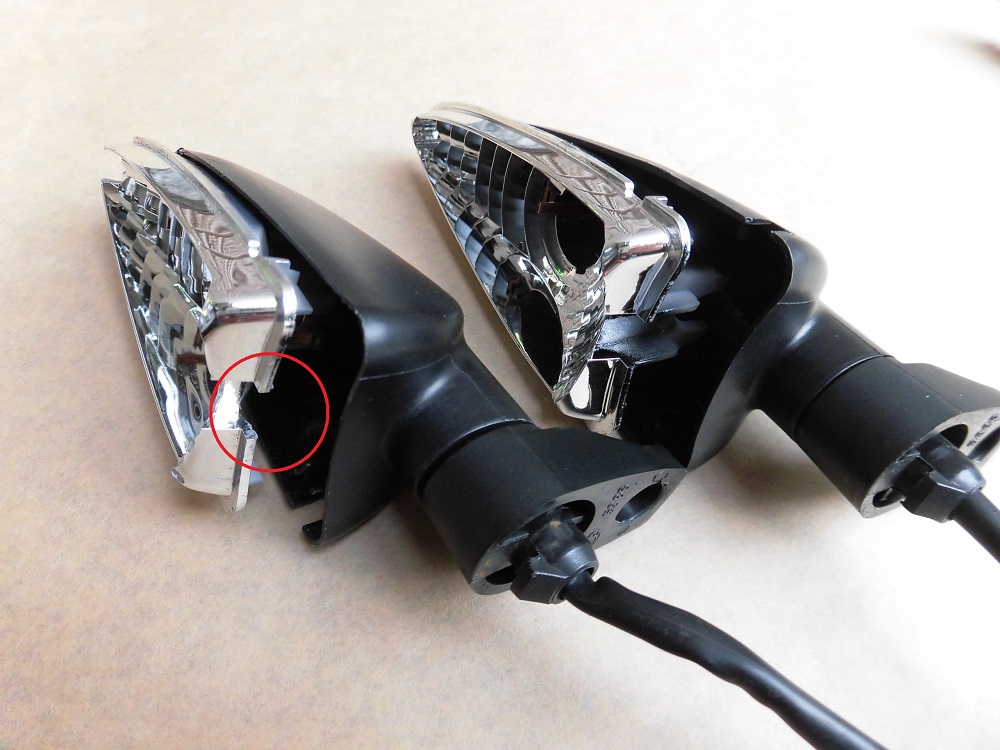
<Check turn signal internal 1>
The reflector inside the left turn signal was broken. (Was it machined?)
Check turn signal internal 2
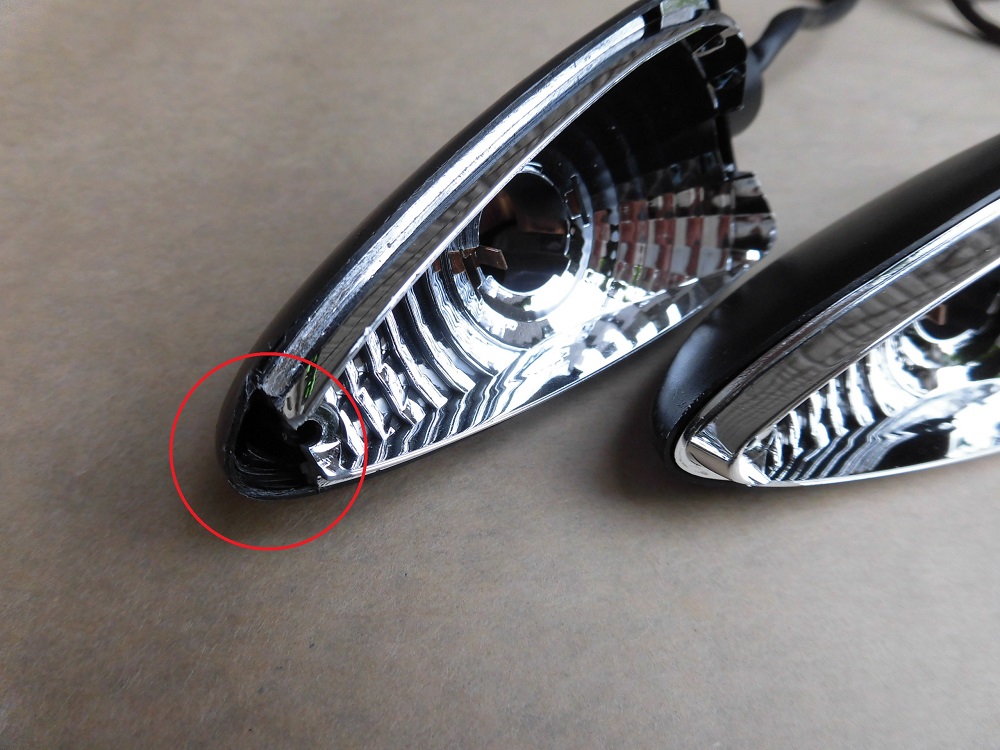
<Check turn signal internal 2>
Fortunately, the screw can be fitted so it won’t come off or move.
Did the previous owner try to convert to LEDs or something?
Wiring arrangement for turn signals
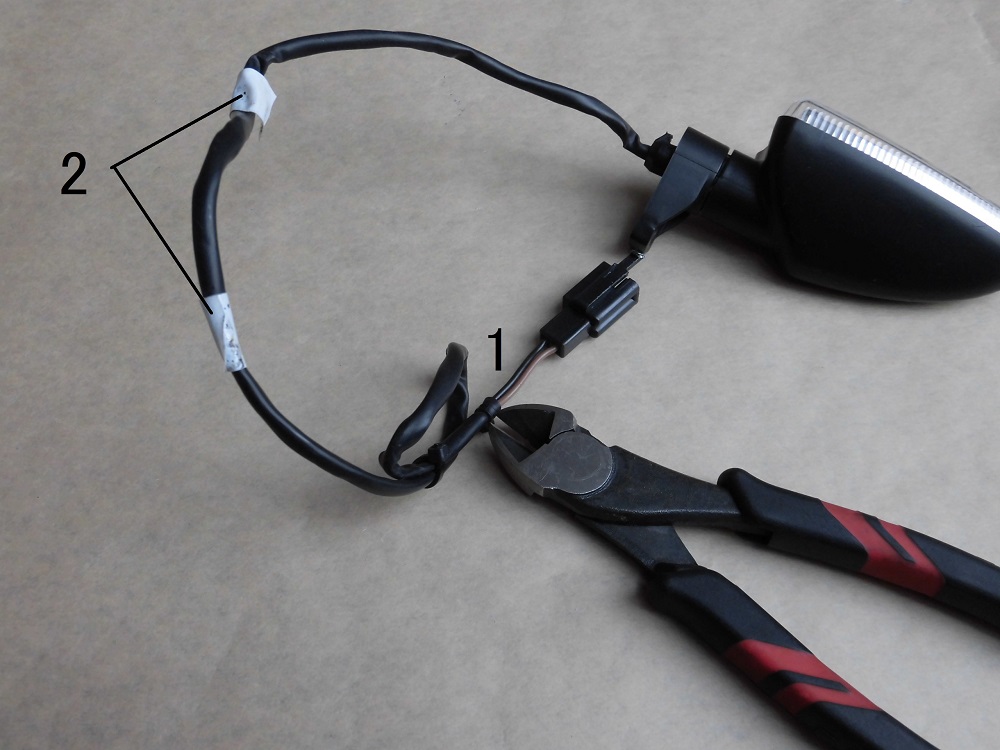
<Wiring arrangement for turn signals>
- Cut the cable ties holding the turn signal wirings together by cutting pliers.
- Also remove the white tape that marks the fixing point to the genuine flap guard.
Remove box and mudguard
Then, remove the box and mudguard to make it easier to install wiring etc.
(For details, see maintenance record ‘How to remove rear cowls and panel etc.’, paragraphs 16 to 26).

Remove rubber plate
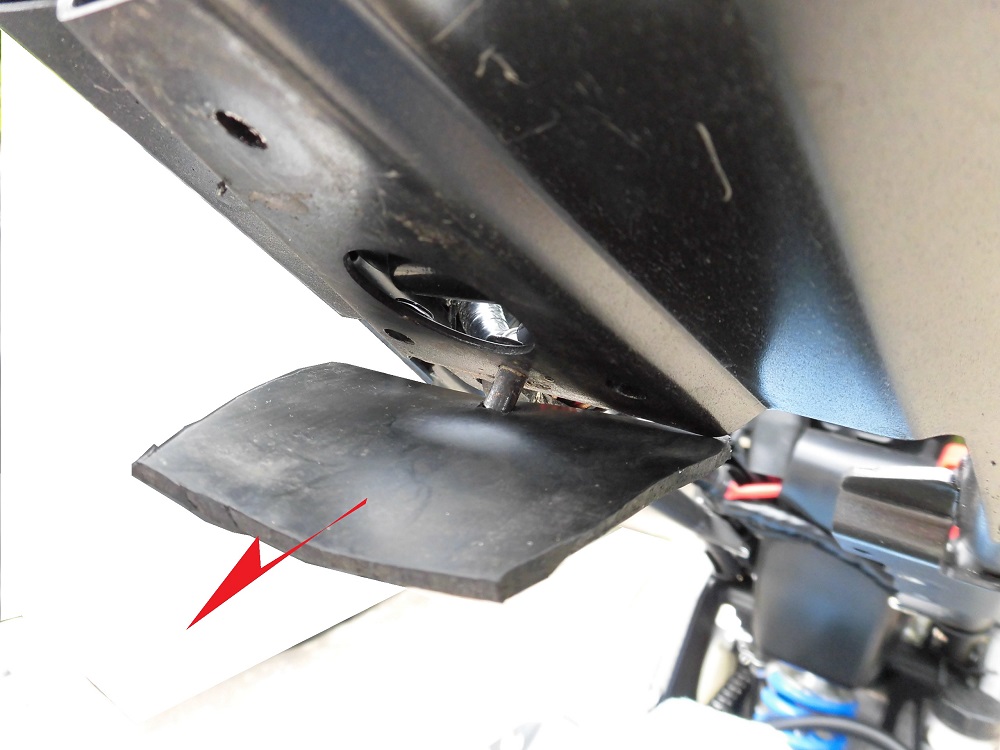
<Remove rubber plate>
Then, remove the rubber plate that the previous owner may have put on to prevent water ingress.
Continue to maintenance record ‘Replace tai tidy 2 【Preparation】’.
3. Summary
As a reminder for me, I have compiled a list of one-off tail tidy removal.
The only reference may have been the removal of the turn signals.
I will start preparing for installation next time, so please take a look.
- The turn signal connectors can be disconnected by pushing on the claw part and pulling the wirings.
