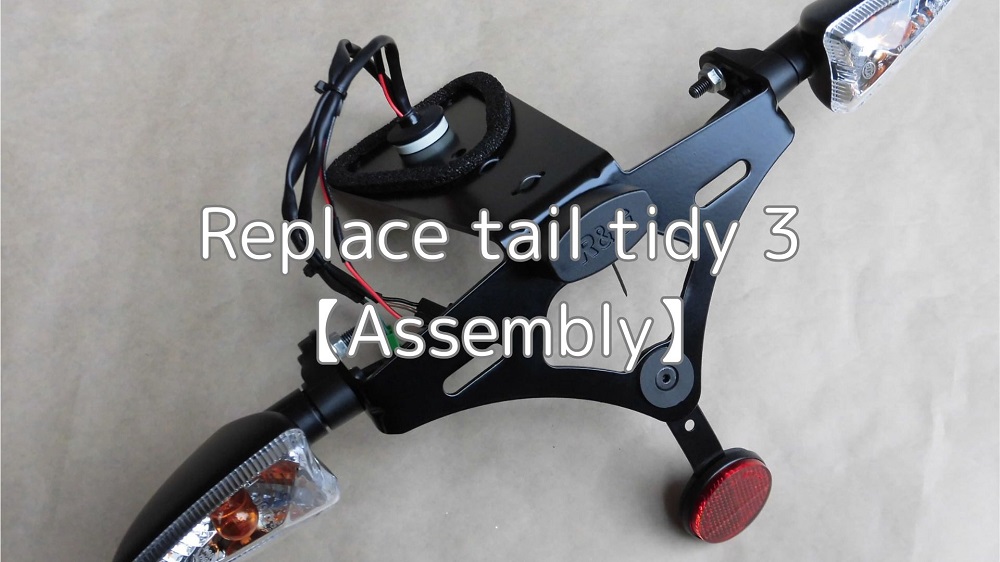
This is a continuation of the maintenance record ‘Replate tail tidy2【preparation】’.
Finally, the tail tidy (R&G LP0162BK) is assembled.
When installing the tail tidy, there is a point that we want to pay attention to so that it doesn’t look like it was retrofitted.
That is the way the wiring is put together.
Simply it is tightened it up by.
- Three wires are covered with the appropriate size corrugated tube.
- It is wrapped with vinyl tape to even out the outer diameter.
You can do this with other tail tidy too.
From this article you will learn as follows.
- How to fix and put together the wiring
- Wiring modifications to license plate light to make them easier to remove and install
- How to install reflector
| Date | 10th July 2021 |
| Subjects | Tuning, Customize |
| Shop or DIY | DIY |
| Difficulty | |
| Working hours | 2 |
| Costs [Yen] | 949 |
1. Goods to use
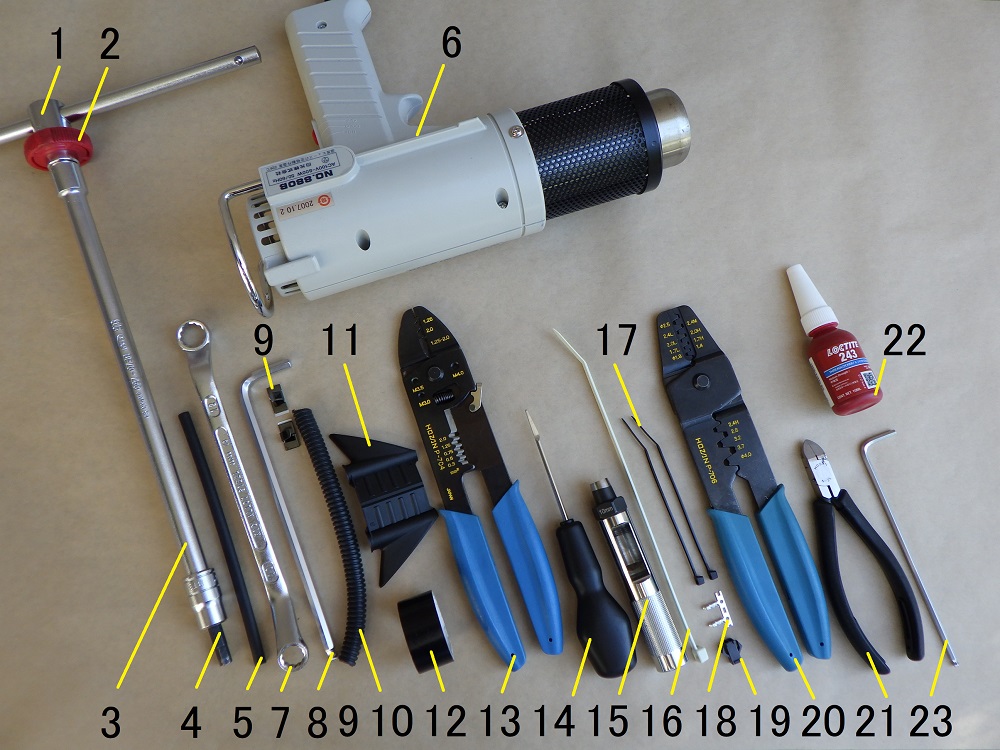
| No. | Name | Manufacturer | Parts number | Quantity | Amounts[Yen] | Purchase this time |
| 1 | Slide head handle | KTC | BHM3 | 1 | 2,970 | |
| 2 | Quick spinner | KTC | BE3-Q | 1 | 2,046 | |
| 3 | Extension bar (250mm) | KTC | BE20-250 | 1 | (2,783) | |
| 4 | Bit socket (6mm) | KTC | B3-06 | 1 | 825 | |
| 5 | Shrink tube (φ4) | AMON | 1196 | 1 | 307 | |
| 6 | Heating gun (Heat gun) | HAKKO | 880B | 1 | (7,260) | |
| 7 | Box wrench (10mm) | KTC | M5-1012 | 1 | 1,936 | |
| 8 | Long hex key (5mm) | KTC | HLD150-5 | 1 | 880 | |
| 9 | Mini cable clamp | AMON | 1193 | 2 | 166 | ○ |
| 10 | Corrugated tube (φ7) | ELPA | SR-070H | 1 | (516) | |
| 11 | Wiring insertion tool | Straight | 35-1900 | 1 | 240 | |
| 12 | Insulating tape | OHM | DK1910K | 1 | (84) | |
| 13 | Crimping tool | HOZAN | P-704 | 1 | 4,895 | |
| 14 | Terminal release tool | Straight | 19-456 | 1 | (2,770) | |
| 15 | Punch (φ10) | Straight | 19-569 | 1 | 3,950 | |
| 16 | Cable tie (4.8mm) | ELPA | KBZ-N200100 | 1 | 769 | |
| 17 | Cable tie (2.5mm) | ELPA | KBF-N100100(BK) | 2 | 175 | |
| 18 | Socket contact (Terminal) | JST | SHF-001T-0.8BS | 2 | 14 | |
| 19 | Plug housing (Connector) | JST | SMP-02V-BC | 1 | 15 | |
| 20 | Crimping tool for open barrel contacts | HOZAN | P-706 | 1 | 6,743 | |
| 21 | Cutting pliers | HOZAN | N-35 | 1 | 3,465 | |
| 22 | Thread-locking agent | Loctite | 243 | 1 | 783 | ○ |
| 23 | Long hex key (3mm) | KTC | HLD150-3 | 1 | 550 | |
| 44,142 | 949 |
2. Tail tidy assembly (STEP 1-20)
Comparison of old and new tail tidy
Now that I have the prep work done, I can compare the old and new tail tidy.
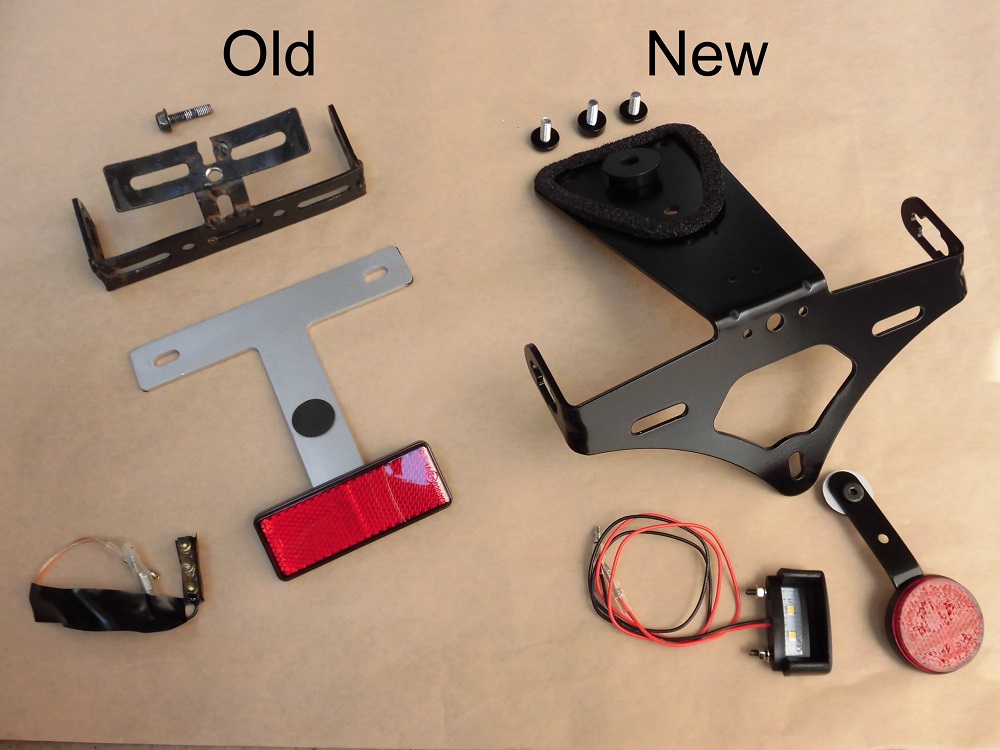
<Comparison of old and new tail tidy>
Left: Old, 235g in total
Right: New, 252g in total
The mounting position is shifted back by about 100 mm.
The new one is made of aluminum, so there was almost no weight increase. (excellent!).
Above all, because it is a three-point fastening, the stability when installed should be much better.
Install license plate light
Now install the components to the bracket.

<Install license plate light>
Install the license plate light to the bracket and tighten two nuts with a T-bar handle with a socket (6 mm).
The nuts are small, so be careful not to overtighten them.
Shrink tube
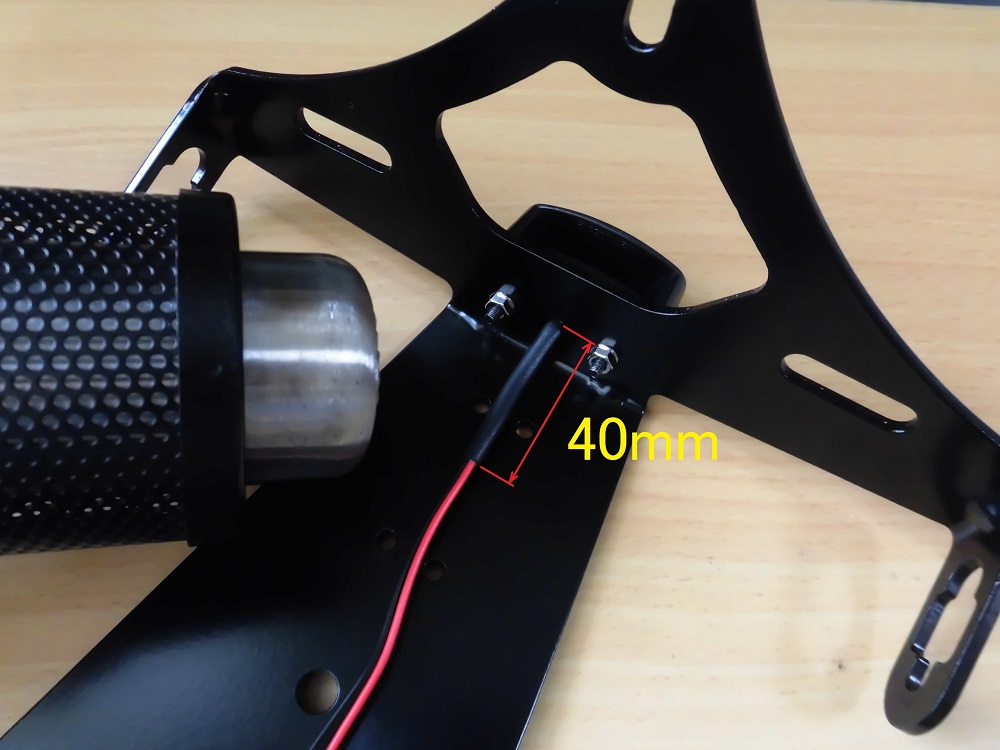
<Shrink tube>
To protect the wiring of license plate light, heat shrink the waterproof type shrink tube (φ4) with a heat gun.
The instructions said to cover the whole area with the kit’s shrink tubing, but I only covered the 40mm at the base because I used corrugated tubing.
Install turn signal 1
Next, attach the turn signal light to the bracket.
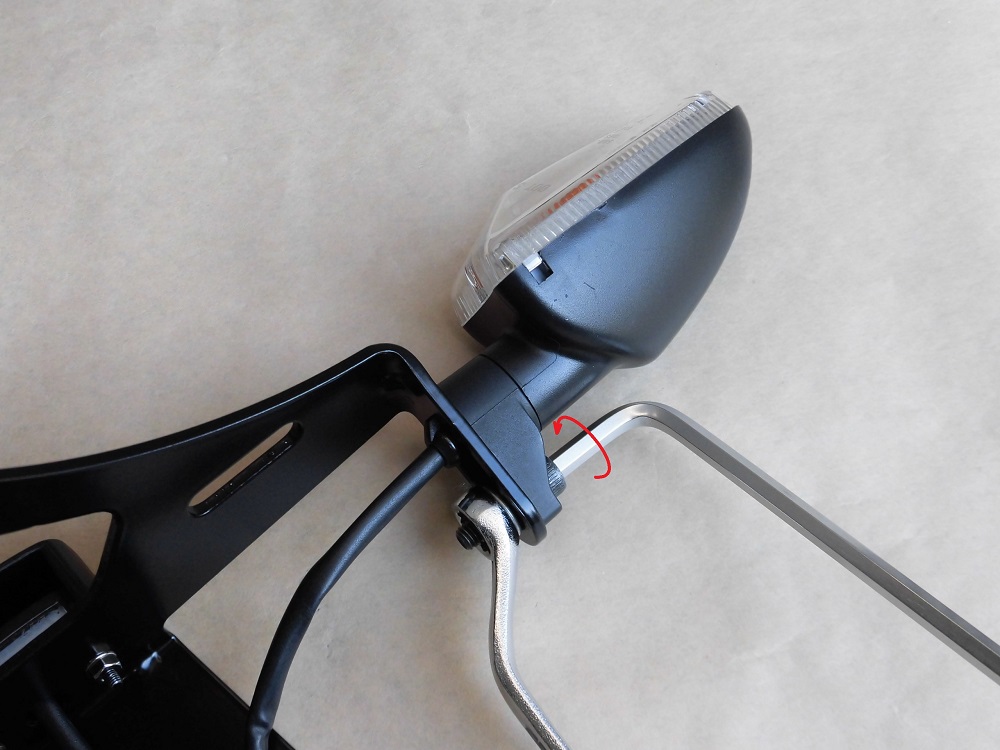
<Install turn signal 1>
Run the wiring of right turn signal through the hole in the bracket, then secure with a hexagon socket bolt and flange nut.
Secure the flange nut with a box wrench (10mm) and tighten it with a hex key (5mm).
Install turn signal 2
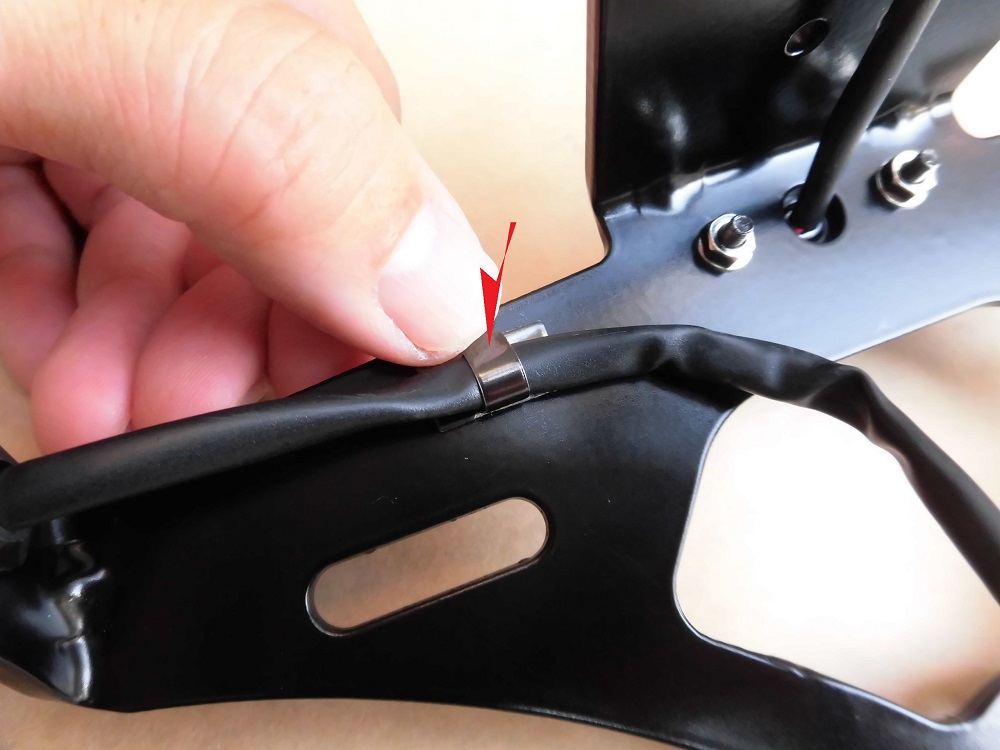
<Install turn signal 2>
Use the cable clamp to fix the wiring of right turn signal light to the bracket.
The cable clamp comes with double-sided tape, so you just position it and stick it on.
The included cable clamps are made of aluminum, which is good, but it is silver and stands out, so I prepared black ones of stainless steel.
Install the left side in the same way.
Install corrugated tube
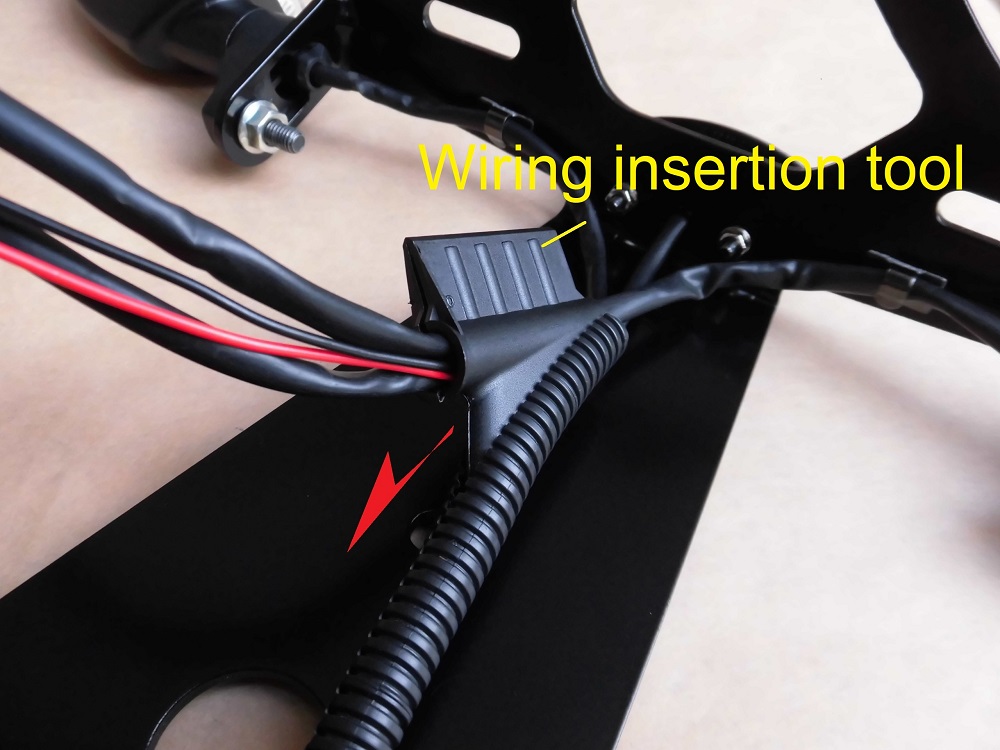
<Install corrugated tube>
Using the wiring insertion tool, pass the wires through the corrugated tube cut to 120 mm.
I managed to push the wiring for the turn signal lights (2 cables) and the license plate light (2 wires) into the φ7 corrugated tube.
You can work without the insertion tool, but I used it to try it out.
Wrap insulating Tape
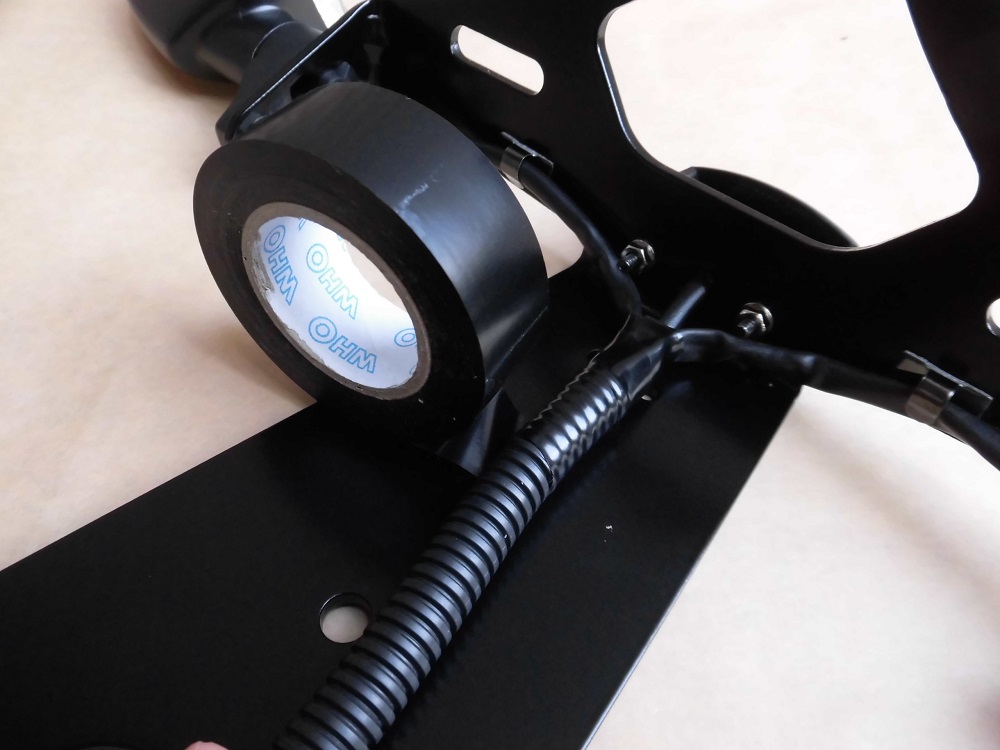
<Wrap insulating Tape>
Insulating tape was wrapped around the entire corrugated tube from the base of the wiring, overlapping each half.
Cut-off bullet terminals
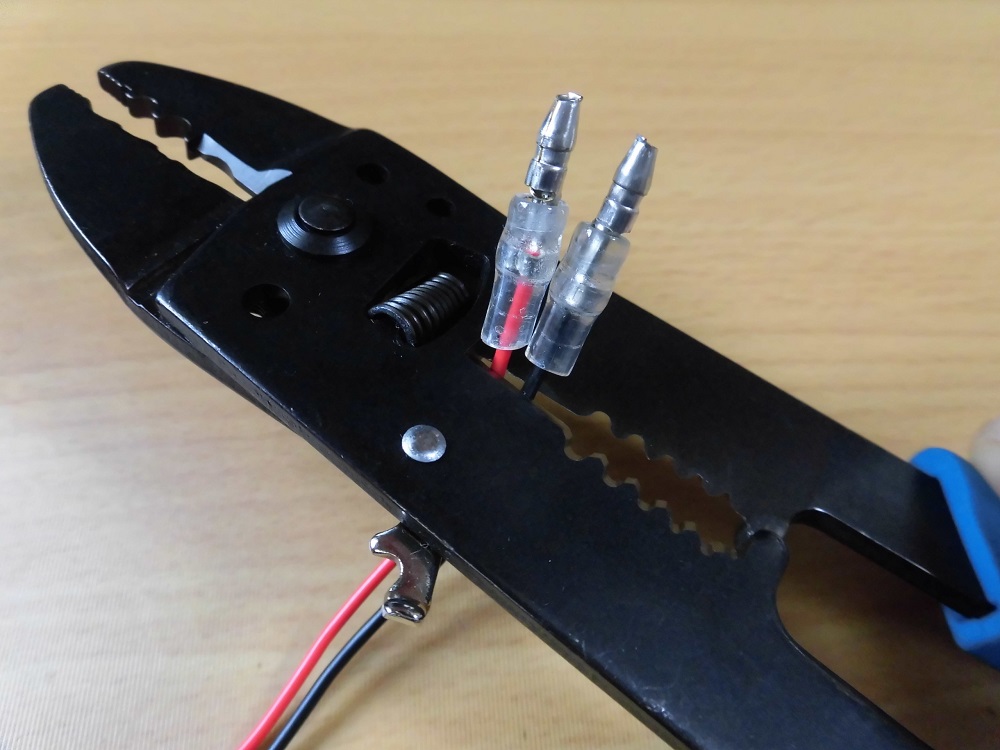
<Cut-off bullet terminals>
To make it easier to pass the wiring of license plate light through the grommet, the unneeded bullet terminals were cut off.
Remove connectors
Disconnect the two connectors in order to pass the wires of turn signal light through the grommets.
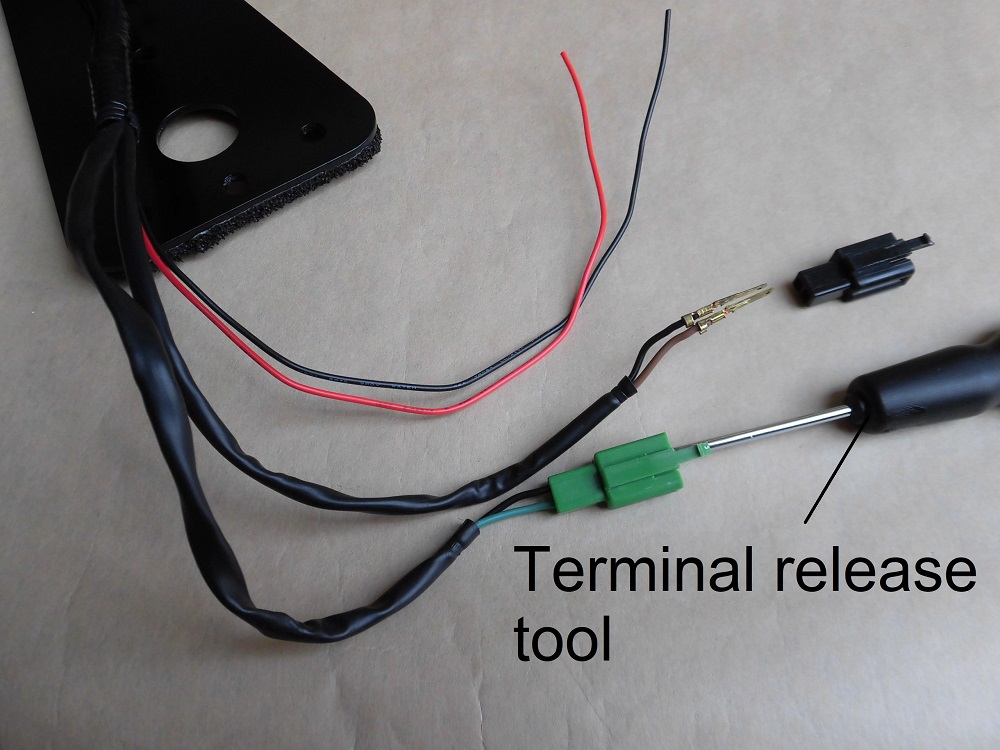
<Remove connectors>
The terminal release tool was used to disconnect the connectors for turn signal light.
Install grommet 1
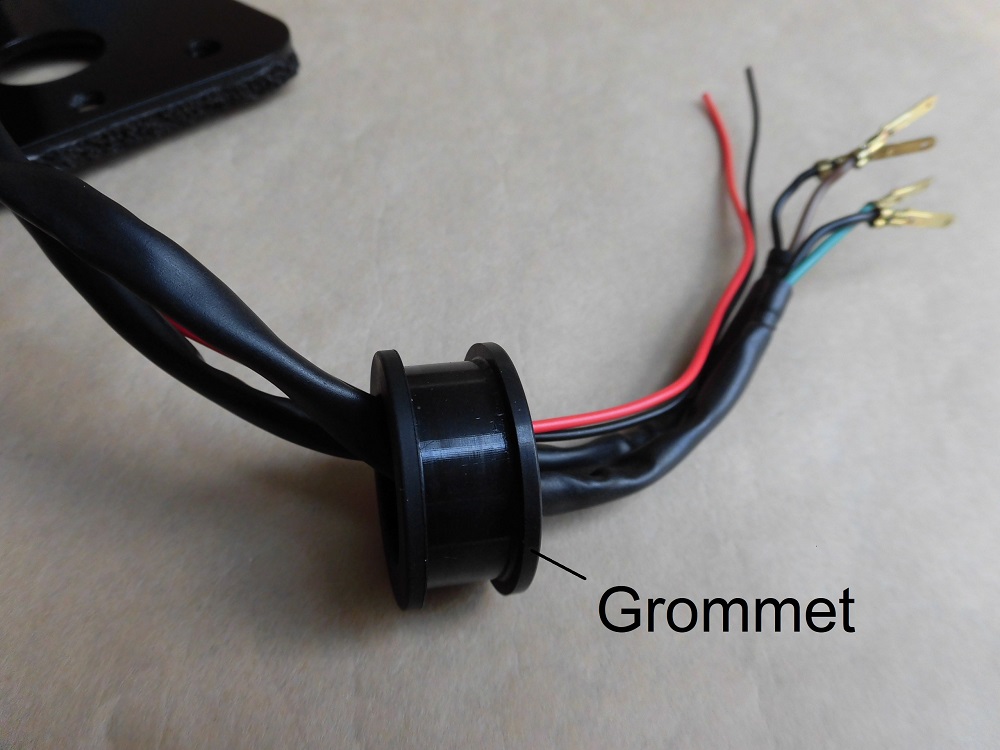
<Install grommet 1>
Pass the corrugated tube with the wires through the grommet.
The grommet had a + cut-out, but in order to pass the corrugated tube through, a 10 mm hole was made with a punch.
Install grommet 2
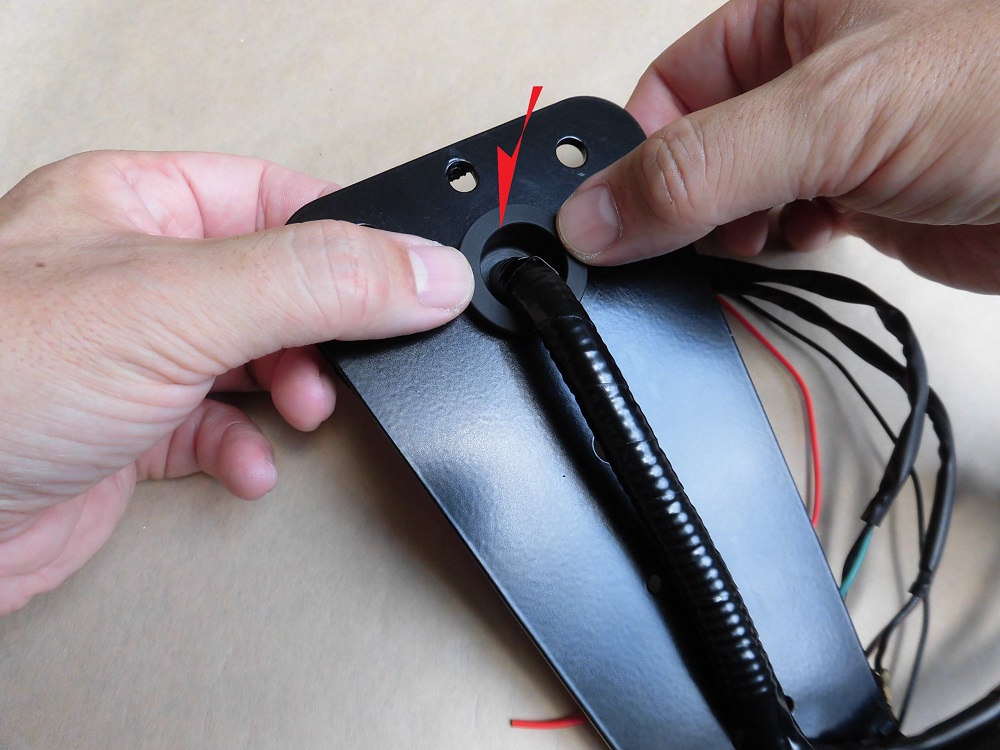
<Install grommet 2>
Then, the grommet is pushed to the bracket.
It was quite hard, but I managed to push it in with my fingers.
Install grommet 3
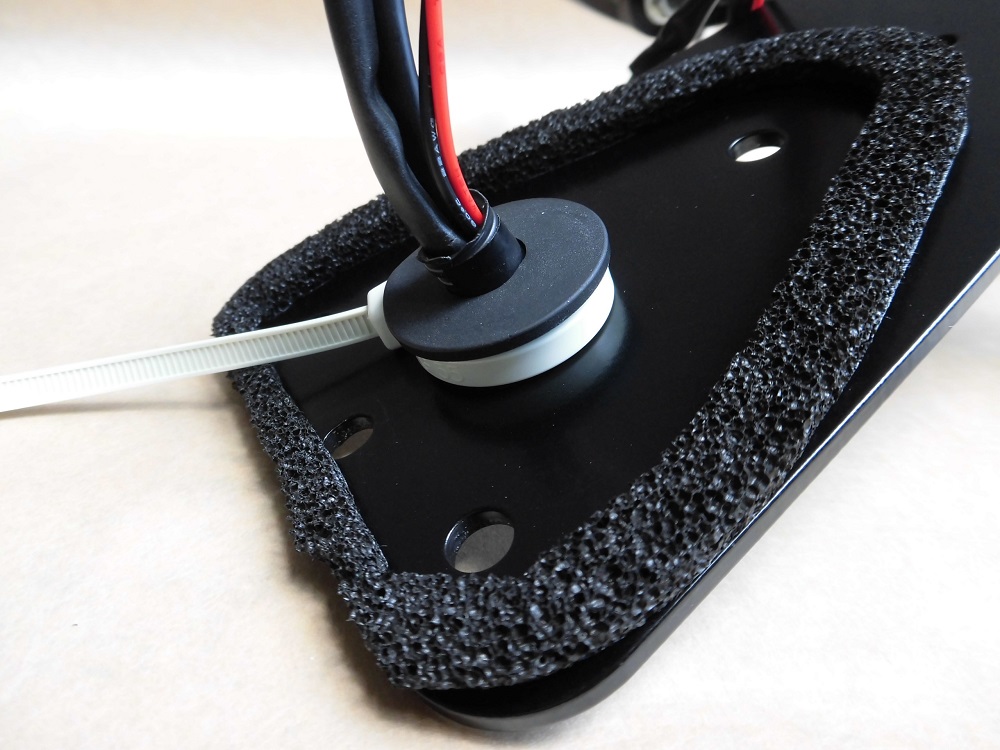
<Install grommet 3>
To prevent the grommets from dropping, they were secured with a cable tie.
Note.)
When a 4.8 mm wide cable tie was used, the head part hit the hole in the frame.
Therefore, I replaced the band with a narrower cable tie at a later date to make the head section smaller.
Condition of fitted grommet
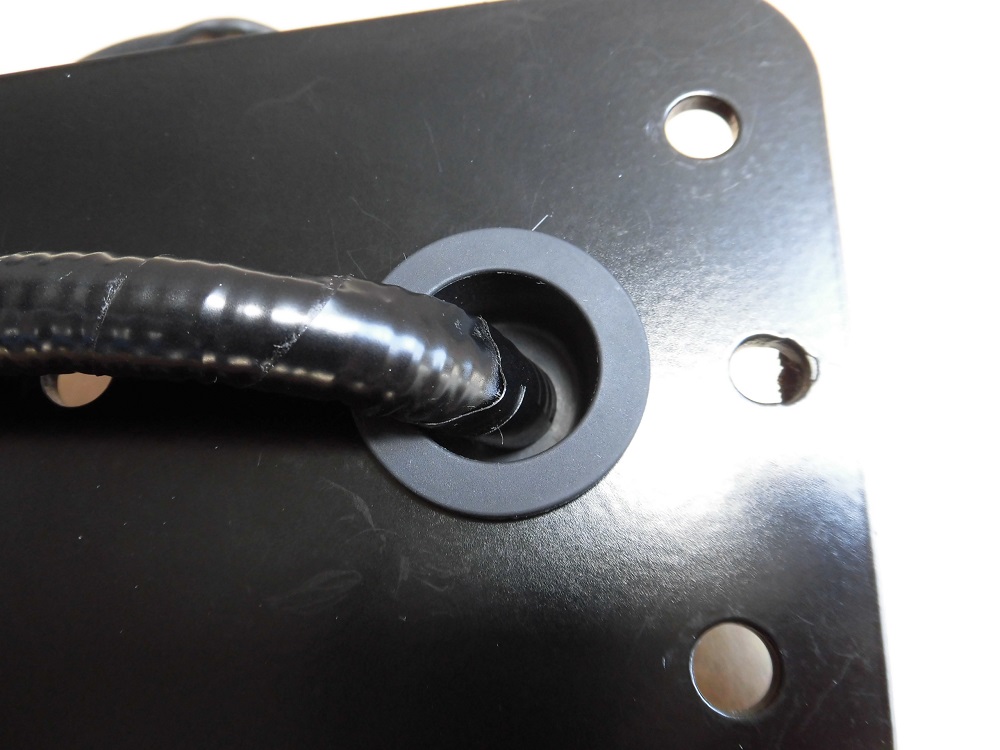
<From the front>
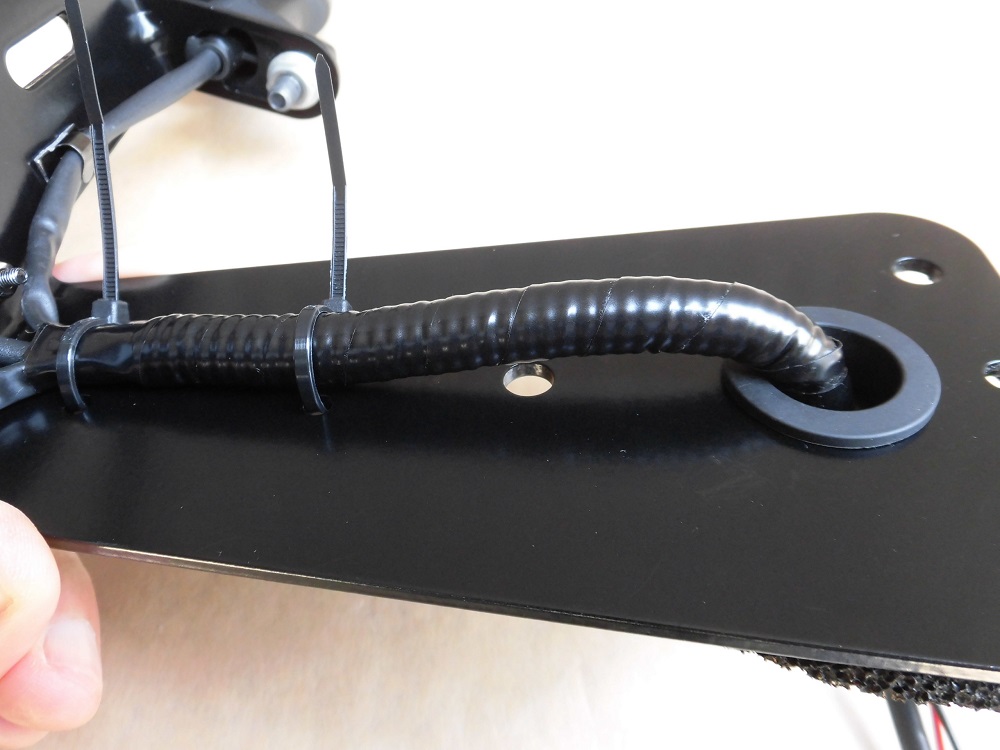
The grommets are oriented in the opposite direction to that in the instructions.
<from the side>
The grommets were put on backwards to make space for the corrugated tube to bend.
We thought that if the hole was at the back, the corrugated tube could be passed almost perpendicular to the grommet, making it more difficult for water to get in.
Tighten cable tie temporarily
<Tighten cable tie temporarily>
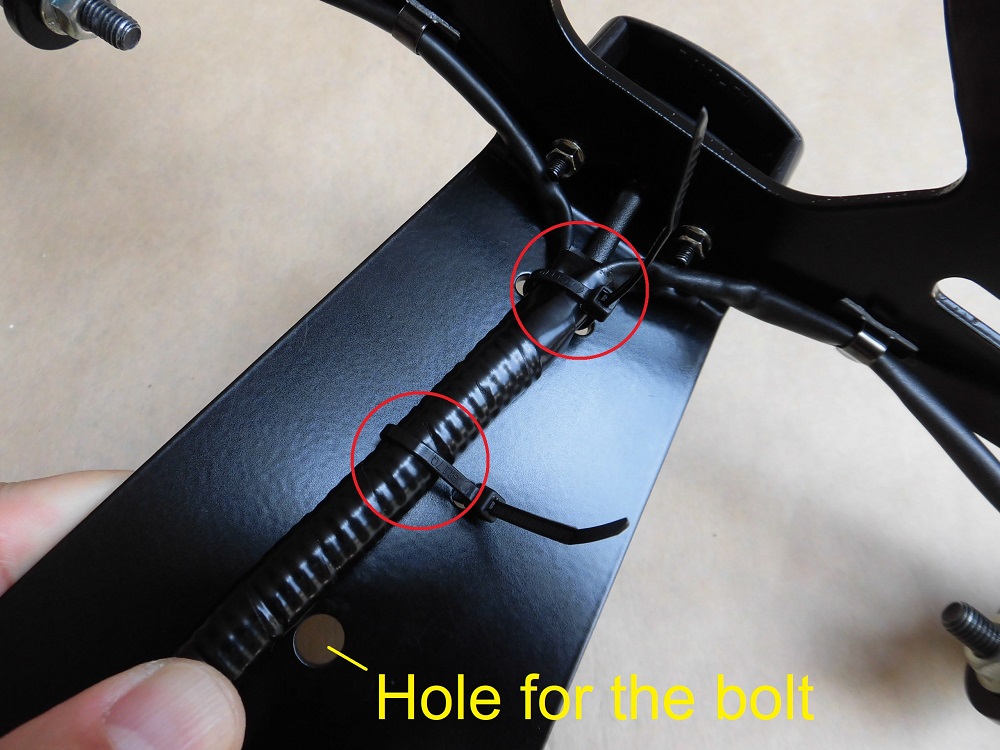
Temporarily tighten the two cable ties securing the corrugated tube.
Tighten the ties after tightening the bolt, as the hole for the bolt overlap with the corrugated tube.
Install connector of license plate light
<Install connector of license plate light>
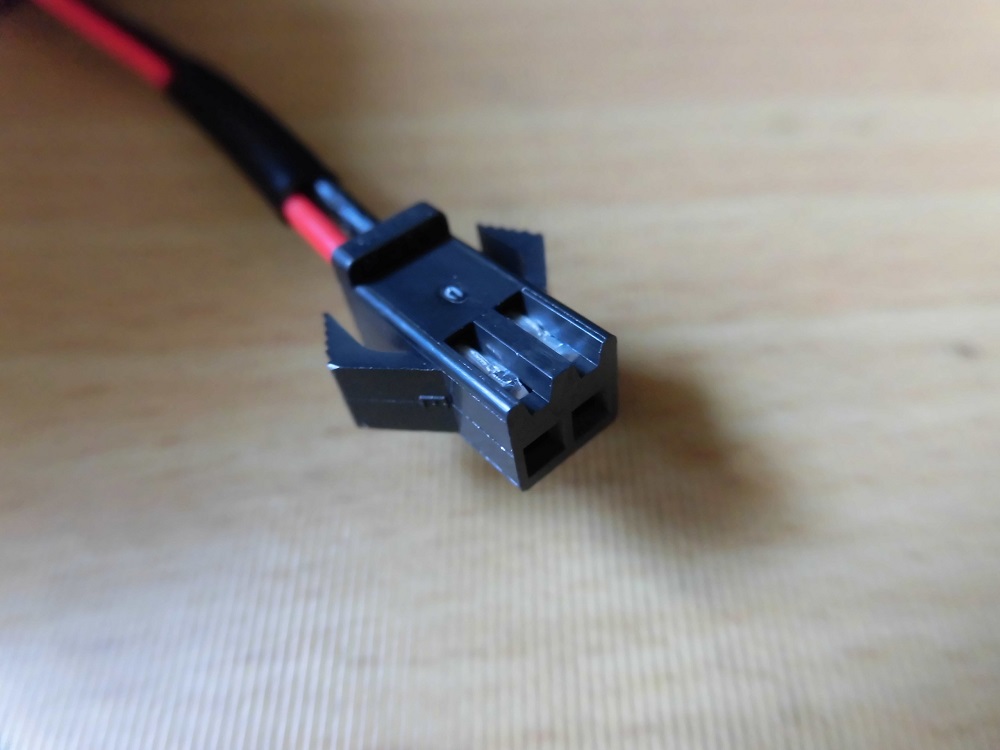
Crimp the terminals to the wiring of license plate light and attach a general connector.
(The processing method is the same as in STEP 10 and 11 of the maintenance record ‘Replace tail tidy 2【Preparation】’).
The vehicle side wiring for the license plate light and turn signals lights is in the same place.
So, I also matched the length of wiring of the license plate light.
However, I completely forgot that the license plate light has an intermediate wiring of about 15 cm, which made it longer.
Tie up wires

<Tie up wires>
Bundled the wires of license plate light and turn signal lights with two cable ties.
Apply thread-locking agent
Next, install the reflector to the bracket.
<Apply thread-locking agent>
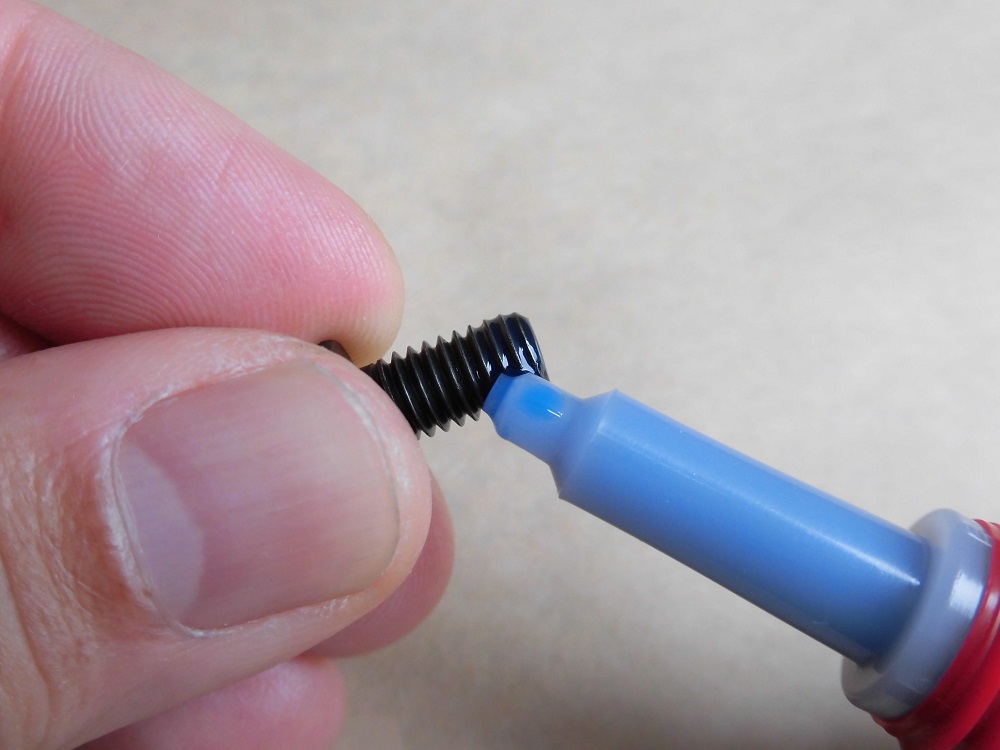
Apply medium-strength thread-locking agent to the low-head bolt securing the reflector stays to prevent them from loosening.
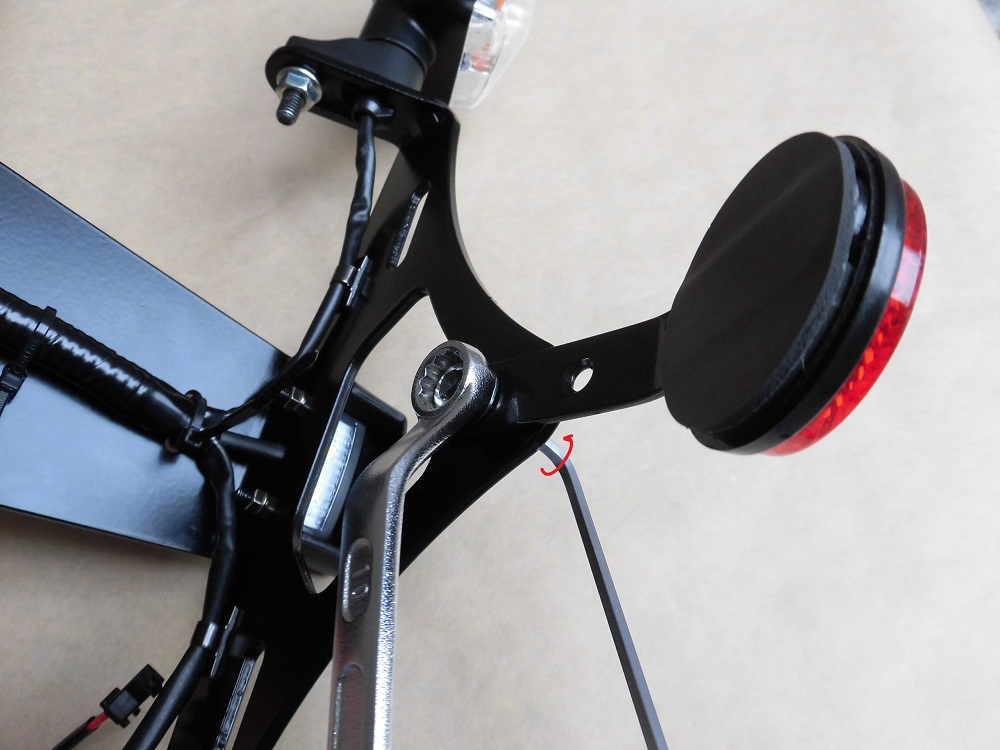
Install reflector 1
<Install reflector 1>
Install the reflector to the bracket.
Fix the flange nut with a box wrench (10 mm) and tighten it with a hex key (3 mm).
It was unexpectedly difficult to tighten it vertically and I had to redo it several times.
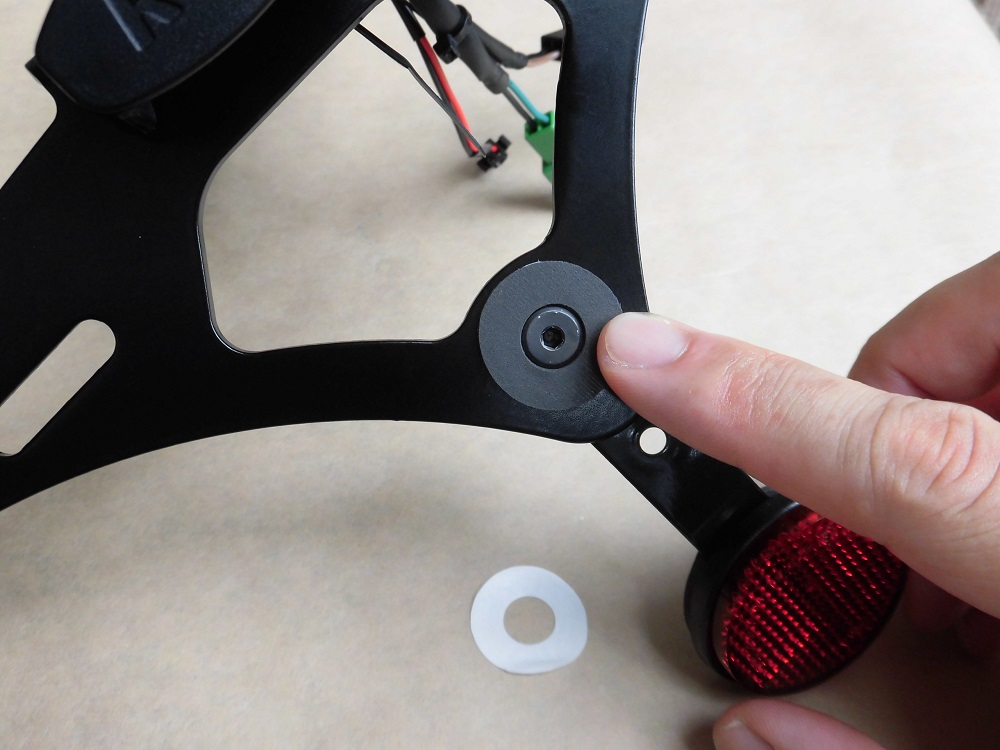
Install reflector 2
<Install reflector 2>
Apply a sponge sheet to prevent the license plate from rubbing against the head of the low-head bolt.
Assembled tail tidy
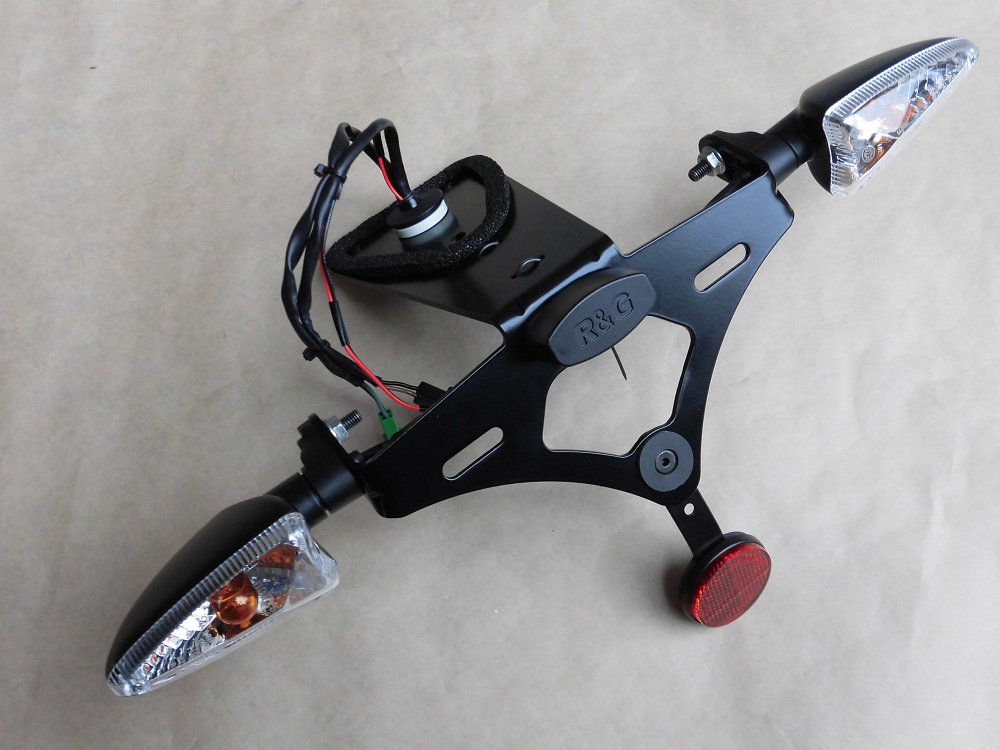
<The front>
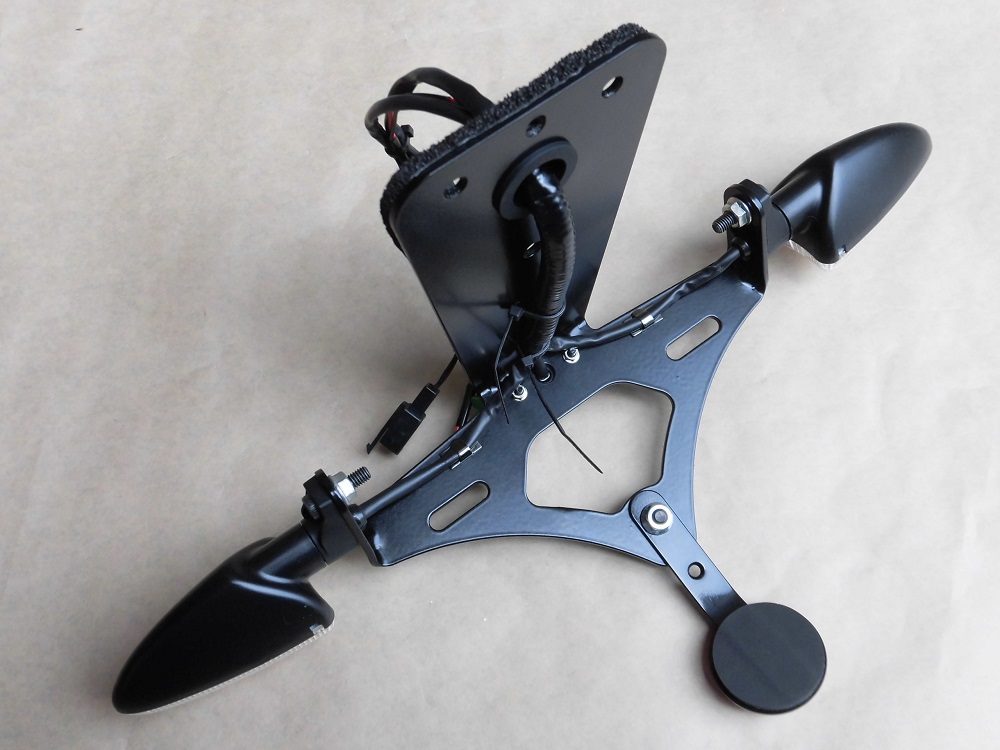
<The reverse>
Although corrugated tube has not been fixed yet, this is what it looks like.
It may be a little bigger than the one I removed.
But I think it is still compact enough.
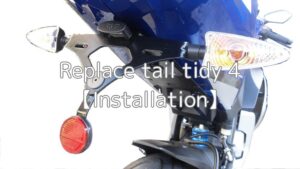
Continue to ‘Replace tail tidy 4 【Installation】’.
3. Summary
The license plate light, turn signal lights and reflector are combined in a tail tidy.
It is made to be detachable, and I can remove it with one piece by disconnecting the various connectors.
This will surely help when repairing or installing parts.
- Use φ7 corrugated tube to organize the wiring
- Install the grommet in the opposite direction to the instructions
- Align the lengths of the license plate light and turn signal lights
- Install a universal connector for the license plate light
