Although recent motorcycles are increasingly using LEDs for lights, the R125 (5D7)’s factory turn signals are bulbs (LEDs are optional).
Perhaps because the 125cc model is an entry grade, it is difficult to spend money on details.
Knowing such a situation of the manufacturer, many attractive after-market products are available.
Among them, I found an inexpensive one in genuine form, so I purchased and replaced it (not replacing the bulb, but replacing the turn signal itself).
The following is a three-part summary of the actual work done on the LED turn signals replacement, in the following order.
- Replace to turn signal relay for LED
- Assemble and install front turn signals
- Assemble and install rear turn signal lights
The reason for replacing the turn signal relay first is to prevent the LED turn signals from blinking repeatedly and quickly (high-flasher phenomenon).
Since LEDs consume less power, the turn signal relay misidentifies it as a burnt-out bulb, resulting in the high-flasher phenomenon.
From this article, you can learn the following.
- Where to find the turn signal relay
- How to Replace the turn signal relay
- How to install the turn signal relay
| Date | 2nd January 2022 |
| Subjects | Tuning, Customizing |
| Shop or DIY | DIY |
| Difficulty | |
| Working hours | 1 |
| Costs [Yen] | 464 |
1. Goods to use
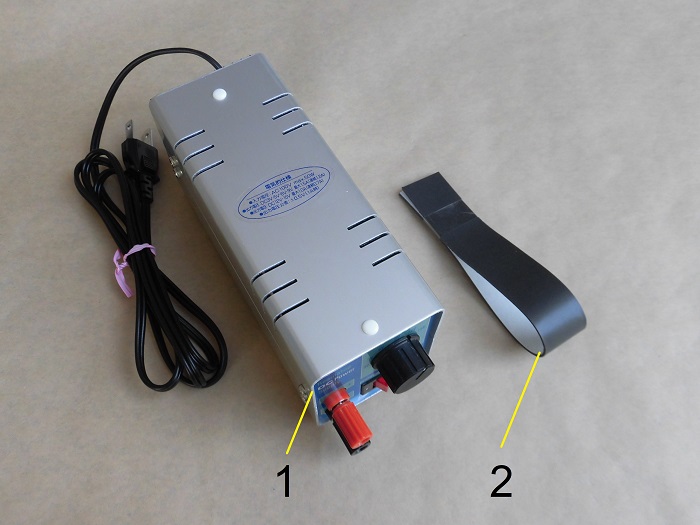
| No. | Products name | Manufacturer | Products number | Quantity | Amounts[Yen] | Purchase this time |
| ST1 | IC turn signal relay for LED | MAD MAX | MM19-0276 | 1 | 464 | ○ |
| 1 | Regulated power supply | SANHAYATO | DK-811 | 1 | (21,978) | |
| 2 | PORON sponge sheet | INOAC | L32-1.550MT | 1 | 549 | |
| 22,991 | 464 |
2. Replace to turn signal relay for LED (STEP1-11)
Check turn signal relay
I purchased a commercially available LED-compatible turn signal relay (MM19-0276 from MAD MAX) to see if it works correctly.
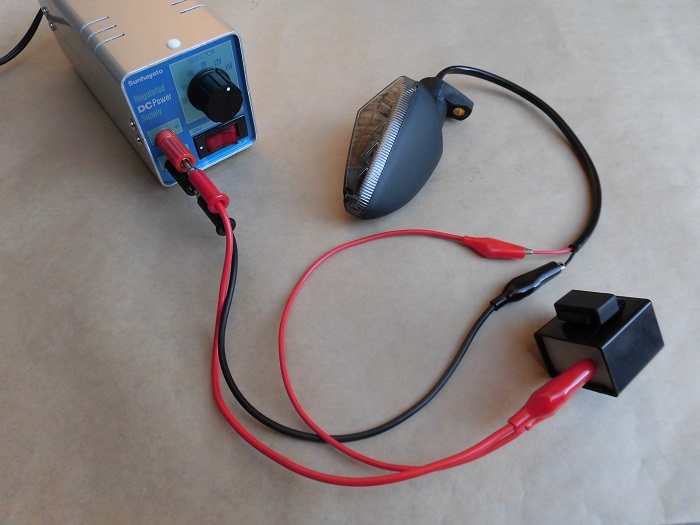
<Check turn signal relay>
Connect the LED-compatible turn signal relay and LED turn signal to the power supply and apply voltage (12V).
I felt that the blinking speed was somewhat fast. But since it blinked, it must be OK.
Remove rear cowls and panel etc.
Now let’s start the replacement work.
As the turn signal relay is located under the passenger seat, I remove it.
In order to replace the rear turn signals, the rear cowls and panel are also removed.
(For details, please refer to the maintenance record “How to remove rear cowls and panel etc.”)
Remove turn signal relay 1
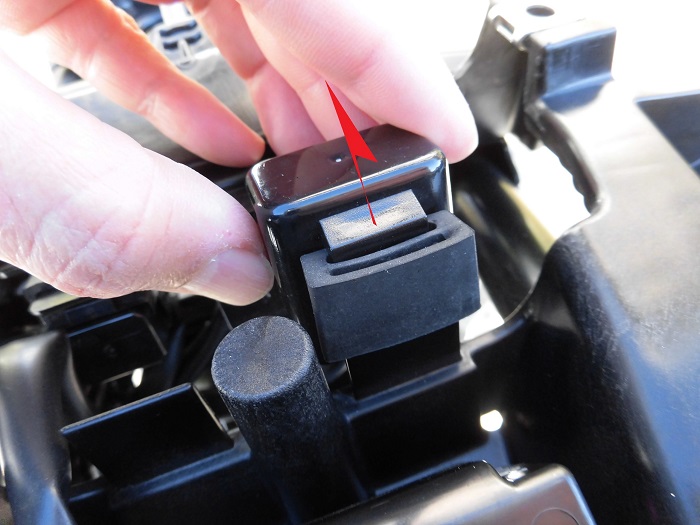
<Remove turn signal relay 1>
Located in front of the lean angle sensor will be the turn signal relay.
Remove the turn signal relay by lifting it off the plate-like protrusion on the box.
Remove turn signal relay 2
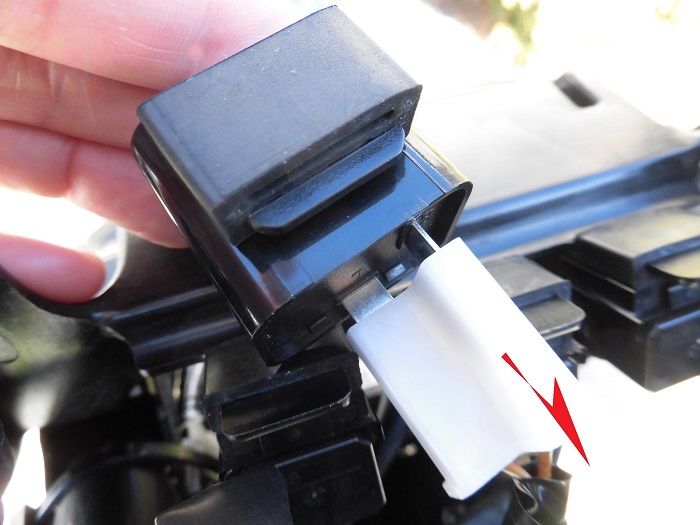
<Remove turn signal relay 2>
Next, disconnect the 2-pole connector from the turn signal relay.
Simply pull it off.
Comparison of old and new turn signal relay
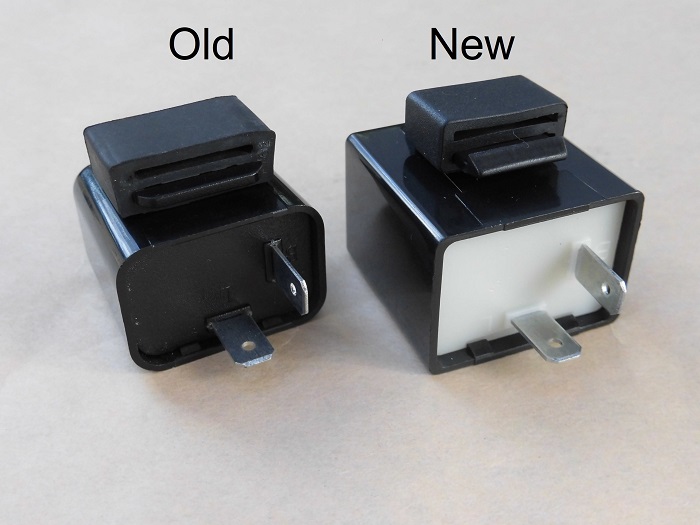
<Terminal side>
Left: Removed, Genuine part 27g
Right: Installed, LED-compatible turn signal relay 15g
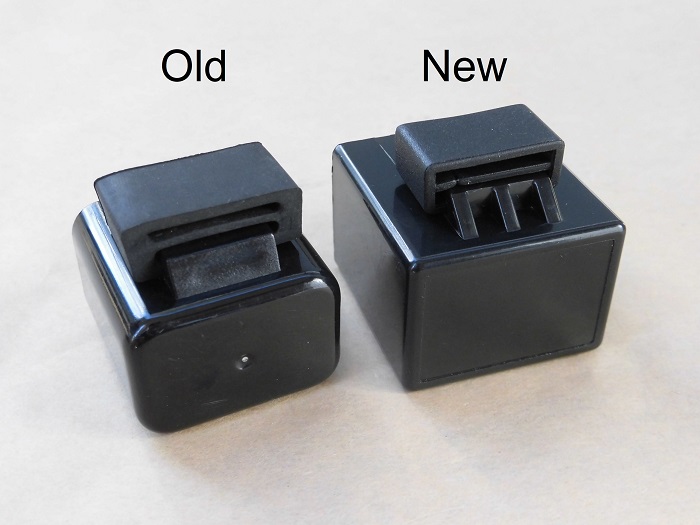
<Upper side>
Left: Removed
Right: Installed
LED-compatible turn signal relay is a little larger in size, but lighter.
The position and size of the terminals are the same.
Install turn signal relay
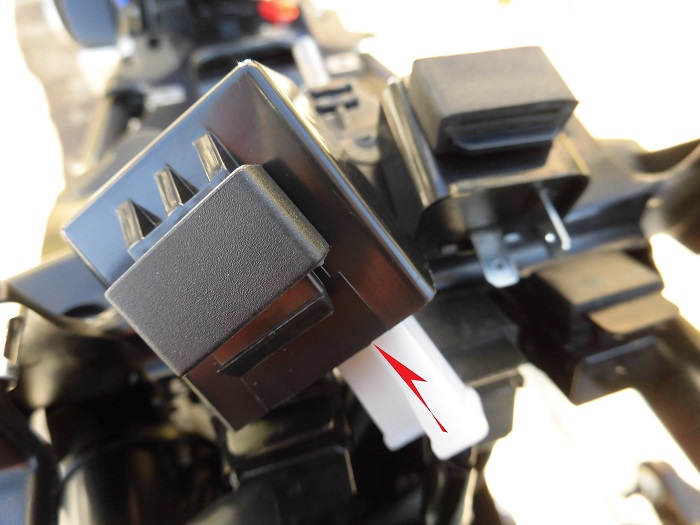
<Install turn signal relay>
The LED-compatible turn signal relay was connected to the connector, and the terminals were installed perfectly.
Confirmation of mixed use of LEDs and light bulbs
Since they were listed as LED compatible turn signals, I figured that both LEDs and bulbs could be used.
So, I installed one LED turn signal on the rear and tried it, and it lit up beautifully.
This would do,
- For installation and budget reasons, I’ll use LEDs in the front and bulbs in the rear.
- I can return to the one I removed when it malfunctions, and so on.
This will expand the usage of the LED turn signals.
Turn signal relay installed 1
However, as noted in STEP 3, because of its large size, the front relay body and the plate-like projection are almost touching.
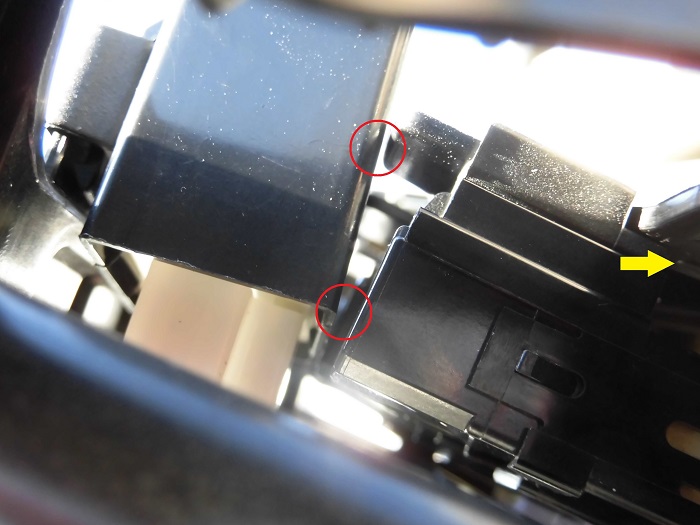
<Turn signal relay installed 1>
If it is mounted higher, the gap between the relay and the relay body in front will widen, but I feel that it may hit the plate-like projection due to vibration during driving.
I should a cushioning material be inserted or the protrusion be shaved off?
Paste sponge sheet
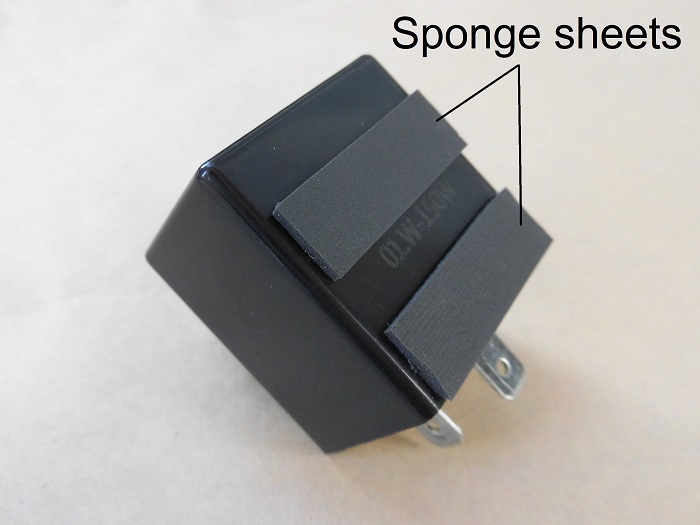
<Paste sponge sheets>
In the end, I put a sponge sheet on the part that was likely to be hit. (16g in total)
Turn signal relay installed 2
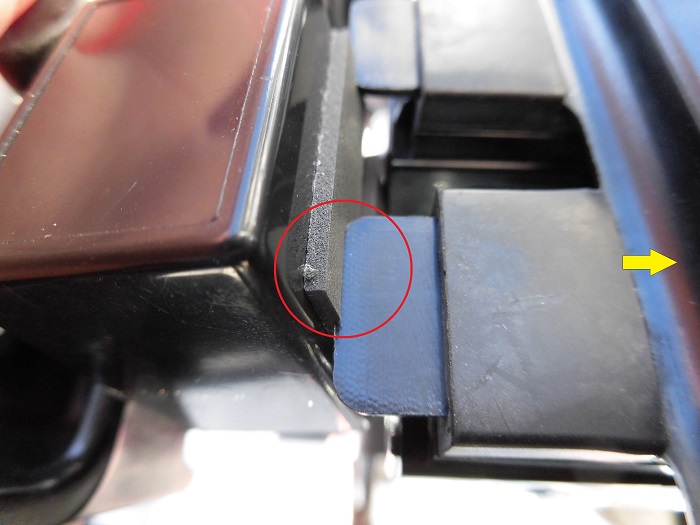
<Turn signal relay installed 2>
The sponge sheet is thicker and hits the projection, but this is more secure.
Comparison before and after turn signal relay replacement
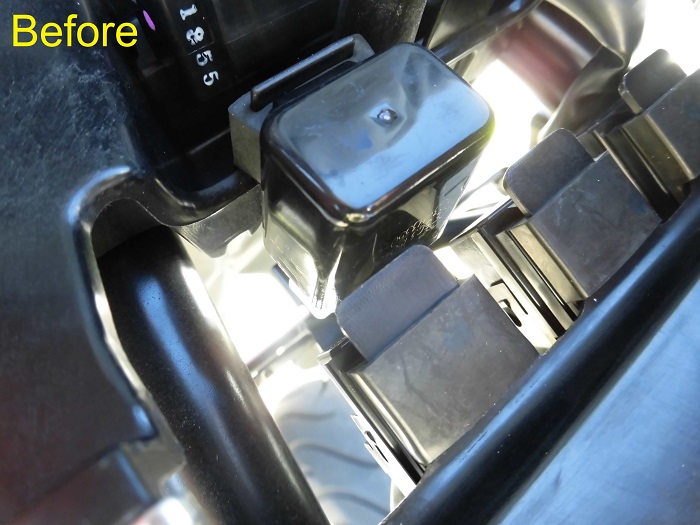
<Before>
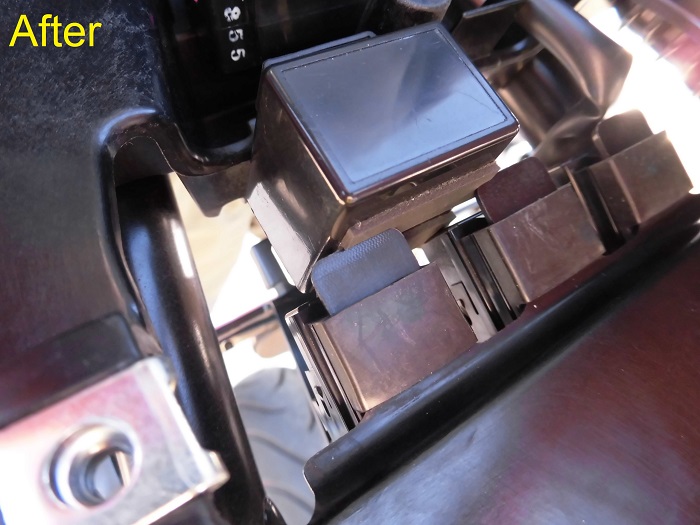
<After>
I was glad to be able to put it on because I bought it without checking anything but the terminals.
Since I found that the bulbs can also be used, I will not put them back on and will use them as they are.
Continue to maintenance record “Replace to LED turn Signals2 【Assemble and Install front turn signals】”.
3. Summary
I have put together a replacement for the LED compatible turn signal relay.
I was able to verify that the LED turn signals work and replace the OEM part.
- I confirmed that the LED turn signals work fine with a commercially available turn signal relay.
- The terminals were installed without any modification.
- If the LED-compatible turn signal relay is larger than the genuine part, it is recommended to check whether it can be installed to the body before purchasing.
- It is possible to mix the genuine turn signals with LED turn signals.
