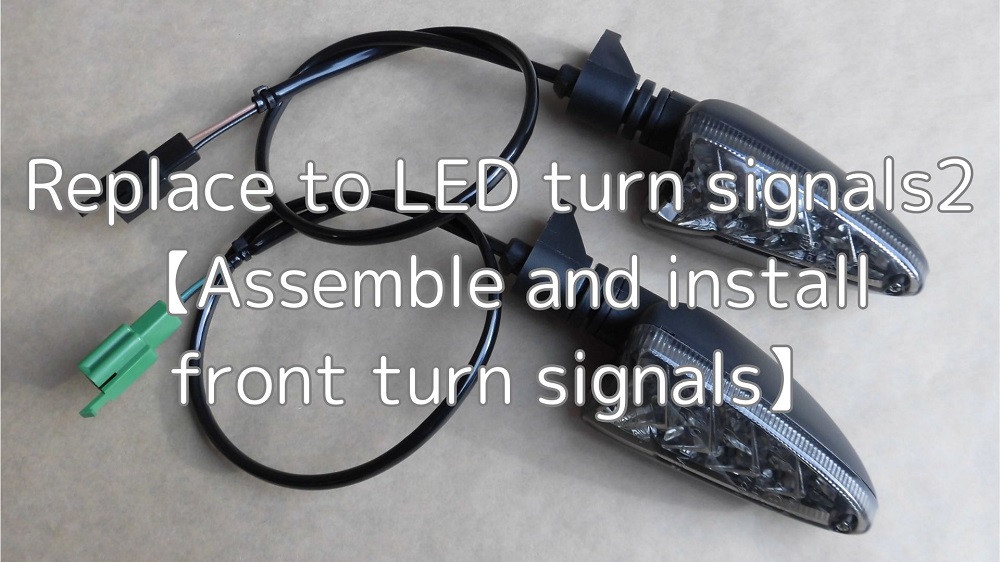
This is a continuation of the maintenance record “Replacement to LED turn signals1 【Replace to turn signal relay for LED】”.
In this second installment, I will assemble and install the front turn signals.
Most LED turn signals on the market require modifications to the mounting area and wiring. Even the genuine Yamaha options require modification of the wiring.
So, for those who want to modify the wiring by themselves, I have compiled the methods and the tools needed to do so.
This time, since I prepared LED turn signals of the genuine form from after-market products, I proceed as follows.
- Mounting part has same shape.
- Wiring modification is necessary.
The wiring is intended to be finished like a genuine part without using the bullet terminals.
From this article, you can learn the following.
- How to remove the terminals of the 110 type connector
- How to modify the wiring
- Lightweight mounting bolts
| Date | 3rd January 2022 |
| Subjects | Tuning, Customizing |
| Shop or DIY | DIY |
| Difficulty | |
| Working hours | 3 |
| Costs [Yen] | 3,577 |
1. Goods to use
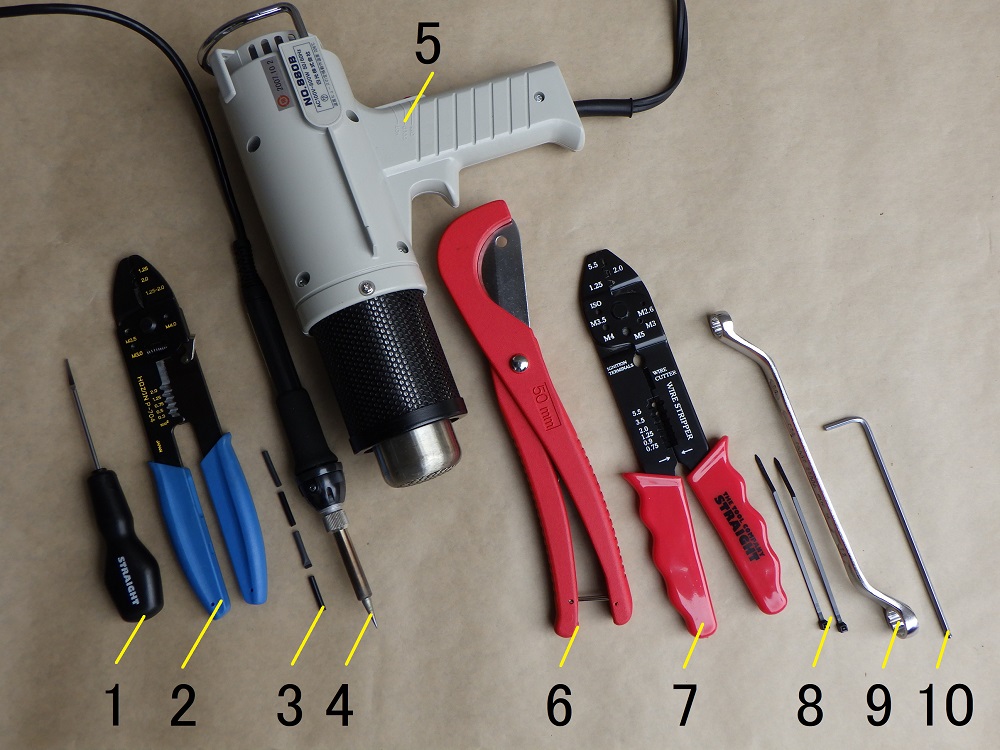
| No. | Products name | Manufacturer | Products number | Quantity | Amounts[Yen] | Purchase this time |
| ST1 | LED turn signals (Length: 36mm) | SAVAGE | – | 1 | 2,453 | ○ |
| 1 | Terminal release tool | Straight | 19-456 | 1 | (2,770) | |
| 2 | Crimping tool | HOZAN | P-704 | 1 | 4,895 | |
| 3 | Shrink tube (φ2) | – | – | 1 | 73 | |
| ST9 | Wire (1m, black) | Sumitomo wiring | AVSSB0.5f | 1 | 132 | ○ |
| ST9 | Wire (1m, green) | Sumitomo wiring | AVSSB0.5f | 1 | 132 | ○ |
| ST9 | Wire (1m, brown) | Sumitomo wiring | AVSSB0.5f | 1 | 132 | ○ |
| 4 | Soldering iron | TAIYO ELECTRIC | PX-601AS | 1 | 17,600 | |
| 5 | Heating gun | HAKKO | 880B | 1 | (7,260) | |
| ST13 | Harness tube (φ4, 1m, black) | – | HSTU-04BK | 1 | 77 | ○ |
| 6 | Hose cutter | Straight | 19-269 | 1 | 1,680 | |
| ST15 | Type 110 male terminal non-waterproof | Sumitomo wiring | M110 | 4 | 88 | ○ |
| 7 | Crimping tool | Straight | 12-679 | 1 | 630 | |
| 8 | Cable tie (2.5mm) | ELPA | KBF-N100100(BK) | 2 | 175 | |
| ST19 | Low head bolts (M6, 16mm, 2 pieces) | YAHATANEJI | 640 | 1 | 184 | ○ |
| 9 | Box wrench (10×12mm) | KTC | M5-1012 | 1 | 1,936 | |
| 10 | Long hex key (3mm) | KTC | HLD150-3 | 1 | 550 | |
| – | Shipping charges | – | – | 1 | 380 | ○ |
| 41,147 | 3,578 |
2. Assemble and install front turn signals (STEP1-22)
Remove front turn signals
First, remove the front turn signals from the moto body.
(For details, please refer to the maintenance record “How to remove and install front turn signals”.)
Comparison of old and new turn signals
This time, I prepared LED turn signals (LED turn signals made by SAVAGE).
I will immediately compare it with the turn signals of the genuine part.
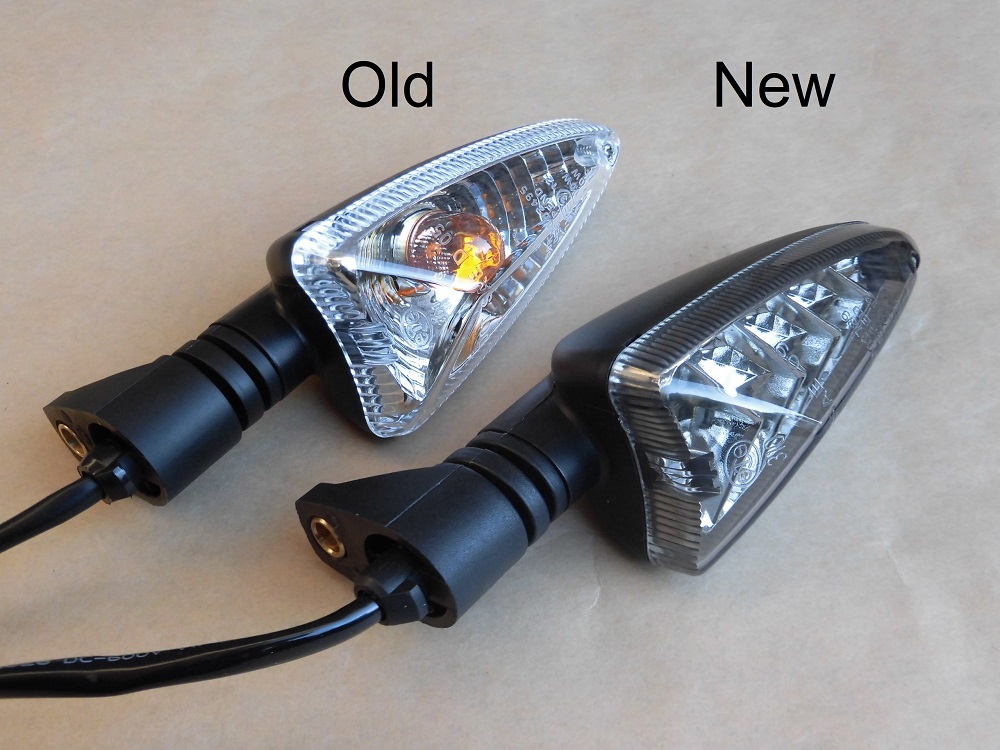
<Front side>
Left: Removed: Genuine parts
Right: Installed LED turn signal
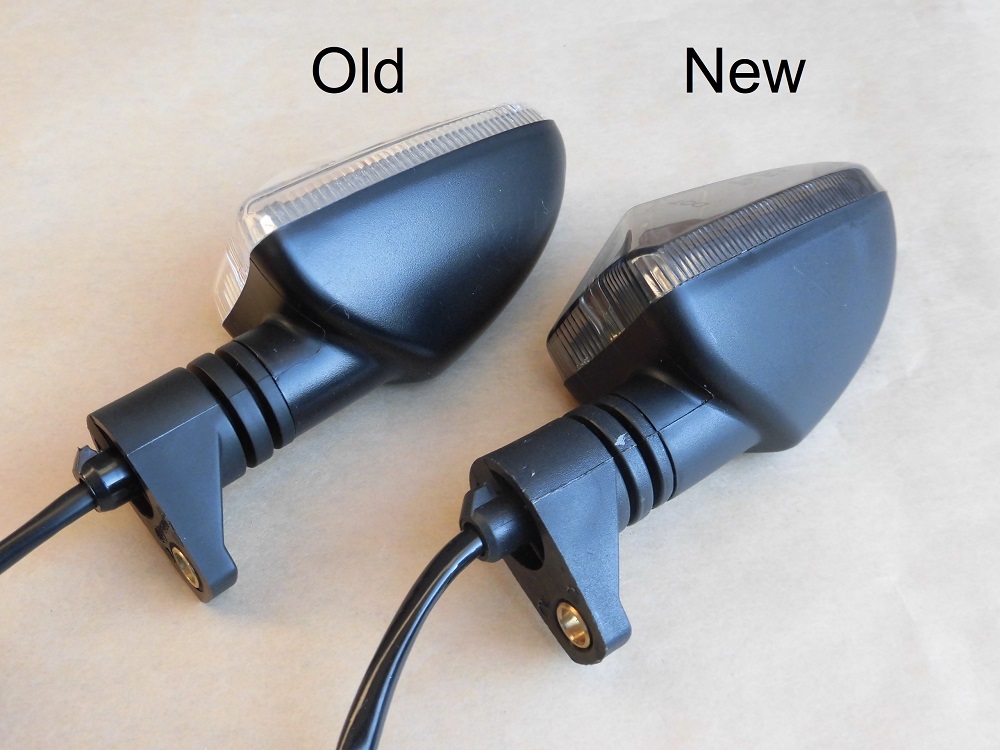
<Back side>
The mounting part has the same shape.
There are 9 LEDs with smoked lenses.
Note that this is not a sequential type.
Wiring procedure
Modify the wiring of the LED turn signals to the same length and shape as that of the genuine parts.
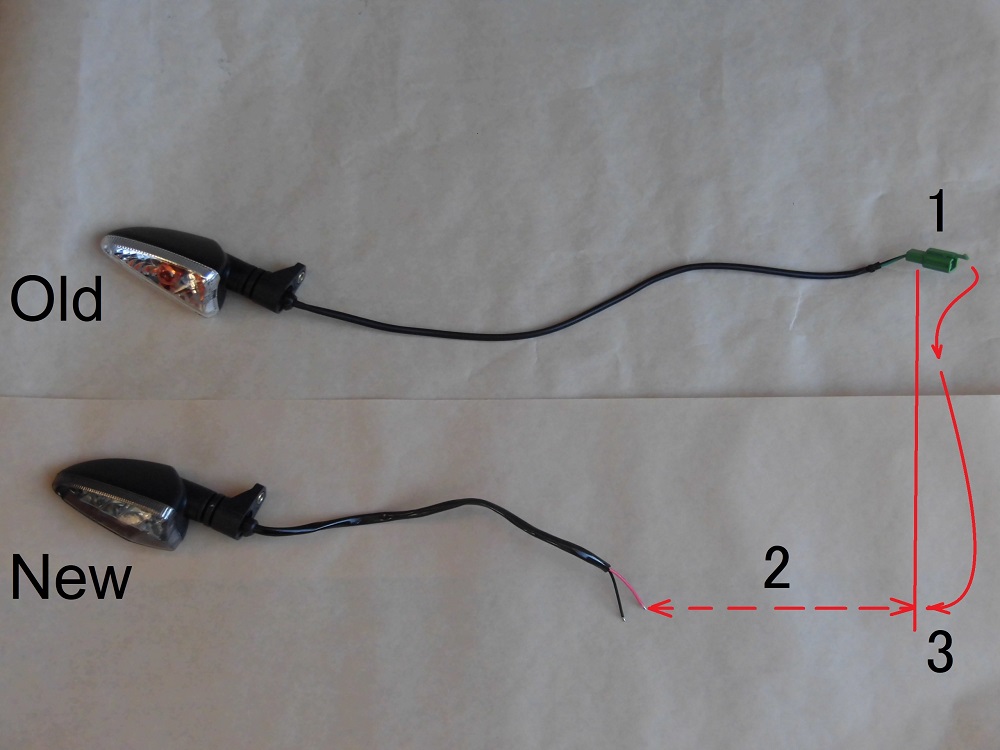
<Wiring procedure>
The wirings for the LED turn signals were shorter than the genuine part, so the wiring will be added.
Proceed as follows to modify the wiring.
- Remove the connector
- Add the wiring
- Install the connector removed in above 1.
I will reuse the connector as it is a waste.
Remove terminals
First, disconnect the turn signal connector.
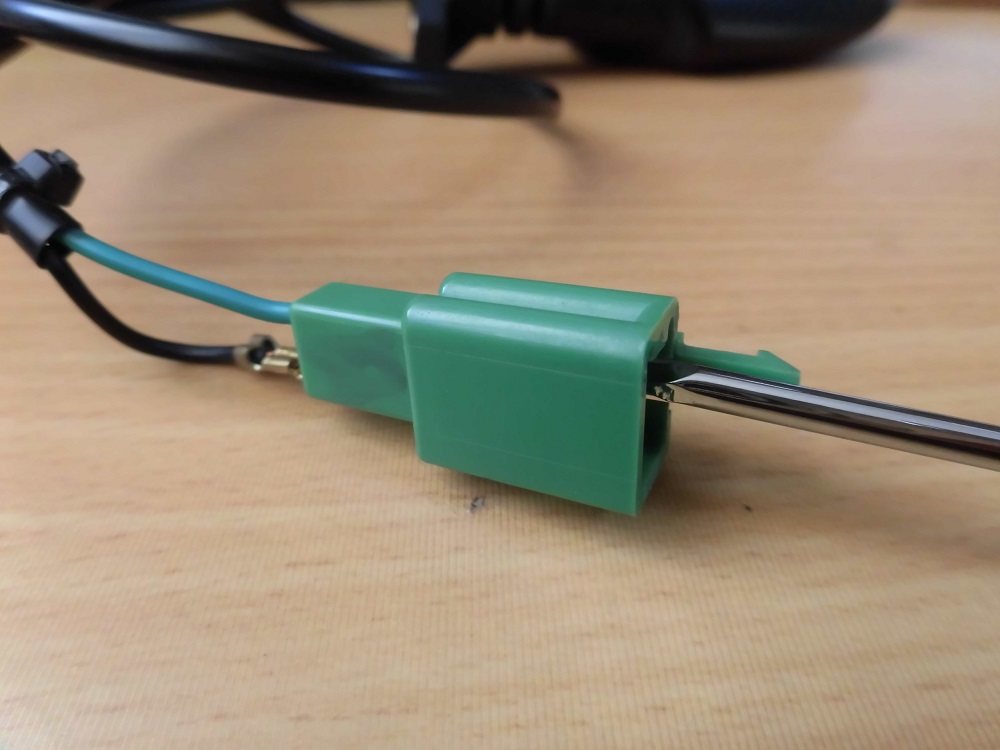
<Remove terminals>
Using the terminal release tool, remove the terminals from the connector.
Image of terminal removal
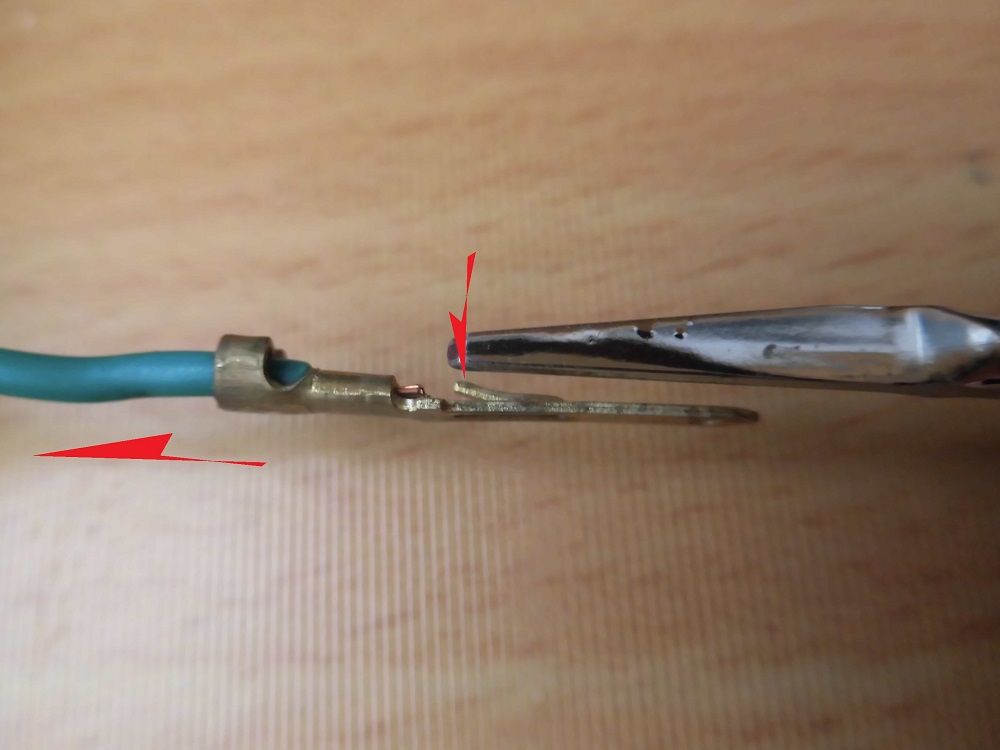
<Image of terminal removal>
The terminals are type 110 male.
The terminal is released by pushing down on the protrusion shown in the photo.
Remove harness tube
Now let’s start processing LED turn signals.
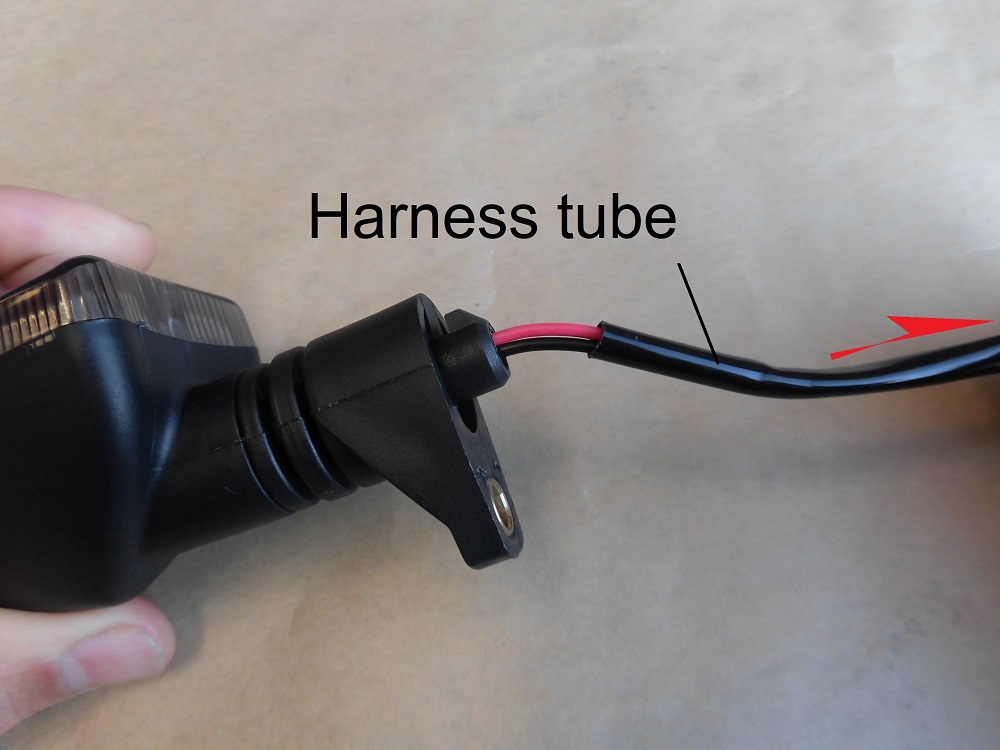
<Remove harness tube>
Remove the harness tube attached to the LED turn signals.
Removed harness tubes
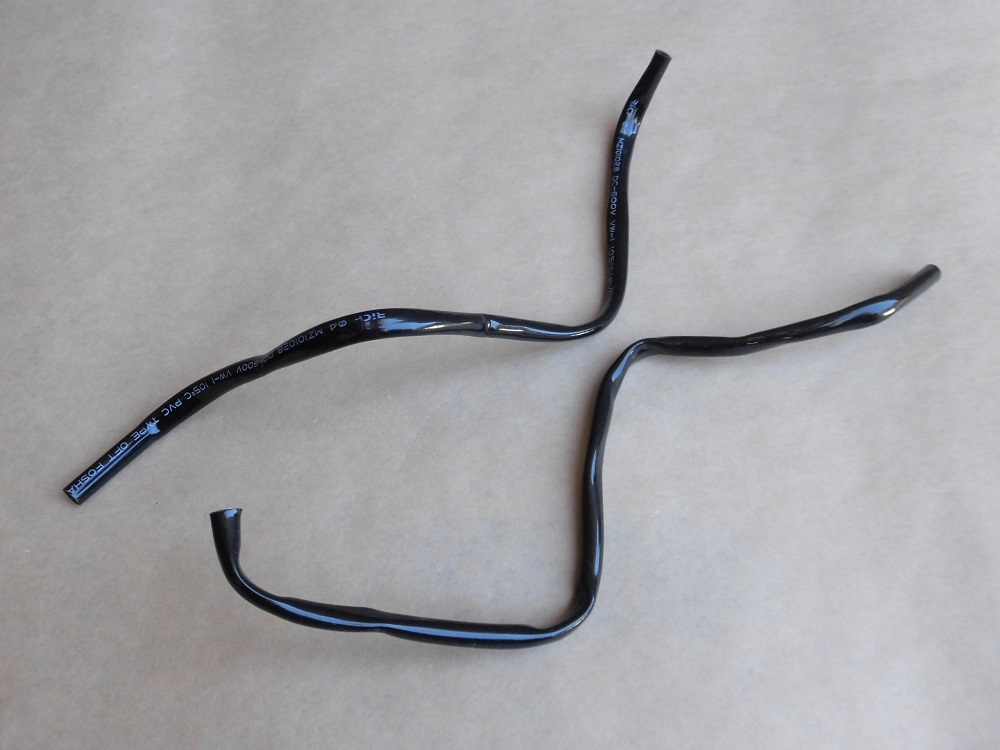
<Removed harness tubes>
It was folded small when delivered, so it was squishy and the folded part was discolored white.
I wonder if it will be straightened by applying heat.
Process wiring 1
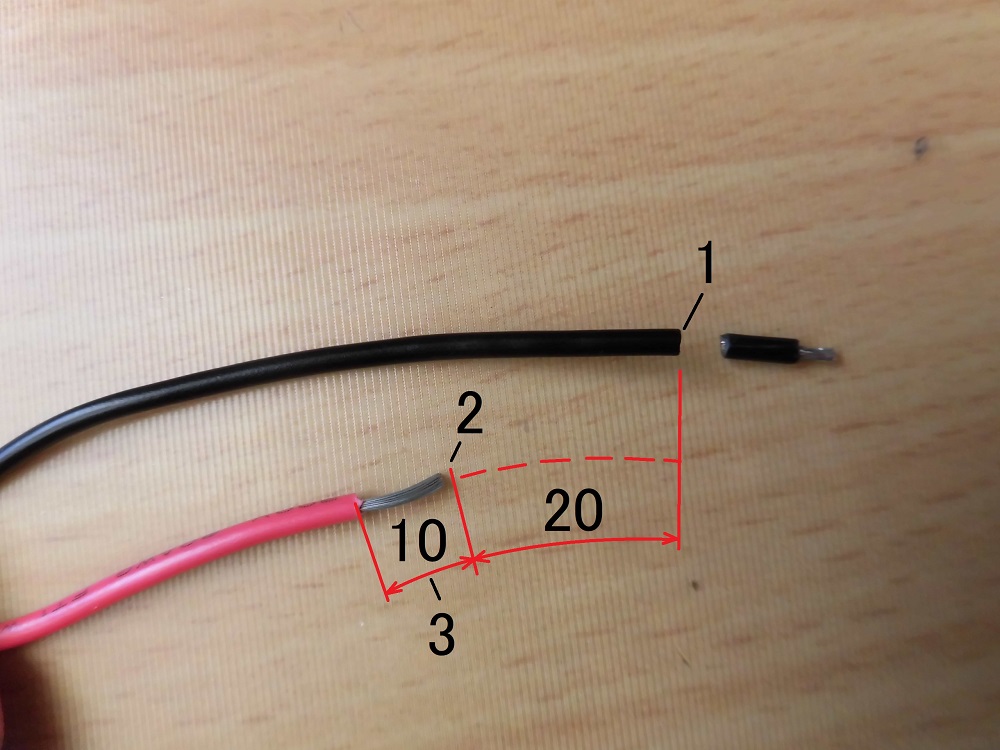
<Process wiring 1>
With crimping tool,
- Cut the tip of the wiring.
- Cut about 20mm off the red wire so that the wires do not overlap.
- Peel off about 10 mm of the outer covering.
Process wiring 2

<Process wiring 2>
- Pass the shrink tube through it.
- Pull the LED turn signal wires together with the wires to be added.
By the way, the color of the wiring to be added matches the color of the genuine product.
This is the advantage of doing the work by myself.
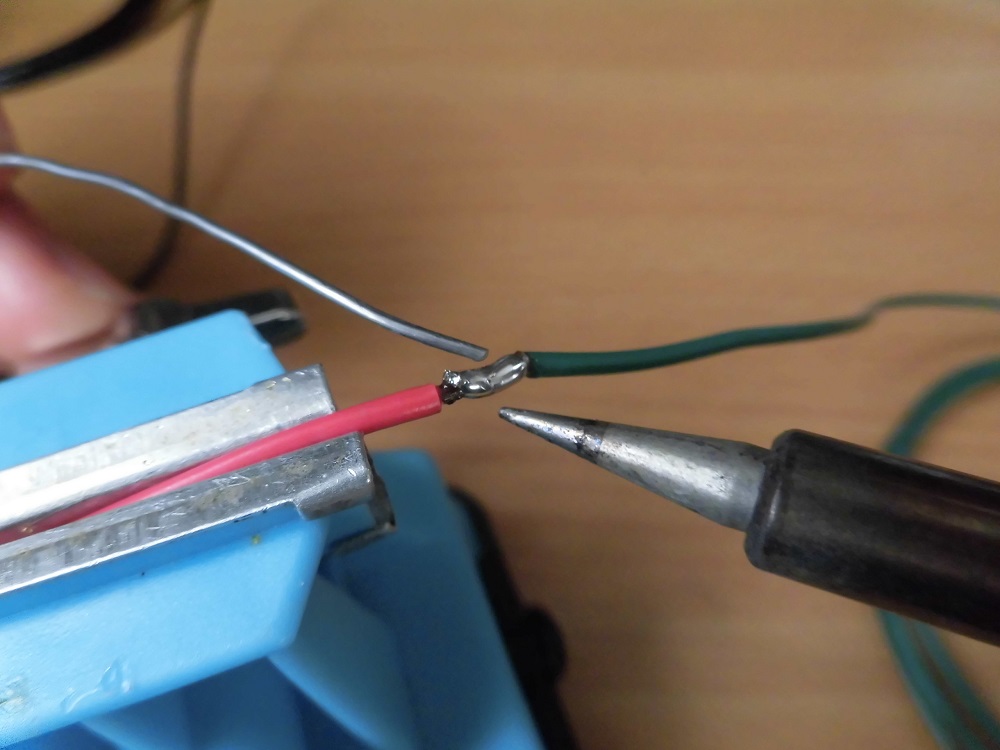
Soldering
<Soldering>
Solder the overhang.
To make it easier for the shrink tube to pass through, flatten the protruding part with pliers or a file.
If you do not do this properly, the harness tube will not pass through in STEP 13.
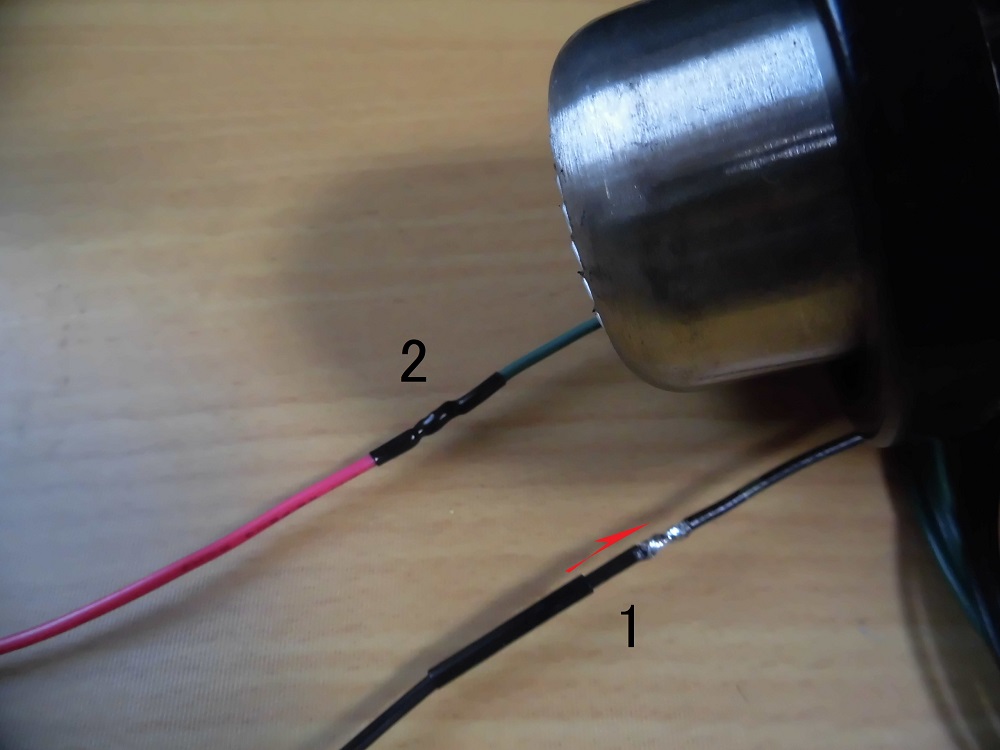
Shrink tubes
<Shrink tubes>
- Cover the soldered area with shrink tube.
- Shrink the shrink tube (φ2) with a heating gun.
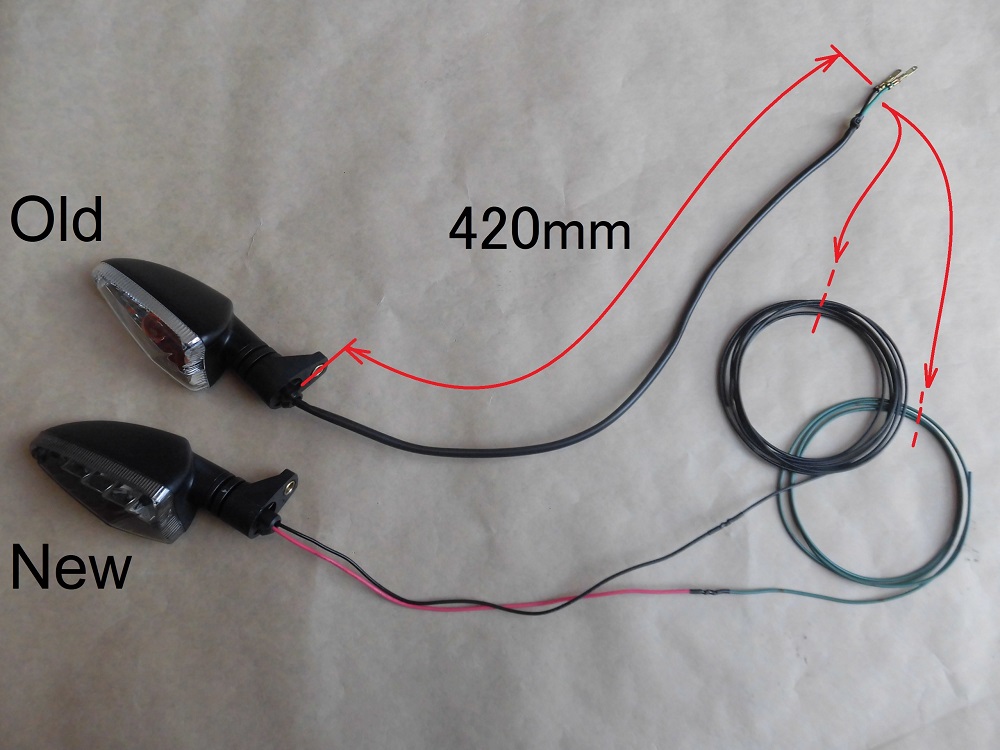
Process wiring 3
<Process wiring 3>
Cut the LED turn signal wires at 420 mm to match the length of the genuine parts.
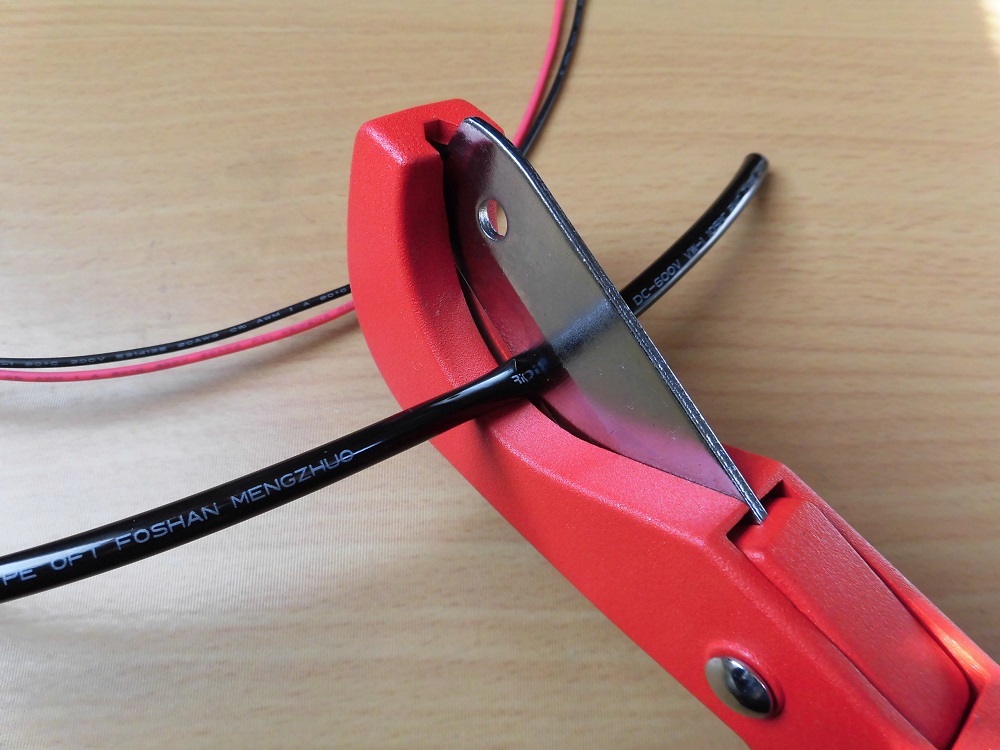
Cut harness tube
<Cut harness tube>
Cut the harness tube (φ4) into 410 mm lengths with a hose cutter.
Install harness tube
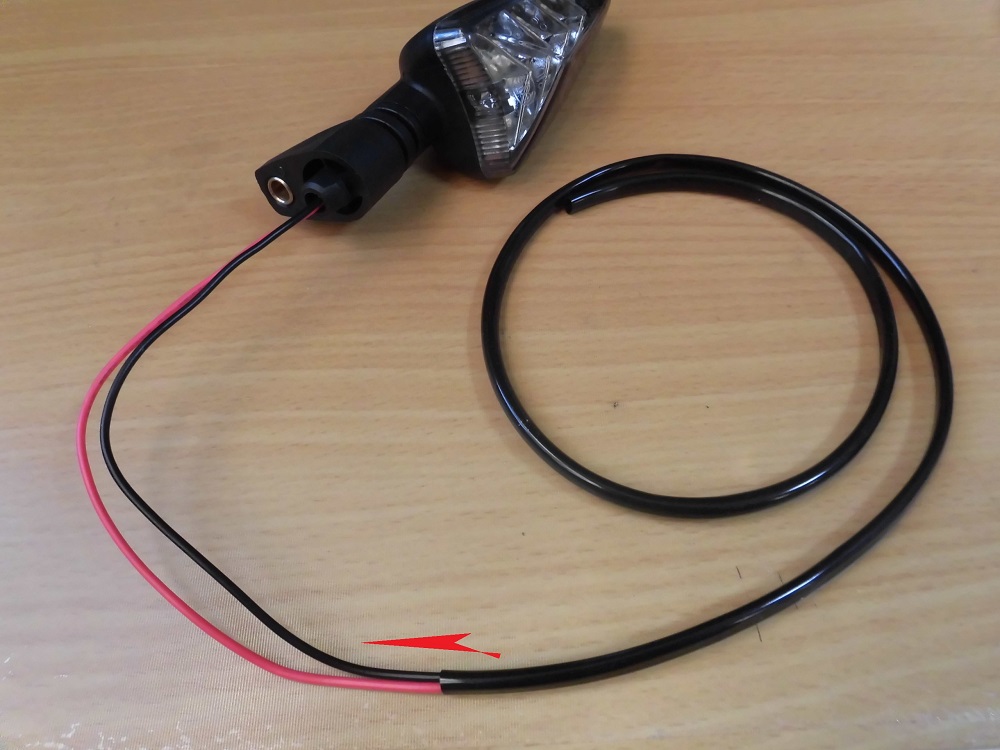
<Install harness tube>
Run the cut harness tube through the LED turn signal wiring.
Crimp terminals
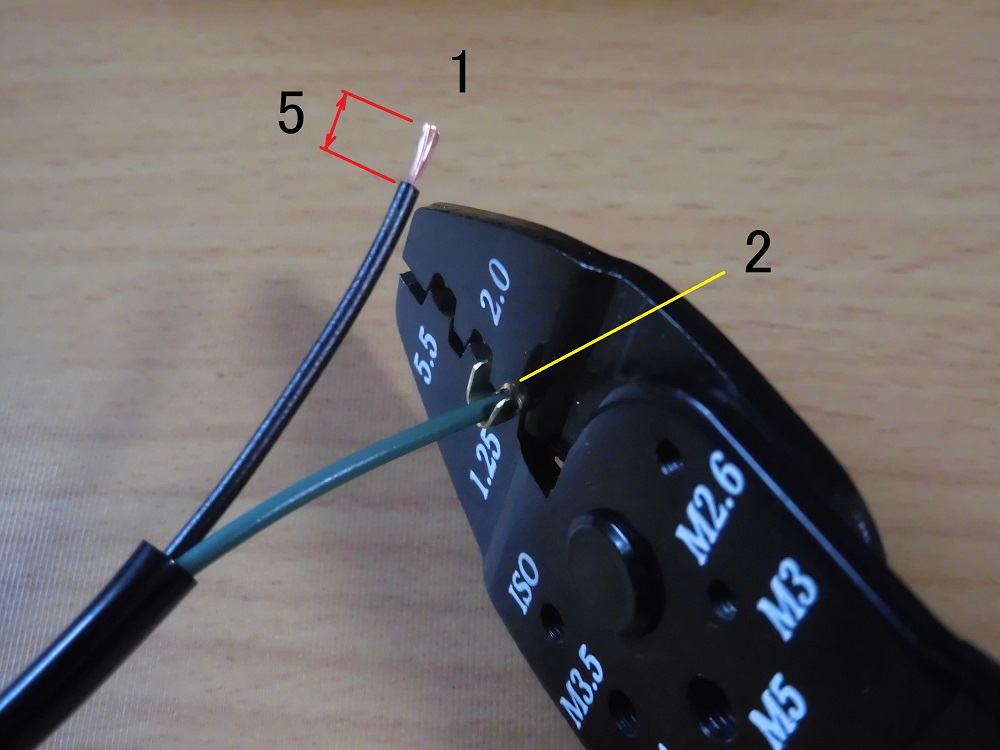
<Crimp terminals>
- Using crimping tool, peel off about 5mm of the outer covering.
- Crimp the terminals with crimping tool.
Install connector
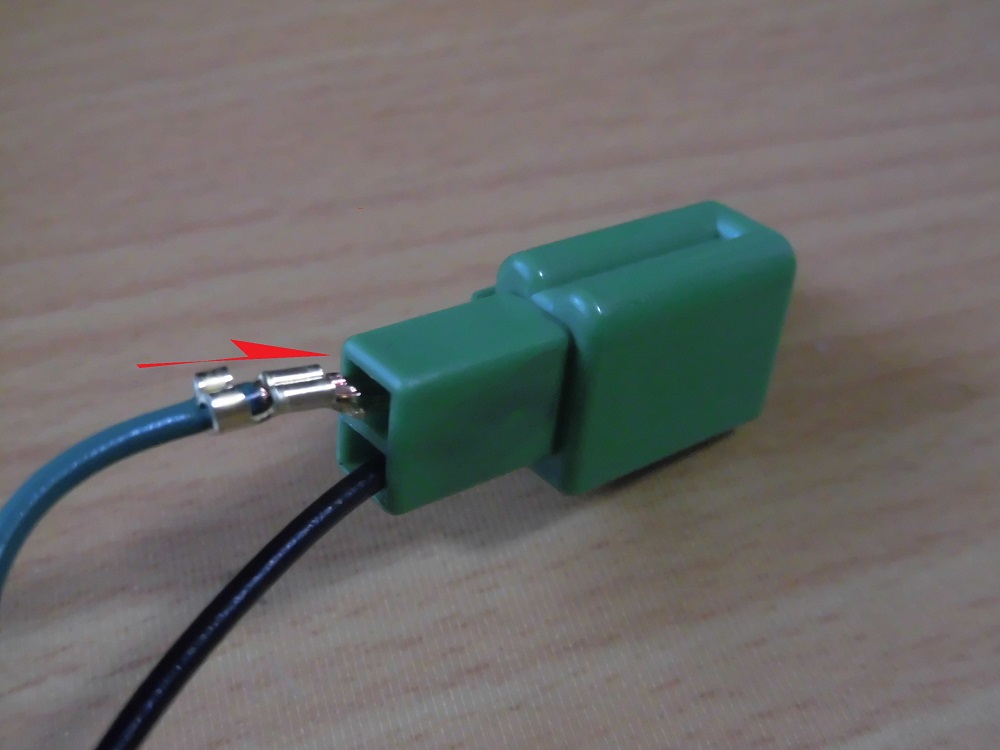
<Install connector>
Insert the terminals into the connector, paying attention to the position and direction.
LEDs have polarity, so they will not turn on if the polarity is reversed.
Fix harness tube
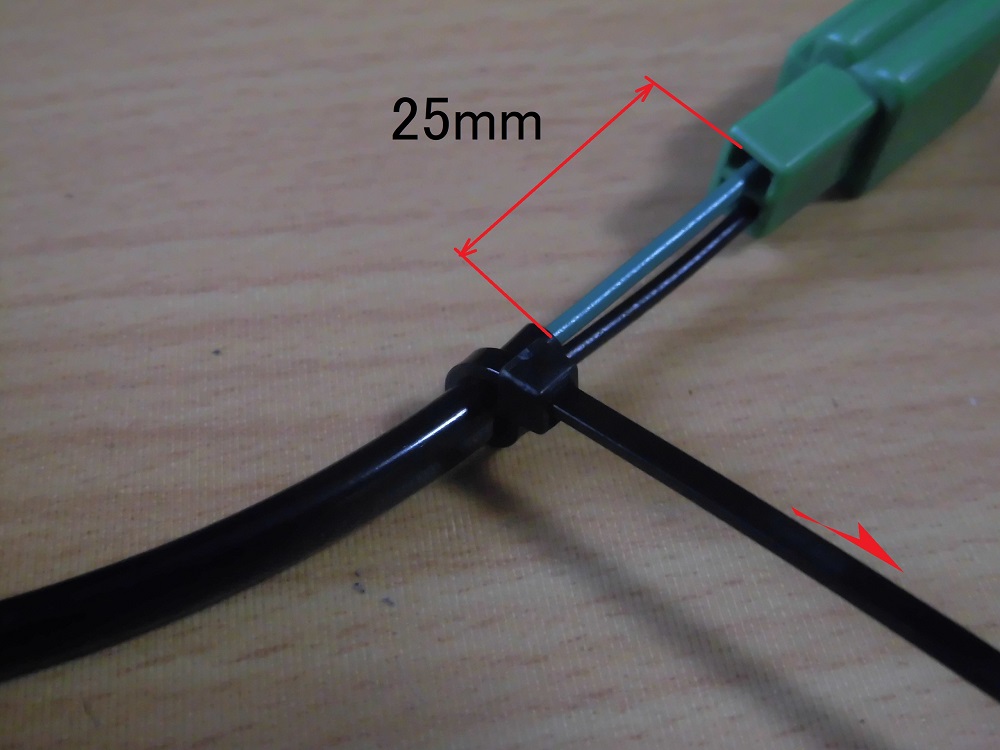
<Fix harness tube>
Align the harness tube about 25 mm from the connector and tighten the cable tie (2.5 mm).
Then cut the excess portion of the cable tie.
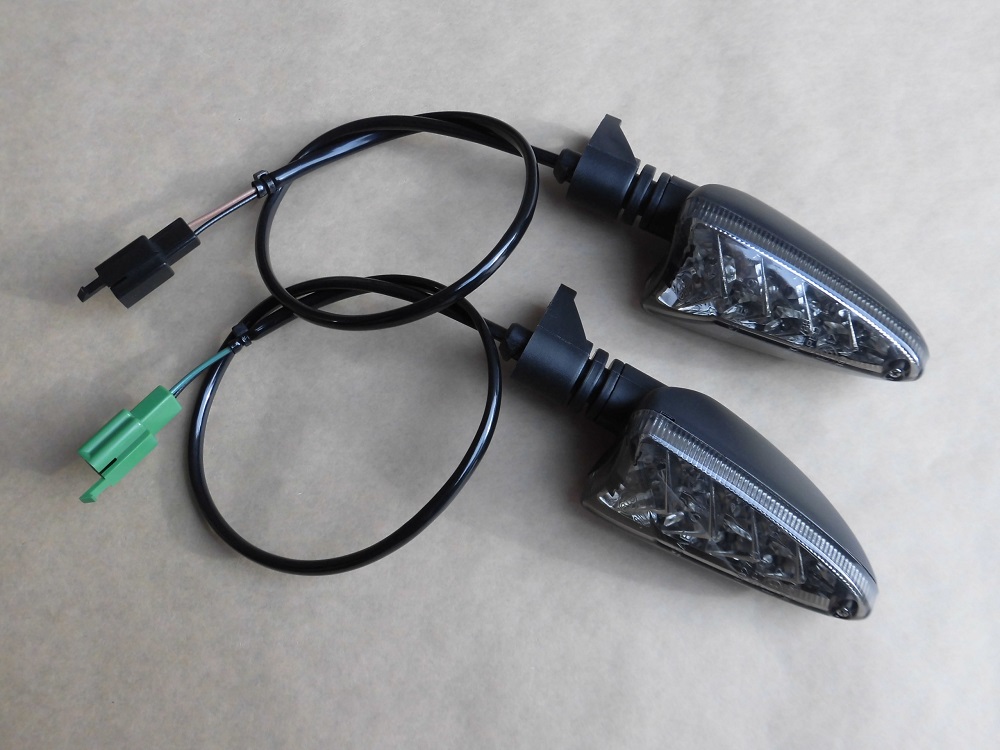
Modified LED turn signals
<Modified LED turn signals>
I was able to make it almost the same shape as the genuine parts.
The weight reduction is 5g each side, 10g in total.
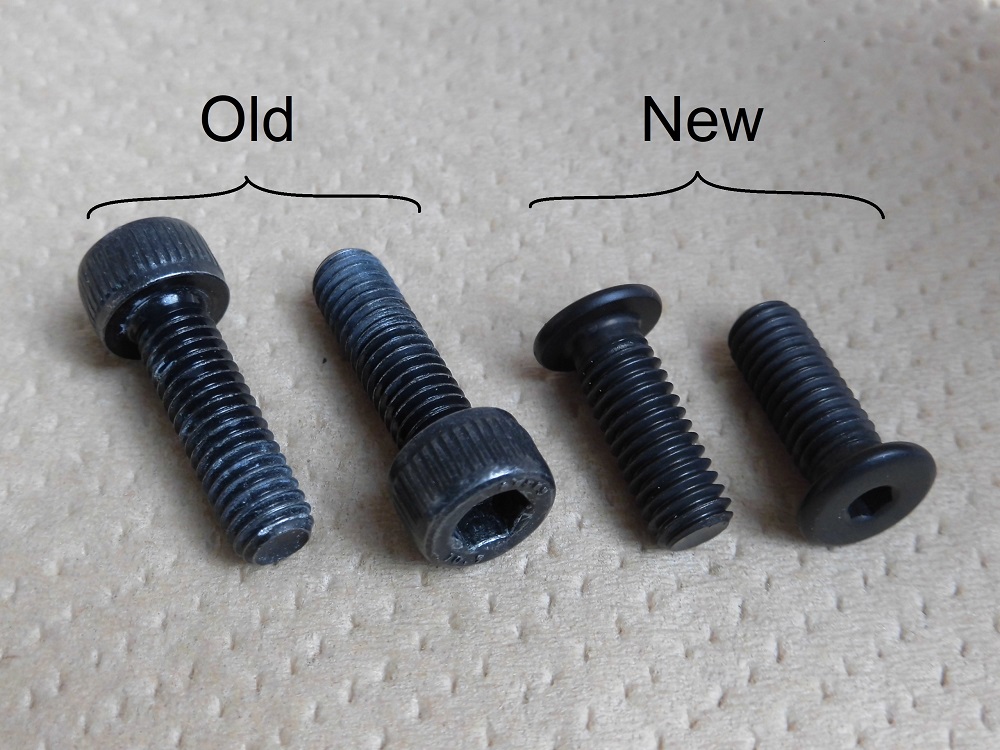
Comparison of old and new bolts
This time, I decided to replace the hexagon socket head bolts with low head bolts for installing on the moto body.
<Comparison of old and new bolts>
Left: Hexagon socket bolts (genuine parts) 6g
Right: Low head bolts 3g
Install LED turn signals
Now, install the LED turn signals to the upper side cowls.
Hang a box wrench (10mm) on the nut to secure it in place and then use a hex key (3mm) to tighten the bolt.
(For details, please refer to the maintenance record “How to remove and install front turn signals”)

In fact, modification of the mounting area was required at this time.
For details, please refer to the next maintenance record.
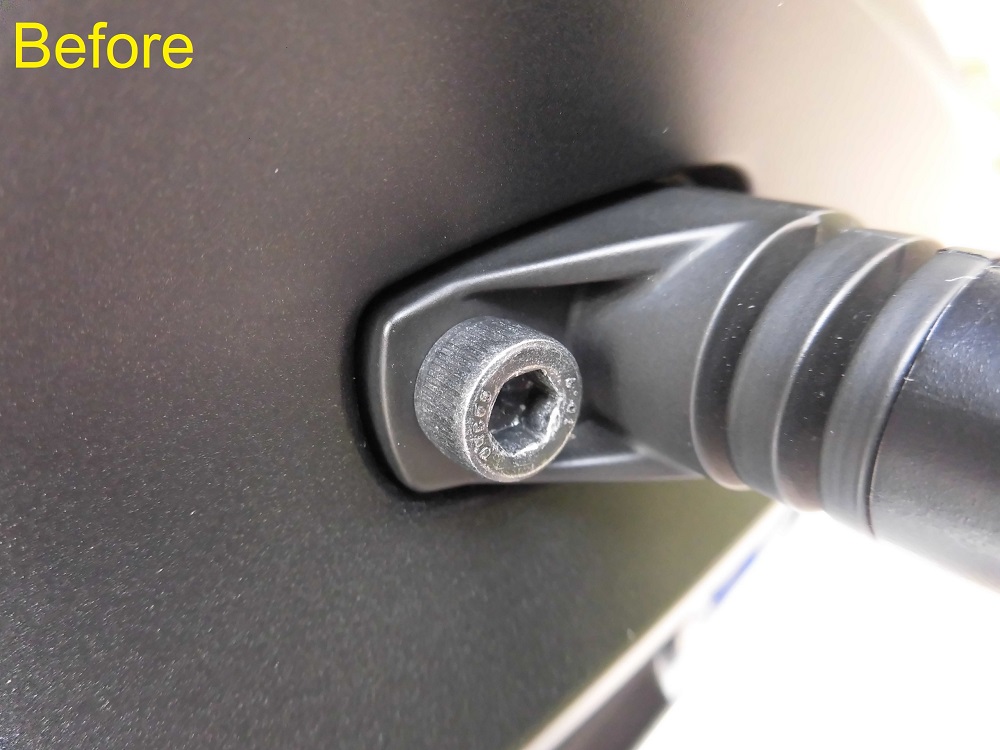
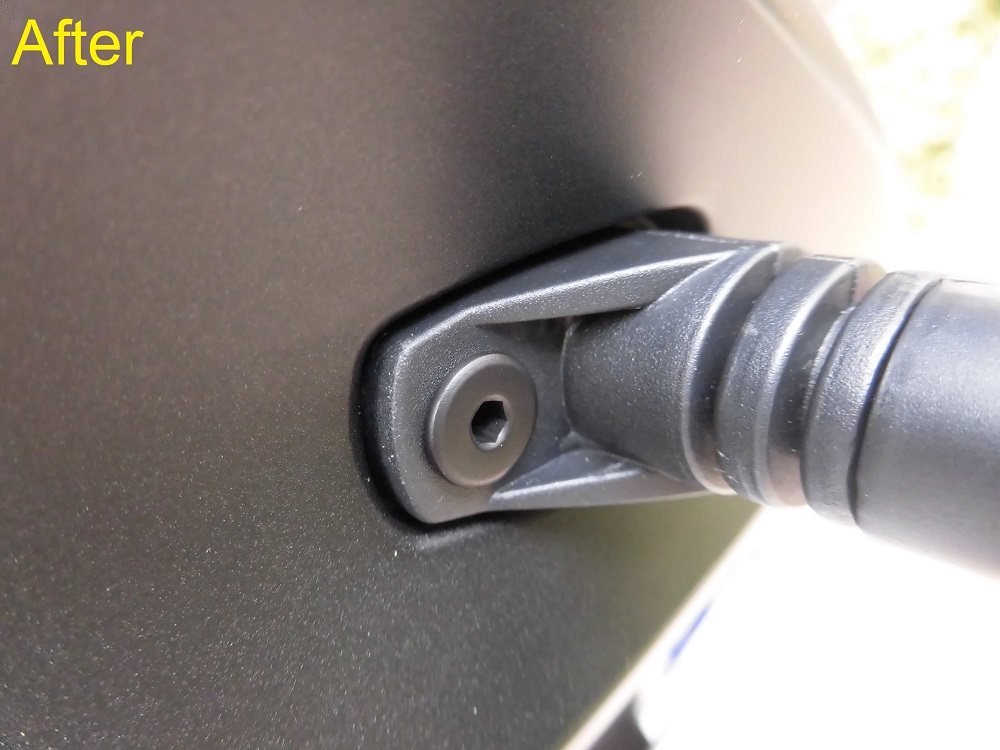
Comparison before and after replacement of mounting bolts
Now, let’s compare before and after replacement.
<Before>
<After>
The protruding bolt has been eliminated for a cleaner look.
Weight reduction of 6g.
Comparison before and after turn signals replacement
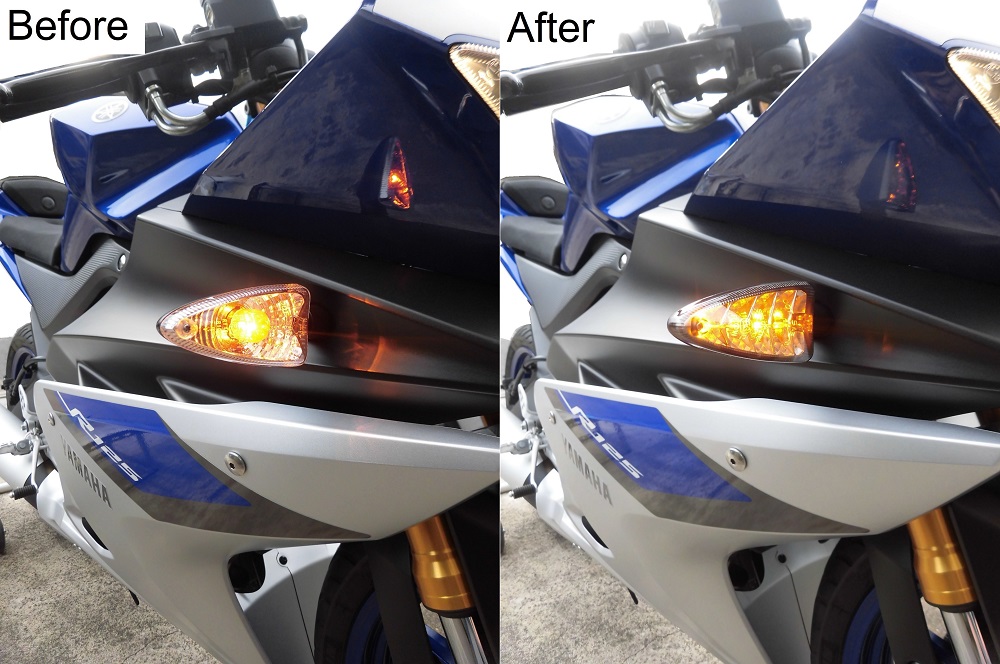
<Before and after turn signals replacement>
Left: Before replacement, Genuine turn signal
Right: After replacement, LED turn signal
No difference?
No, it’s the shape of the genuine part, but the LED inside is cool.
Continue to Maintenance Record “Replacing LED turn signals3 【Assemble and install rear turn signals】”.
3. Summary
This is a summary of the assembly and installation of LED front turn signals.
Since I didn’t use the bullet terminals and the color of the wiring matched the genuine parts, at a glance, no one might not notice that I have replaced them.
- I was able to install commercially available LED turn signals with no problem.
- It is recommended to match the color of the wiring with the genuine parts.
- It is recommended to use 110 type male terminals and crimp the connector instead of using the bullet terminals.
- It is also fun to change the color and shape of the mounting bolts!
